Easy Gooey Chocolate Brownies

Easy Gooey Chocolate Brownies
By Caro
Let me show you the key to making perfect gooey chocolate brownies & not just a chocolate cake. Only takes 5 more minutes of work, to achieve the perfect brownies! Let me show you how.
Jump to Recipe Jump to Video


**Some photos updated in 2021, Halloween 2022
Proper Brownies
Now the reason my title includes ‘Proper Brownies’ is I see too often recipes claiming to be brownies, but are simply just chocolate cake squares, with basic cake instructions and no soft gooey centre.
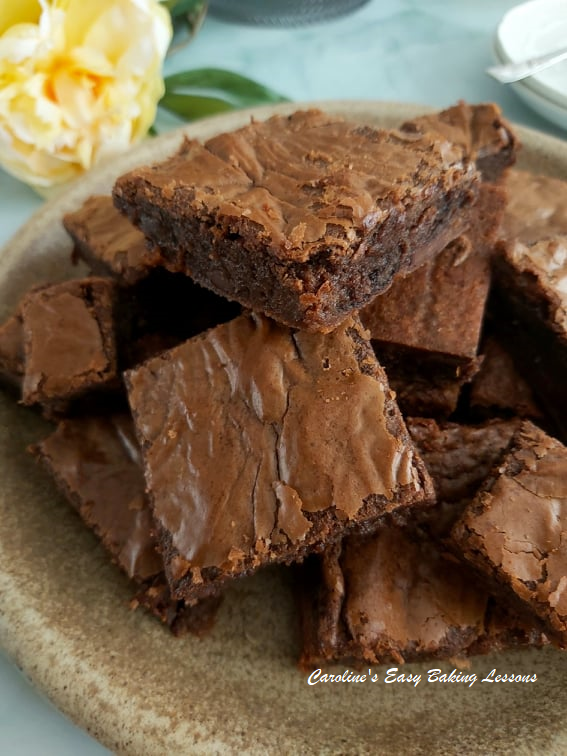
Love them or hate them, brownies should not have a sponge texture through out and must have a ‘paper crust’ to the top. They are by no means pretty in the conventional meaning of the word, but if they have the true characteristics of a ‘proper’ brownie,(as described), these will be visible and people will be drooling – enter drooling emoji ?


Key To Perfect Brownies
Now getting these brownies right is by no means hard, and only takes a few minutes more of gentle mixing and getting out of the oven a bit sooner than if you were making a chocolate cake or tray bake. The secret is whisking the sugar and eggs for 5 minutes till mousse like, very pale in colour and with a noticeable increase in volume size.
So after this you don’t want to mix in as normal. The best way is to fold the other ingredients in the shape of an ‘8’. As if you were writing the number 8; where the spatula is your pen & the batter your paper. And in doing so, only until all the flour is no longer visible. Over mixing can also ruin the brownie texture you are looking for.


A Note On Ingredients
There is cocoa powder in the brownie and I use inexpensive dark (bitter) chocolate for the gooey centre chunks and it works well for these, with milk/semi-sweet chocolate melted and added to the batter. (Lidl or Aldi cheapest chocolate is fine for this). Note the brownies are very rich and go nicely with some ice-cream or whipped cream!


Gluten Free Gooey Brownies
I should point out too, that this recipe can also be used with GLUTEN FREE plain/all purpose flour and in the exact same amount, just bake a little longer. Recipe to come to the new site.
Halloween Chocolate Brownies
Decorate your brownies for Halloween, with some sprinkles or decorate with a simple glaze. Pipe fine lines to make a spider’s web, or a few lines for bandages, and add on candy eyes to make a ‘Mummy Brownie’. All of these can be added once the brownies are cooled. Use some glaze or melted chocolate to stick the sprinkles and candy eyes in place. Cut the brownies into 16 pieces, and you can let the kids have fun, decorating them all differently.


Go to my Chocolate Orange Brownie Stack, or view my Browned Butter Hazelnut Brownie recipe.
Experienced Bakers
For experienced bakers, you can skip to the Recipe Card – an abbreviated version of the recipe, that you can also print. Click below:
Jump to Recipe Jump to VideoBaking lessons students, download the detailed recipe below:
Without further ado, let’s get baking!
EQUIPMENT


- Scales or measuring cups & spoons
- Knife
- Microwave safe bowl to hold butter & chocolate
- Microwave or stove top for melting
- Spoons (several)
- Mixing Bowl
- Sieve
- Stand/hand-held mixer
- OR bowl and hand whisk
- Timer or phone timer
- Plastic/silicone baking spatula
- Baking tin (approximately 23 x 23 cm (9in square). Don’t use too small a dish or it will take too long to cook. You want the sum of the length + width to be about and not to exceed 46 cm (18 inches) or they will be too thin).
- Spray, lining paste or butter for greasing
- Baking paper/parchment
- Scissors & pen/pencil (optional)
- Cooling rack.
- OVEN: 180/160c Fan Oven/350f/Gas mark 4
INGREDIENTS


- 185g Butter, cubed & unsalted
- (1 stick + 1/3c or 6.5 oz)
- 185g Milk chocolate
- (6.5 oz semi-sweet)
- 275g Golden Granulated sugar
- (1+ 1/3 c, 9.75 oz) OR
- 75g Light Brown (1/3c, 2.5 oz) &
- 200g Granulated (1 c, 7 oz)
- 3 Eggs (med-large)
- 85g Plain/AP Flour (2/3c, 3 oz)
- 40g Cocoa (1/3c, 1.5 oz)
- 100g Dark Chocolate
- (3.5 oz bitter)
INSTRUCTIONS
1. Break up the 185g/6.5oz milk/semi-sweet chocolate and place in a microwave safe bowl with the butter. Melt by heating in 30 second bursts, stirring well in-between each. The butter will melt first but keep mixing and the heat will melt the chocolate. Leave to cool as we will be adding to the eggs later and don’t want scrambled eggs! Alternatively, melt in a bowl over a pan of barely simmering water.


2. Weigh out the flour and cocoa through a sieve into another bowl. (Not the mixer bowl).
3. Oil or grease your baking tin and place baking paper/parchment inside it. See photo 1 for how to cut your paper to fit. I usually hold in position with cake lining paste. Read how to make some at home for baking and cooking – Cake Lining Paste


4. Next place the 3 eggs and sugar in a mixing bowl and whisk with a hand/stand mixer for approximately 4 – 5 mins, on medium to high speed. You want the mixture to become thick and cream like, paler in colour and increased in volume. See Photo 2 .


5. Now gently fold in the melted chocolate and butter mixture with a plastic or silicone baking spatula and do so in the shape of a number 8. Think of the batter as your paper and the spatula your pen. Mixing too vigorously will undo all the whisking from earlier so it is to be avoided. Remember to scrape down the sides and tilt the bowl to make sure of getting to the bottom of the bowl (as the chocolate mixture will have sunk when added). Mix just until all mixed in and no more. See photo 3.
6. Place the sieve over the mixing bowl and re-sieve the flour and cocoa mixture, into the batter. See Photo 4.


7. Mix it in again like before until no flour is visible, and scraping down the sides too. See photo 5.
8. Roughly chop the remaining 100g/3.5 oz dark/bitter chocolate and add to the mixture, folding in lightly till evenly distributed.


9. Now carefully pour the brownie batter into the prepared pan and level off if required. See Photo 6. Leave to sit so that it will form a crust later. (Leave at least 10 mins).
10. Heat up the oven to: 180/160c Fan oven/350f/Gas mark 4 while the brownie sits.
11. If the brownie has sat long enough, when you try to shake it, it won’t wobble too much.


12. Bake for about 18 – 25 minutes, turning the tray every so often. I did so at the 15 minute mark and then checked every minute after that. The top will had formed the crust, (see photo 7) and I inserted a tooth pick/cocktail stick to check if ready. The outer edges produce a clean stick whist the centre is a little moist with just a few crumbs. This is what we want. Leave the brownies to sit to cool down in the tin for 5 minutes. Then lift out using the paper and place on a cooling rack to cool down. Leaving in the tin any longer, will cook the centre of the brownies and you won’t have a gooey centre.


13. Once cool enough to cut, lift the paper onto a chopping board. Very gently and carefully, cut into 16 squares (or however many you want 🙂 Have a tea or cof fee and enjoy. See Photo 8.
As an alternative, and when updating the end photos, I cut some into small bite-sized squares. I good trick for clean cut brownies is to chill when still a little warm or even leave at room temperature overnight. If cutting into bite-sized squares (about 1″/2.5cm), you will get about 64 pieces. See photos below.


14. Store in a tin an airtight container if there is any left.

NEWSLETTER SUBSCRIPTION
I send out monthly newsletter emails and occassional seasonal emails, updating you of what’s new on the website. Fill the form below if you would like to subscribe. Thanks so much, Caro xx


Here’s the brownies made by my friend Diana, who tests a lot of my recipes for me. Her second time making them, she constructed into a tower for a birthday cake for her ‘brownie-loving’ son. See Photo, which has become one of the most saved pics on my Pinterest account. Check out my Chocolate Orange Brownie Stack
Share The Love
Please see the sharing options or even printing, at the right/bottom of your screen (bottom of your screen for mobiles, and down the right-hand side on computers). You can even pin this to your own Pinterest page. AYou could also leave some feedback if you like.
DOWNLOAD full recipe lesson:


Join My Facebook Group
Why not also join my Facebook group – Easy Online Baking Lessons, dedicated to this baking lessons website, as well as providing one-on-one support with myself & my team? Be sure to answer all security questions when requesting to join. Click to join the group.
DIFFICULTY LEVEL – simple, easy when followed


Readers’ Bakes & Feedback
Here’s a photo by reader Dianne B, who had this to say about my brownie recipe:
“I made Caro’s brownies today and they are fabulous! I highly recommend these! So rich and so good with vanilla ice cream. These brownies were a hit!”
Dianne B, FB GBBO Fans
Try my Browned Butter Hazelnut Brownie recipe

Abbreviated Version – RECIPE CARD
EASY GOOEY CHOCOLATE BROWNIES

Equipment
- Scales or measuring cups
- Measuring Spoons
- Microwave safe bowl to hold butter & chocolate
- Microwave or use stove top for melting
- Spoons (several)
- Mixing bowl
- Sieve
- Stand/Hand-held Mixer
- Plastic/silicone baking spatula
- Baking tin (approximately 23 x 23 cm (9in square). Don’t use too small a dish or it will take too long to cook. You want the sum of the length + width to be about & not to exceed 46 cm (18 inches) or they will be too thin).
- Spray, lining paste or butter for greasing
- Baking/parchment paper
- Scissors & pen/pencil (optional)
- Timer
- Wooden Cocktail stick
- Cooling rack
Ingredients
- 185 grams Butter, unsalted & cubed (1 stick + ⅓ cup or 6.5 oz)
- 185 grams Milk chocolate (6.5 oz semi-sweet)
- 200 grams Granulated sugar (1 cup, 7 oz) plus
- 75 grams Light Brown Sugar (⅓ cup, 2.5 oz) OR 275g/9.75/1⅓ cup Golden Granulated Sugar.
- 3 Medium Eggs (US Large)
- 85 grams Plain Flour (⅔ cup, 3 oz All Purpose Flour)
- 40 grams Cocoa Powder (⅓ cup, 1.5 oz)
- 100 grams Dark Chocolate (3.5 oz bitter chocolate)
Instructions
- Break up the 185g/6.5oz milk/semi-sweet chocolate & microwave in 30 second bursts, stirring well in-between each, until nearly melted. Then add in the cubed butter & mix well & then continue heating & mixing till all melted. Leave to cool while you gather the other ingredients. Alternatively, melt in a bowl over a pan of barely simmering water.
- Weigh out the flour & cocoa through a sieve into another bowl (not the main mixing bowl).


- Grease the baking tin & place baking paper/parchment inside it. See photo 1 above for how to cut your paper to fit. I usually hold in position with baking spray or Cake Lining Paste


- Next whisk the eggs & sugar with a hand/stand mixer for approximately 4 – 5 mins, on medium to high speed. It must become thick & creamy, paler in colour & increased in volume. This is the key to these gooey brownies. See Photo 2 above.


- Gently fold in the melted chocolate/butter with a plastic/silicone baking spatula & do so in the shape of a number 8. Mixing too vigorously will undo all the whisking from earlier. Mix just until all mixed in and no more. See photo 3 above.
- Next re-sieve the flour & cocoa mixture, into the batter. Mix it in again like before until no flour is visible, and scraping down the sides too.


- Roughly chop the remaining 100g/3.5 oz dark/bitter chocolate & finally fold into the batter just till evenly distributed. See Photo 5 above.


- Pour the brownie batter into the prepared pan & level off if required. See Photo 6 above. Leave to sit so that it will form a crust later. (Leave at least 10 mins). Heat up the oven to: 180°c/160°c Fan oven/350°f/Gas mark 4 while the brownie sits.


- Bake for about 18 – 25 minutes, turning the tray if needed, after half-way through. The top will have formed the crust, (see photo 7 below). Testing with a wooden cocktail stick, & the outer edges produce a clean stick whist the centre is a little moist with just a few crumbs. This is what we want. Leave the brownies to sit to cool down in the tin for 5 minutes. Then transfer via the paper, to the cooling rack to cool down completely before cutting into 16 squares. See tips in notes for cutting


- Store left-overs in an airtight container for a few days.


Video
Notes

 Type of chocolate can be adjusted to taste, just note however, that these brownies are very rich, so both chocolate being dark/bitter chocolate would maybe be too much. Also if using half dark/bitter chocolate, there is no need for higher cocoa content chocolate.
Don’t skip the 5 minute mixing of the eggs and sugar stage, as this is key for gooey brownies.
Type of chocolate can be adjusted to taste, just note however, that these brownies are very rich, so both chocolate being dark/bitter chocolate would maybe be too much. Also if using half dark/bitter chocolate, there is no need for higher cocoa content chocolate.
Don’t skip the 5 minute mixing of the eggs and sugar stage, as this is key for gooey brownies.

 Brownies can be cut much easier if left overnight to cool at room temperature. This will give much cleaner squares. Alternatively, place in the fridge, (while still in the tin) to speed up cooling, from about 15 minutes after coming out of the oven.
More Brownie Recipes: Browned Butter Hazelnut Brownies, Chocolate Orange Brownie Stack, or Mini Egg Gooey Brownies
Brownies can be cut much easier if left overnight to cool at room temperature. This will give much cleaner squares. Alternatively, place in the fridge, (while still in the tin) to speed up cooling, from about 15 minutes after coming out of the oven.
More Brownie Recipes: Browned Butter Hazelnut Brownies, Chocolate Orange Brownie Stack, or Mini Egg Gooey Brownies


Thanks for reading.
Happy Baking & Making
Happy Memories & Tummies!
Caro x


Follow me on social media:


**Some photos updated in 2021
Leave some feedback if you like 🙂


Caroline’s Easy Baking Lessons


These were the first brownies recipe of yours I tried and what a success! Proper gooey brownies at last, just wonderful and with all the tips you need.
These brownies are the best ever. An easy to follow recipe with great instructions. They are gooey in the centre just how a brownie should be.