Flour Free Chocolate Swiss/Jelly Roll

Flour Free Chocolate Swiss/Jelly Roll
Gluten Free Too
By Caro
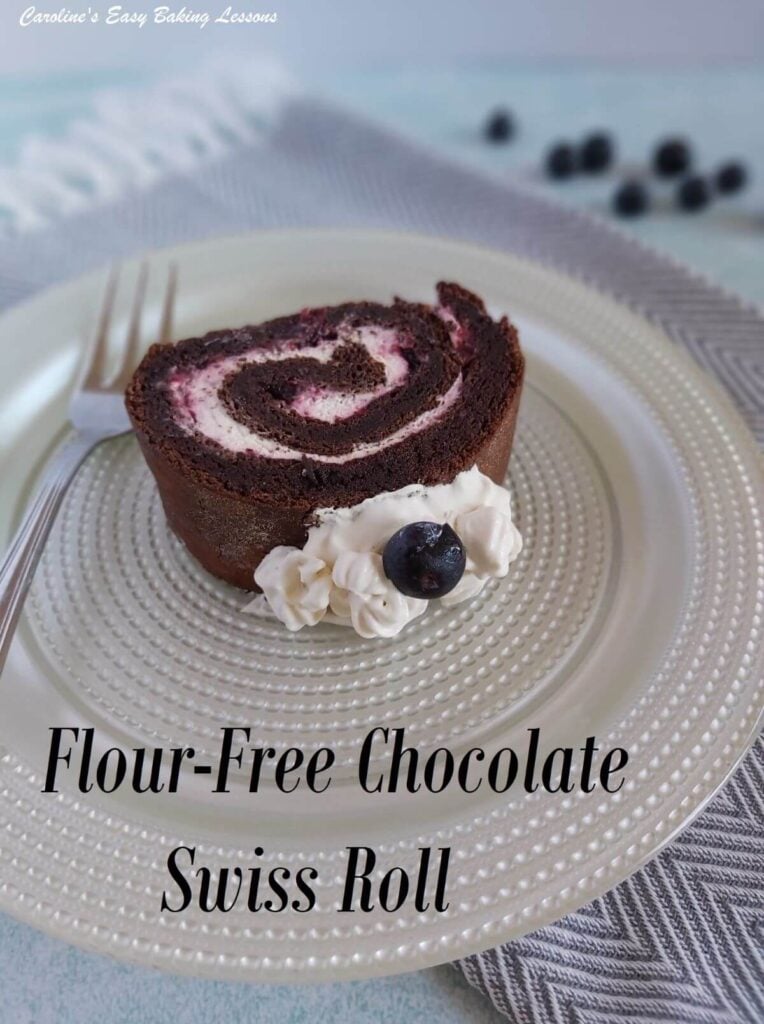
Using only eggs, sugar and a small amount of cocoa powder, you can have a chocolatey cake fix with my Flour Free Chocolate Swiss/Jelly Roll. Fill with whatever you have in the fridge or pantry. This is a great recipe for these times of flour shortages and perfect for a Gluten Free diet. Read on for my tips & video tutorial for mastering a Swiss Roll.

Flour Shortages
During the flour shortage period of 2020, I decided I would do a cake recipe, that doesn’t use any flour at all. Using only eggs, sugar and a small amount of cocoa powder you have a cake treat and keep any flour you have to make bread (since that is in short supply now too!).
Gluten Free
With no flour in the recipe at all, my Chocolate Swiss/Jelly Roll recipe, is also Gluten Free! So perfect for those on a gluten free diet.
Use Fridge & Pantry Staples
Now to make it even more simple, I used some fridge & cupboard ingredients for the filling too. You can just use jam, or jam and chocolate spread. But in the pics & video below, I added some fresh whipped cream on top of the jam. It made a simple but very indulgent tasting dessert.
CONQUER YOUR FEAR OF SWISS/JELL ROLL CAKE
This type of cake is really easy to make, but many bakers are apprehensive of it for a few reasons:
They often fear the rolling up stage, and risking the cake cracking. And because of this, they don’t roll tight enough. This in turn also can lead to the fillings oozing out and not getting the much coveted, clearly defined ‘swirl‘ at the end of their cake roll.
Tips For Swiss Roll Success
Be brave and just go for the rolling, and be sure to start off with a very tight bend of the cake.
The cake is best rolled up straight from the oven, with no filling and left to cool down in that position. In doing so, the cake, ‘remembers’ that roll, once you go to re-roll it again with filling inside. This reduces cracks and also keeping the filling in place and giving a nice swirl curve.
Always use a tea-towel and/or paper, sprinkled with cocoa or powdered sugar to also eliminate the cake sticking to it in the rolling stage.
And you know what, sometimes cracking happens, but if your are decorating the top, you can easily cover that.
Finally, if you want to eat quickly, or just want a great sliced shot for sharing on social media, read my tips further down in the recipe.


A NOTE ON INGREDIENTS – Caster Sugar
Just a note on sugar. Caster sugar, or extra/super fine sugar is best for this type of recipe where you whisk the yolks with the sugar. Smaller sugar granule size, creates good friction & air pockets, that make the batter rise. There’s no flour or raising agent in this cake, so we need to get as much air into the batter as possible.
Make Your Own Caster Sugar
If you have granulated sugar, you can grind or pulse it a little to get a smaller size & make your own caster or extra/super fine sugar. Just be aware that US granulated is a slightly smaller granule size than our UK version. Do not go as far as a powder or you will have made icing/powdered sugar. See the photo below of our sugar’s in the UK. See my article on Differences Between UK & US Baking Ingredients.
UK Sugar Comparison
, Caster sugar (C) & UK Granulated (R).")
, Caster sugar (C) & UK Granulated (R).")


Size & Type Of Cake Pan
For the cake, you can use a Swiss Roll tin/pan, but I use one of my regular baking sheets/trays that has a bit of a lip on it (at least 1.5cm or 2/3″ deep). I normally use my 35 x 23 x 1.5 cm, or (13¾ x 9 x ⅔ inch) one. Swiss Roll pans are about 23 x 33cm (9 x 13″).
I have also used a slightly smaller tray (2cm/1″ shorter and I just held back a little of the batter and put in a silicone cupcake cake as a taste test). You will see from the photos & video how much batter to use, but just note it will rise a lot in the oven and then sink down a little naturally (since there is no flour in the batter).
DOWNLOAD the recipe to save to your phone or computer. Just click the ‘Download’ button below.
Swiss Roll Video Tutorial


INGREDIENTS
- 6 Medium – Large Eggs, separated (Large – XLarge USA)
- 150g Caster Sugar
- (6 oz, 2/3c extra/super fine, see note)
- 50g Cocoa Powder, sieved
- (1/3 cup, 1.75 oz or 5 tbsp)
- Filling of your choice –
- About 1/2 jar Cherry Jam (8oz, 1c)
- Small Tub Of Double Cream at least 200ml
- (Heavy/Whipping Cream 6.75 fl oz, less than 1 cup)
- Just use what you have to hand. You can of course make a buttercream if you have the ingredients (see my chocolate and orange yule log recipe for a great buttercream).
- Some icing/confectioners’ sugar for dusting & glaze cherries or blueberries for decoration (optional)
- OVEN: 180c/160c Fan Oven/360f/gas mark 4


EQUIPMENT
- Scales or measuring cups
- Large mixing bowl (or stand mixer)
- Hand or stand mixer
- Medium – Large Bowl (for whites)
- Sieve
- Plastic/rubber/silicone spatula for folding
- Baking tray/sheet or jelly/swiss roll tray/sheet (see notes above)
- Baking/parchment paper
- Clean tea-towel
- Icing/powdered sugar or cocoa
- Timer
- Wooden Cocktail stick/tooth pick
- A clean tea-towel, wider and longer than the baking sheet/tray
- Pastry brush (optional)
- Baking palette knife, off-set best (optional)


INSTRUCTIONS
1. Heat up the oven to 180c/160c Fan oven/360f/Gas mark 4. Lightly grease your baking tin/sheet and place a cut piece of baking/parchment paper on the bottom only. You can use baking spray, cake release spray, butter or lining paste, but be sure to use paper on the bottom and remember to grease the sides well too. (See Equipment Photo above).
2. Separate your eggs and place the yolks into a large bowl. Whisk the egg whites in a large bowl or stand-mixer for at least a few minutes at high speed, until stiff peaks are formed. (The volume will increase considerably and the whites will be like clouds).
Lift the beaters upwards and see how the whites fall or tilt the bowl and it’s ready if the mixture doesn’t move. You might also see peaks in the surface of the whites in the bowl. See Photo 1 and the video, which shows this more clearly.


3. Take the bowl of yolks and then add or weigh in the sugar. (If you used the stand mixer bowl to whisk the whites, carefully transfer to another bowl and then use the stand mixer bowl to whisk the yolks and sugar – no need to clean it.)
Whisk on high speed for about 2-3 minutes, until the mixture changes from a strong orange colour to much paler, thicker & creamy. See Photo 2. There is also a test to perform to see if you have whisked enough. It is very important for cakes with no leavening agent (baking powder) in it.


4. To do the test, drizzle some mixture from the end of the mixer, (or a spatula), and let it fall onto the rest of the mixture. If it ‘leaves a trail’ for a few seconds before it disappears then it is whisked enough. This is also known as the ‘Ribbon Stage’ or the ‘Trail Test’.
Use the whisk beater/attachment or even a spatula to let some mixture fall back into the bowl and see if it leaves a pattern on the surface of the mixture for a few seconds. If it just sinks immediately in to the mixture, more whisking is required. Note my hand-held mixer only takes about 2 minutes. See the video for this, or Photo 3 above. For more on this subject, see my article on Whisking Egg Yolk & SugarTo The Ribbon Stage
5. Next sieve the cocoa powder into the whisked yolk/sugar mixture and fold through. Don’t mix or use the mixer. Switch to a silicone, rubber or plastic spatula and fold through like you are writing a number 8. Think of the spatula as your pen and the batter your paper.
See video for how this is done – folding the mixture from the bottom and up and over the top, scraping the sides in-between. This reduces lots of air being knocked out of the batter and we want air as it will help the cake rise a little. See Photo 4.


7. Now fold 1/3 of the whisked egg whites into the cocoa batter. See Photo 5. Again use a plastic, rubber or silicone baking spatula as metal will knock out the air you incorporated. Remember to scrape the sides as you ‘write’ or ‘fold’ the whites in and do so just until most of the whites are incorporated (no need for it all to be 100% mixed in, as you are going to add in more). This method, loosens the initial cocoa batter, making it easier to incorporate the whites, and not lose their volume.
8. Finally fold the rest of the whites into the batter, in 2 more batches, just like before, until all the white is incorporated. See Photo 5 & also the video for guidance.


9. Pour the mixture into the prepared cake tin, moving the bowl as you let it drop down, filling any gaps as you go. (Alternatively, gently encourage the batter into the corners of the tin, by using your spatula). Give the tin a few taps on the worktop/counter to expel any trapped air and place in the oven. If there are any particularly large air bubbles, you can pop them with a wooden cocktail stick. See Photo 6 & the video for reference.
10. Bake in the center of the oven, for about 12-15 minutes until a cocktail stick inserted in the middle, comes out clean, and the cake is starting to come away from the sides of the tin. See Photo 6. I like to turn the tin past half way through cooking, to ensure an even bake. I used the end of a spoon to pull out the tin without getting my thumb in the cake!


11. While the cake is baking, place the clean tea-towel on the counter/worktop and cut some baking/parchment paper a little longer than the longest side of the towel. Place the paper on top and brush or sprinkle/sieve over some icing/powdered sugar or cocoa on top of the paper. This is to stop the cake sticking. If you have no more baking/parchment paper, you can sprinkle directly onto the tea-towel. Note though that impressions from details in the towel might show on the cake if no paper is used. See Photo 7.
12. As soon as out of the oven, run a palette knife along the edges of the cake to loosen it. Then turn the tin over and drop onto the prepared towel & paper. (Alternatively use a paper lined second baking sheet/tray to turn it out). It might need a few taps to release from the tin. See video for reference.


THE ROLLING STAGE
13. Next, gently start to peel back the baking/parchment paper very slowly. Don’t worry if there are some crumbs stuck on, just pay attention to it not breaking. I like to loosen all the edges first, before pulling from the top, all the way down to the bottom. Little breaks/tears at the outer edges is fine, as these will be trimmed off. See Photo 8 above.
14. Now start to roll up the cake (from the narrower end). Fold and squeeze the cake together to get a good start to the swirl. Don’t hesitate and concentrate on getting a tight roll. See the video, where I showed 2 ways to roll it up. You can roll up with the paper and towel inside, or just the paper and then roll in the towel at the end. Both work, but the paper and towel, will not only give a slightly softer surface, but also makes the gap between the cake spiral a little wider.
Remember the pre-rolling of the unfilled cake, is done right out of the oven, so that the cake ‘remembers’ the roll shape, and will roll up again nicely instead of going flat. So including the towel, is mimicking a filling if you like. Let it sit with the seam side of the cake underneath. Then take some string or something else you have, and tie the ends of the towel tightly to keep in a roll shape. Then slide onto a tray/sheet or plate and chill for about 30 minutes for it to cool down. See Photo 9 or the video for reference.


MAKING THE FILLING
15. If using cream, place in a medium – large sized bowl and whisk on high speed until thick and has peaks. See Photo 10 or if you want a laugh, see my video (5 minutes in) where I was trying to get a good shot of the peaks, when my son decided to stretch his hand in and dip some cake into the cream! And he did it twice!!! Anyway, you can add some vanilla if you like but I find it doesn’t need it.
Alternatively you can just use jam as the filling – that’s great too, in particular black cherry with the chocolate cake!!


ASSEMBLY OF THE CAKE
16. Un-wrap and gently unroll the cake and then spread out the jam evenly across the whole of the sponge. See Photo 11.
17. Now spoon some drops of the whipped cream on top of the jam and very carefully spread out as best you can, trying now to mess the jam. You won’t need all of the cream for the filling.
18. Starting at the same starting point you rolled up from before, tightly bend over the sponge and roll very gently and slowly. Some of the cream will move, but just go with it slowly and once nearing the end of rolling. See Photo 11. Carefully use your spatula and remove some of the excess cream that has built up. Just add it to the remaining cream and don’t worry if there’s some jam, just mix it through. This is better than not having enough filling and no defined ‘swirl’. Then finish the rolling, ending with the seam side down.
19. Wipe off any of the cream that might have came out the ends and make sure the paper is clean, before wrapping the paper and tea-towel around the cake and tie the ends again. Don’t be tempted to use less cream to avoid it coming out at the rolling up stage, as this can result in not enough cream to cake ratio – and we LOVE our cream, right? 🙂
20. Now if you aren’t going to use for a couple of hours, you can just place in the fridge, but if you want to eat sooner and get really good shots of a swirl, you can freeze the cake on a plate, for about 30-45 minutes.


21. Remove the tea-towel and paper carefully and place onto a long plate/platter or cake stand. (Keeping the seam side underneath). You can use a couple or spatulas to carefully transfer the Swiss roll but freezing for a short time makes it much easier to handle.
22. Using a very sharp large knife, carefully trim off a little cake from both ends of the cake. *** This will ALWAYS make the cake look better and you can see swirls better. ***
It’s also an opportunity for the baker to taste test! See Photo 12.


23. Finally finish off by sieving icing/confectioners’ sugar on top of the cake (because I used cocoa for the rolling up, I decided not to add any sugar now), pipe on little rosettes of left over cream on top of the cake, which will also hold some blueberries nicely. See Photo 13. You could also use glaze cherries. All that remains is to cut into just under 1cm (1/3″) slices and serve. with any remaining cream and fruit.
24. If not serving straight away, best to leave in the fridge and slice when ready. Will last a day or too in the fridge, if you are very lucky!


Share Your Pics
I do hope you can go for it, and make this cake. Please share your photos of it, with me on social media, or via the contact form below. I would love to see your pics. 🙂
Share The Recipe
Please see the sharing options or even printing, at the right/bottom of your screen (bottom of your screen for mobiles, and down the right-hand side on computers). You can even pin this to your own Pinterest page. Alternatively, you can download this article, see below. You could also leave some feedback if you like.
DIFFICULTY LEVEL: easy with guidance


Follow me on social media:
Thanks for reading.
Happy Baking & Making
Happy Memories & Tummies!
Caro x


Leave some feedback if you like:)
Flour Free Chocolate Swiss/Jelly Roll
Caroline’s Easy Baking Lessons


