Gluten Free Carrot Bundt Cake

Gluten-free Carrot Cake
In A Bundt Pan
With Orange Cream Cheese Frosting
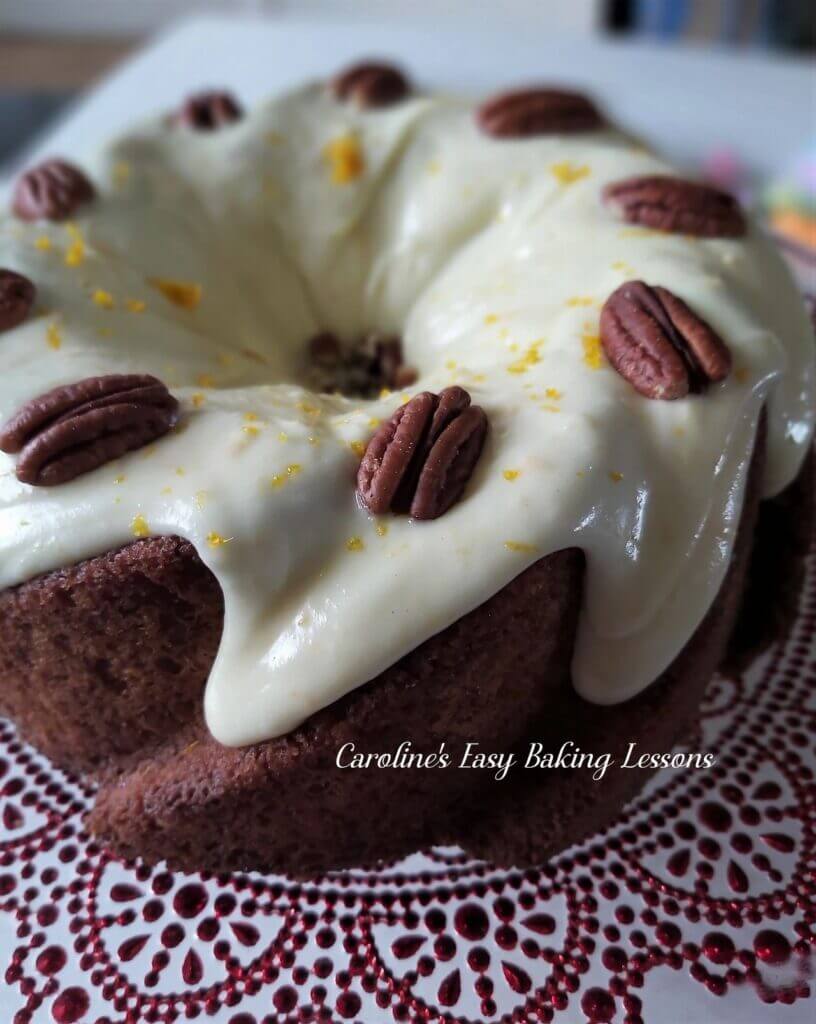
Here’s my regular carrot cake, reduced a little in volume and using Gluten Free flour, as well as Plain/All Purpose flour instead of my usual Self-raising flour. All baked in a pretty bundt pan, with orange cream cheese frosting and finished off with some pecans. Perfect for Easter or Spring-time baking!


You can of course make a non-gluten free version, by simply using regular wheat flour and omitting the Xanthan Gum.

Bundt Cakes That Don’t Stick
I also used GBBO winner Nancy Birtwhistle’s lining paste recipe to ensure the cake came out in one piece. This time, I added some cocoa powder to colour the paste since the cake is a little darker. For how to do this, see my review of the paste – go to lining paste. Also watch the video below of lining the tin, removing the cake and also decorating it.
About The Ingredients
If you can’t get Mixed Spice, you can use All Spice, Pumpkin Spice or make your own (search the internet for the ratios, but it’s basically cinnamon (about 50%), ginger, cloves, pimento & ginger in the one I use. But recently I started adding nutmeg too.) If you want to use self-raising flour, then add only 1 & 1/2 tsp of baking powder. You can also add chopped nuts to the batter if you like. For info too, Dr Oetker’s brand of baking powder is gluten free.


If you want to make some fondant carrots or other spring time decorations for the cake, go to my Fondant Spring Bouquet tutorial. Or directly to the one on Fondant Carrots Without Moulds. I also have a bigger 2 or 3 layer carrot cake recipe you might like to try – go to Classic Carrot Cake recipe


DOWNLOAD the recipe to save to your phone or computer. Just simply click the ‘download‘ button below.
Let’s get baking!!
Here’s a video of me making the carrot cake batter for mini bundt cakes:


INGREDIENTS
- 180ml Sunflower or vegetable oil
- (approx. 3/4cup, or 6 fl oz)
- 3 Medium – Large eggs
- 169g Light brown sugar
- (3/4 cup or 6 oz)
- 225g Gluten Free Plain Flour (8oz)*
- (1 3/4 cups Gluten Free A.P. flour)
- 4 1/4 tsp Baking powder (Gluten Free*)
- 3/4 tsp Mixed spice* (see above)
- 3/4 tsp Ginger powder
- 1/4 tsp Cinnamon powder
- 150g Carrots, grated/shredded
- (1 1/2 rounded cups or 5 1/4 oz)
- ** If you want to use self-raising gluten free flour instead, then use the same amount of flour, but do not add any additional baking powder, ie. the 4 1/2 tsp mentioned above.
FROSTING/ICING
- 200g Cream Cheese (7 oz), softened room temp.
- 45g Butter, cubed, soft (3 tbsp/ 1.5 oz)
- 250g- 300g Icing/powdered sugar, sieved
- (2 cups – 2 1/2 cups or 8 3/4 – 10.5 oz), sieved
- 1 Orange – zest and a little orange extract according to taste
- 10 -12 pecans or other nuts (optional)
OVEN: 180c/160c Fan/350f/Gas Mark 4.
EQUIPMENT
- Weighing scales or measuring cups
- Small measuring jug
- Mixing spoon
- Large mixing bowl
- Sieve
- Measuring spoons
- Grater/shredder and bowl for carrots
- Bundt Pan (7cup volume/5cup baking capacity, 24cm/9.5” at it’s widest, 17cm/6.5” at it’s smallest & depth 9cm/3.5”)
- Lining Paste*, baking spray, or melted butter and cocoa for the pan)
- Small brush/pastry brush
- Timer or Phone timer
- Cooling rack
- Cocktail stick/tooth pick
- Medium bowl for frosting
- Spoon or hand/stand mixer
- Baking/Parchment Paper
- Fine grater/zester


INSTRUCTIONS
1. Prepare your bundt pan first. Instead of using melted butter and flour or cocoa powder, I used and strongly recommend, this lining paste by Nancy Birtwhistle. Go to my review for the lining paste recipe. For this darker cake, (like for chocolate cakes), I coloured the paste, by adding some cocoa powder. Simply take 2 tbsp of the paste and place in a small bowl, before adding in about an 1/8 tsp of cocoa powder. Mix till all incorporated. Then like with souffles, brush the paste onto the pan, with upward strokes. This makes removal much easier. Go around the pan covering twice, with generous coatings until all the paste is finished. See Photo 1. (See also the video below of me applying the lining paste at the bottom of the recipe).
2. Heat up the oven to: 180c/160c Fan/350f/Gas Mark 4.


3. In a large mixing bowl, add the oil, eggs and sugar. Mix thoroughly together until incorporated. No need to get a mixer out, as this can easily be done by hand if you can. See Photo 2 above.
4. Now place your sieve over the mixing bowl, (on top of the scales and set to zero), add in the flour and baking powder. Use the back of a spoon to rub them both through the sieve. See Photo 2 above.


5. Now sprinkle in the mixed spice, ginger and cinnamon. See Photo 3 above. You can even add 1/2 tsp Nutmeg if you like.
6. Next mix all the ingredients, just until they come together, with no flour visible. Over-mixing will produce a tough bake.
7. Finally add in your carrots and mix by hand just until distributed evenly and no more. See Photo 3 above.


8. Spoon the batter evenly into the prepared cake pan, spreading it out to level it. Also give the pan a few taps on the counter/worktop to expel any trapped air. See Photo 4.
9. Bake in the preheated oven for 30 – 40 minutes until golden brown. Check it is done, by inserting a wooden cocktail stick/tooth pick into near the centre of the cake and if it comes out clean it is ready. Another way to check is if the cake springs back when pressed with a finger gently. It will also be starting to come away from the sides of the pan when baked fully. (See Photo 4). If it isn’t done yet, continue to bake for a further 2 minutes and check again. Continue until fully baked. If it colours too much on top, cover with some foil/aluminium. My oven doesn’t cook evenly, so I turn the pan and use my timer to do so in intervals. Be sure to use a timer. See Photo 4.
10. Leave to cool in the pan on top of a cooling rack for at least 30 minutes. Meanwhile prepare the cream cheese frosting.


ORANGE CREAM-CHEESE FROSTING
1. Beat the cream cheese with an electric whisk, (or by hand) on low speed until smooth. See Photo 5.
2. Next add in the zest of one orange and mix through. See Photo 5.


3. Add in the softened cubed butter and beat till smooth. See Photo 6.
4. Sieve in the icing/powdered sugar, one cup at a time (125g), mixing well in-between each addition, until smooth. We want a frosting with a dripping consistency rather than a pouring consistency. Test it by letting it drip off the end of a spoon, in to the bowl. We want it not to drip too fast like it’s running off. Like that and it will drip down all the sides of the cake and not puddle onto the plate too much. See Photo 6.
5. If too thick, add some orange juice (or milk), a 1/4 tsp at a time. If too thin, simply sieve in more sugar until you get the desired consistency. Leave somewhere cool until ready to use.


TURNING OUT THE CAKE
1. Now comes the time to remove the cake tin! Have a cake stand or large serving plate ready. Place the cooling rack on top of the cake, and with 2 hands, turn everything over. Position the rack on the counter/worktop and carefully lift the pan off the cake. It should come out very easily and all in tack. See Photo 7 (sorry the photo is bad, but it’s a video still). Also see the video below of me turning it out.
2. Next, cut a large piece of baking/parchment paper, bigger than the size of the plate/cake stand and cut in half or into 4 pieces. Place the paper under the cake & covering the plate/stand. This will help catch any drips of frosting.
APPLYING THE FROSTING
3. If the cake isn’t too hot, you can now apply the frosting which ever way you like. You can drizzle on, pipe on or as I did, spoon on. I started by spooning to let it drip down the sides of the groves of the cake, but found an easier method. I took large spoon fulls and dropped onto the top of the cake, working my way around the cake in a circle. With time, if the frosting is the right consistency , it will eventually drip down part of the sides. If not, you can give it some gentle encouragement with the small end of a spoon.
Continue to go around and let the frosting drip down into the centre hole of the cake too. Do this slowly and you will have more control. For other bunts, I also found letting a small amount drip off a small spoon from at least 2.5cm/1″ above the cake helps it not all drop down in a thick stream. Once you have finished the frosting, zest a little more of the orange on top if you like. I also added pecans on top of the cake and broken pieces into the centre to finish it off.
Now leave somewhere cool to firm a little, OR jump right in and have a slice!
MY VIDEO
See my old video of me lining the bundt tin, removing and then decorating the cake.
SHARE THE LOVE
Please see the sharing options or even printing, at the right/bottom of your screen (bottom of your screen for mobiles, and down the right-hand side on computers). You can even pin this to your own Pinterest page. (Just hover over the pics & the pinterest logo comes up, but be sure to logged into your account on that web browser). Alternatively, you can download this article, see below. You could also leave some feedback if you like.
Click the ‘Download‘ button below, to save to your phone or computer.
DIFFICULTY LEVEL: super simple, beginner


Follow me on social media:
Thanks for reading
Happy Learning & Baking!
Caro xx


Leave some feedback if you like 🙂
Caroline’s Easy Baking Lessons


