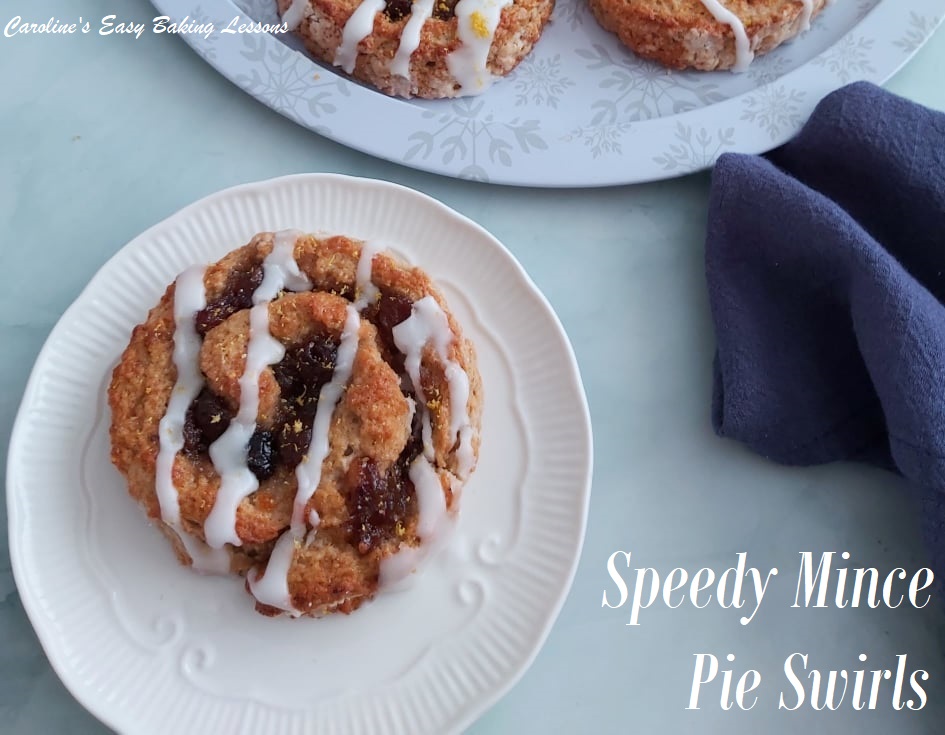
Speedy Mince Pie Swirls

Here's the sweet version of my Speedy Cheese Swirls recipe. Speedy Mince Pie Swirls have the same minced fruit filling of your favourite mince pies, but can be made much easier and quicker too.
Speedy Mince Pie Swirls
Yeast-Free Snacks In A Hurry
Jump to Recipe
WHY USE THIS RECIPE?

1. Easy & ideal for beginners
2. Quicker to make than mince pies
3. No baking equipment needed
4. Detailed recipe & step-by-step instructions & photos
5. Make something a little different


1. Easy & Ideal For Beginners
This Speedy Mince Pie Swirls recipe is super simple with no special baking techniques, or prior baking knowledge required. Kids could help making these too. The recipe is a simple one bowl process to prepare the dough, which is then rolled out, filled with the mincemeat, rolled up and sliced before baking. That’s it.
2. Quicker To Make Than Mince Pies
Speedy Mince Pie Swirls is a quick recipe, when you want something festive, but have no time (or energy) to make a yeast dough or puff pastry and don’t have any shop bought puff pastry in the freezer 🙂 These can be on the table in an hour, and so much quicker than making your own pastry, chilling the dough, cutting out, chilling again, filling, and baking.


3. No Baking Equipment Required
No special baking equipment required for Speedy Mince Pie Swirls. Most things will be found in every kitchen and if you don’t have a rolling pin, a large glass bottle would do. A full list of all you need is listed below in the recipe.
4. Step-by-step Instructions
The recipe too, like all of my recipes, is written with thorough, step-by-step instructions as well as lots of photos to guide you.
5. Make Something Different
Another good reason to make these fruity swirls, is that they are a little different to the standard mince pies that are everywhere this time of year. They still have the same taste that says Christmas, but just look a little different.
Experienced Bakers, can skip to the Recipe Card – an abbreviated version of the recipe. Just click below.
Jump to Recipe


A NOTE ON INGREDIENTS
Flour Used
The dough for Speedy Mince Pie Swirls is made using UK self-raising flour. You can also use US self-rising flour, but I have also tested them out using plain/ All Purpose flour, but just added some baking powder to help them rise a little. All details are given in the ingredient list.
Mincemeat
Ok so for our American readers who have never heard of Mincemeat or Mince Pies, the mincemeat is actually made from finely minced dried fruit. There is no meat in it now (many many years ago there was). There is also suet in a lot of mincemeat that can be bought here in the UK. But it is also very easy to find vegetarian versions, as well as some supermarkets do some with alcohol in them. I like Lidl’s large Belbake Classic jar, or Robertson’s Classic Mincemeat. You can also make your own mincemeat. Here’s a Delia Smith recipe for Vegetarian Mincemeat.


Mixed Spice
A lot of British recipes use Mixed Spice and in particular in Autumn & Winter recipes. It is roughly equivalent to US Pumpkin Spice and I always recommend that as a replacement. If you can’t get Pumpkin Spice, you can use Cinnamon, ginger, nutmeg & clove or anise. I would recommend you make a mixture of ratio of: 1 tsp clove/anise & ginger, 2 tsp nutmeg & 1 tbsp cinnamon and then use accordingly.
Speedy Cheese Swirls
Why not also try the original savoury recipe? Speedy Cheese Swirls, are an easy, yeast-free cheesy snack, that’s ideal for entertaining. Go to Speedy Cheese Swirls


Step-By-Step Instructions
1.Prepare a large baking tray/sheet or 2, by lining with baking/parchment paper (hold in position with some oil if there is no lip on this or your baking can go flying onto the floor).


2.Also prepare your area that you will roll out the dough on. I like to use baking/parchment paper to save on the mess. I buy quality paper, and often keep it and re-use it. Cut out a piece 35cm at its longest (14″). Have some additional flour or icing/powdered sugar handy for rolling out & place with the paper, to one side while you prepare the dough.
3.Heat the oven to: 220c/200c Fan Oven/ 425f/Gas Mark 7.


4. Add the butter & flour (and the baking powder if using) to a medium bowl. Then by hand or using a pastry blender, ‘rub in’ the butter to the flour. This is like in pastry and scone making, where you are blending it to a ‘breadcrumb’ like consistency. However, there isn’t much butter in this recipe, so only a light rubbing of the flour and butter between your finger-tips is required. Lift up between your finger-tips, rub and let fall back into the bowl, before moving onto the next area and repeating. ( See my Scones video 5 minutes in, if you want to learn this method more). See Photo 1 above.
You can also use a pastry blender/cutter to do this. Just push down on the bottom of the bowl, and perform a twisting left and right motion. Then lift up and repeat on another area. This is great if you have hands/fingers that tire easily like me. But as said, there’s not much butter in this recipe, and so only maybe 20-30 seconds is required.
5. Next add in the spices, salt, sugar & zest and mix through.


6. Make a well in the middle and add in the egg. Give it a whisk in this hole, and then add in half of the milk, & mix just the milk & egg together. See Photo 3.
7. Now use a baking spatula or wooden spoon to mix the milk and egg with the dry ingredients. Keep pushing down on the flour, and let it take on as much of the liquid as possible, before adding in any more small drops of the milk. You want the mixture to come together into a very rough ball that will be just a little sticky. So very gradually add the milk. You might not need all the milk, or might need a little more.


8. Place your ready-cut piece of baking/parchment paper down & dust that and your rolling pin with some icing/powdered sugar. If you use powdered sugar it helps stop sticking, but doesn’t mess with the structure of the bake like if you use flour.
9. Next gather the dough together into a rough ball and then place onto the centre of the paper and form into a square or rectangle. Add some icing/powdered sugar on you hands if needed. See Photo 5.
10. Roll out the dough to a rectangle of about size 22.5 x 30cm (9×12″). See Photo 5 & 6 below. If your dough is too sticky, sprinkle on more powdered sugar on top of the dough and then use a second sheet of paper on top for rolling out.


11. Divide your jar of mincemeat put on top of the rolled out dough, and spread for an even coverage, to very near the end of the dough. See Photo 7.
12. Now very carefully bend over the end of dough nearest you and begin to roll up the dough. (Make sure you have the dough with the widest length running across the way, as in the photo 7, so you can cut more pieces). Squeeze a little once at the end and press down the seam to make it stick together, and leave seam side down. See Photo 8 below.


13. Using a long sharp knife, cut the roll of dough into slices about 1.5cm (2/3″) wide. This will make about 15 slices. See Photo 9. If you need to, you can coat your knife in some more powdered sugar.
14. For each slice, lift carefully and place on top of your prepared baking tray/sheet, & then re-shape any that have got a little squashed and lost their shape on cutting. See Photo 10 below.


SIGN UP FOR MY NEWSLETTER – I would love it so much if you could sign up for my newsletter. I will send out monthly emails, showing the latest recipes and articles, and latest info. Being a site without ads, building a following, is even more important and will keep it up and running and for free to everyone. Occasionally there will be the odd seasonal emails, but is really a means of reaching you, if you are not already in one of the Facebook groups I admin. Please note too, that these email addresses are not shared or sold onto another party. Thanks so much Caro xxx


15. Leave at least 2.5cm/1″ gaps between the slices, (see Photo 10 above), and then pop in the oven to bake for 14-20 minutes. The Speedy Mince Pie Swirls are ready when golden and the undersides are set and firmed up. See Photo 11.
16. Remove from the oven, and place the baking sheet/tray on top of the cooling rack for 5 mins, before transferring, paper and all to the rack to cool down completely.


17. Now prepare the glaze by simply starting with your sieved icing/powdered sugar and add very gradually juice from 1/2 a lemon. I always begin with 1/2 tsps of liquid and push down on the sugar with a metal spoon and let the sugar take on the liquid. Don’t add all liquid at once. If you want you can add some orange or pineapple extract if you have any (I love Pineapple extract – I used 10 drops, 2 tsp orange extract & a splash of lemon extract but you can also just use lemon juice and water).


Keep mixing really well by hand adding each in, and then I work down to 1/4 & 1/8 tsp amounts of juice or water, till I get a thick but pourable consistency. (See Photo 13, right pic, where it first becomes like a paste. Then after very gradually adding more liquid, it will be like smooth like in Photo 14 below). Be sure to make just before you want to drizzle it, or it will thicken and harden a little.


18. Once the swirls are cooled, simply use a small spoon (or a piping bag with a tiny hole or piping nozzle), and drizzle the glaze across all the swirls. If using a small spoon, I recommend holding the spoon high above the bake, and it will produce a thinner drizzle and look that bit better. Leave to set up for 15-30 minutes if you can wait! See Photo 15. Add some orange zest too if you like to the top of the finished swirls.
19. These freeze great too, just wrap individually in paper and then with some cling film/plastic wrap or foil and a labelled food bag. Defrost at room temperature. Will last at least 2 days if in a sealed container – I always use metal cake tins.


Please see the sharing options or even printing, at the right/bottom of your screen (bottom of your screen for mobiles, and down the right-hand side on computers). You can even pin this to your own Pinterest page. Alternatively, you can print or save via the Recipe Card below. You could also leave some feedback if you like.
DIFFICULTY LEVEL: easy, beginner
Speedy Mince Pie Swirls Recipe Card
Speedy Mince Pie Swirls

Equipment
- Scales or measuring cups
- Measuring Spoons
- Chopping Board
- Med-Large Mixing bowl
- Baking spatula or wooden spoon
- Measuring Jug
- Fork
- Baking/parchment paper
- Icing/Powdered Sugar for rolling out
- Rolling Pin
- Sharp knife
- Large or 2 medium baking trays/sheets
- Timer
- Cooling rack
Ingredients
For The Dough
- 350 grams Self Raising Flour (12 ¼oz, 2 ¾ cups) OR Plain/A.P. Flour plus 4 tsp Baking Powder.
- 1 tsp Mixed Spice* (Pumpkin Spice, see above recipe)
- ½ tsp Salt
- ¼ tsp Anise (optional)
- ¼ Whole Nutmeg or ½ tsp Powdered Nutmeg
- ½ tsp Ginger
- 3 tbsp Granulated Sugar
- 50 grams Butter (cubed & unsalted, 2 oz, ¼ cup)
- 1 Egg, medium to large (US large – x large)
- 150 ml Milk approx. (5 fl oz, ⅔ cup)
- Lemon &/or Orange Zest (optional)
For The Filling
- 411 grams Mincemeat Filling * (14½ oz jar, see notes above recipe)
For Decoration
- 125 grams Icing Sugar, sieved (4½ oz, 1 cup Powdered Sugar)
- Lemon juice (water & some orange or pineapple extract if you like)
- Orange or Lemon zest (optional)
Instructions
- Prepare a large baking tray/sheet or 2, by lining with baking/parchment paper. Also prepare your area that your will roll out the dough on. I like to use baking/parchment paper to save on the mess. Cut out a piece 35cm at its longest (14″). Have some additional flour or icing/powdered sugar handy for rolling out
- Heat the oven to: 220°c/200°c Fan Oven/ 425°f/Gas Mark 7.
- Add the butter & flour (& baking powder if using) to a medium bowl. By hand or using a pastry blender, ‘rub in’ the butter to the flour, to a ‘breadcrumb’ like consistency. However, there isn’t much butter in this recipe, so only a light rubbing of the flour & butter between your finger-tips is required. You can also use a pastry blender/cutter to do this.
- Next add in the spices, salt, sugar & zest & mix through. Make a well in the middle & add in the egg. Give it a whisk in this hole, & then add in half of the milk, & mix just the milk & egg together.
- Now mix the milk & egg with the dry ingredients. Keep pushing down on the flour, & let it take on as much of the liquid as possible, before adding in any more small drops of the milk. You want the mixture to come together into a very rough ball that will be just a little sticky. You might not need all the milk, or might need a little more.
- Place your ready-cut piece of baking/parchment paper down & dust that & your rolling pin with some icing/powdered sugar. If you use powdered sugar it helps stop sticking, but doesn’t mess with the structure of the bake like if you use flour.
- Next form the dough into a rough ball & place onto the centre of the paper & form into a square or rectangle. Add some icing/powdered sugar on you hands if needed.
- Roll out the dough to a rectangle of about size 22.5 x 30cm (9×12″). If your dough is too sticky, sprinkle on more powdered sugar on top of the dough & tuse a second sheet of paper on top for rolling out.
- Spread the mincemeat filling on top on the rolled out dough. Carefully bend over the end of dough nearest you & roll up the dough. Squeeze a little once at the end & press down the seam to make it stick together, and leave seam side down.
- Using a long sharp knife, cut the roll of dough into slices about 1.5cm (2/3″) wide. This will make about 15 slices. If you need to, you can coat your knife in some more powdered sugar.
- For each slice, lift carefully & place on top of your prepared baking tray/sheet, & then re-shape any that have got a little squashed and lost their shape on cutting.
- Leave at least 2.5cm/1″ gaps between the slices, and then pop in the oven to bake for 14-20 minutes. Ready when golden & the undersides are set & firmed up. Remove from the oven, & place on top of the cooling rack for 5 mins, before transferring, paper and all to the rack to cool down completely.
- While the swirls are cooling, prepare the glaze by simply starting with your sieved icing/powdered sugar & add very gradually juice from 1/2 a lemon. Don’t add all liquid at once. If you want you can add some orange or pineapple extract if you have any (I used 10 drops, 2 tsp orange extract & a splash of lemon extract but you can also just use lemon juice and water). You want a thick but pourable consistency.
- Once the swirls are cooled, simply use a small spoon (or a piping bag with a tiny hole or piping nozzle), & drizzle the glaze across all the swirls. If using a small spoon, I recommend holding the spoon high above the bake, and it will produce a thinner drizzle and look that bit better. Leave to set up for 15-30 minutes if you can wait!
Notes


Follow me on social media:


Thanks for reading
Happy Baking & Making
Happy Tummies & Memories!
Caro xx


Leave some feedback if you like 🙂


Caroline’s Easy Baking Lessons


I love mincemeat and make your mini mince pies, but going to use a large jar of mincemeat and make these too.