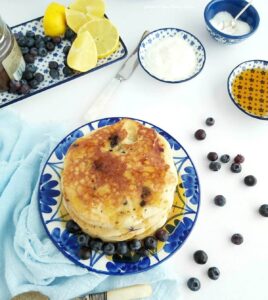
Thick Fluffy Pancakes For Beginners

Here's my thick fluffy pancakes for beginners. Learn how to make this easy & quick dessert or breakfast. Full process shots & video provided, so what's stopping you?
Equipment
- Scales or measuring cups
- Measuring Spoons
- Whisk
- Mixing bowl
- Medium Bowl
- Baking spatula
- Non-stick frying pan/skillet or pancake pan
- Cooking spatula/turner
- Stove top/hob/burner
- ¼ Measuring Cup (or ice-cream scoop)
- Butter or cooking spray for cooking
- Kitchen paper/paper towels
- Large Metal Cookie Cutter/Pastry Ring (Optional - I used a 11cm/4¼" one)
Ingredients
- 188 grams Self-raising Flour ( 6½ oz, 1½ cups Self-rising Flour, or Plain/A.P. flour plus 2¼ tsp Baking Powder)
- ¼ tsp Salt
- 2¼ tsp Baking Powder (in addition to also adding if using A.P./Flour flour)
- 1 Egg, medium to large (US large to XLarge)
- 30 grams Melted Butter (Unsalted, 1 oz, 2 tbsps)
- 1½-2 tsp Vanilla Extract (Make your own home-made Vanilla Extract)
- 1½ tbsp Sugar
- 250 ml Milk (Any kind, 8½ fl oz, 1 cup - note you may need slightly more)
Instructions
Prepare The Batter
- Begin by adding the 188 grams Self-raising Flour, ¼ tsp Salt & 2¼ tsp Baking Powder to a large mixing bowl and whisking together till combined. Set aside. See Photo 1.

- In a medium bowl, add your 1 Egg, medium to large and beat well, before adding in your 30 grams Melted Butter, 1½-2 tsp Vanilla Extract & 1½ tbsp Sugar. Mix again to combine. See Photo 2.

- Finally, add the 250 ml Milk to this wet mixture and whisk well till fully incorporated. See Photo 3.

- Now add about half of this wet mixture to the dry ingredients and mix together. Then gradually add in more of the wet to the dry, mixing with a spoon to begin, followed by a whisk. Add enough of the liquid, to make a thick but pourable batter. You might not need all the liquid. But if you need more, just add in tsps of milk. See Photo 4 & the video for an idea of the thickness the batter should be. Set aside.

- Prepare your area to work and have a plate with some kitchen paper/paper towel on top for the cooked pancakes. I used a ¼ measuring cup for the amount of batter needed, but you can also use a large ice-cream scoop worth. Better to use one of these than a smaller spoon and have to keep adding to the pan, as they would not cook evenly. Even a ⅔ full soup ladle would also work. Have a cooking spatula/turner near by too, butter cubed or spray cooking oil for greasing.

- Heat your non-stick frying pan/skillet on a low-medium heat, and then add the butter or cooking spray just before adding the pancake batter. (See video). Pour in the batter and only move the pan enough just to get a rough round shape. Don't let it spread out too thin like a crepe. See Photo 5 above & the video.
- Leave to cook for a few minutes. Bubbles will start to appear on the surface of the pancake when it's nearly ready to turn. (See Photo 5 above). After the first few appear, use your spatula to lift just one edge up to see the underside. You want a nice browned surface. If not browned yet, or feels too soft to turn over, leave a little longer. You want to make sure the top side is setting enough so that when flipped over it doesn't splash everywhere. See Photo 6.

- Use your spatula to lift up the pancake while you use the opposite hand to grease the pan again if needed. Then flip the pancake over and let the other side cook. This will take less time so keep checking. Once happy with the colour, remove and place on the prepared paper lined plate. See Photo 7.

- Use some paper to wipe clean the pan before greasing again and adding another amount of pancake batter and cooking as before. After doing 1 or 2 pancakes, you might want to lower the heat to the optimal level for your stove top.
- ALTERNATIVE - You can also choose to use a large metal cookie cutter to shape the pancakes, making them all the same size and in my experiment, they were thicker too. I used an 11cm/4¼" metal cutter. Make sure it's metal that's going to be touching the heat (mine has a plastic coloured top end). Be sure to well grease the cutter - I found using a cooking spray worked best and used it each time after wiping the cutter. I recommend FryLight cooking sprays for this and for lining cake pans. When using the cutter, just pour into the middle and let it cook. Once the bottom is done, you should be able to easily remove the cutter, (be sure to be careful of your hands). You can also just flip the whole thing over, and in doing so, let the pancake fall onto the frying pan, releasing itself from the cutter. Continue cooking the other side till ready. You can also use smaller shaped cookie cutters like the heart one below in the photo, but I found the round much easier.

- Repeat and you will get about 8 x 11cm/4¼" wide, thick pancakes.


Serving & Storing
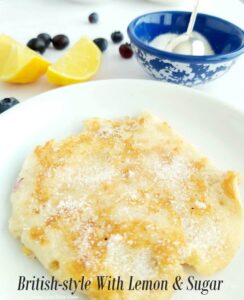
- Eat when ready, with cream, maple syrup, honey, blueberries, chocolate spread, fresh fruit, whatever you like. Try some lemon curd, fig anise curd or new blueberry orange curd.

- Left-over pancakes can be kept in the fridge or somewhere cool for 1 - 2 days. Don't store stacked as they will stick together - use baking/parchment paper in-between if stacking and cover with cling film/plastic wrap. You can re-heat slightly to take the cold-edge off, by heating for 30 seconds in the microwave, or on a dry pan on the stove-top on a very low heat until just warmed.


Video
Notes
In The Pancake Video - I made some thick pancakes free-hand & also some using a large metal cookie-cutter (11cm, 4 1/4").
 Flour & Baking Powder - I usually use UK Self-raising flour & you can also use US Self-rising. Alternatively, use Plain/A.P. flour & add the additional baking powder as noted. But remember to add the 2nd listed amount too.
Vanilla Extract - (not essence), it’s so easy to make your own Vanilla extract.
Sugar & Salt - tiny amount of salt & not much sugar either. Use any sugar you like.
Flour & Baking Powder - I usually use UK Self-raising flour & you can also use US Self-rising. Alternatively, use Plain/A.P. flour & add the additional baking powder as noted. But remember to add the 2nd listed amount too.
Vanilla Extract - (not essence), it’s so easy to make your own Vanilla extract.
Sugar & Salt - tiny amount of salt & not much sugar either. Use any sugar you like.
 Egg & Milk - I use medium to large egg, but note that US equivalent is Large to Extra Large.
***Just add enough liquid ingredients till the correct consistency (see video for reference). You may require more milk at the end.
Egg & Milk - I use medium to large egg, but note that US equivalent is Large to Extra Large.
***Just add enough liquid ingredients till the correct consistency (see video for reference). You may require more milk at the end.
 ALTERNATIVE FLAVOURINGS
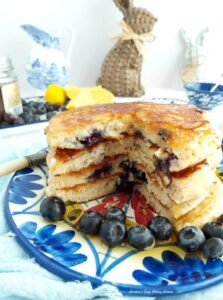
Blueberry Browned Butter - add some more flavour by browning the butter, & adding blueberries. Brown the butter, (see my article & video on browning butter) being sure to add the residue from the bottom of the pan, before adding in with the eggs, milk & sugar. And fold the blueberries in once your batter is formed. Approximately ½ - ¾ cup (100-125g) blueberries per 8 pancake batch.
ALTERNATIVE FLAVOURINGS
Blueberry Browned Butter - add some more flavour by browning the butter, & adding blueberries. Brown the butter, (see my article & video on browning butter) being sure to add the residue from the bottom of the pan, before adding in with the eggs, milk & sugar. And fold the blueberries in once your batter is formed. Approximately ½ - ¾ cup (100-125g) blueberries per 8 pancake batch.
 Serve with some blueberry orange curd, a fig anise curd, lemon curd or homemade salted caramel sauce.
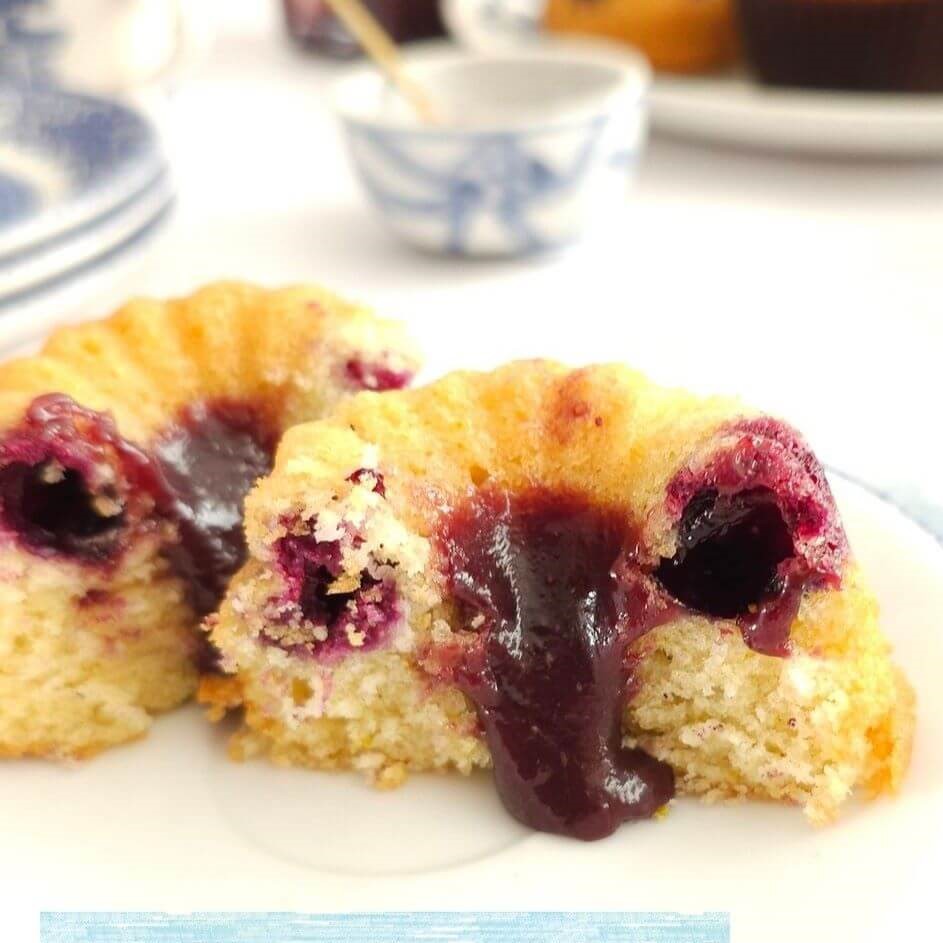 For more Easter & Spring recipes - go to Easter Page Or try the easy, Mini Easter Carrot Bundt Cakes
Happy Baking xxx
For more Easter & Spring recipes - go to Easter Page Or try the easy, Mini Easter Carrot Bundt Cakes
Happy Baking xxx
Flour & Baking Powder - I usually use UK Self-raising flour & you can also use US Self-rising. Alternatively, use Plain/A.P. flour & add the additional baking powder as noted. But remember to add the 2nd listed amount too.
Vanilla Extract - (not essence), it’s so easy to make your own Vanilla extract.
Sugar & Salt - tiny amount of salt & not much sugar either. Use any sugar you like.
Egg & Milk - I use medium to large egg, but note that US equivalent is Large to Extra Large.
***Just add enough liquid ingredients till the correct consistency (see video for reference). You may require more milk at the end.
ALTERNATIVE FLAVOURINGS
Blueberry Browned Butter - add some more flavour by browning the butter, & adding blueberries. Brown the butter, (see my article & video on browning butter) being sure to add the residue from the bottom of the pan, before adding in with the eggs, milk & sugar. And fold the blueberries in once your batter is formed. Approximately ½ - ¾ cup (100-125g) blueberries per 8 pancake batch.
Serve with some blueberry orange curd, a fig anise curd, lemon curd or homemade salted caramel sauce.
For more Easter & Spring recipes - go to Easter Page Or try the easy, Mini Easter Carrot Bundt Cakes
Happy Baking xxx
Nutrition Facts
Thick Fluffy Pancakes For Beginners
Serving Size
1 pancake
Amount per Serving
Calories
153
% Daily Value*
Fat
5
g
8
%
Saturated Fat
3
g
19
%
Monounsaturated Fat
1
g
Cholesterol
32
mg
11
%
Sodium
256
mg
11
%
Potassium
53
mg
2
%
Carbohydrates
23
g
8
%
Sugar
4
g
4
%
Protein
4
g
8
%
* Percent Daily Values are based on a 2000 calorie diet.