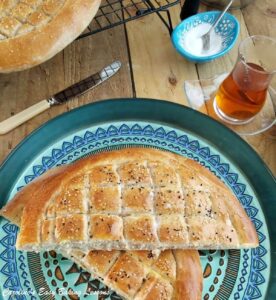
Turkish Ramadan Bread – Ramazan Pidesi In 2hrs

Turkish Ramadan Bread, or Ramazan Pidesi is a special bread from Turkey, pronounced 'Ra-ma-zan Pee-de-see' & is often made during Ramadan. Let me show you how to make it in 2 hours
Equipment
- Stand Mixer with dough hook (optional)
- Scales of measuring cups
- Small measuring jug
- Pastry Brush (or small artist/paint brush)
- Small bowl for egg wash
- Baking/parchment paper
- 2 Baking sheet/trays (or pizza trays)
- Tea-Towel
- Small Knife or spoon with a straight edged end
- Timer or Phone Timer
- Cooling rack
Ingredients
For The Dough
- 200 grams Plain or Strong Bread Flour – [F1] (7 oz, 1 ⅔ cups All Purpose or Bread Flour) - [F1]*
- 1 tsps Salt
- 2 tsp Garlic or Onion powder or granules (optional)
- 1 tsp Sugar
- 7 grams Yeast, Instant/Active (1 packet/2¼ tsp Instant or 2½ tsp Active)
- 400 ml Tepid Water (13½ fl oz, 1 ⅔ cups, see recipe instructions on temperature*)
- 1 Egg White, medium - Large (Large - XLarge US eggs)
- 1 tbsp Olive Oil or E.V.O. Oil
- 100 grams Plain or Strong bread Flour– [F2] (3½ oz, ¾ cup All Purpose or Bread Flour) - [F2]*
- 325 grams Plain or Strong bread Flour – [F3] (Up to 11½ oz, 2⅔ cups All Purpose or Bread Flour) - [F3]*
For The Topping
- Egg yolk & splash of milk for egg wash
- Sesame seeds &/or Nigella Seeds - çörek otu (optional)
Instructions
Prepare The Dough
- Begin by measuring out all the ingredients. It is very important to have the 3 flour amounts in separate bowls. You can have [F1] flour in your stand mixer bowl.
- Have the water in a microwave safe jug & heat for about 30 – 45 seconds until just a little warm (120-130°f, 49-54°c). Alternatively test with a clean finger for just above tepid. You could use hot & cold water mixed together in a jug to get tepid temperature. But if unsure, best to use a thermometer first time making. Once at the right temperature, add in the egg white & oil & mix together.
- While the water is heating, add the yeast to the [F1] flour in the main mixing bowl, & mix well. Then add in the salt & then the sugar & mix well between each addition. Add in the onion/garlic powder if using. See Photo 2 below.
- Add the liquid mixture to the flour mixture & mix a little by hand before starting the stand mixer, with the 'k' paddle/mixer paddle attached (not the kneading hook yet). Mix for 2 minutes, on medium speed with a timer. The timings are important in this recipe.
- Next add in the 2nd bowl of flour - [F2], (the smaller one) & let the mixer mix the flour in for another 2 minutes.
- Now add in half of the third flour bowl - [F3] & let the mixer incorporate the flour on low - medium speed. Then slowly add in the rest of [F3] flour. You might not need it all, (or a little more – sometimes I have needed an extra ¾ cup or 90g), but you want a dough that starts to come together as a very rough ball around the paddle. Mix for 10 seconds after each addition of flour & wait to see the ‘ball’ of dough. Note that the dough will be a bit sticky.
- Next put the dough hook onto the stand mixer (use a scraper to get the dough off the paddle), & knead on medium speed for 4 minutes.
- Scrape the dough off the hook & from down the sides of the bowl. Turn the dough over, using the scraper & let the mixer continue kneading for another 4 minutes. The dough does tend to stick at the bottom when kneading, & this is another reason why we turned it during kneading. (Do not be tempted to add more flour). Alternatively, knead by hand on a very lightly floured surface for about 10 minutes till smooth & a little less sticky.
Prove The Dough
- Have a feel of the dough to know how well kneaded dough feels. Note also how stretchy it is when you lifted the dough hook up. Place a clean tea-towel on top of the bowl & leave somewhere warm & draft free for 15 minutes.
Prepare The Baking Trays/Sheets
- Take this time to prepare the baking trays with baking/parchment paper. Do not bake these without paper as they will stick. I use 2 pizza baking trays as they are the right size 25cm/10”) and I prepare each bread on the actual paper lined tray, rather than moving them over after preparing them.
- It’s so simple to cut baking/parchment paper to fit any round cake tin or pizza tray. Follow the pics in Photo 5 in the step-by-step process (before this Recipe Card), of folding & trimming the paper, to get the perfect fit. Alternatively watch the video, or follow the detailed instructions in the main part of the recipe, before this Recipe card.
Shaping The Breads
- Flour some baking/parchment paper or worktop/counter. Release the dough from the bowl, sprinkle on some more flour on top of it or onto your hands. Form the dough into a ball or rectangle, of even shape, so you can cut in half (flour the blade of your knife if needed).
- Roll the pieces of dough into 2 balls and place one in a lightly floured bowl while you work on the other. Place the ball of dough in the centre, on top of the paper lined pizza tray, and flatten out into a circle. Now proceed to spread out the dough more, with your palm & fingers, until you fill the 25cm/10″ round tray. If you don’t have pizza trays, you can flatten by hand , roll out with a floured rolling pin, into a circle approximately 25cm (10") wide, on a paper-lined cookie tray/sheet.
Creating The Pattern
- To make the pattern on the dough, using a small sharp knife, make an indent into the dough to create a round border. Leave at least 1”/2.5cm gap from the edge. Make long vertical lines, with about 1″ /2.5cm gap in-between. Turn 90 degrees & repeat the lines making a diamond pattern.
- Gently, brush egg-wash (yolk mixed with a splash of milk), on the bread. Then sprinkle on some Nigella seeds &/or sesame seeds, or leave plain if you prefer. See Photo 10 below.
Second Prove
- Repeat for the 2nd bread & leave both in the same warm, draught free place for 30 – 45 minutes to prove and puff up a little.
- Heat up the oven to – 220c/200c Fan Oven/425f/Gas Mark 7.
- Before placing in the oven, go over the cuts again you made on the bread, as they will be less defined now with proving. Just be very careful not to deflate the dough. Tip – Regular dipping of the knife in flour will make this easier, see video.
Bake The Breads
- Bake in the centre of the oven, for between 14– 18 minutes,till nice and golden, risen and the underside looks cooked all the way through to the centre.
- Leave the breads on the trays, on top of cooling racks for about 5 -10 minutes, before removing the trays & paper and leaving to cool down. Cut or just tear apart, and eat with your meal. (Turkish way is with meals such as Beans & Rice - Kuru Fasulye (coo-roo fa-sool-ye) More on that in the main recipe post).
Storage
- Store any left-overs in sealed food bags, or even brown paper bags. I prefer not to store homemade bread in the fridge, as it can make it go off quicker.


Video
Notes
*Make sure you divide your flour into 3 bowls as per the ingredient list and add as per the instructions. This will ensure a successful rise and quicker baking time. You can watch a almost real-time video of the mixing process in my Quicker Dinner Rolls Video.
Plain/A.P. flour or Strong/Bread flour can be used. I have also used 50% wholemeal/wheat flour with this quicker bread technique - see my Quicker Yeast Bread & Roll Recipes (including Pizza) Or check out my 90 Minute Bigger Burger Buns recipe.
 Active or Fast Acting dried yeast can be used for this recipe & I have used both. But if you want to be exact with the amounts, or to use fresh yeast, see my Yeast Conversion tables. Also read before the recipe for more on the types/different names of the yeast.
TIPS
For making lines in the dough easier (in particular after proving), dip knife often, in flour.
When preparing the first bread, if your environment is too warm, (causing the 2nd ball of dough to prove too quickly), place this 2nd ball of dough in the fridge or somewhere cool until ready to shape it.
Active or Fast Acting dried yeast can be used for this recipe & I have used both. But if you want to be exact with the amounts, or to use fresh yeast, see my Yeast Conversion tables. Also read before the recipe for more on the types/different names of the yeast.
TIPS
For making lines in the dough easier (in particular after proving), dip knife often, in flour.
When preparing the first bread, if your environment is too warm, (causing the 2nd ball of dough to prove too quickly), place this 2nd ball of dough in the fridge or somewhere cool until ready to shape it.
 Go to my Bread & Roll recipes.
Another popular Turkish recipe is Poĝaça - cheese filled rolls. Try my 2 hour, yeast-based recipe. Or no-bake, yeast-free Lahmacun - Turkish Meat Flatbread.
Go to my Bread & Roll recipes.
Another popular Turkish recipe is Poĝaça - cheese filled rolls. Try my 2 hour, yeast-based recipe. Or no-bake, yeast-free Lahmacun - Turkish Meat Flatbread.
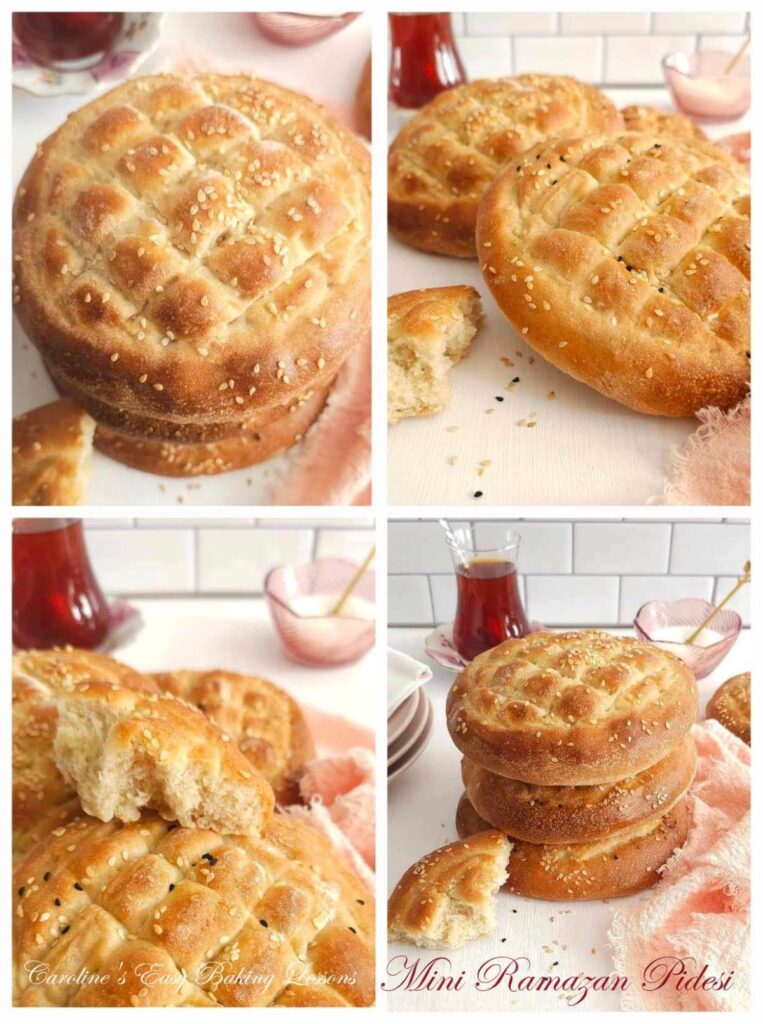 Try Mini Ramadan Bread (see collage above) – simply divide the dough into 6 pieces for individual Ramazan Pidesi. About 170g each and 4-5”/10-12.5cm wide, & start checking after 12 minutes of baking.

Active or Fast Acting dried yeast can be used for this recipe & I have used both. But if you want to be exact with the amounts, or to use fresh yeast, see my Yeast Conversion tables. Also read before the recipe for more on the types/different names of the yeast.
TIPS
For making lines in the dough easier (in particular after proving), dip knife often, in flour.
When preparing the first bread, if your environment is too warm, (causing the 2nd ball of dough to prove too quickly), place this 2nd ball of dough in the fridge or somewhere cool until ready to shape it.
Go to my Bread & Roll recipes.
Another popular Turkish recipe is Poĝaça - cheese filled rolls. Try my 2 hour, yeast-based recipe. Or no-bake, yeast-free Lahmacun - Turkish Meat Flatbread.
Try Mini Ramadan Bread (see collage above) – simply divide the dough into 6 pieces for individual Ramazan Pidesi. About 170g each and 4-5”/10-12.5cm wide, & start checking after 12 minutes of baking.
***I am not a qualified nutritionist, and all nutritional values are based on a serving of ¼ of one bread, made from a 2 bread batch as per the recipe above. Values from Whisk.com.
Caroline's Easy Baking Lessons 2022 https://easyonlinebakinglessons.comNutrition Facts
Turkish Ramadan Bread – Ramazan Pidesi In 2hrs
Amount per Serving
Calories
311
% Daily Value*
Fat
3.5
g
5
%
Sodium
301.4
mg
13
%
Potassium
97.5
mg
3
%
Carbohydrates
58.5
g
20
%
Sugar
0.9
g
1
%
Protein
9.8
g
20
%
Vitamin A
8.27
IU
0
%
Iron
3.6
mg
20
%
* Percent Daily Values are based on a 2000 calorie diet.