Amazing Fig & Anise Curd

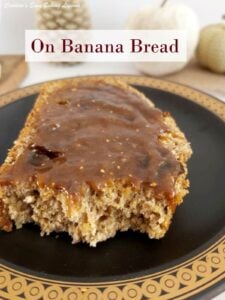
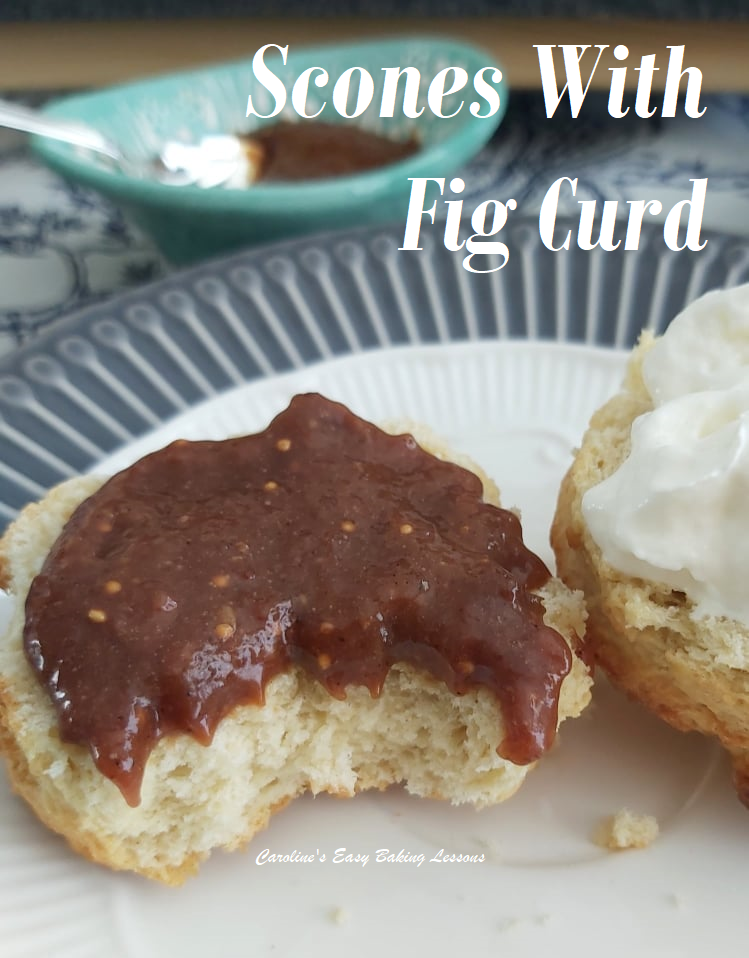
Love figs, love anise or aniseed flavour? Have figs that are no longer fresh, or even frozen ones? Let me show you how to make use of the figs & have a tasty, home made curd that you can use on things such as banana bread or spread on British Scones.
Equipment
- Scales or measuring cups (see my hand-measured baking ingredient conversions table )
- Measuring Spoons
- Cooking pot for figs
- Immersion blender (stick blender, small food processor, smoothie maker etc)
- Bain Marie (heat save bowl on top of a cooking pot, that does not touch the bottom of the pot. See notes)
- Electric hand mixer (with dough hooks, electric whisk or a hand-held whisk. See further notes)
- Wooden spoon
- Medium sized heat proof bowl (for cooling fig curd)
- Cling Film (plastic wrap/saran wrap)
- 2 Glass Jars (Masan jars, old jam/preserve jars etc. About 2 x 16oz jars or 1 bigger. Thoroughly cleaned & dried or sterilized)
Ingredients
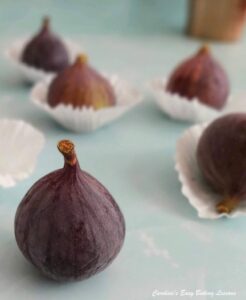
- 290 grams Figs, chopped (10¼ oz, 1⅔ cups, about 6 medium or 8 small figs, any variety of fresh or frozen figs, roughly chopped to about 1"/2.5cm pieces*)
- 26 grams Strawberries, or any other berries (1 oz, optional, or increase fig quantity**)
- 3 tbsp Water (45ml, 1½ fl oz)
- 2 Small - Medium Lemons (Juice of one & one cut in wedges)
- 420 grams Dark Brown Sugar (14¾ oz, 2 packed cups plus 4 tsp. For alternatives see notes ***)
- 3 Eggs, med-large (US large - xlarge size)
- 160 grams Butter, unsalted (5½ oz, ¾ cup, cubed)
- ¾ - 1 tsp Ground Anise (Alternatively Star Anise, with pods removed & ground with mortar & pestle. )****
- 1 tsp Cinnamon
- 1¼ tsp Ginger
- ¼ tsp Mixed Spice (Pumpkin Spice)
Instructions
Cook The Figs
- Begin by chopping your figs if you haven't already, ensuring you remove the 'neck' & any bruised areas. (The 'neck' is what's left on the top of the fig after removing from the stalk when harvested). Cut into pieces about 1" (2½cm). See photo collage below. Don't worry if the figs don't look as vibrant a red colour inside as when really fresh. Same goes if you used frozen figs.
- Then place the chopped figs, lemon wedges (skin and all and berries if using), into a medium sized pot. (I have used a non-stick frying pan, and a non-stick pot). Add the 3 tbsp water & cook on a low heat to begin with until you see the figs give off some of their clear juices. Then proceed to increase the heat to medium & let it come to a gentle boil. Add in the lemon juice, stirring occasionally & continue cooking until the figs are tender & there is now a significant amount of red fig juice. (See Photo 1 of th eprocess shots before this recipe card & video for reference & note that for frozen figs, it will be more of a brownie red colour).


Puree The Figs
- Transfer to a different bowl/container & use an immersion blender (stick blender, processor etc), to puree the cooked figs. Some lumps is fine, but if you don't want to eat the odd fig skin, blitz further till thick and smooth. Leave to cool in the fridge a little while you prepare for cooking the curd. (See photo above).
Make The Curd
- Break the eggs into a small bowl before whisking together with a fork. (Make sure you are using room temperature eggs). Now find a heat-save bowl (glass, metal or ceramic), that will sit nicely on top of a cooking pot without touching the bottom of the pot. (Known as a double boiler or bain marie ). Remove the bowl, add in about 1 - 2" (2½-5cm) level of water to the bottom of the pot, heat on medium heating & allowing to start to come to a boil.
- Move your pot onto a smaller ring, intended for cooking with a smaller sized pot, and turn the heat to medium for the water to gently simmer. (Changing rings is a very good idea if you have trouble making curd or worry about scrambling the eggs. By heating on a ring that is a bit small for your cooking pot, this will ensure the eggs don't get cooked too quickly.)
- Now sit the heat-save bowl on top of the pot of water & add the brown sugar, ½ tsp anise, 1 tsp ginger & 1 tsp Cinnamon to the bowl & whisk/mix together by hand.
- Next add in the pureed figs that will have cooled a little, and mix till fully combined. Then add in the whisked eggs, gradually, in increments of about 2 or 3, whisking well in-between each addition. Make sure your water is not boiling, & not bubbling up the pot. If it does get too hot (which is less likely, reduce the heat to low).
- Whisk the mixture for about 2 minutes by hand or with a hand-held electric whisk. Most recipes will now have you whisk continually by hand or at least hold an electric whisk, for at least fifteen minutes. But my hands get tired easily, so I found a way to reduce the amount of time needed to mix. Using a hand-held electric mixer, attach the dough hooks it comes with (see photo ). If you have an immersion/stick blender that also has a 'balloon style' whisk attachment, use that. Add in one cube of the butter at a time, & mix gently with a wooden spoon, let the heat melt the butter. Then turn the machine on, let it mix the curd on a moderate setting for 10 seconds. Add in another cube of butter and mix a little by hand until it melts. Repeat the 10 second mixing with the machine, alternating with adding the cube of butter.
- Don't let the dough hook attachment mix for longer than 10 seconds at a time (you don't want to blow the motor on your machine). The idea is to cook on very low, for longer, but with less constant mixing, which also allows the mixture to thicken more naturally, as well as reduce the chances of scrambled eggs.
- In-between the adding butter and mixing, every so often check the thickness of the curd with your wooden spoon. Mix through the curd to see the thickness and when you think it might be thick enough, test by submerging the business-end of the spoon in the curd, turning it over to let the curd coat the back of the spoon. At the beginning the curd would have ran off the back of the spoon but once it stays longer and coats it - do the test.
- Run your finger, or better still the end of a small spoon (as the mixture will be hot), through the curd coating the back of the spoon and try and draw a clear line through it. This line should show the thickness of the curd - is it clear definition between the exposed wood of the spoon, where you scraped it, and where the curd still remains? Or is it less defined because the curd is not thick enough and more liquid state? Get in the habit of checking during the mixing stage so you will become accustomed to what it should look like. (See photo below).

- Once thick enough with the clear line, (note you don't need it to be really really thick & set now, as it will continue to thicken off the heat & on chilling), remove from the heat & remove the bowl from the cooking pot. Let it cool a few minutes before adding anymore of the anise & other spices. Add in ¼ tsp of Mixed Spice/Pumpkin Spice, ¼ tsp Ginger & another ¼ tsp anise. Mix thoroughly before having a taste test. Add in more anise by the ¼ tsp until you are happy with the level of anise. If not as keen on anise, you can alternatively add small amounts of ginger, cardamom, or nutmeg.

Cooling & Setting
- Once happy with the flavouring, transfer the fig curd from the bowl and place in a different bowl before covering with cling film/plastic wrap. Like with pastry cream/creme pat, you want to place the plastic on top of the surface of the curd, so as not to let any air cause a crust to form. See my video for how to do this. Then simply place in the fridge till set.
- Setting of the curd fully, for using, can take up to 4 hours in the fridge. However, if in a hurry, this method works for me - first chill for 30 minutes, before placing in the freezer for 30 minutes. Remove from the freezer & use now if set enough. Otherwise, place back in the fridge for another 30 minutes. Alternatively, leaving overnight in the fridge after cooking, will also produce a nice extra firm curd, that holds its shape.


Using & Storing
- Once the cooled curd is thickened enough, transfer to any glass jars you have. Mason jars, old jam jars, etc. It makes enough for a few standard sized jars. Just make sure you have nice airtight lids. No need to sterilize or can the jars unless you think you will not consume within 2 - 3 weeks. Just wash and dry thoroughly, keep in the fridge and never place a used spoon/knife in the curd or it will spoil sooner. If you want to can the curd, it will last 3 - 4 months. (See below)

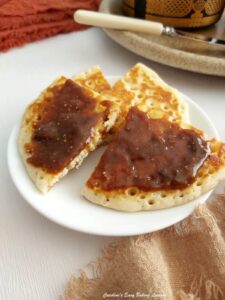
- Serve the curd with anything you would normally enjoy jam, jelly or preserve with. Examples are on my Classic British Scones. Paired lovely with some whipped double/heavy cream (see below or before Recipe Card). Also great on warm toast, or even spread on waffles or Scottish crumpets. Add a thin layer to your overnight oats before serving or even spoon on top of some plain Greek Yoghurt. Love cheese & figs? Then why not pair with some crackers and white creamy cheese? I combined with cottage cheese & red grapes & that was amazing.


Video
Notes
*Figs - chopped, skin on, fresh or frozen but not dried figs.
**Strawberries - or other berries to provide more pectin for setting, but optional. Alternatively increase the fig total weight or add an extra lemon, in wedges, skin on.
 ***Alternative Sugar - I have also tested using 300g (10½ oz or 1½ packed cups) of Dark Brown Sugar plus 120g (4¼ oz or ⅔ cup) Dark Brown Muscovado sugar. A combination of light and dark brown sugar will also work but the deeper flavour of dark brown sugar pairs beautifully with the figs & anise.
****Ground Anise - this really makes the fig curd amazing and if you like aniseed you will like this. An alternative to anise, is to use star anise, remove the pods & finely grind with a mortar & pestle till you have enough for 1 tsp worth. Pre-ground star anise will also work. For all, add to taste when the curd is made.
***Alternative Sugar - I have also tested using 300g (10½ oz or 1½ packed cups) of Dark Brown Sugar plus 120g (4¼ oz or ⅔ cup) Dark Brown Muscovado sugar. A combination of light and dark brown sugar will also work but the deeper flavour of dark brown sugar pairs beautifully with the figs & anise.
****Ground Anise - this really makes the fig curd amazing and if you like aniseed you will like this. An alternative to anise, is to use star anise, remove the pods & finely grind with a mortar & pestle till you have enough for 1 tsp worth. Pre-ground star anise will also work. For all, add to taste when the curd is made.
 Other Spices - you can play about with the other spices if you like and to your own taste. Just start with the initial amounts before varying the rest on tasting.
Preserving/Canning - reference from National Centre For Home Food Preservation, @ https://nchfp.uga.edu/how/can_02/lemon_curd.html
Other Spices - you can play about with the other spices if you like and to your own taste. Just start with the initial amounts before varying the rest on tasting.
Preserving/Canning - reference from National Centre For Home Food Preservation, @ https://nchfp.uga.edu/how/can_02/lemon_curd.html
 Recipe Yield - Makes up to 2 standard jars worth (16 oz). And I am not exact as I kept eating the curd when I was adding more anise :)
My British Scones - my popular recipe and almost real-time video - go to Classic British Scones.
Recipe Yield - Makes up to 2 standard jars worth (16 oz). And I am not exact as I kept eating the curd when I was adding more anise :)
My British Scones - my popular recipe and almost real-time video - go to Classic British Scones.
 Or watch my Scones Video Tutorial
Easy Banana Bread Recipe - watch out for an even healthier 100% wholemeal version with pumpkin puree coming soon.
Or watch my Scones Video Tutorial
Easy Banana Bread Recipe - watch out for an even healthier 100% wholemeal version with pumpkin puree coming soon.
 Plum & Orange Home Made Jam
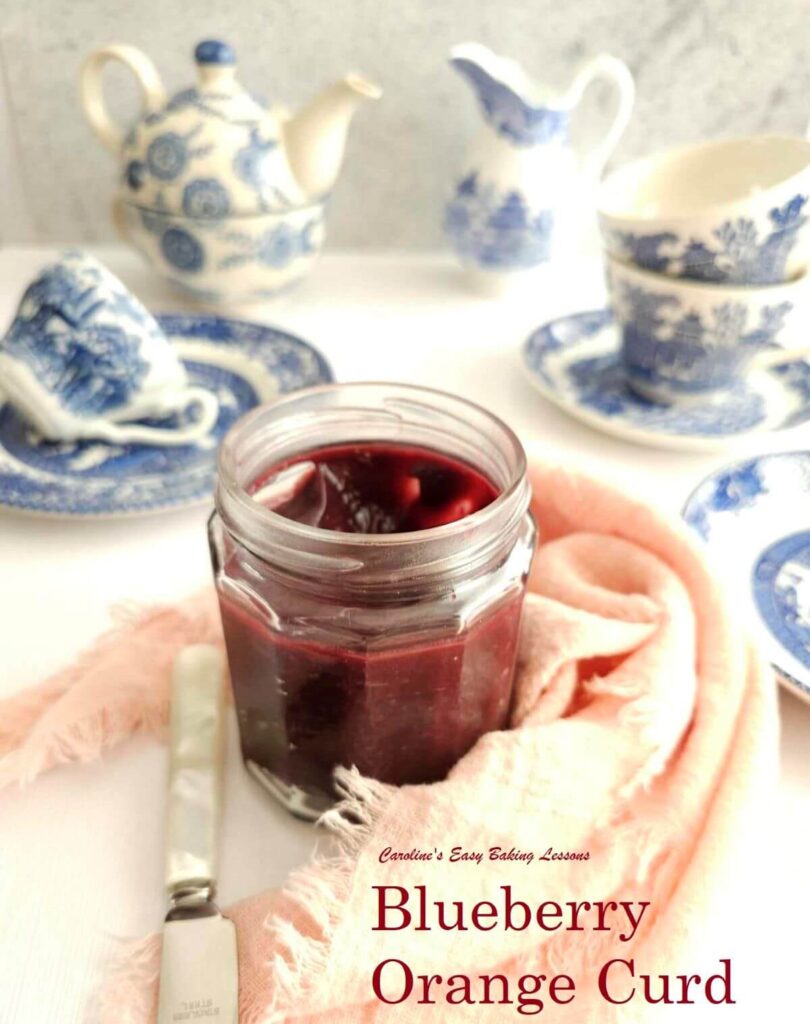
Easy Lemon Curd or Blueberry Orange Curd
Check out & print my Baking Ingredients Conversion Table
Plum & Orange Home Made Jam
Easy Lemon Curd or Blueberry Orange Curd
Check out & print my Baking Ingredients Conversion Table
 Thanks for reading
***Alternative Sugar - I have also tested using 300g (10½ oz or 1½ packed cups) of Dark Brown Sugar plus 120g (4¼ oz or ⅔ cup) Dark Brown Muscovado sugar. A combination of light and dark brown sugar will also work but the deeper flavour of dark brown sugar pairs beautifully with the figs & anise.
****Ground Anise - this really makes the fig curd amazing and if you like aniseed you will like this. An alternative to anise, is to use star anise, remove the pods & finely grind with a mortar & pestle till you have enough for 1 tsp worth. Pre-ground star anise will also work. For all, add to taste when the curd is made.
Other Spices - you can play about with the other spices if you like and to your own taste. Just start with the initial amounts before varying the rest on tasting.
Preserving/Canning - reference from National Centre For Home Food Preservation, @ https://nchfp.uga.edu/how/can_02/lemon_curd.html
Recipe Yield - Makes up to 2 standard jars worth (16 oz). And I am not exact as I kept eating the curd when I was adding more anise :)
My British Scones - my popular recipe and almost real-time video - go to Classic British Scones.
Or watch my Scones Video Tutorial
Easy Banana Bread Recipe - watch out for an even healthier 100% wholemeal version with pumpkin puree coming soon.
Plum & Orange Home Made Jam
Easy Lemon Curd or Blueberry Orange Curd
Check out & print my Baking Ingredients Conversion Table
Thanks for reading