Easter Chocolate Filled Sandwich Cookies

Easter/Spring Chocolate Filled Sandwich Cookies
By Caro
Easter Chocolate Filled Sandwich Cookies are my soft vanilla sugar cookies, sandwiching a firmer chocolate buttercream filling, that is perfect for sandwich cookies. Use themed cookie cutters and these make an easy Easter or Spring cookie.

Perfect For Easter Or Spring Baking
These chocolate filled sandwich cookies are simple to make and the only time consuming part is chilling the dough once the shapes are cut out. But this is essential to keep their shape.
First few times I made them, I used all Easter themed cutters, but this year I made some with square and slim rectangular cutters for all round baking days. I have also got better at food photography and setting up the scene. So apologies for the differences. I don’t want to photoshop them as I believe in authenticity.
Valentine’s Day Cookies
Use some heart shaped cookie cutters, & with minimal decorating required, these would be perfect as a Valentine’s day gift. See my Jam Sandwcih Cookies as an example. Or take a look at my sweet and savoury recipes on the Valentine’s Day page.

Recipe Yield
So in all I get 18 sandwich cookies from this batch. But this will depend on what size of cookie cutters you use, and I used a variety of sizes and shapes. If you go for the little square or slim rectangular ones, you will be sure to get more than 18. But don’t worry, there is enough filling if you make smaller cookies and get more than 18 pairs. Any left over filling can be covered and left at room temperature for a day or two and used on something else. Or just nibbled every time you pass by it – so I heard, honestly 😉

A Special Buttercream Filling
The chocolate filling is similar to what I use in my Chocolate Orange Oreo style sandwich cookies. You use clarified butter, which is a very simple process to do – trust me. Just melting and heating the butter until the milk solids separate from the liquid. Only takes about 10 minutes and can be done while the cookies bake. It really is worth it, as it makes a filling that is so much firmer and suitable for sandwich cookies. Doesn’t squish out and can set nicely at room temperature. Tastes great too.
DOWNLOAD the recipe to save to your phone or computer. Simple click the ‘download’ button below, or use one of the share options on screen.
INGREDIENTS
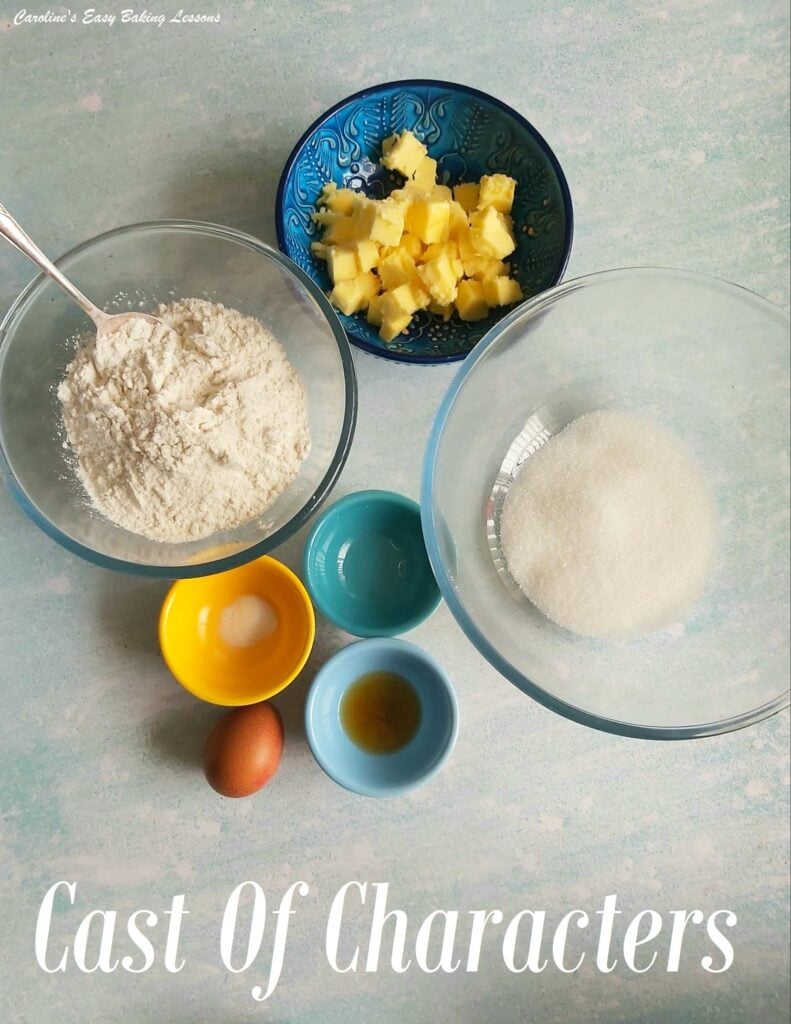
- 113g Butter, unsalted, soft & cubed (3/4 cup, 4 oz)
- 100g Granulated Sugar
- (1/2 c, 3.5 oz)
- 1 Egg, med – large
- 1 1/2 tsp Vanilla Extract/Paste
- 1/8 tsp Almond Extract
- 200g Plain Flour
- (1 2/3 cups, 7 oz All Purpose)
- 1/4 tsp Baking Powder
- 1/8 tsp Salt

FILLING
- 128g Butter, unsalted
- (1/2 cup/1 stick + 1 tbsp, or 4.5 oz)
- 155g Icing Sugar, sieved
- (1 1/4 cups Powdered sugar, 5.5 oz)
- 32g Cocoa Powder sieved (1/4 cup, 1 oz)
- Splash of Vanilla Extract (optional)
- Little Icing/powdered sugar, (sieved), for decoration.

EQUIPMENT
- Scales or measuring cups
- Measuring spoons
- Stand/Hand mixer or large mixing bowl & large spoon
- Knife
- Baking/parchment Paper
- Rolling Pin
- Baking sheet/Tray x 2
- Cookie Cutters/Glass (see above)
- Small bowl and some flour for dipping cutters
- Small spoon
- Small sieve
- Timer or phone timer
- Cooling rack
- Small saucepan/cooking pot
- Wooden spoon
- Small – medium bowl
- Medium bowl for mixing the filling
- Large spoon
OVEN: 180/160c Fan Oven/350f/Gas mark 4

INSTRUCTIONS
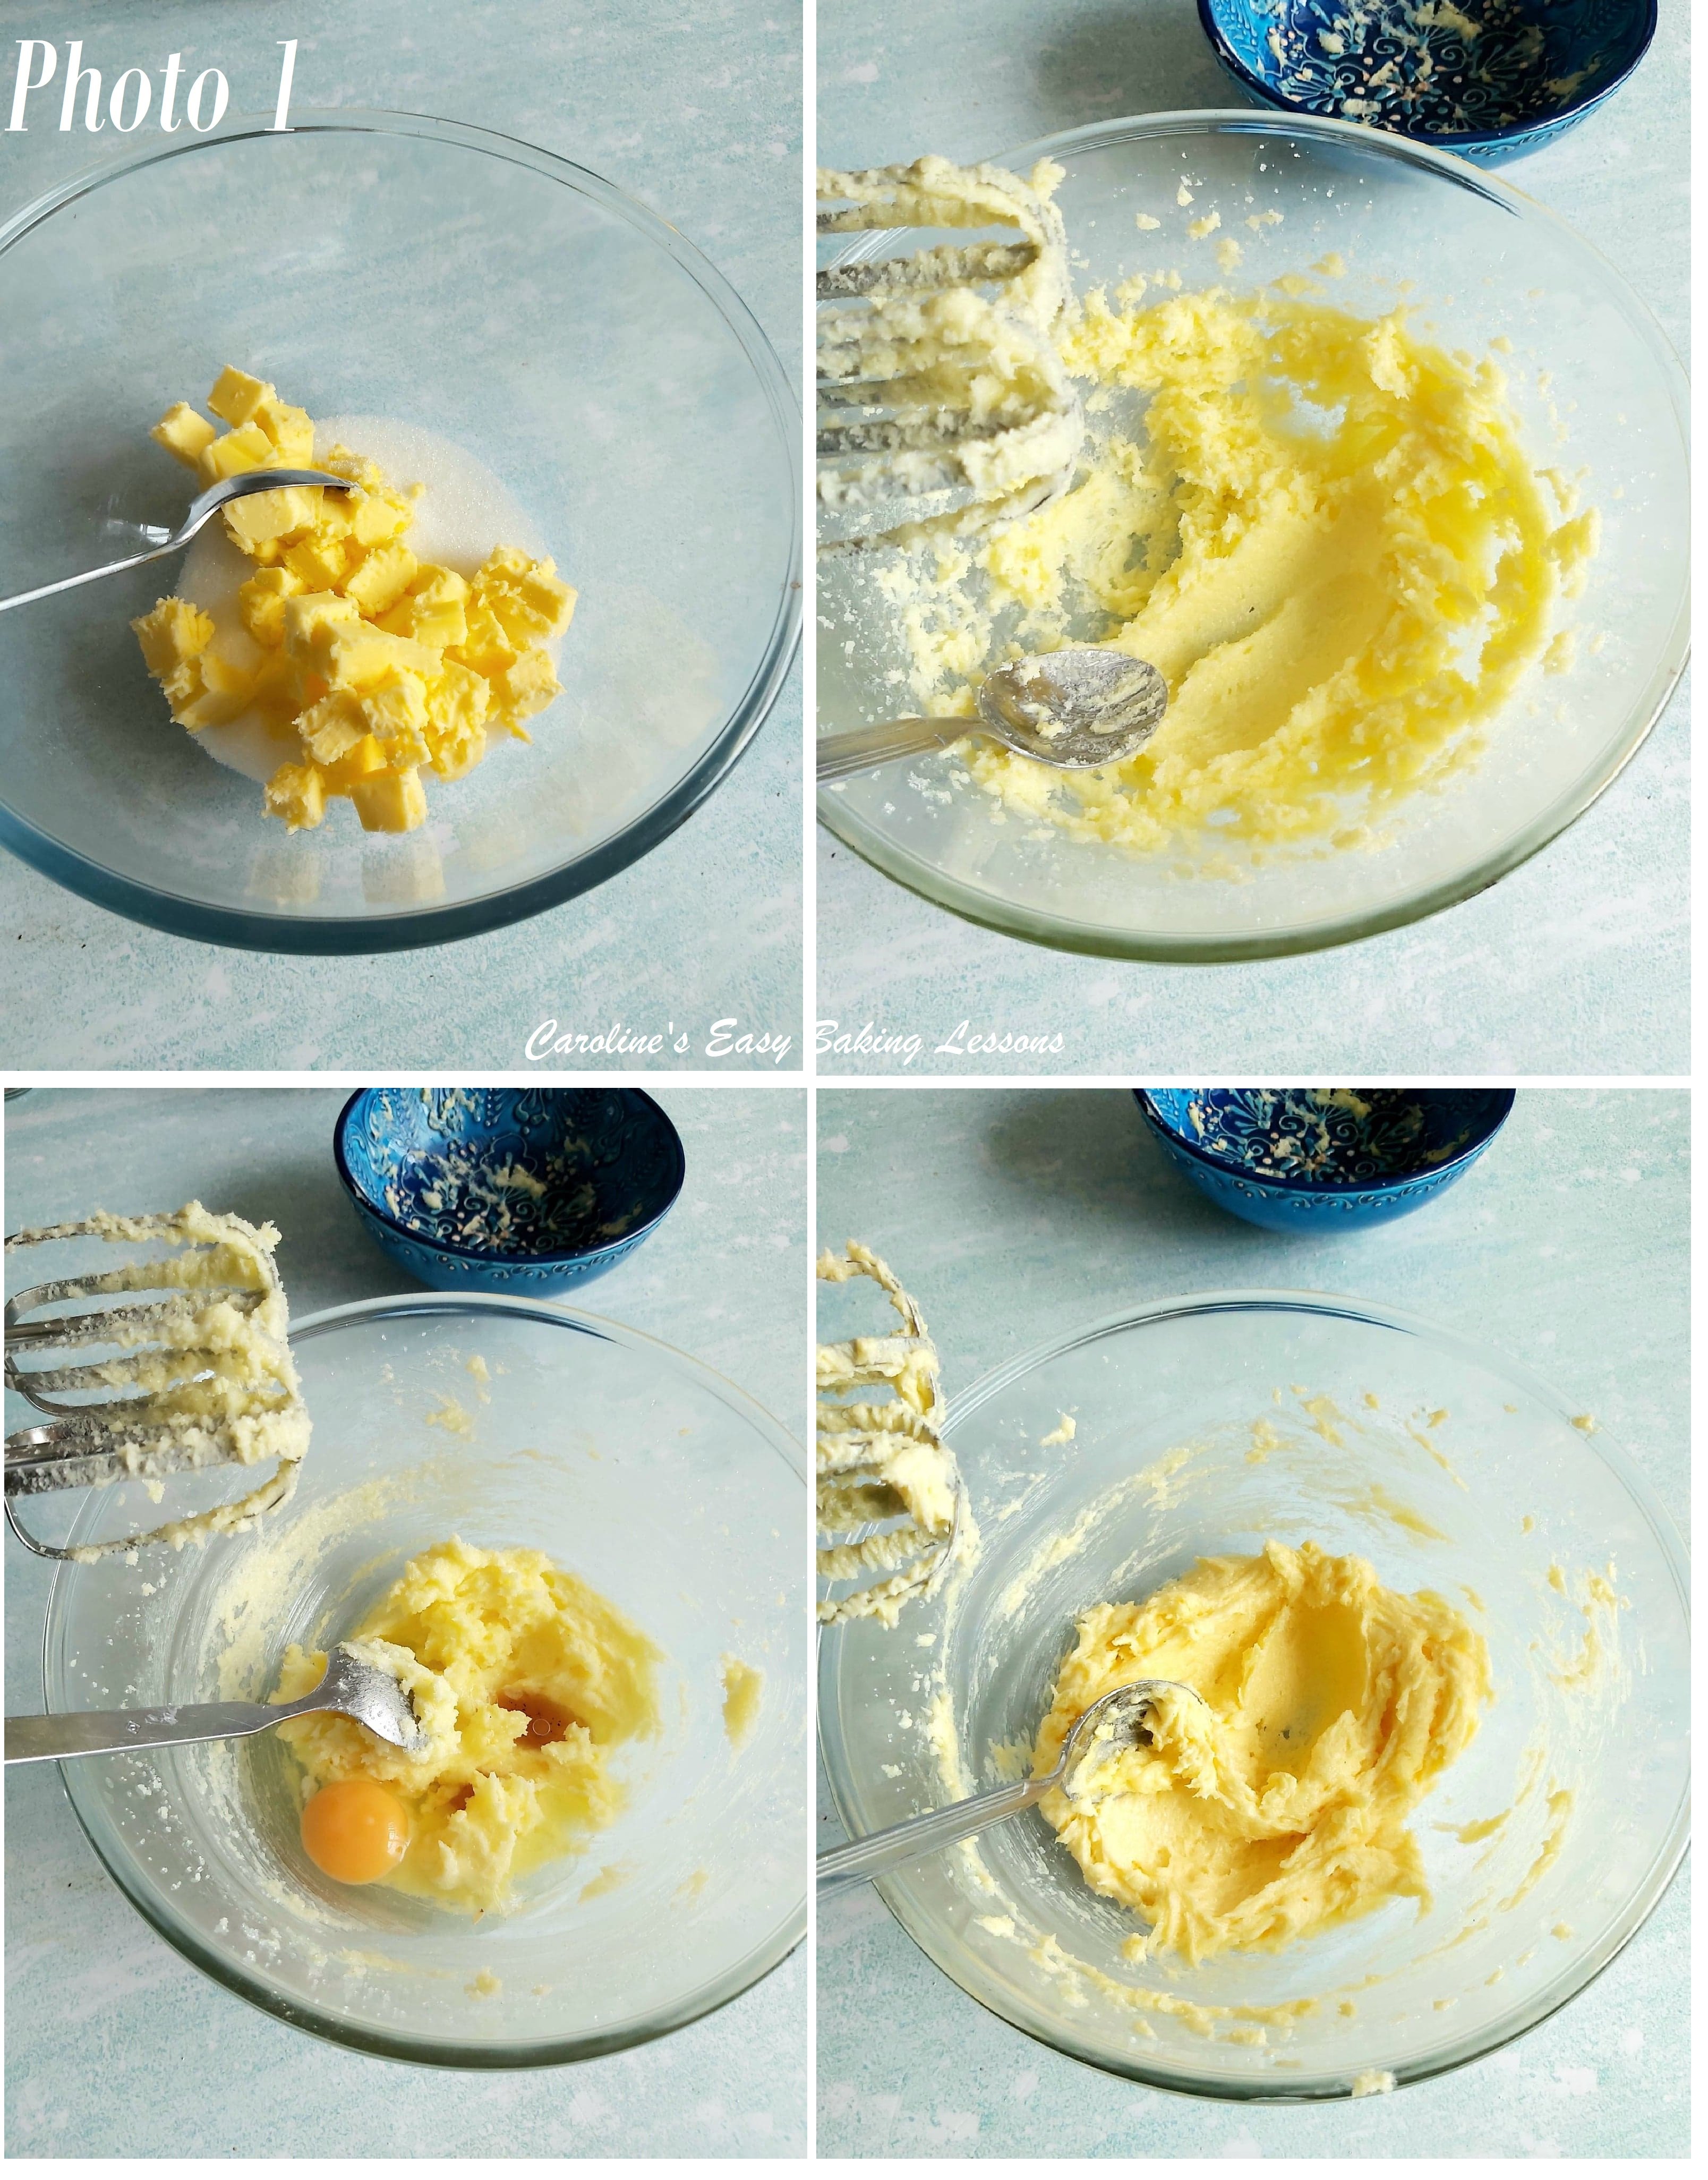
1. Weigh or measure out your butter for softening. I like to cube into about 1.25 cm(1/2″) pieces, as a smaller surface area will come to room temperature quicker. If you forget to take out in time, try this hack for softening quickly – Soften Butter In About 10 Minutes. Once soft enough to bake with, beat the butter for 1 minute & then add the sugar and mix for a further 2 minutes in a stand/hand mixer. See Photo 1.
2. Add the egg, vanilla & almond extract & then mix on high speed for about 1 – 2 minutes. See Photo 1.

3. Place the mixing bowl over the scales and set them to zero. Weigh in the flour and spoon in the baking powder & salt.
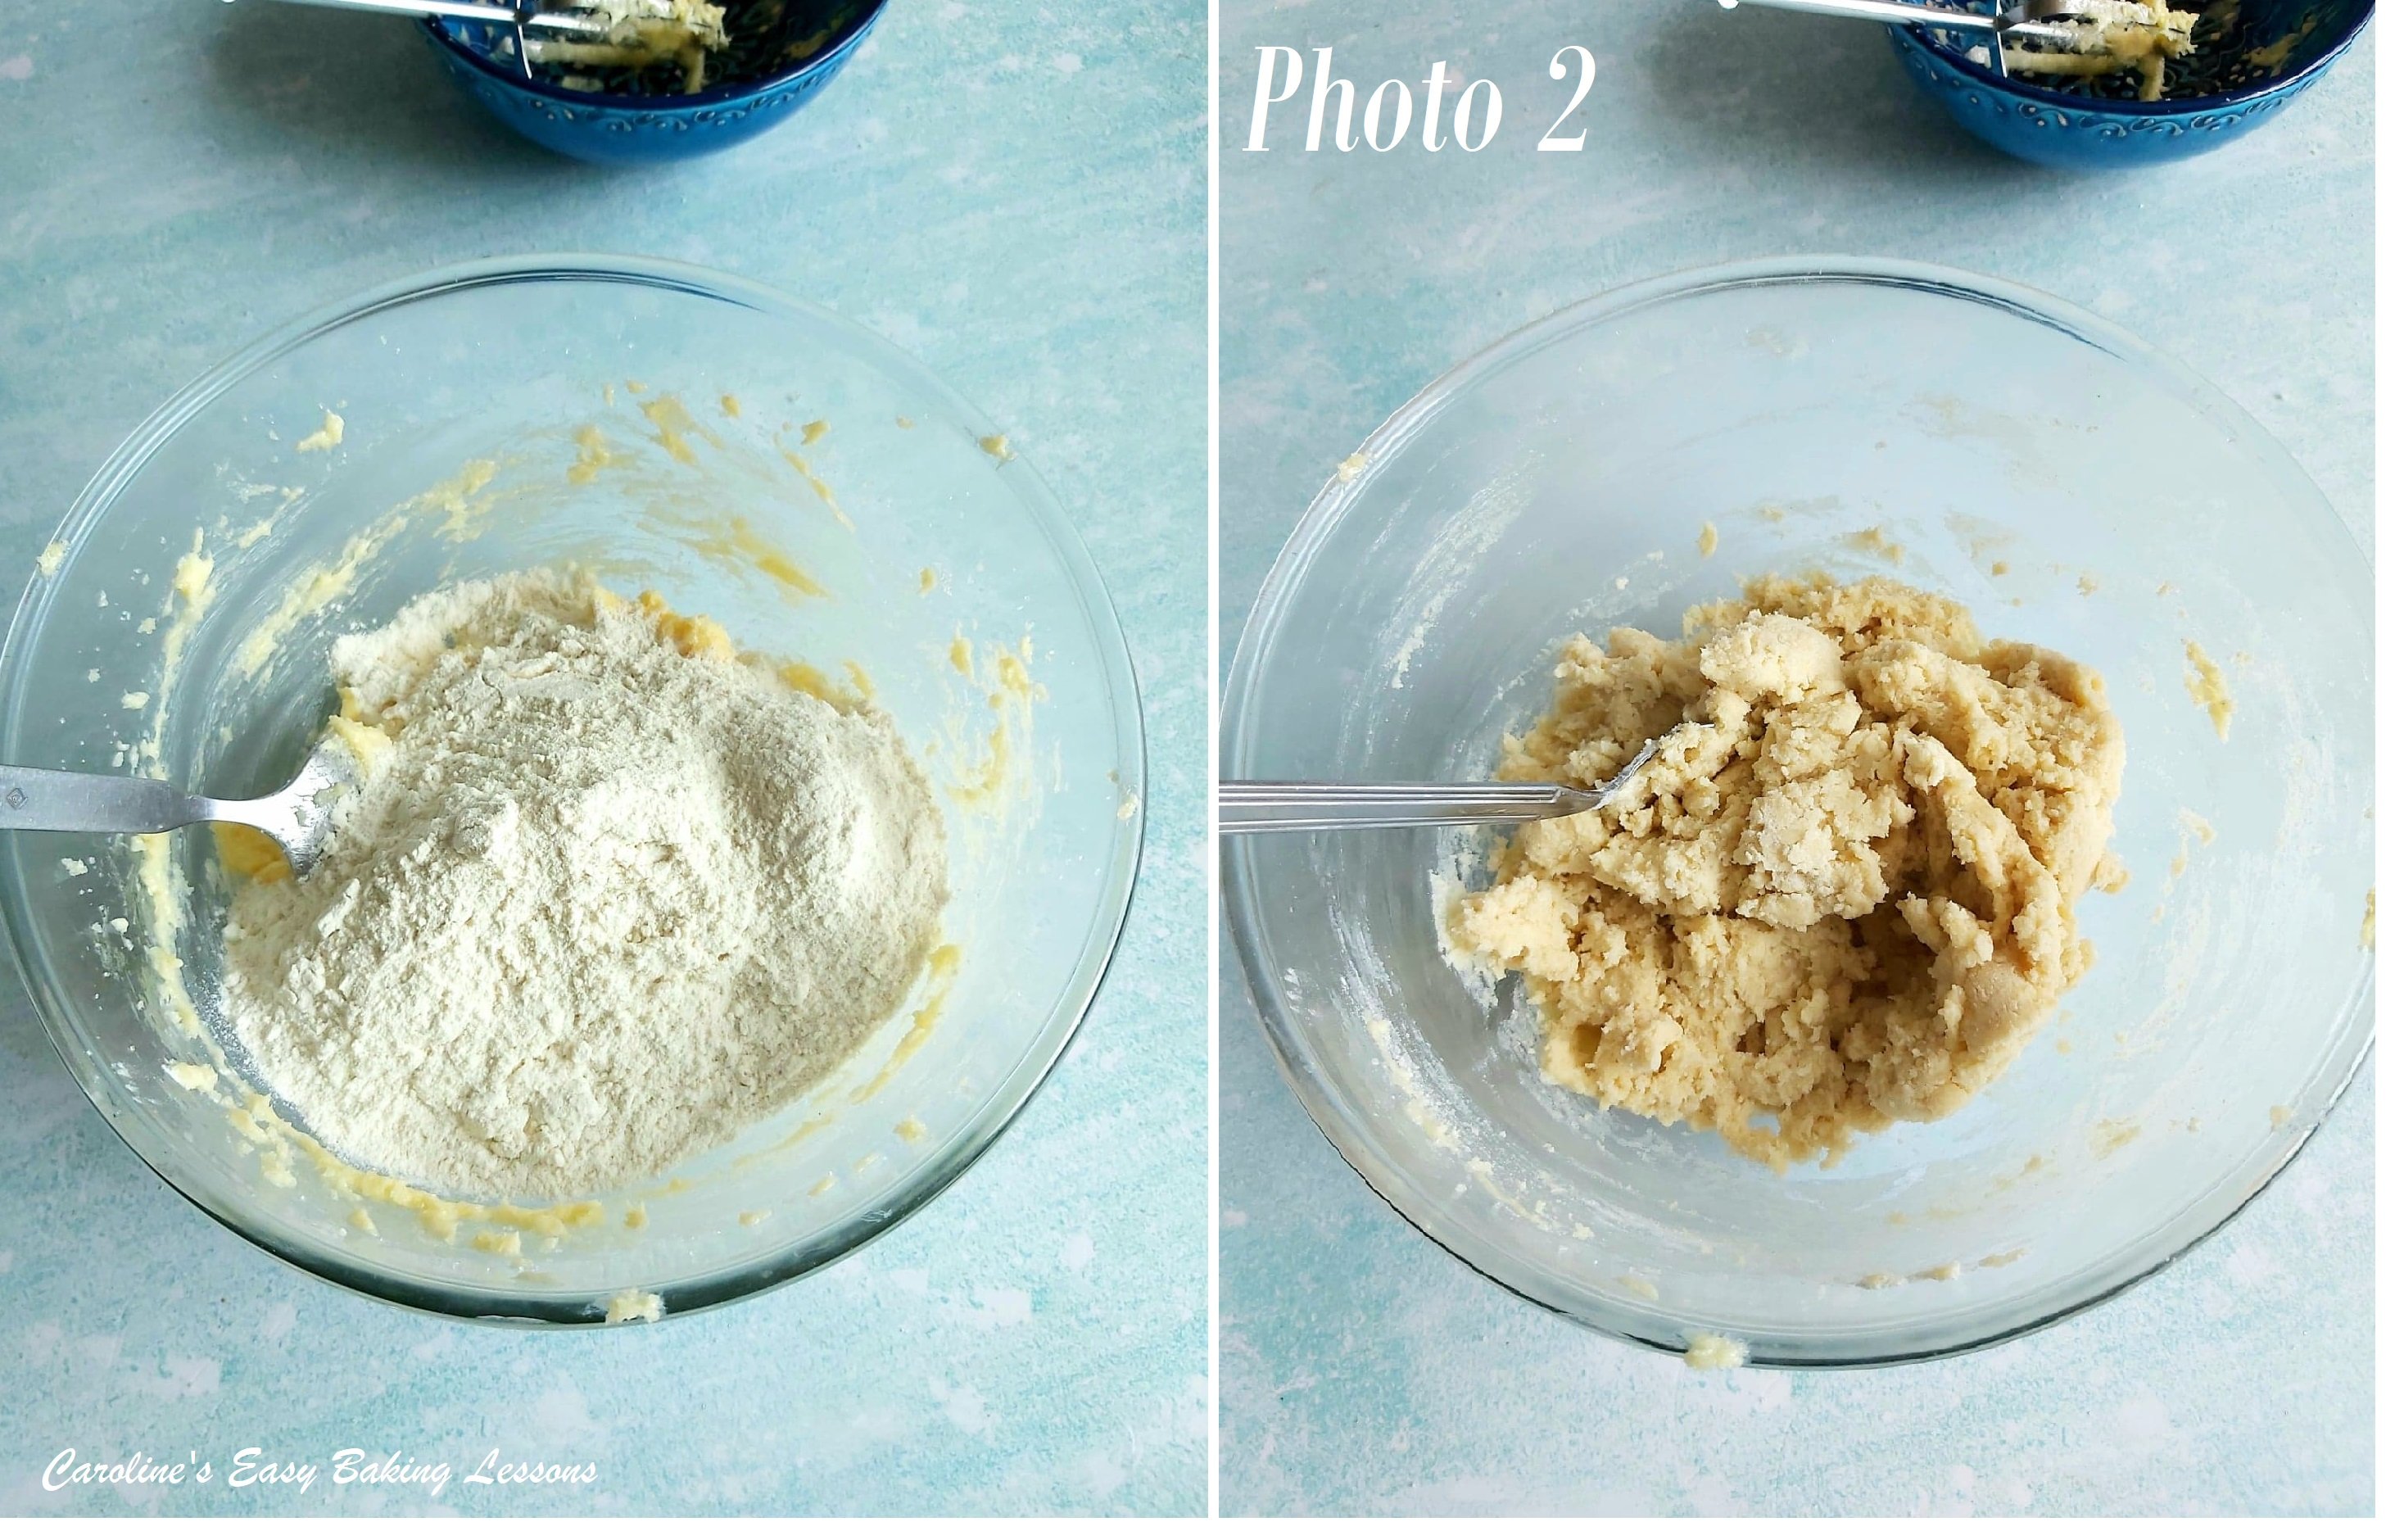
4. Now mix on low speed until all the dry mixture is absorbed and no ‘white bits’ are visible anymore. Don’t over-mix it or the biscuit will be tough. You can even do this by hand as it won’t take long. See Photo 2.

5. Cut out baking/parchment paper to fit your baking sheets/trays or ordinary trays (which ever will fit in your fridge). You will need 5 pieces. 2 for the baking sheets/trays, 2 for rolling out the dough on and 1 for wrapping the excess cookie dough.
6. Place one piece of the paper on a worktop/counter and sprinkle a generous amount of flour on top. Take ½ of the dough from the bowl and form into a disc. Place in the centre of the paper. Position a 2nd piece of paper on top of the dough and you will not need to flour the rolling pin. Roll out till the dough is 7 or 8mm or 1/3″, (height of 2x £1 + 2p coins – don’t go any thinner than this at the edges). See Photo 3.
7. Repeat with the 2nd half of the dough and put both into the fridge for 1 hr to firm up. This makes cutting out easier and the cookies holding their shape better. (But you can also cut the cookies out now if the dough is not too soft & then do the chilling for 1 hour of the cut out shapes.)

8. Take 1 tray from the fridge and slide the paper and dough onto the counter/worktop. Prepare the baking sheet/tray by placing another sheet of baking/parchment paper on top, ready to take the cookies.
**TOP TIP – if your baking tray/sheet does not have a lip, be sure to grease the paper in position, or the cookies can easily slide off and onto the floor.
9. Prepare the cutters by lightly dipping in the bowl of flour. Cut out as many shapes as you can from this piece and place on one of the prepared baking trays, (with at least 1.25 (1/2″) space in-between). Be sure to make pairs of the same cutter and either turn the cutter over or turn one of the cut out pieces over, so you have the cookies are facing the correct way once joined together (if you know what I mean – if they aren’t symmetrical that is). Roll up any left over dough and place in the fridge with the prepared tray of cookie.
** TOP TIP – keep similar sized cookies to the same baking sheet/tray and then they will all cook at the same time.
10. Repeat with the second half of the rolled out dough and place in the fridge. Collect the scraps of left over dough and roll out just as before, between paper and cut out more shapes. (If too soft, chill for 10 minutes or even freeze quickly).

11. Chill the cut out cookies in the fridge for at least 10 mins, during which time, you can heat up the oven to: 180/160C Fan oven/350f/Gas Mark 4.
12. Bake the cookies in the centre most area of the oven, for about 8 – 16 minutes (depending on the size of your cookies). Bake just until they are only just beginning to set and don’t stick to the paper. They will still be very soft and pale in colour. Only the edges will be just starting to colour. If your dough is on the thick side, it will take a little longer. See Photo 5.

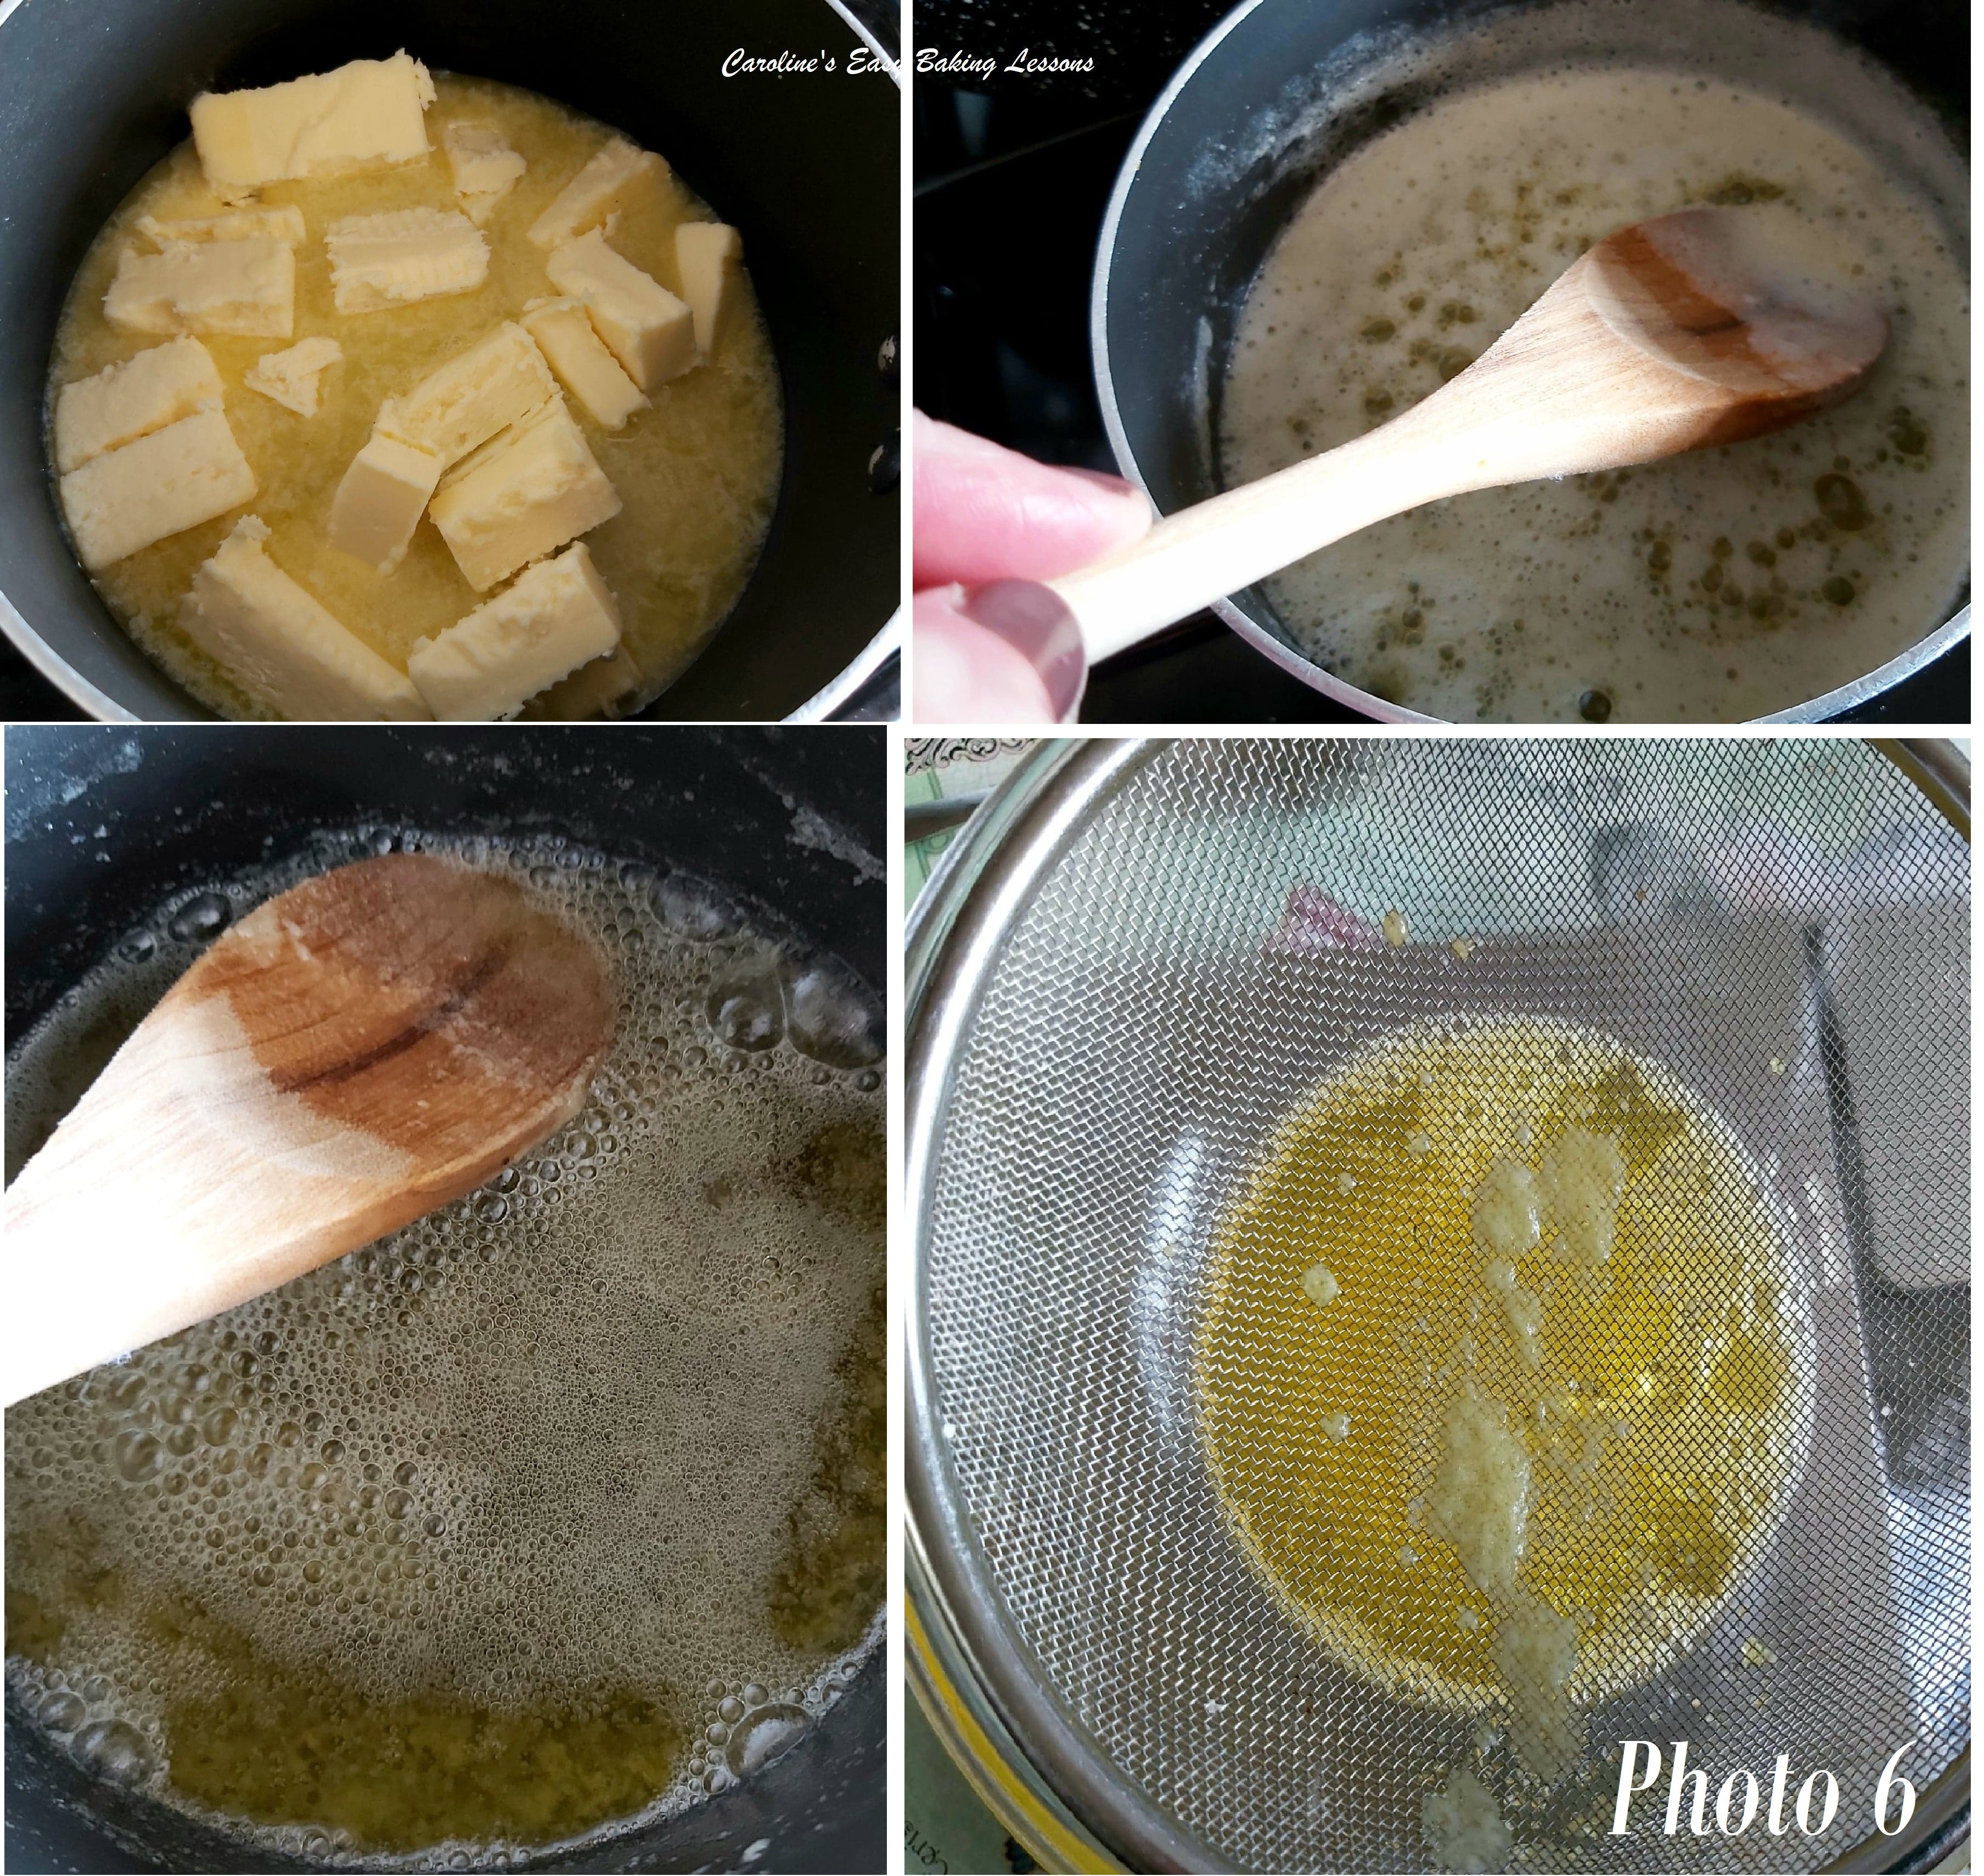
13. While the cookies are baking, (or even cooling down) make up the chocolate filling by preparing the butter. (You can take the butter straight from the fridge, no need to soften as we are melting it). You will clarify it, and basically it just means separating the milk solids. Place the butter in the pan and melt on a medium heat (roughly chop it up for a quicker melt). Once melted, leave to bubble and hiss, mixing occasionally with a wooden spoon.
Leave until the hissing sound stops or is much quieter. During this time, you will see the solids separating and surfacing to the top and to the sides of the pan. At this point, turn off the heat, remove from the stove and add in the splash of vanilla (be careful it will sizzle) and mix through. Now pour the butter through a sieve and into a small sized bowl to cool a little. See Photo 6.

14. Once the cookies are baked, leave to cool on the trays/sheets for a few minutes. Then transfer to cooling racks, paper-and-all (this is the easiest way while they are hot and soft) and leave to cool down for about 20 minutes.
15. While the cookies are cooling, Wash out the sieve and then measure or weigh, and sieve the icing/powdered sugar into a medium sized bowl. Gradually add in the melted butter, mixing well in-between each addition. Add in all the sugar, as we want a fairly stiff filling, that will also firm up with time.

ASSEMBLING THE COOKIES
16. To fill the cookies, I like to pair them up first, and get all the ones that match the best together. Then I lay them out next to each other, underside up, ready for filling. You can use a small spoon to drop the filling onto the cookie, (on the underside) and leave a little gap along the edges. This is what I did the first time, and used the small end of the spoon to gently spread out (in a pulling motion), if need be. Since then, I have piped the filling on. I used a medium sized nozzle (any kind is fine). Pipe a border and fill in the centre if need be.
17. To help even more with it not squashing out too much, what I do is leave the filling on the cookie, and proceed to top the next empty cookie. See Photo 7. Once done, the filling is a little more set, and at that point I take the corresponding ‘cookie partner’/top cookie and place on top of the filled cookie and gently squeeze together. See Photo 8 below.


Photo 8 – sandwiching the chocolate filled Easter cookies together.

18. If desired, you can sieve some icing/powdered sugar on top of the sandwich cookies for extra decoration. See Photo 9. But only do this if serving now. They are best left for at least 15 minutes to let the filling set up and be easier to eat, but no need to put in the fridge unless it’s particularly warm.
19. Store in an airtight container – I prefer a metal tin, as it keeps them soft for longer and can last as long as a week (unfilled) and minimum 3 days filled.
Join My Facebook Group
Why not also join my Facebook group – Easy Online Baking Lessons, dedicated to this baking lessons website, as well as providing one-on-one support with myself & my team? Be sure to answer all security questions when requesting to join. Click to join the group.

Share The Love
Please see the sharing options or even printing, at the right/bottom of your screen (bottom of your screen for mobiles, and down the right-hand side on computers). You can even pin this to your own Pinterest page. Alternatively, you can download this article, see below. You could also leave some feedback if you like.
Click the ‘Download’ button below, to save to your phone or computer.
Take a look at my sweet and savoury recipes on the Valentine’s Day page.
DIFFICULTY LEVEL: easy, beginner
Easter Chocolate Filled Sandwich Cookies
See more Easter/Spring recipes
Follow me on social media:
Thanks for reading
Happy Baking & Making
Happy Tummies & Memories!
Caro xx


Caroline’s Easy Baking Lessons
Add some feedback if you like 🙂


What a great cookie recipe. Can be used for different occasions. The grandchildren loved doing them for Easter.