Pink Royal Icing Trees (Cake Toppers)

Try these Pink Royal icing trees as toppers for your Christmas cake this year. Decorate that fruit cake with something a little different, easy to make & edible too! Let me show you how.
Pink Royal Icing Tree Toppers
Christmas Cake Topper Ideas


***Click to jump to section***


What Are Pink Royal Icing Tree Toppers?
These royal icing trees, (in my pink branding), are little edible, easy to make, trees to use on the top of your Christmas cake this year. You could also make smaller ones for cupcake toppers. Even use if you are doing a gingerbread house/scenes. Perfect for kids to help with too.
Made from a cone base of marzipan/almond paste, (alternative options suggested below), they are covered with pink coloured Royal icing that is not only edible, but goes nice & hard to make detailing so simple.
Make the Royal icing with a ready-made packet, that just requires water. Or make your own with icing/powdered sugar, egg whites (or meringue powder) & water.


Why Use This Recipe/Tutorial?
- Easy & ideal for beginners
- No special equipment needed
- Detailed step-by-step instructions & photos
- Video tutorial
- Easily customizable
- Makes something a little different
- Great for gifting
- Therapeutic
Ideas For When To Use
- Use as a cake topper or scene on a Christmas cake
- Use as cake topper on cupcakes
- Use for a gingerbread house/scene
- Make at a Christmas crafting party
- Christmas activity with young/older kids
Ingredients & Substitutes


These Royal Icing trees, are made up of the following ingredients. (Note ingredient amounts are listed in the Recipe Card below).
For The Tree/Cone Shape:
- Marzipan*
For The Pink Icing:
- Royal Icing powder*
- Water
- Red or Pink Food Colouring*
For The Decoration (optional)
- Icing (Powdered Sugar)
- Stars, sprinkles etc
*see notes below


Marzipan
I used well out-of-date marzipan (almond paste), for the cone shaped base of the tree toppers.
Marzipan is expensive to buy just for bases, (unless you want to eat the toppers), so there are other options.
Use any small bits of fondant you might have (any colour is fine as it will be covered). Old fondant will also work, but you’ll really need to knead it and soften it, to be able to roll into shape.
Small, and varying sizes of polystyrene cones can easily be purchased in shops and online. Great for any other crafting idea you might have, or you might already have some. Any cone shaped item you already have will work.
If you have cream horn cones, you could use those, if intending using on a very large cake. (Don’t try to remove the icing but).
Cardboard covered with cling film/plastic wrap, or tin foil/aluminium foil, could also be used to shape your tree base.
Royal Icing
I used Silver Spoon brand of Royal icing powder. This has dried egg whites already in it, so only water is needed to make the icing.
Alternatively, you can make from icing/powdered sugar, with egg whites or meringue powder & glycerine.
To learn how to make Royal icing like a pro, check out the website and video tutorial by my friend Tanya. Tanya appeared on the American version of The Great British Bake Off/Baking Show, (season 5, 2019). View Tanya’s Royal icing video tutorial here.


Food Colouring
You can use pink or red food colouring to make your trees pink.
I always use & recommend Sugarflair food colouring. It is a paste rather than a liquid or gel food dye, so doesn’t add any moisture to whatever you are colouring. It also comes in a vast array of shades, but best of all its concentrated and can make lots of shades depending on the look you are going for.
I used Christmas Red shade, but only a tiny amount. When using Sugarflair paste colourings, add a tiny amount at a time, mix in and wait 30 seconds for it to develop before adding anymore if needed.
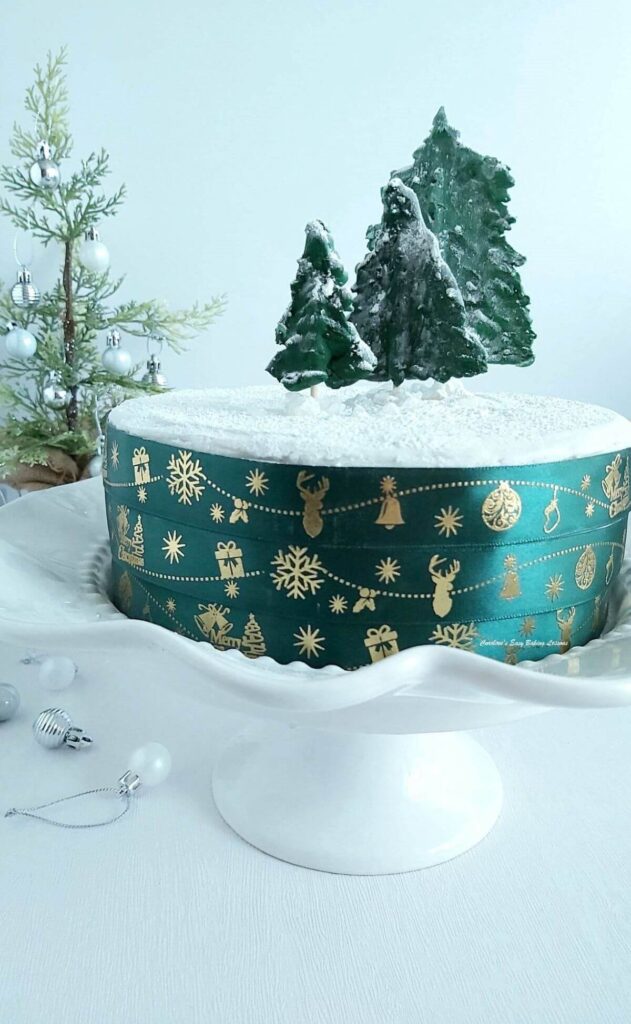
I have made 2d green coloured Roal icing trees in my Last Minute Christmas Fruit Cake recipe. For those I used an emerald green shade, again by Sugarflair.


Decoration Ideas
You can just leave the iced trees as they are, or decorate them more. A simple way is to just dust with icing/powdered sugar to mimic snow falling on the leaves. You could alternatively spray with luster dust for a pearlized finish.
You can add a star to the top, add some sprinkles to the rest of the tree to look like baubles. So many options depending on your theme and the occasion.
Equipment Used
The beauty of this method is not needing lots of fancy tools and equipment.
To make the Royal icing, a hand-mixer or stand-mixer is recommended. If you use the marzipan, fondant or foil to use as your cone base for the trees, you only need your hands to mould the shape.
To cover the tree base, you can simply spread on with a palette knife (off-set one is best but not essential). Most bakers will have one, but even artist palette knives, or a butter knife will do.


You also have the option of piping on the icing. You could use a piping bag, a small piping syringe or use a new food bag, with/without a nozzle & make a tiny hole for applying the icing. Using a nozzle, you can pick different tips for textured looks or use the ‘leaf’ nozzle.
You don’t even need anything like edible glue to stick down any decoration you might add. The icing/powdered sugar, clings onto anywhere there is texture. For a star or sprinkles, add these while the icing is still wet or tacky.
Recipe Yield
When making these Royal icing tree toppers, I made a batch of icing to cover my Christmas fruit cake, that I had already covered in marzipan a few days before. I did 2 layers of icing and had what didn’t look like much icing left to use for the trees.


However, because you are simply covering the tree bases, and the icing is relatively thick, you don’t need more than one layer.
Using 500g (17.5 oz, 1lb) packet of Silver Spoon Royal Icing powder, you can cover a 6-8″ round Christmas cake and have enough icing left over for at least 12 tree toppers of varying sizes. (Note my trees ranged from 4cm (1.5″) to 7cm (2.75″) in height).
For convenience, I listed in the Recipe card below, how much to use to make 6 trees – 2 sets of 3 sizes. Measurements below:


Small iced trees were about 2.5-3.5cm (1-1.3″) at the base & 4cm (1.5″) high. Medium 3.75cm (1.5″) base &5cm (2″) high. Large 3.75cm (1.5″) base & up to 7cm (2.75″) high.
I don’t recommend reducing anymore, even for 1 or 2 trees, as having a little bit more icing is very useful for practice. You can double, triple etc for more trees.
Make Ahead
You can make these tree toppers, at any point. They take not much time to set – leave the marzipan for 30 minutes before adding the icing & leave till hard (depending on the room environment, this can be as quick as 1 hour. So you could make same day as adding to the cake.


Alternatively, you can make the toppers, way, way ahead of time, & no-where near Christmas. Like fondant, Royal icing can be made weeks or months in advance. Just make sure everything is nice and dry & set. You can leave out at room temperature, uncovered (this is what you do to let it set anyway).
If you plan on eating them, probably best to cover loosely with some cling film/plastic wrap, or loosely maybe with a container on top. No airtight container or putting in the fridge as it can cause condensation. Also, like coloured fondant, keep away from direct sunlight for any longer period of time, as it can discolour the icing.
Step-By-Step Instructions
Forming The Moulds


1. If using the Royal iced tree toppers for on top of a Christmas fruit cake, you can make icing to cover the cake & use to make the trees too. (See notes above & in recipe card for increased amount to use).
2. Start by forming the cone shape, with marzipan (almond paste), fondant, polystyrene cones or even foil. Roll small amounts of marzipan into a smooth ball shape, then into a sausage shape to the height you wish your trees to be.
3. Next, hold the marzipan vertically, with one end touching to the worktop/counter, and rotate left and right. This motion flattens this end (see Photo 1).


4.Between your fingers, roll just the opposite end into a thin pointed top for the cone shape. (See Photo 2).
5. Place on some cut squares of baking/parchment paper or a fondant rolling mat, and repeat with some more cone shapes of varying heights.
6. Once you have all the cones you want (plus extras), leave to set on the paper, for at least 30 minutes.
**You can leave out till next day. Do not cover or put in the fridge.


Covering The Cone Shapes
1. Once you have made the cone shapes, you can cover with Royal Icing.
2. Prepare the Royal icing now, or ahead of time. For Royal icing powder, only water needs gradually added & then whisked for 4 minutes till glossy & with soft peaks. To make using icing/powdered sugar & egg whites/meringue powder, see Global Bakes Royal Icing video. Once ready, cover the surface of the icing with cling film/plastic wrap then a lid or plate on top. Very important to keep covered at all times or it will go hard very quickly.
3. Gradually add small amount of red or pink food colouring to the prepared Royal icing, till the desired pink shade is achieved. (See notes above about food colouring). See Photo 3.


4. If making ahead, cover the surface of the icing and then plate or lid on top, till ready to use.
5. To cover the cone shapes, use a palette knife, butter knife or even a piping bag.
6. Add some of the pink icing to the very bottom of the cone shape, (still on a square of paper), and push so it creates a seal between bottom of the cone and the paper. This is to ensure the very bottom is completely covered. Don’t worry about icing on the paper, it will come off easily.
7. Then, with the knife held vertically, spread on, in upward strokes to the top. Gradually work your way all around the cone till covered.
8. Add little ‘branches’ by simply dabbing the knife against the wet icing and pulling back. See Photo 4


9. Continue covering all the cone shapes and then leave out at room temperature to set.
**You can add sprinkles or a star if you want & best done while still wet & tacky.
Finishing Touches
1. Once ready to add to your cake(s), simply & gently, peel the paper from the tree. You can leave the icing rough edges, or smooth off if you wish.
2. Position the trees on top in the sizes you wish (in ‘3’s’ is good). No need to stick down, they should stay up by themselves.
3. Finish off with a dusting of sieved icing/powdered sugar, or even lustre dust brushed or sprayed on top. **You can dust them with the sugar before adding to the cake(s).


After Care
1.The trees will be fine uncovered (just like a British Christmas fruit cake), where the high sugar & alcohol content, means they are preserved. You can loosely cover for hygiene or transporting, but don’t place in a fridge or air-tight container. This can cause condensation and the colour to run.
2. The Royal icing trees can be consumed if wished, or if you can save them for next year or as a keepsake.
3. To save them, simply place the trees in a cardboard box for example. Or in a container that is not air-tight. You can also loosely wrap in cling film/plastic wrap to prevent any breaks to the tree ‘branches’. If stored in a display case for example, make sure not in direct sunlight, or the pink colouring will eventually fade with time. These, like fondant, can last for years.
Recipe Card
Pink Royal Icing Christmas Trees

Equipment
- Scales or measuring cups
- Baking/parchment paper
- Hand Mixer or Stand Mixer
- Mixing bowl (with lid would be great)
- Measuring Spoon (or small jug)
- Wooden Cocktail stick
- Cling Film (Plastic Wrap)
- Palette Knife (off-set) (Butter knife or piping bag & nozzle)
- Small Fine Sieve (or fine tea strainer, optional – for icing)
Ingredients
For The Tree/Cone Shape:
- 130 grams Marzipan (4½ oz, approximate, other alternatives*)
For The Pink Icing:
- 66 grams Royal Icing powder* (2⅓ oz, ½ cup – other alternatives in notes)
- 12 ml Water (2½ tsp, ½ fl oz, approximate)
- Red or Pink Food Colouring (Sugarflair Christmas Red paste recommended*)
For The Decoration (optional):
- 1 tbsp Icing Sugar (Powdered Sugar)
- Stars sprinkles etc.
Instructions
Prepare The Cone Bases:
- Knead the marzipan (almond paste) or fondant, into a ball shape, then a sausage shape, to the height you want your tree to be.
- Hold vertically, allowing one end to touch the worktop/counter & rotate right & left to flatten this end.
- Roll the opposite end between your fingertips & thin to a pointed top. Place on a small square of baking/parchment paper & repeat, making more trees of varying heights.
- Leave all the marzipan cones shapes for at least 30 minutes before coating. (**Can be left 1 or 2 days, just don't put in the fridge).
- Alternatively, use polystyrene cones, or even foil moulded into a cone shape & covered with cling film/plastic wrap.
Prepare The Royal Icing:
- Prepare the Royal Icing now or ahead of time. For Royal Icing powder that only requires water, very gradually add the water & whisk for 4 minutes until soft peaks are formed and the mixture is glossy. To make your own Royal icing from icing/powdered sugar, see Global Bakes' Royal icing Video.
- As soon as prepared, cover the surface in cling film/plastic wrap, then either with a lid or plate on top or a 2nd layer of cling film/plastic wrap as it can dry out and go hard very quickly.
- You can use the icing to cover your cake, or colour it pink now, by gradually adding a very small amount of red or pink food colouring, till you achieve the desired colour & shade. Sugarflair Christmas Red colouring paste, is recommended, in a very small amount).
Ice The Bases:
- Use a palette knife, butter knife or piping bag to cover the cone shape, by starting at the bottom & spreading the icing on, in an upward motion to the top of the 'tree'. Use the paper to slowly rotate the cone around, & apply the icing till fully covered.
- Leave the sugar trees like this, or use the palette knife to dab against the wet icing, pulling back swiftly, to make little peaks to represent 'branches' of your trees. (See video or step-by-step instruction photos before this Recipe card.) Repeat randomly around the tree till happy with the design.
- Do the same for the rest of the trees & leave to set & harden at room temperature. (No need to cover). Sprinkles or a star can also be added before the trees are allowed to set.
Finishing Touches & Assembly:
- When ready to add your trees to the cake, gently remove the square of paper from the bottom of the tree. Dust the tops of the trees with sieved icing/powdered sugar before or after adding to the cake, to represent snow. Alternatively, brush or spray on some lustre dust.
Storing & After Care:
- The Royal icing trees will be good left on the cake, uncovered & at room temperature. For hygiene or transporting purposes, you can loosely cover but don't store in the fridge or in an air-tight container.
- The trees can be eaten or saved as keepsakes, in a cardboard box or display box, for months if not years. Just keep away from direct sunlight as it can fade the colouring.
Video
Notes

 Recipe Yield – makes enough for 6 trees: 2 sets of 3 with 2 small, 2 medium and 2 large. Small, when iced, were about 2.5-3.5cm (1-1.3″) at the base & 4cm (1.5″) high. Medium 3.75cm (1.5″) base & 5cm (2″) high. Large 3.75cm (1.5″) base & up to 7cm (2.75″) high. Recipe can be reduced or increased, but always recommend making plenty of spares.
Icing A Cake & Making Trees – 500g (17.5 oz, 1lb) box of Silver Spoon Royal icing Powder is enough for up to 2 layers on a deep 6″ (15.25cm) round cake, plus up to 12 trees of varying heights.
Make Ahead – make same day as using on your cake or make ahead, even up to months before. Can also be preserved for keepsakes.
Ideas For Using The Trees – Christmas cake decoration, cupcake toppers, in a gingerbread house/scene, Christmas activity or Christmas crafting party.
Recipe Yield – makes enough for 6 trees: 2 sets of 3 with 2 small, 2 medium and 2 large. Small, when iced, were about 2.5-3.5cm (1-1.3″) at the base & 4cm (1.5″) high. Medium 3.75cm (1.5″) base & 5cm (2″) high. Large 3.75cm (1.5″) base & up to 7cm (2.75″) high. Recipe can be reduced or increased, but always recommend making plenty of spares.
Icing A Cake & Making Trees – 500g (17.5 oz, 1lb) box of Silver Spoon Royal icing Powder is enough for up to 2 layers on a deep 6″ (15.25cm) round cake, plus up to 12 trees of varying heights.
Make Ahead – make same day as using on your cake or make ahead, even up to months before. Can also be preserved for keepsakes.
Ideas For Using The Trees – Christmas cake decoration, cupcake toppers, in a gingerbread house/scene, Christmas activity or Christmas crafting party.Subscribe For More Recipes
Join My Facebook Group
Why not also join my – Facebook group Easy Online Baking Lessons, dedicated to this baking lessons website, as well as providing one-on-one support with myself & my team? Be sure to answer all security questions when requesting to join.
Follow me on social media:
Happy Learning & Baking!
Caro x
Pink Royal Icing Tree Toppers
Search For Something You Fancy!
Caroline’s Easy Baking Lessons
References:


Another excellent tutorial. Love how easy you make it look. The step by step pics help so much
Definitely going to make these. Thanks for sharing.
Thanks you – looking forward to seeing photos of your tree toppers.