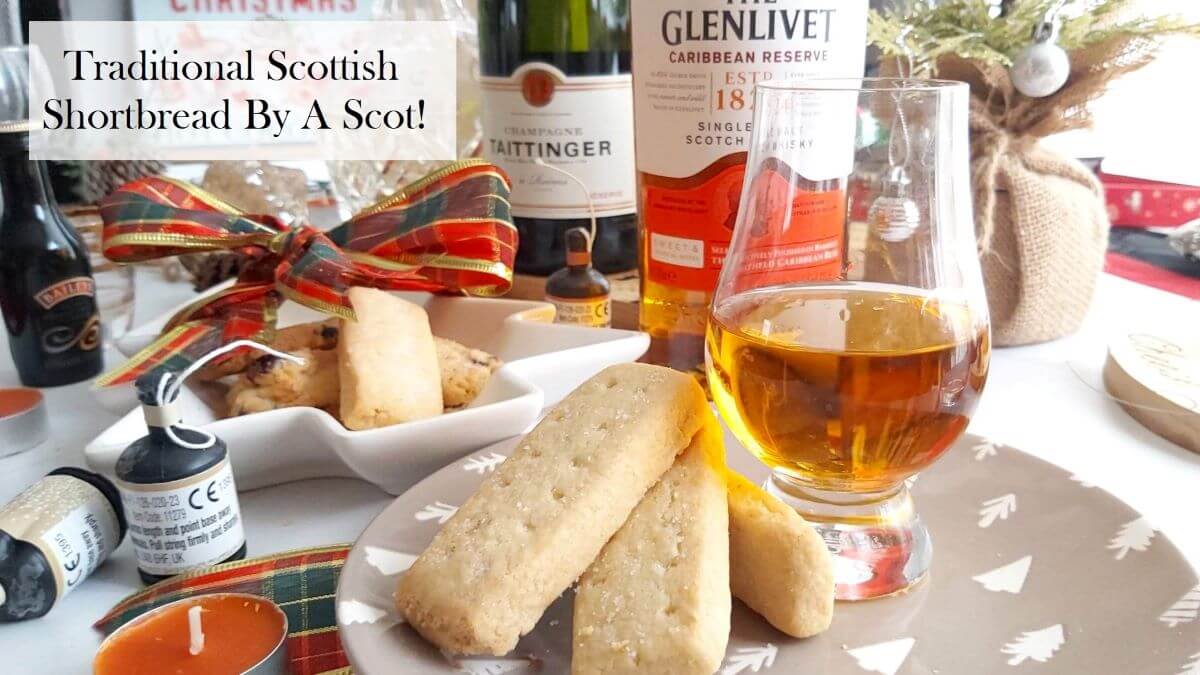
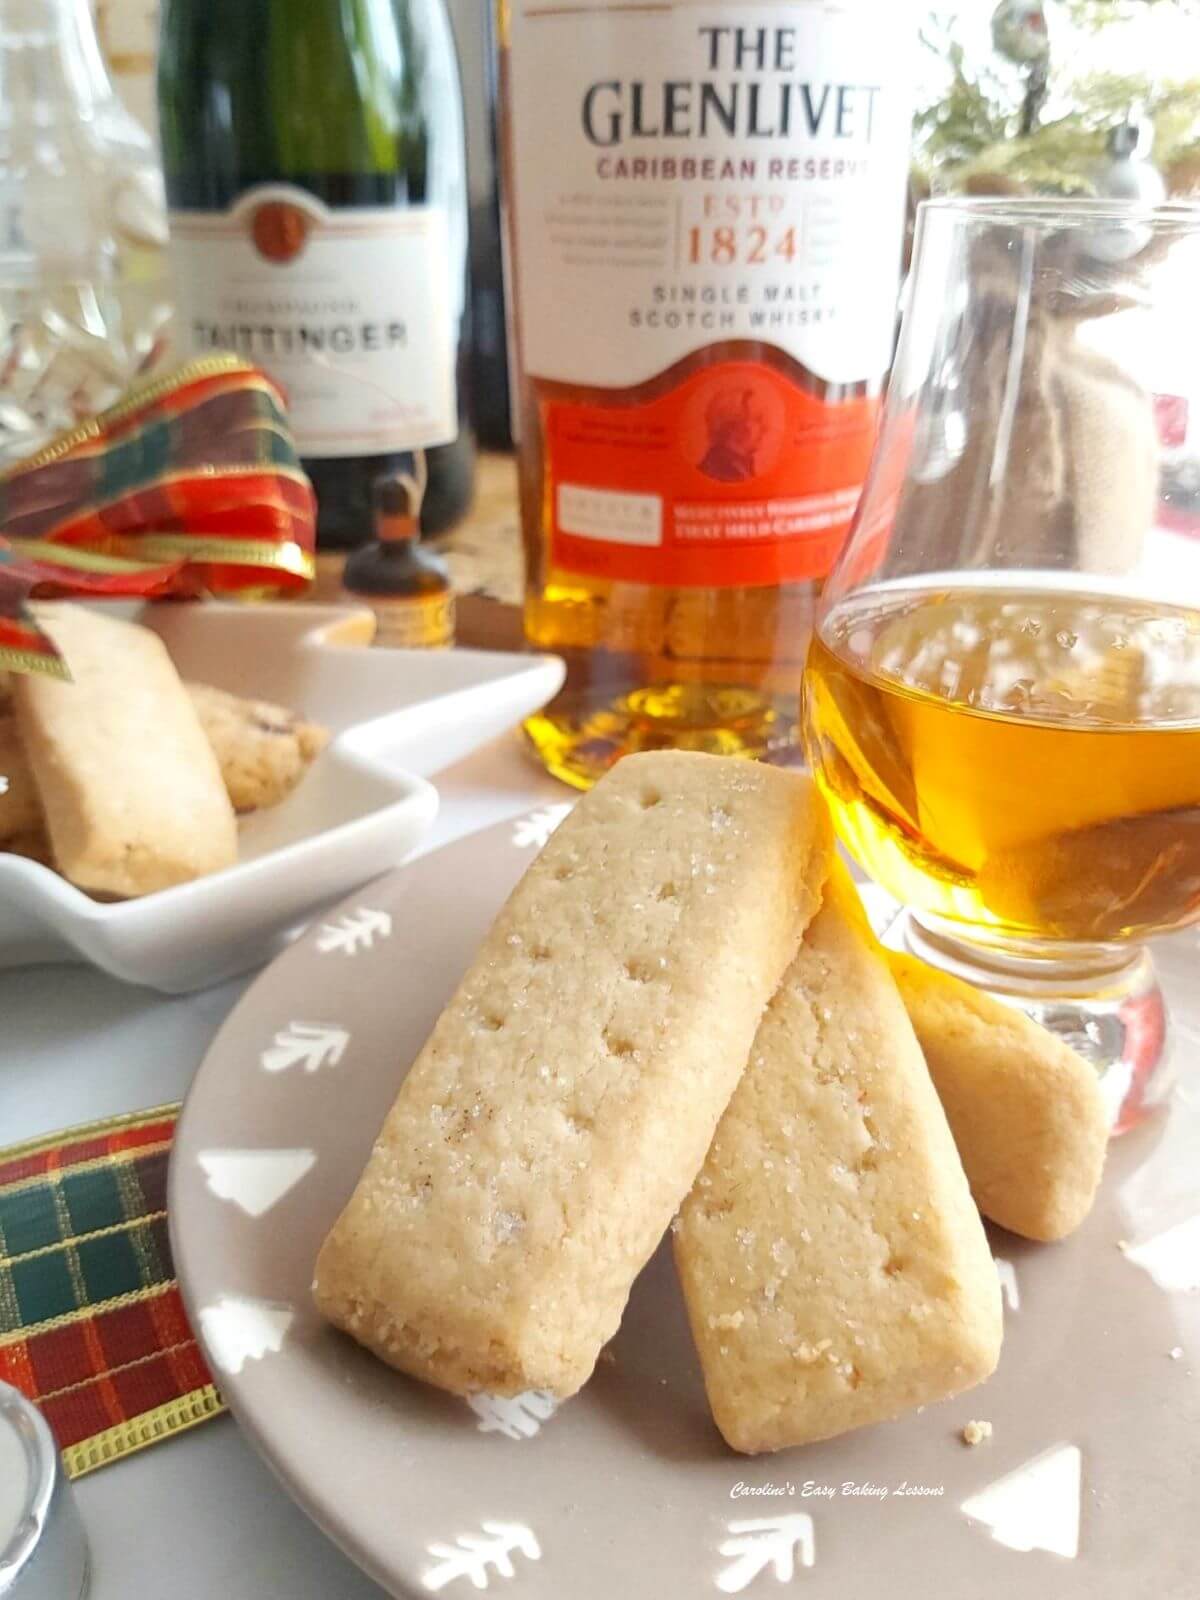
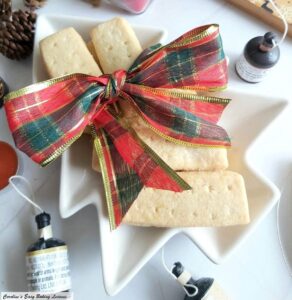
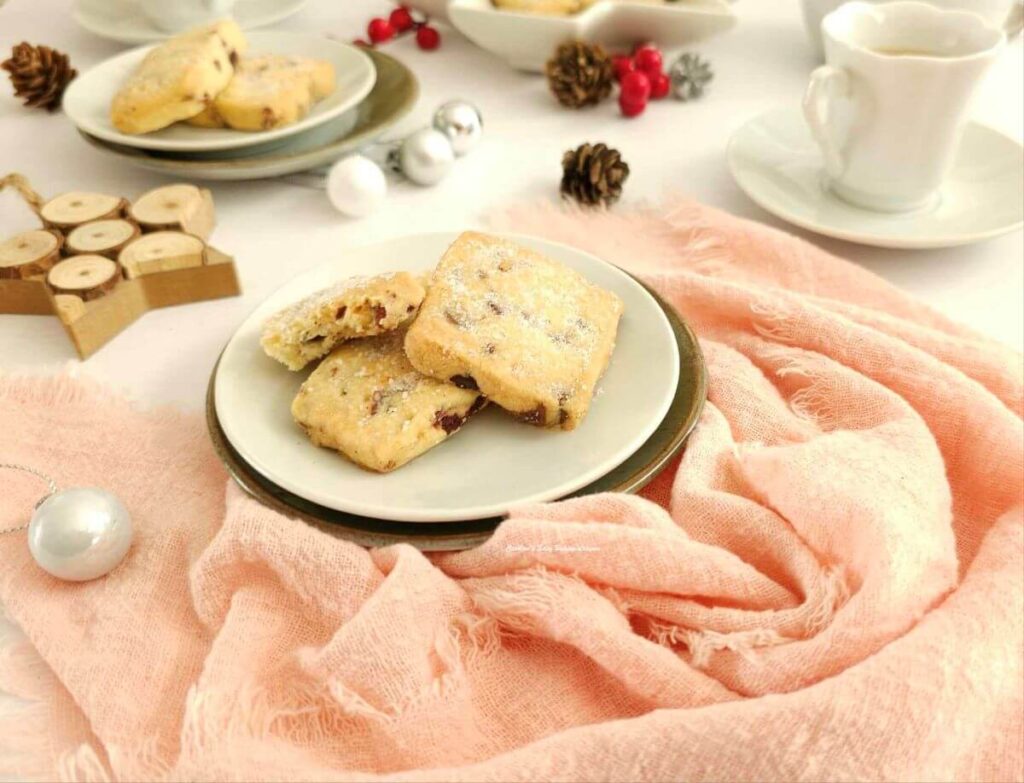
Authentic Scottish Shortbread By A Scot

Try my recipe for traditional Scottish Shortbread as it is supposed to be made & with a soft & melt-in-the-mouth buttery texture everyone loves. Shortbread is synonymous with New Year in Scotland. No Scottish New Year (or Hogmanay party), is complete without the addition of our shortbread and a slice of Madeira cake.
Authentic Scottish Shortbread
Sweet Lesson 5


*Original post 16/11/18, new photos Dec 2022, new theme 07/11/23


***click to jump to section***


Why Use This Recipe?
This recipe is for traditional Scottish Shortbread as it is supposed to be made, no margarine or baking spread in sight, just real butter. You can trust me – I am Scottish 🙂 And a flame-haired Scot at that!
These soft and melt in the mouth buttery biscuits are surprisingly only made up of 4 main ingredients: butter, flour, corn flour & Sugar. The corn flour (corn starch), helps to give that extra soft texture that I mentioned & just ‘melts in the mouth’.
Be very careful when baking, as you want them to be baked but still very pale in colour. They will still be soft when taken out of the oven, so make sure when transferring to a cooling rack, that you use the baking/parchment paper or else you will have a crumbled mess on the floor!


Note, this delicate biscuit/cookie texture is exactly how Scottish shortbread should be. So for this reason, you can not use molds. You would need to be spot on with greasing, work the dough more and bake longer. All of which would prevent that soft texture being achieved. These biscuits should be super easy to eat, and not exactly ideal for dunking in your tea! (For that you can use my Coconut Chocolate Digestive Biscuits).
Once you master this recipe, it is perfect for gifting, as it tastes so much better than shop bought shortbread. And I have had feedback to that effect, even from an 80 year old fellow Scot.


Ingredient Notes
He is an outline of the traditional ingredients to make Scottish shortbread:
- Butter, unsalted
- Caster Sugar (Extra/Super Fine)
- Plain Flour (All Purpose)
- Cornflour (Corn Starch)
- Salt
**Note, amounts & conversions, given in the Recipe Card below, which you can skip to
Jump to RecipeIf you are in the US/Canada and can’t get extra/super fine sugar for the UK caster sugar, you can make your own by grinding regular granulated sugar a little bit or processing lightly. Do not go as fine as a powder, keep it as small granules. Just note that US granulated is slightly smaller a granule size than our UK version. See below for a photo of different sugar from the UK. (Read my article on differences of UK & US baking ingredients.
Also note the recipe used Cornflour which gives it the melt-in-the-mouth texture. The US/Canadian name for this is Corn Starch.


DOWNLOAD the recipe with photos, to save to your computer or phone. Alternatively share or use the print options on the right or bottom of your screen. To save to your device, click the ‘download’ button below
More Experienced Bakers
For more experienced bakers, skip the step-by-step photo recipe below and jump to the abbreviated version – The Recipe Card. Click below:
Jump to Recipe

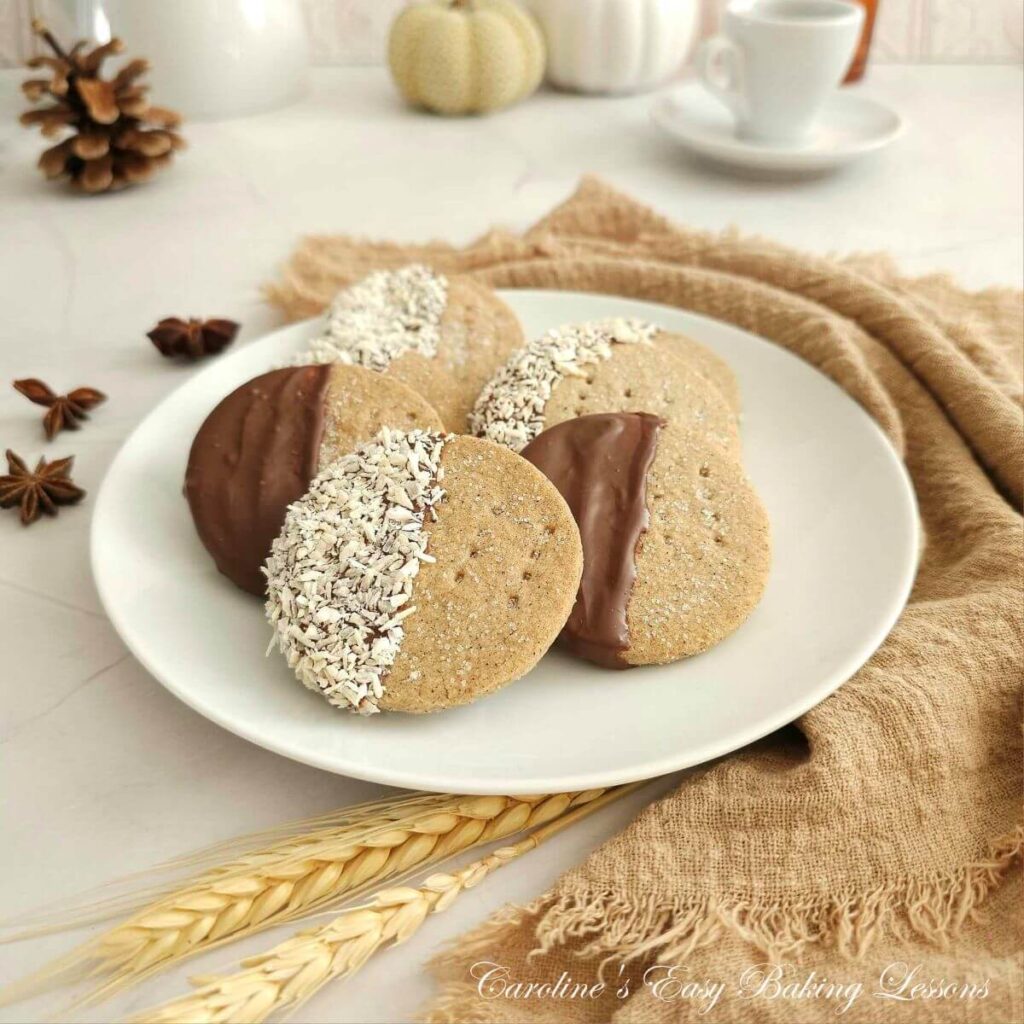
Chocolate Coconut Anise version In Photos Below


Valentine’s Day Shortbread
How about some Scottish shortbread for Valentine’s day or a special food basket?


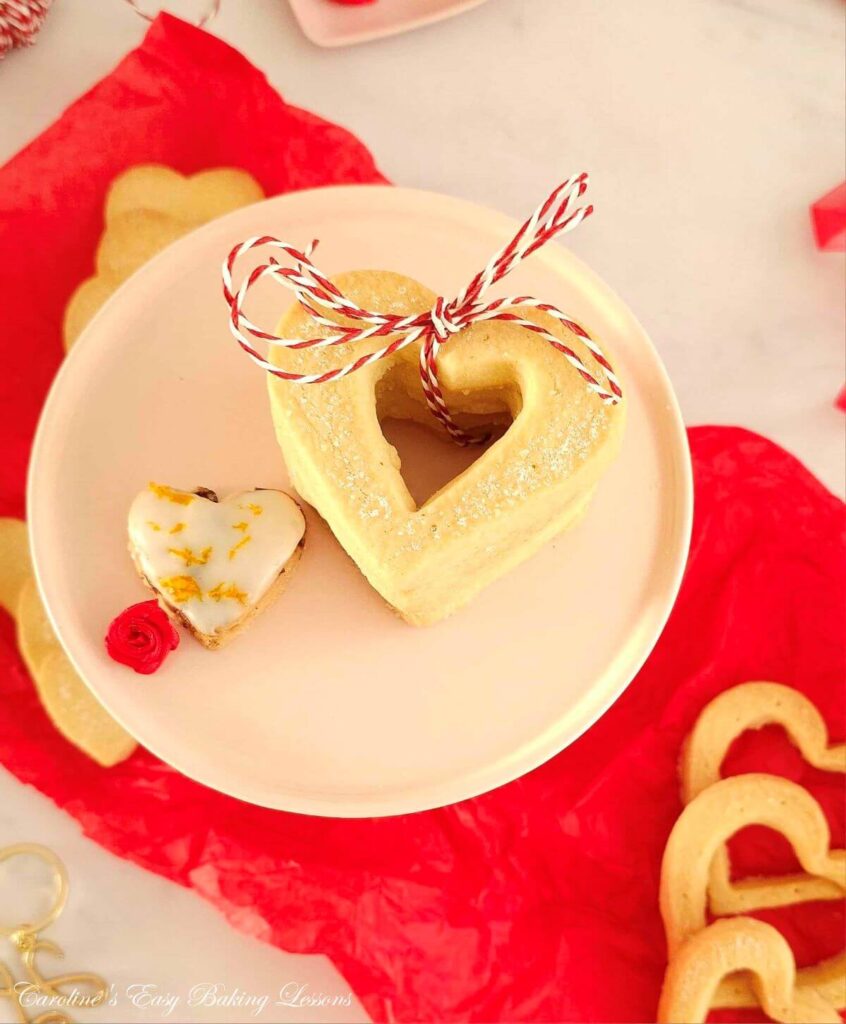
Use some heart cutters of various sizes and make these super cute biscuits to gift. Cut out the centre and stack these shortbread hearts, tied together with some red ribbon or twine. You can also dip in some orange zest glaze for something a little more special. (See above & below).


Top Tips
- Make cut-out heart centre a little bigger than you want as the shortbread will expand slightly on baking.
- Be sure to not skip the chilling stage!
- You can ‘dock’ with a cocktail stick before/after chilling.
- Don’t be scared to cut out a large heart from the centre as it looks great once baked and more unusual.
- Make up some orange zest/juice glaze/icing & dip like in the photo collage.
Step-By-Step Instructions
1. Weigh out and cube the butter and leave out till softened. I like to cut my butter into about 1cm (less than 1/2 inch) cubes as a smaller surface area will soften faster. See Photo 1 below.
If you forget to take the butter out to soften, here’s a hack I reviewed to soften butter in about 10 minutes.


2. Weigh the sugar into your mixing bowl and add in the butter. Combine these two ingredients, firstly with a quick mix by hand with a spoon or spatula. Then mix on low speed with a stand/hand mixer until light and fluffy, (known as ‘creaming the butter’). You can of course do by hand with a spoon and some elbow power! See Photo 1 for how it should look once creamed. Soft and paste like and easy to spread. Don’t over beat it though as much as you would for cakes.


3. Lightly oil/grease the baking sheets/trays before placing baking/parchment paper on top. This is a good idea if your baking trays/sheets are completely flat, with no lips. I have lost cookies before, when the paper slid off the tray – so best to avoid that 🙂
4. Place the bowl back on the scales with the sieve on top and set to zero (TARE). Weigh in the flour, corn flour/starch & salt through the sieve. (Alternatively add in with a measuring cup). Mix in by hand, don’t use a mixer. See Photo 2.


5. Now I like to use a Pastry Cutter/blender for this part- it helps you incorporate the flours into the butter/sugar mixture much more easily and is quicker, (especially when your hands hurt sometimes like mine!) See Photo 3 above. With the pastry cutter, you push down on the bottom of the bowl and perform a crushing and turning motion, rotating left and right. Do this to all the mixture until the butter had taken in all the flour, (see Photo 3). Alternatively, you can do this ‘cutting in’ process, using 2 butter knives. Note though that the mixture will not come together into a ball at this stage. It will be very crumbly and that is fine.


6. Next, in the bowl or on a large sheet of baking/parchment paper very gently knead the dough just until it starts to come together, and no more. It will change from a white lumpy powder into a beige smooth dough. See Photo 4.
7. Next form the dough into a very rough square shape, by using you hands and pressing down. Push in the end pieces to make sure the ends are the same height as the middle of the dough. Do this until the dough is about 1/2cm (5mm or 1/5in) thick. See Photo 5 below, for an idea of how it should look. You can of course place baking/parchment paper on top of the dough and roll out, but I prefer to be gentler and do by hand.


8. Now using a sharp knife, trim around the dough until you have a straight square shape. Place the scraps of dough, back in the bowl. Cut down the middle of the dough, and then cut ‘slabs’ as in Photo 5. I got 18 slabs, that were between 1.5 – 2cm (approx. 2/3 – 3/4 inch.) wide and about 8cm/3 inches long. (Note that in Photo 5, I was making a half batch, but you get the idea!) Don’t worry if the slabs look too thin when cutting as they do expand once baking. So try to cut a little thinner than you want them to bake out at.


9. Now very carefully transfer them with a palette knife to the prepared baking trays/sheets. If any pieces break/fall off, carefully put back and squash together. Remember to leave a good 2.5cm/1 inch gap at least, in-between the biscuits. Now make holes with a fork all over the slabs, but very carefully not to go too far down and break them.


10. Using the scraps left over, gently squish the dough together into a ball and flatten into a disc shape, pushing up the edges to make an even thickness like before. Cut this disc of dough into equal sized slices, (I got 8 pieces). Using your thumb & index finger, pinch the ends of the round dough to give the standard shortbread decorated edging & shape known as Petticoat Tails. See Photo 6 for how it is done. Carefully transfer the dough to the baking tray & then make holes with a fork over the dough like before. (See Photo 7 below). Alternatively, make some more ‘slab’ shapes.
11.Place both trays/sheets in the fridge (or somewhere extra cold) for 60 minutes. If you omit this step, the shortbread will be too soft and not hold any of it’s shape. If you can’t get the baking trays/sheets into the fridge, you could try transferring with the paper, to regular trays.


12. When the time is nearly up, heat up the oven to 180c/160c Fan/350f/Gas Mark 4, (or sooner if your oven takes a long time to come to temperature).
13. Place the 2 trays/sheets in the oven and bake for approximately 15 minutes. You may need a little longer, but you want to take them out when the edges are just starting to turn a very pale golden colour. (See Photo 8). I turned and rotated the trays during baking to ensure an even bake. If the biscuits move when very gently pushed, they are ready. Be warned though that they are still soft, so take the trays out and leave for 5-7mins before touching them. At this just out of the oven stage, sprinkle plenty of granulated sugar on top of the biscuits.

14. After the 5-7 minutes, transfer (very carefully) to a cooling rack by lifting the baking/parchment paper. Leave the biscuits to cool down completely.
15. Enjoy now with a cup of tea or coffee (or Whisky) or store in an airtight tin or container where they will last at least a week.
DIFFICULTY LEVEL- easy, beginner
Rate This Recipe
While you are here, can you take a few more seconds and leave me a rating for the recipe? Just scroll to the very bottom of the page to leave a rating. Thanks so much xx


Readers’ Photos & feedback
Here’s some of the shortbread made by my friend Sally who just happened to appear on The Great American Baking Show this year on the holidays edition (2019). She flavoured hers with orange zest and cardamom, and added a nice glaze too! Check Sally’s blog out at Bewitching Kitchen.
This is one of my popular recipes, but don’t just take my word for it. Read what others thought and see photos of their bakes using my shortbread recipes.
Serving Idea For Summer


Here is a great idea by Mrs D, for making the humble biscuit a bit more special and a perfect Summer dessert! She made the shortbread round and served with fresh whipped cream and strawberries. A nice take on the Strawberry Shortcake. Don’t they look wonderful?


Bake For The Holidays
You can also cut out this shortbread but make sure that the dough is very cold and cut very carefully. The soft texture of this biscuit, does mean it crumbles by nature, so not suitable for intricate designs or using a stamp or mold. Here are some below by my friend Diana, that she made for Christmas time & Valentine’s.


Follow Me For New Recipes
SIGN UP FOR MY NEWSLETTER – I would love it so much if you could sign up for my newsletter. I will send out monthly emails, showing the latest recipes and articles, and latest info. Being a free site, building a following, is even more important and will keep it up and running and for free to everyone. Occasionally there will be the odd seasonal emails, but is really a means of reaching you, if you are not already in one of the Facebook groups I admin. Please note too, that these email addresses are not shared or sold onto another party. Thanks so much Caro xxx


Lessons Bakers
For those following the structured lessons, once this lesson is completed, process are normal to the next Theory Lesson – Lesson No. 10 (when available) or go to Savoury Lesson No.4. – Quicker Tear-&-Share Dinner Rolls (an introduction to bread making and using a quicker method).
Please see the sharing options or even printing, at the right/bottom of your screen (bottom of your screen for mobile devices, and down the right-hand side on computers). You can even pin this to your own Pinterest page. Alternatively, you can download this article, see below. You could also leave some feedback if you like. If you do try this recipe, please let me know and send me some pics. I love seeing your bakes & hearing how you got on. And I am setting up a feedback and readers’ pics page, so feel free to send me them or tag me on social media.


Recipe Card
Traditional Scottish Shortbread By A Scot

Equipment
- Scales or measuring cups
- Large spoon
- Stand or Hand Mixer, (or Medium-Large Mixing bowl & spoon)
- Pastry Cutter/pastry blender (optional)
- Baking/parchment paper
- Baking Sheet/Tray x 2
- Palette knife or sharp kitchen spatula
- Timer or Phone Timer
- Cooling rack
Ingredients
- 225 grams Butter, unsalted, cubed & softened (1 cup/2 sticks or 8 oz)
- 110 grams Caster Sugar (3¾ oz), ½ cup Extra/super fine sugar, see above notes)
- 225 grams Plain Flour (1 ¾ cups All Purpose or 8 oz)
- 110 grams Corn Flour (3¾ oz, 1 cup less 1 tbsp Corn Starch) *see above
- Pinch of Salt
- Granulated Sugar for topping
Instructions
PREPARE THE BISCUIT DOUGH
- Weigh & cube the butter & leave till softened. If you forget to take the butter out to soften, here’s a hack I reviewed to soften butter in about 10 minutes.
- Add the sugar to the butter in your mixing bowl & give a light mix together. Then mix on low speed with a stand/hand mixer until light and fluffy, (known as ‘creaming the butter & sugar’). You can of course do by hand with a spoon and some elbow power!
- Line baking sheets/trays with baking/parchment paper and grease in place if the trays do not have a lip (or you could lose your biscuits).
- Sieve in the flour, corn flour/starch into the sugar/butter mixture. Mix in by hand, don’t use a mixer .
- Use a Pastry Cutter/blender for this next part- incorporates the flours into the butter/sugar mixture much more easily & is quicker, (especially if your hands hurt) Push the pastry cutter down on the bottom of the bowl, rotating left & right. Do this to all the mixture until the butter had taken on all the flour. Alternatively, do this ‘cutting in’ process, using 2 butter knives. Note that the mixture will not come together into a ball at this stage. It will be very crumbly & that is fine.
- In the bowl or on a large sheet of baking/parchment paper, very gently knead the dough just until it starts to come together, and no more. Form the dough into a very rough square shape, by using you hands & pressing down. Push in the end pieces to make sure the ends are the same height as the middle of the dough. Do until the dough is about ½cm (5mm or ⅕in) thick. Alternatively, place baking/parchment paper on top of the dough and roll out.
- Trim around the dough until you have a straight square shape. Place the scraps of dough, back in the bowl. Cut down the middle of the dough, and then cut ‘slabs. I got 18 slabs, (1½ – 2cm, approx. ⅔ – ¾" wide & about 8cm/3" long). Try to cut a little thinner than you would want, as they spread a little on baking.
- Very carefully transfer them with a palette knife to the prepared baking trays/sheets, leaving a good 2½cm/1" gap at least, in-between. Make holes with a fork all over the slabs, but very carefully not to go too far down & break them.
- Using the scraps left over, gently squash the dough together into a ball & flatten into a disc shape, pushing up the edges to make an even thickness. Cut this disc into 8 pieces. Using your thumb & index finger, pinch the ends of the round dough to give a decorated edging & shape known as Petticoat Tails. Carefully transfer the dough to the baking tray & make holes with a fork over the dough. Alternatively, make some more ‘slab’ shapes.
CHILL THE DOUGH
- Place both trays/sheets in the fridge (or somewhere extra cold) for 60 minutes. If you omit this step, the shortbread will be too soft & not hold any of its shape. If you can’t get the baking trays/sheets into the fridge, you could try transferring with the paper, to regular trays.
BAKE THE SHORTBREAD
- Heat up the oven to 180c/160c Fan/350f/Gas Mark 4, to coincide with the chilling time ending.
- Place the 2 trays/sheets in the oven & bake for approximately 15 minutes. You may need a little longer, but you want to take them out when the edges are just starting to turn a very pale golden colour. Be warned though they should still be very soft, so take the trays out and leave for 5-7mins before moving them. At this just out of the oven stage, sprinkle plenty of granulated sugar on top of the biscuits.
- After the 5-7 minutes, transfer (very carefully) to a cooling rack by lifting the baking/parchment paper. Leave the biscuits to cool down completely.


- Enjoy with a cup of tea or coffee (or Whisky) & store leftovers in an airtight tin or container, where they will last at least a week.

Video
Notes

 *Cornflour (Corn Starch) should not be omitted as this gives the biscuits their melt-in-the-mouth texture. As well as using proper butter, this is what makes this a traditional Scottish recipe that we are used to here in Scotland.
*Do not skip the chilling stage as it is very important for these and most biscuit/cookie recipes.
*Cornflour (Corn Starch) should not be omitted as this gives the biscuits their melt-in-the-mouth texture. As well as using proper butter, this is what makes this a traditional Scottish recipe that we are used to here in Scotland.
*Do not skip the chilling stage as it is very important for these and most biscuit/cookie recipes.

 *See main recipe for readers’ pics and feedback page to hear how others rave about these biscuits.
*You can also use seasonal cookie cutters for these biscuits, just not really intricate ones because of the soft nature of the biscuits. See main recipe for more pics & ideas.
*See main recipe for readers’ pics and feedback page to hear how others rave about these biscuits.
*You can also use seasonal cookie cutters for these biscuits, just not really intricate ones because of the soft nature of the biscuits. See main recipe for more pics & ideas.
 Go to my flavoured Shortbread – Cranberry, Orange & Pecan Shortbread. A new flavour for Christmas 2021 – Chocolate Coconut Scottish Shortbread (below).

 Please take a few seconds to rate this recipe – scroll down to the very bottom of the main recipe post & leave your feedback, thanks Caro xx


***I am not a qualified nutritionist, & all nutritional values are based on a serving of 1 shortbread finger (from a batch of 24 as per recipe above). Bigger or smaller shortbread & the nutritional values will change. All values from Myfitnesspal.com.


Authentic Scottish Shortbread
Search For Something You Fancy!
Caroline’s Easy Baking Lessons


We can buy caster sugar in Canada. I buy it all the time and for years. it may be called super fine sugar. Bulk Barn has it, and so does most grocery stores.
Hi, thanks for your feedback. Yes extra/super fine sugar it is called. There is a section in the recipe about this, and a link to my article on the difference between UK & US/Canadian common baking ingredients and terms. I believe it is less expensive to make your own but from granulated sugar. https://www.easyonlinebakinglessons.com/differences-between-uk-us-baking-ingredients/
looks like a great recipe thank you.
Thanks so much for the feedback and taking the time to comment. I appreciate that, and hope you can try out the recipe, and take a photo or two and let me see. Thanks again.
Best recipe!
My dad says they are the best he has ever tasted in his 80yr life!
I am so happy your dad loves them too! I see these being made plenty times more in your future 🙂
These shortbread are amazing. They are the true melt in the mouth biscuit and make a lovely gift too. Will never use another recipe again. Thank you for sharing.
Thanks so much Diana. so glad you are enjoying my Scottish recipe.
These look yummy Caro, your step by step process and photos give clear instruction of what and how, thank you for sharing.
I make shortbread quite regularly however never used the Pastry Cutter, I will definitely give it a try on my next batch. ?
Thank you Helen. Would love to see pics when you do.