Viennese Whirls Baking Tutorial

Love Viennese Whirls or love British foods & baking? Then you will love this Viennese Whirls baking tutorial to make this classic British biscuit from scratch. Perfect for gifting too!
What Is A Viennese Whirl?
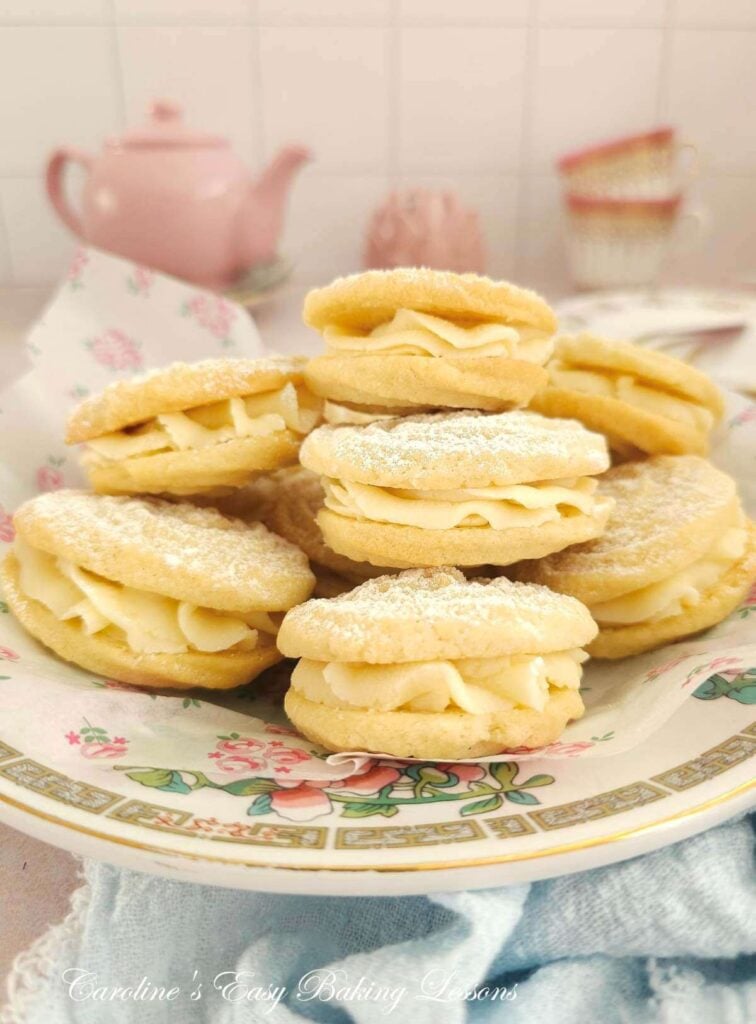
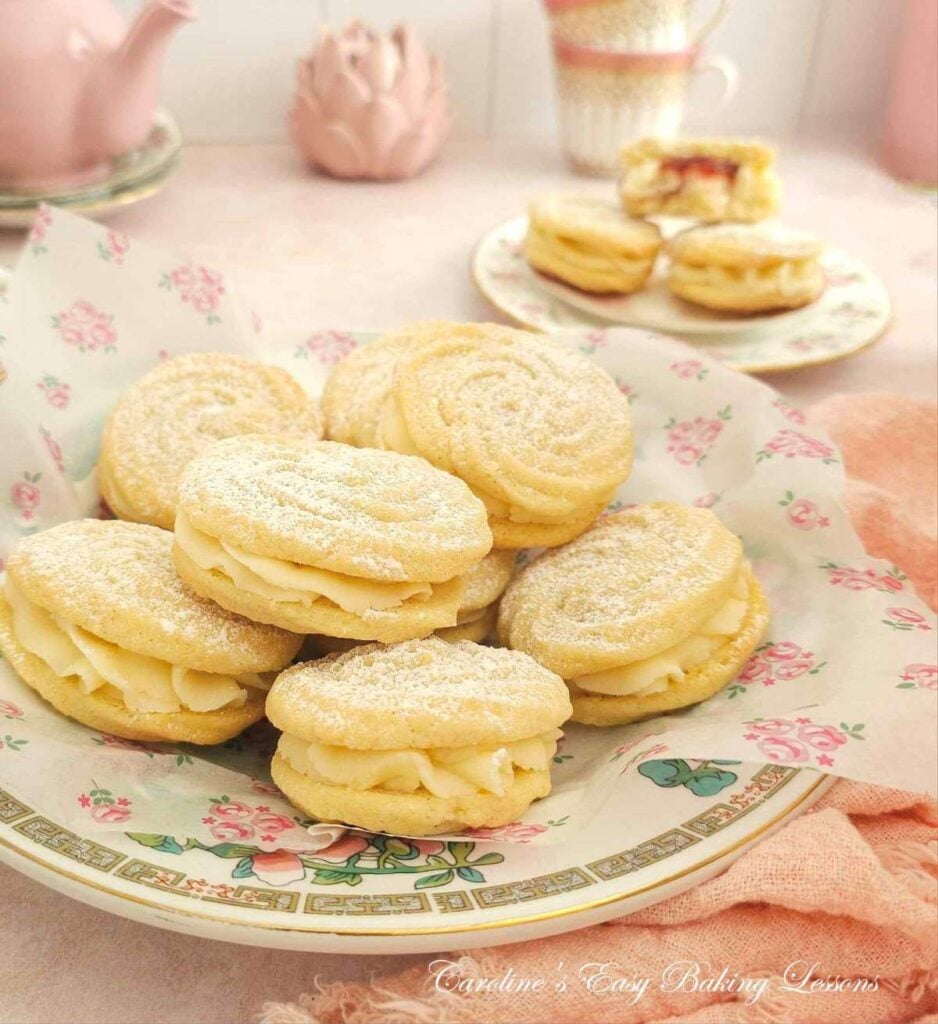
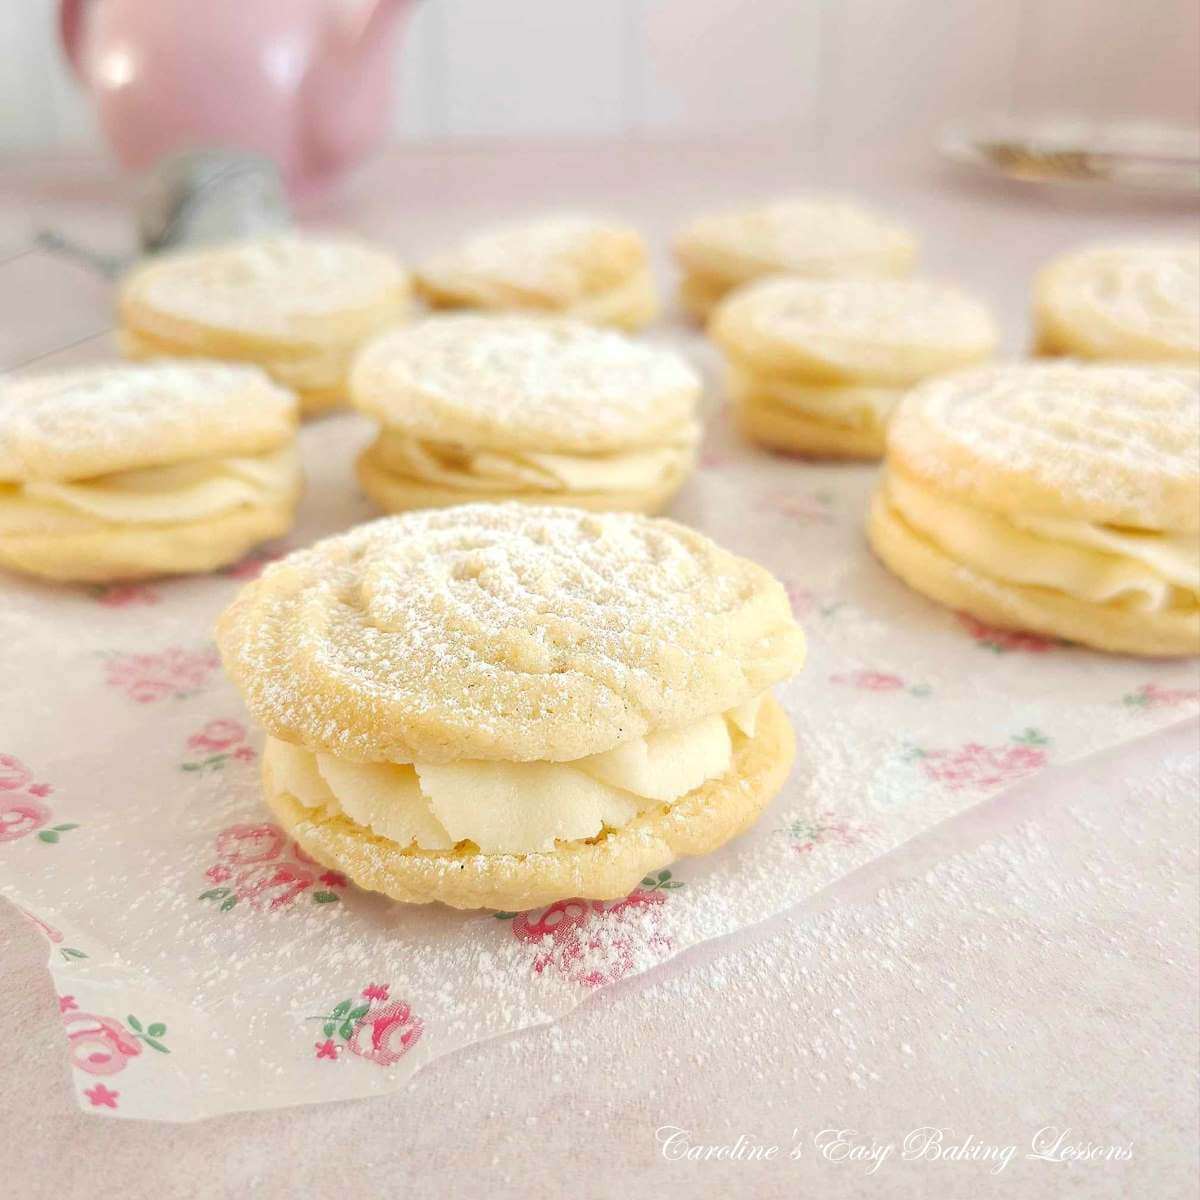
A Viennese Whirl is a popular British biscuit (or cookie), consisting of 2 layers of very delicate shortbread-like biscuits, sandwiching a piped buttercream and jam filling.
The classic is the round sandwich biscuit/cookie, piped in a ‘whirl’, hence the name. But they also come in ‘finger’ shapes, half-dipped in melted chocolate.
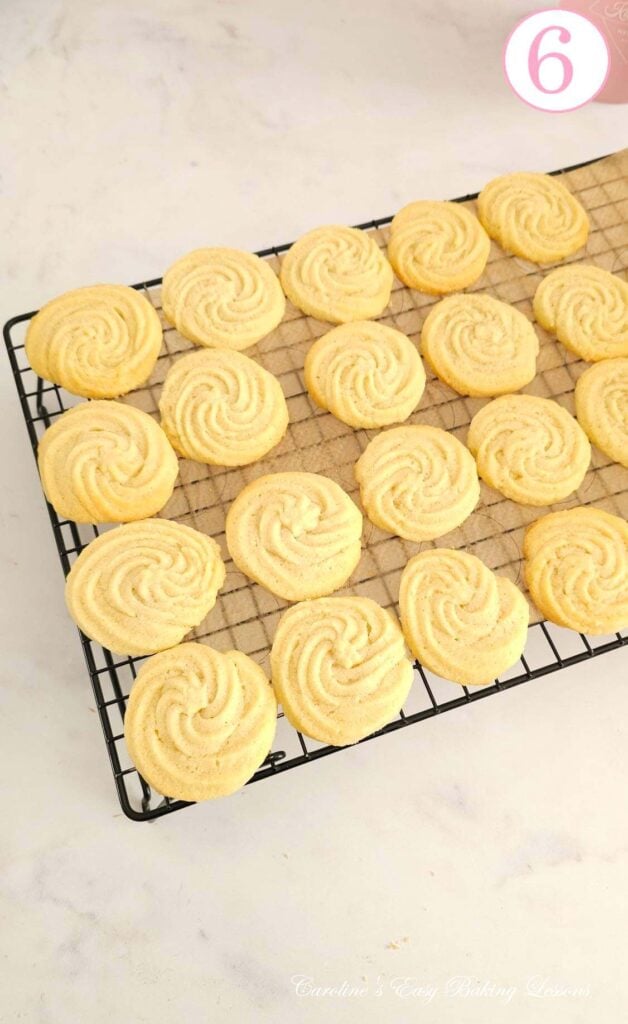
As mentioned, these biscuits are piped, and as such they have a classic characteristic of pipe ‘lines’ or ridges if you like. This is more evident in the Viennese Swirls and maintained by always chilling the piped biscuits before baking.
These Viennese Whirls have a firmer buttercream, that keeps the jam filling inside, as well as ensuring not too much buttercream oozes out the sides when eating.
Origin Of Viennese Whirls
Contrary to what the name would suggest, Viennese Whirls did not originate in Vienna, Austria. They were in fact created in England, sometime before the 1920’s, inspired by Austrian pastries & and made popular by British brand Mr Kipling.
Why Make Viennese Whirls?
- Easy with step-by-step instructions, photos & video tutorial.
- Taste amazing!
- Look good
- Can be frozen (best not filled)
- Made from simple ingredients
- Egg-free
- No special techniques/equipment
- Great for gifting
- Love The Great British Bake off (Great British Baking Show)? – then try this classic bake
Ingredients & Substitutes

Here are the ingredients for these Viennese Whirls:
(*note ingredient amounts are listed in the Recipe Card*)
- Butter, unsalted
- Icing/Powdered Sugar
- Flour
- Cornflour (Corn Starch)
- Vanilla Extract
- Milk (not pictured)
For The Filling:
- Butter, unsalted
- Icing/Powdered Sugar
- Vanilla Extract (optional)
- Milk
- Raspberry or strawberry jam/preserve
Flour
These Viennese Whirl biscuits use Plain (All Purpose) flour.
Butter
Unsalted butter should always be used for baking. Not only to control the salt intake, but for best results. Salted butter contains a higher water content than unsalted butter. As a result, the fat content is lower which can affect the results. To make matters worse, the salt content varies from brand to brand.
If your old go-to recipe all of a sudden doesn’t work despite no changes & a working oven, chances are there has been an increase in water content of your usual brand of salted butter, (especially so, post-pandemic).

Vanilla Extract
Vanilla gives the biscuits a delicate flavour and can be used in the buttercream too if you like but is optional. Learn how to make homemade Vanilla Extract.
Sugar
Unlike most British recipes that use Caster Sugar, these biscuits use Icing (Powdered) Sugar. This is because there is no ‘creaming’ of the butter & sugar in the usual sense, & consists of a dough more like a batter and reminiscent of Choux pastry batter.
Milk
Since there is no eggs or other liquid ingredients, milk is used in the biscuit dough to thin to the correct consistency to pipe. It is also used for piping consistency in the buttercream too.
Cornflour
Just like my Traditional Scottish Shortbread, these Viennese Whirls, contain cornflour (Corn Starch), which contributes to the delicate nature of these biscuits, & ‘melt-in-the-mouth’ texture.
Recipe Yield
This recipe will make about 20-24 biscuits for 10-12 biscuits sandwiched together. And biscuit size is slightly bigger than Mr Kipling’s variety.
Equipment
A full list of equipment is included in the Recipe Card below, but the only thing to mention is you need a piping bag, with a medium sized open star-tipped nozzle (9mm, 2M) for the biscuit. You can use for piping the buttercream filling too, or a medium closed star-tipped nozzle.
Alternatively, if you don’t have a piping bag, you can use a food bag with a small hole. YouTube videos can show you how to cut the end of one of the corners to mimic a star-tipped nozzle. Buttercream can be spread in the middle, but will not be as good a finish.
Next
Learner bakers, next is the step-by-step instructions for these Viennese Biscuits. Experienced bakers can skip to the Recipe card (an abbreviated version of the recipe), by clicking below:
Jump to RecipeStep-By-Step Instructions
Preparing The Biscuits
1. Start by weighing/measuring out cold butter & cube to about 1cm, (⅓”), before leaving out to soften and come to room temperature, (**smaller surface area & this will happen quicker as well as working into the batter easier).
2. Once softened, beat the butter cubes in a mixing bowl or stand-mixer bowl, until relatively smooth.
3. Add in half of the sieved icing/powdered sugar & beat together. (**Place a clean tea-towel over the bowl to stop the ‘sugar dust’).
4. Add the remaining sugar and beat until fully combined. (See Photo 1).
5. Next, sieve over the flour, cornflour (corn starch) & baking powder, followed by the vanilla extract. (Learn how to make your own homemade vanilla extract).
6. Start to mix together on low speed, before gradually adding enough milk to produce a stiff but thin enough batter that you will be able to pipe with firm pressure..
**Tips – make sure butter softened enough & add milk to a consistency similar to Choux pastry. The heat of your environment & your hand can help with this. But if still too stiff to pipe, you can warm in the microwave for 20 seconds just until it is a little warm. (See Photo 2). But please note that it should still have some stiffness to create the definition on the biscuits.
7. Add the biscuit dough to a piping bag fitted with an open-star tipped nozzle. (I used a medium nozzle, labelled 9mm, (2M)). **Tip – fit the tip and place the bag inside a jug, turn the ends over the jug & open the bag. This lets you use both hands and be able to scrape the dough into the open bag. (See Photo 3).
8. Close up the end of the bag, squeeze the dough towards the end of the nozzle, then twist the bag closed (making sure there is no air inside), and squeeze the end of the bag till a tiny bit of the dough is starting to come out of the nozzle. **Tip, keep the bag closed with a peg or food bag clip.
9. Place the piping bag to the side (make sure not somewhere cold or it will be hard to pipe), and prepare the baking trays for piping.
10. Cut a sheet of baking/parchment paper the size of your baking tray/cookie sheet. Then using a coupler, widest end of a large piping nozzle or something similar (with width of 4.5cm (1.75″), draw circles on the paper, leaving at least 2.5cm/1″ in-between them. Draw over 2 sheets of paper, as we need at least 22 circles.
11. Grease the baking tray/cookie sheet, (here I used Frylight 1cal Spray), turn the paper over so the side you have drawn on is underneath & position in place.
12. Pipe the Viennese Whirls using the circles you marked out as a guide. You can of course do free-hand but we need to have pairs roughly the same size.
13. Pipe from the outside of the circle, and then work your way into the centre, making sure there is no gap.
14. Once one is piped, use a wet finger and gently press down on the biscuit dough, where you ended the piping in the centre.
15. If you are not happy about the size or shape, you can scrape back off the paper. See Photo 5.
Chilling & Baking
1.Once all the biscuits are piped (you will get about 20 – 24 pieces), they have to be chilled so they can keep their shape and definition. Place in the fridge for 45 minutes or in the freezer for 20 minutes.
2. Before the chilling time is up, set the oven to heat to: 190°c/170°c Fan oven/375°f/Gas Mark 5.
3. Once the oven is ready, place the Viennese biscuits in the centre of the oven & bake for 10-15 minutes. The biscuits should be starting to colour at the edges, be set though & you should be able to move them slightly with a palette or butter knife (but don’t try to lift up). Bigger you pipe them, the longer they will take.
4. Remove from the oven and leave on the baking tray/cookies sheets, on top of a cooling rack for 5 minutes.
5. Next, very carefully transfer the biscuits to just the cooling rack, by sliding them out of the tray, using the paper. **Any that drop will break. Leave to cool completely before decorating.
Prepare The Buttercream
1.Make sure the butter for the buttercream is cubed and softened before making the buttercream.
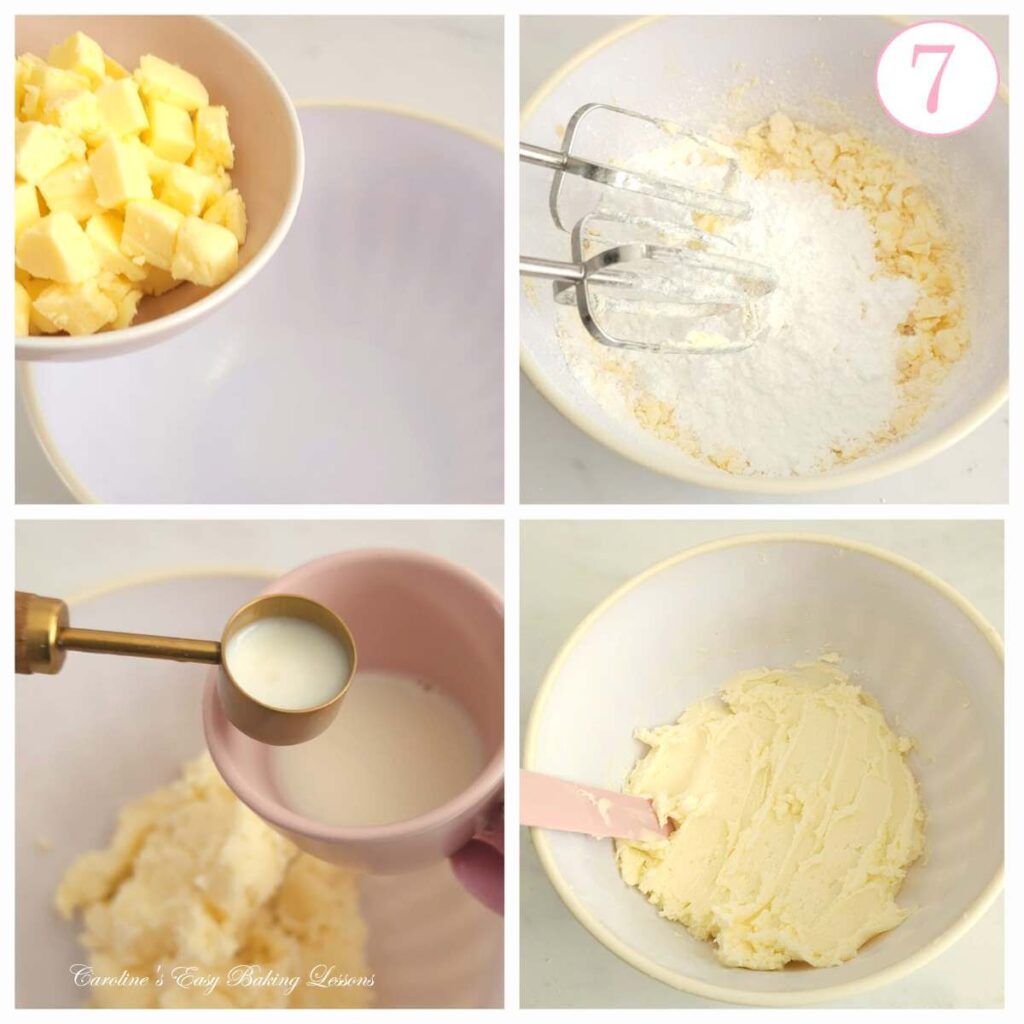
2. Add to a mixing bowl and use a hand-mixer or stand-mixer, to beat the butter cubes until paler and no longer cubes.
3. Gradually add in the sieved icing/powdered sugar & mix till combined & batter like.
4. Add in enough milk to produce a smooth & pipeable buttercream. Note that this buttercream is firmer for sandwich cookies, but needs to be soft enough to pipe easily. See Photo 7.
5. Fit a piping bag with a closed star-tipped piping nozzle (or the one you used for the biscuits), & open up the bag like before.
6. Fill with the buttercream and push to the bottom of the bag, before twisting the bag closed.
**Tip, for getting as much of the buttercream down as possible, use a metal bench scraper (or even a plastic icing scraping), to push the buttercream down, by scraping against the bag. (See video for how to do this).
Fill & Assemble The Biscuits
1.Once the biscuits are cooled completely (or even next day if stored in a cake or cookie tin), you can fill with buttercream. But first, pair up the biscuits as they will not all be identical size or shape. Then separate the tops from the bottoms. I like to line them up & know which top is for which bottom half.
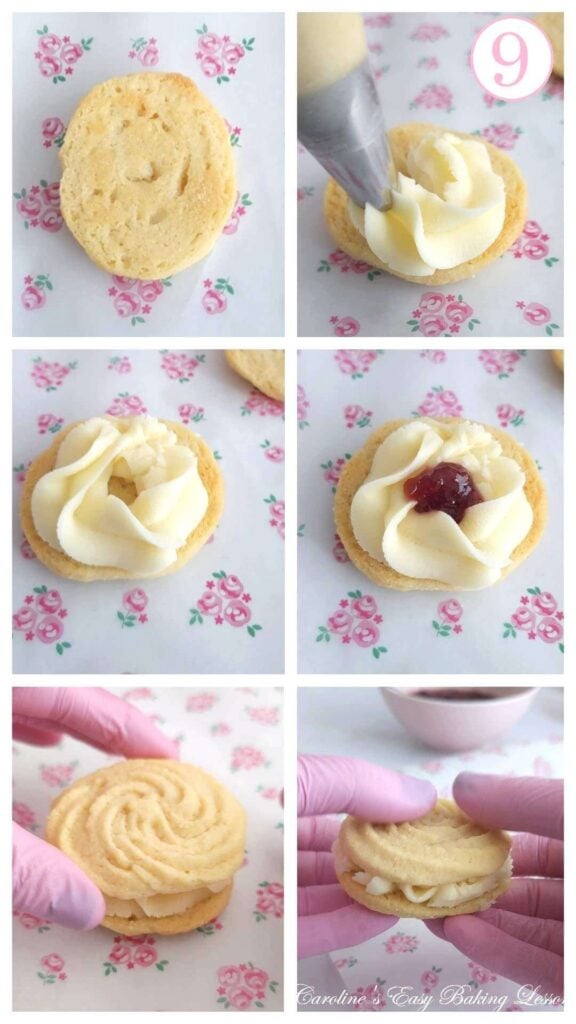
2. Take the bottom half of the biscuit, and pipe a ring of buttercream around the edge of the biscuit, leaving a little gap. This only needs to be about 3mm (1/8″), provided you have a firmer buttercream like this recipe. **Tip, use one hand to hold the biscuit and as you pipe the buttercream, slowly rotate the biscuit around in a circle.
3. Release the pressure from the bag and use the end of a small spoon to ‘cut’ the buttercream and then use a wet finger to press down the end of the buttercream (optional). ** Make sure there is a little gap in the centre of the ring of buttercream.
4.Take about 1/2 tsp worth of the jam and spoon into the centre of the buttercream.
5. Place the top half of the biscuit on top & very gently squeeze together. See Photo 9.
6. Repeat for the remaining biscuits. **Tip – since it is a firmer buttercream, if you are not happy with the piping, you can scrape off easily and re-apply.
7. Finally, dust the tops of the biscuits with a fine sieve of icing/powdered sugar and the biscuits are made.
8. If the environment is quite warm, you might need to set the biscuits for a few hours in the fridge. If not, just place in the fridge for 30 minutes and they should be ready to serve.
**Tip – if you want the biscuits to last longer with the filling inside, you can spread on melted white chocolate on the underside of one of the biscuit pairings & leave to set before sandwiching together. The chocolate can provide a layer of protection from the buttercream softening these already delicate biscuits. But if you know they will be finished soon, I feel it not necessary.
Serving & Storing
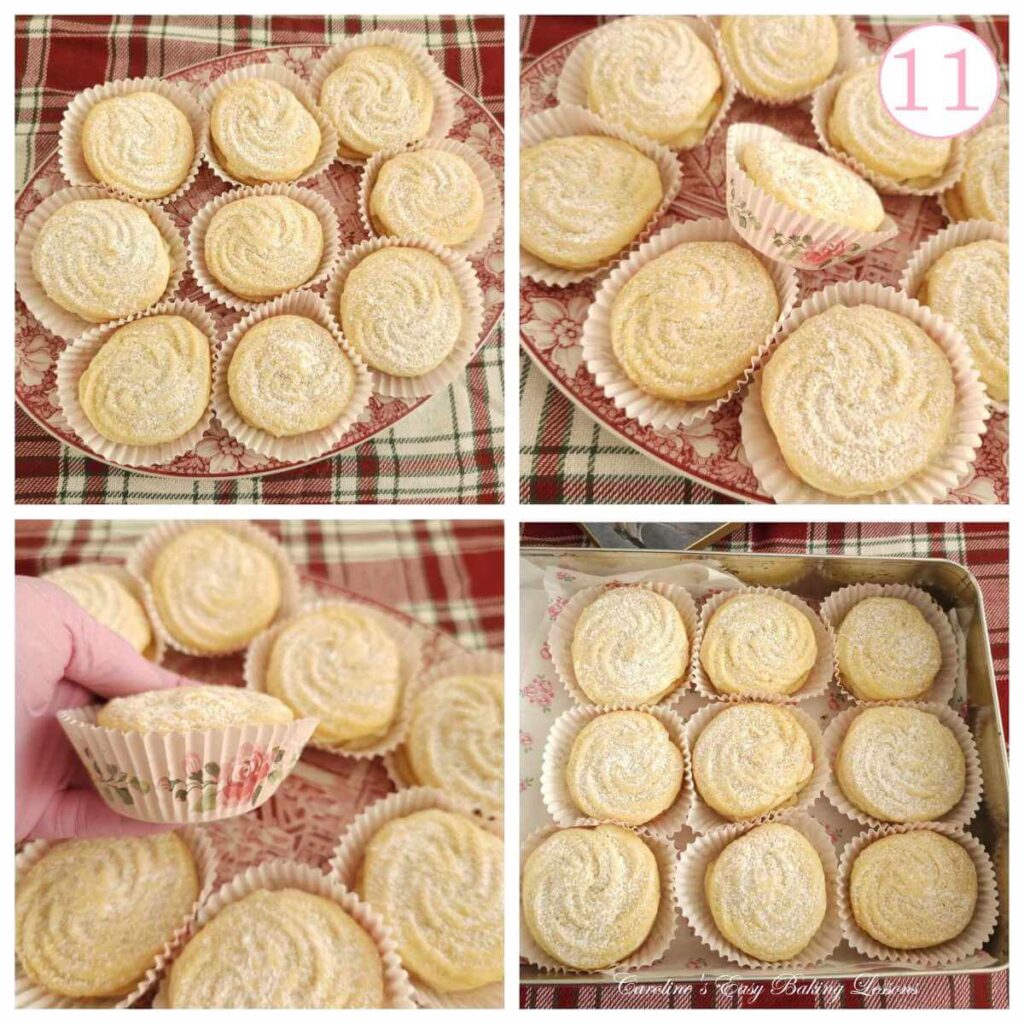
1.Serve these Viennese Whirl biscuits when the filling is firm, with your favourite tea or coffee, or cold class of milk if you prefer. **Tip, you can store or serve these in cupcake cases, making its own disposable ‘plate’. See Photo 11.
2. Perfect for tea parties or afternoon tea, these are a British favourite.
3. Store the biscuits in a cake or cookie tin, either in the paper cases (see above), or on some baking/parchment paper. These are good for up to 7 days1 if stored properly. Just ensure that they are not somewhere particularly hot.
4. Viennese Whirls can be frozen, preferably at the baked & cooled stage. Flash-freeze on a baking sheet, then place in a labelled airtight container, with paper in-between them and freeze at the back of the freezer,

5.These will be fine frozen for up to 3 months.2 Defrost however many biscuits you need, on a wire rack at room temperature for about 2 hours. Fill with the buttercream & immediately consume for best taste.
More British Biscuits & Cookies
Check out my other biscuits, including popular & traditional Scottish Shortbread, my Chocolate Digestive Biscuits or on the biscuits & cookie page. Or via the photos below, by clicking on the picture.
Recipe Card
Viennese Whirls – British Classic Baking

Equipment
- Digital scales or measuring cups
- Medium mixing bowl
- Measuring Spoons
- Sieve
- Hand/stand mixer
- Baking/parchment paper
- 2 Baking trays (Cookie sheets)
- Pencil
- Ruler (or measuring tape)
- Coupler/Large Nozzle (round 4½cm (1¾″) wide)
- 2-3 Piping Bags
- Medium Open Star-tipped Nozzle (9mm, 2M)
- Cooling rack
- Medium Bowl (for buttercream)
- Medium Closed Star-tipped Nozzle (for buttercream, optional)
- Extra Fine Sieve (or tea-strainer, for dusting sugar)
Ingredients
For The Biscuits:
- 180 grams Butter (6¼ oz, 1⅔ sticks of unsalted, cubed & softened*)
- 50 grams Icing/Powdered Sugar (1¾ oz, rounder ⅓ cup, sieved)
- ½-1 tsp Vanilla Extract (make your own homemade Vanilla Extract)
- 156 grams Plain Flour (5½ oz, 1¼ cup, All Purpose Flour)
- ½ tsp Baking Powder
- 25 grams Cornflour (3 rounded tbsp, scant ¼ cup Corn Starch*)
- 2 tbsp Milk (May need little more*)
For The Filling & Decoration:
- 60 grams Butter (2 oz, ¼ cup, unsalted, cubed & softened)
- 185 grams Icing/Powdered Sugar (6½ oz, 1½ cups, sieved)
- ½ tsp Vanilla Extract (homemade Vanilla Extract, optional)
- 1-1½ tbsp Milk
- Icing/Powdered Sugar (for dusting)
- 65 grams Raspberry Jam (2½ – 3½ tbsp, jelly/preserve, or strawberry)
* denotes see notes
Instructions
Prepare The Biscuits
- Weigh/measure out 180 grams Butter & cube to roughly 1cm, (⅓”) to soften & come to room temperature quicker.
- Beat the softened butter with a hand-mixer or stand-mixer till relatively smooth, then gradually add in the sieved 50 grams Icing/Powdered Sugar and beat until fully combined.
- Sieve over the 156 grams Plain Flour, ½ tsp Baking Powder & 25 grams Cornflour, briefly mix by hand before adding in the ½-1 tsp Vanilla Extract.
- On low speed to start, gradually add in enough of the 2 tbsp Milk to make a stiff but batter-like dough that you will be able to pipe with some pressure. **Tip – stiffness helps with the classic ridge definition of Viennese Whirls, and should be similar to Choux pastry consistency. But if your environment is cold this can be harder to pipe, so as a last measure, warm the mixture in the microwave for 20 seconds till just a little warm.
- Add the biscuit dough to a piping bag fitted with a 9mm (2M) open-star tipped medium nozzle & leave to the side but not anywhere cold.
- Cut baking/parchment paper to fit 2 baking trays/cookie sheets & use the widest end of a large coupler, large piping nozzle or something round with width 4.5cm (1.75″) to draw circles on the paper. Leave at least 2.5cm/1″ in-between & draw at least 22 circles.
- Grease the paper in place (here I used Frylight cooking spray), making sure to turn the paper over first. Then use the circles as a guide to pipe the whirls. Start from the outer edge & work your way in to the centre. Use a wet finger to press down the end, where you finished piping. Repeat with the rest of the batter.
Chill & Bake
- Chill the Viennese Whirl biscuits in the fridge for 45 minutes or freezer for 20 minutes to keep their shape and distinctive definition.
- Preheat the oven to: 190°c/170°c Fan oven/375°f/Gas Mark 5 & to coincide with the end of the chilling time.
- Place in the centre of the oven & bake for 10-15 minutes, until set, beginning to colour at the edges & will move when pushed gently (but don't try to lift).
- Leave to cool as is, on top of a cooling rack for 5 minutes before sliding via the paper, onto the cooling rack & leave to cool completely before filling.
Prepare The Buttercream
- Add the cubed & softened 60 grams Butter to a bowl & beat until paler and no longer cubes. Then gradually add in the sieved 185 grams Icing/Powdered Sugar, the ½ tsp Vanilla Extract & 1-1½ tbsp Milk and beat for 2 – 3 minutes till a slightly firmer buttercream is formed but pipeable. **Add little more milk to get the correct consistency.
- Fill a piping bag fitted with the same nozzle as before, or a large closed star-tipped nozzle, before adding the prepared buttercream.
Fill & Assemble
- When the biscuits are fully cooled, 'pair' them up then separate into 2 rows so you know which is the top & bottom for the sandwich biscuits.
- Take a 'bottom' biscuit & pipe a ring of the buttercream around the edge of the biscuit, leaving about 3mm (1/8″) gap at the end. Release pressure & use a wet finger to push down the end of the buttercream.
- Fill the centre of the buttercream with about ½ tsp of the 65 grams Raspberry Jam , then carefully place the biscuit 'top' for the pairing, on top of the jam & buttercream & gently squeeze a little bit together. Repeat for the rest of the biscuits.
- **You can add melted white chocolate to the inside of one biscuit piece, before the buttercream & jam if the biscuits are not going to be finished quickly but not essential.**
- Sieve over a dusting of Icing/Powdered Sugar & chill the biscuits for 30 minutes, or a few hours if a hot environment.
Serving & Storing
- Serve the biscuits with tea or coffee as they are or enjoy with other tea party or high tea treats.
- Store in a paper lined cake or cookie tin. You can also store or serve, in cupcake cases. These will be fine for up to 1 week1.
- Viennese Whirls can be frozen, preferably unfilled. Simply flash freeze on a tray and then store in a paper lined air-tight container, with paper in-between if stacked and placed at the back of the freezer. These are fine frozen for up to 3 months2. Defrost at room temperature (the number of biscuits you want) for about 1 – 2 hours. Then assemble & consume immediately.
Video
Notes
 Vanilla Extract – is optional & it is easy to make Vanilla Extract at home.
Cornflour – US name for this is Corn Starch (not flour made from corn).
Milk – in both the biscuits and the buttercream mixture, milk is added to thin down. Both should be stiff but not so much that they can’t be piped with a little pressure.
 Jam – raspberry jam/jelly/preserve is best, but you can use strawberry or even apricot. See my Plum Orange jam recipe for how to make your own, or try some lemon curd. Traditionally piped in the centre, you can add a layer if you prefer, provided not too runny.
***Please see the step-by-step photo tutorial before this Recipe Card for more details & information. Especially recommended for beginners.
 Try some more British biscuits like my popular Traditional Scottish Shortbread, homemade Chocolate Digestives or Air fryer British Scones if having your own afternoon tea or tea party.
Nutritional Information – I am not a qualified nutritionist and all values are approximate. Macros are based on 1 serving, being one Viennese Whirls sandwich biscuit, using all ingredient amounts as listed above. Assumes an average recipe yield of 11 whirls/22 biscuit pieces & using all the jam & buttercream. Make more or less biscuits & these values will change. All details calculated via MyFitnesspal.com.
Subscribe For More Recipes
Want more great recipes, tips, baking information and newsletters? Then please consider subscribing by adding your email address below. Be sure to check for a confirmation email & respond back, so you can follow me & receive your free emails. Your personal information will not be shared with a third party.
Join My Facebook Group
Why not also join my – Facebook group Easy Online Baking Lessons, dedicated to this baking lessons website, as well as providing one-on-one support with myself & my team? Be sure to answer all security questions when requesting to join.
Follow me on social media:
Happy Learning & Baking!
Caro x
Viennese Whirls Baking Tutorial – Sweet lesson No.18
Search For Something You Fancy!
Caroline’s Easy Baking Lessons
References:
- How long to store Viennese Whirls information – from website FreezeIt.Co.UK- Viennese-Whirls ↩︎
- Freezing Viennese Whirls information – from website FreezeIt.Co.UK- Viennese-Whirls ↩︎










Fantastic post for yet another classic bake! LOVED IT!
Aww thanks so much Sally! That means a lot xxx
I made these when you had on your old website and loved them so much I had to make again once I saw them! perfection!