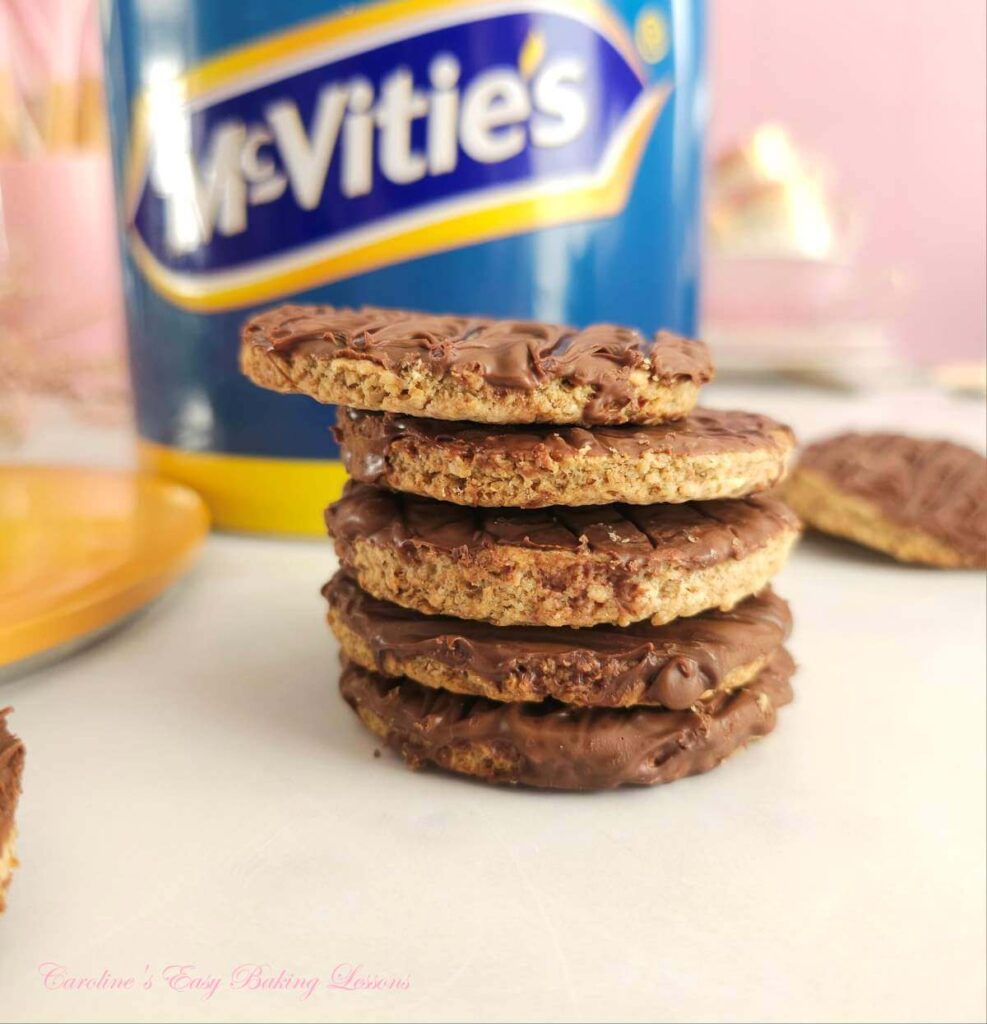
Easy Chocolate Digestive Biscuits (Classic British Cookie)

These easy Chocolate Digestive Biscuits (cookies), are a popular British biscuit. They come in the plain, oaty form, but the chocolate topped version is the nation's favourite, second only to maybe Jaffa Cakes.
Chocolate Digestive Biscuits
Classic british Cookie
Sweet Lesson No.6


***Click to jump to section***


What Is A Digestive Biscuit?
Chocolate Digestives are a classic British biscuit (or cookie to you bakers in the States/Canada). They come in the plain form, but the chocolate topped version is the nation’s favourite, second only to maybe Jaffa Cakes.
Digestive Biscuits are what we use for cheesecake bases, and so are often considered to be similar to Graham Crackers. They are however more wheat & oat based and not very sweet.
For my version of the chocolate topped Digestive, I added extra oats, as well as a more unusual ingredient – Desiccated Coconut. (US alternative would be unsweetened shredded coconut). This is entirely optional and we like it on top of the melted chocolate too.


Why Are They Called Digestive Biscuits?
This is a question I am asked all the time, so thought a good idea to answer here too. These biscuits were originally developed by 2 Scottish doctors, back in 1839. Being low in sugar, and containing healthy oats & fibre, these were designed to aid digestion, hence their name. The chocolate topped version came to existence in 1925, from the McVitie’s factory.
Baking Tutorial
Like all of my recipe tutorials, the recipe is broken down into step-by-step instructions with detailed process photos to guarantee success.
Ingredients & Substitutes


Here are the ingredients for these chocolate Digestives:
(*note ingredient amounts are listed in the Recipe Card*)
- Butter, unsalted
- Sugar
- Wholemeal/wheat Flour
- Oats
- Bicarb/Baking Soda
- Salt
- Water
- Coconut (optional)
- Milk (or water)
For The Topping:
- Chocolate
- Coconut (optional)


Oats
Oats, are the main ingredient in these biscuits. I just use regular porridge oats (the basic kind with nothing added).
If you happen to have fine oats, then this works great, but I just tend to process the oats a little. The US equivalent is Rolled Oats (Old Fashioned).
See my photo here of plain Scottish porridge oats.
Flour
These less-sweet biscuits also use wholemeal (wholewheat) flour instead of Plain/All Purpose white flour. After sieving the flour, you can add in the bran too, for even more benefits of healthy fibre1.


Butter
Unsalted butter is always recommended for baking. Not just to control salt intake, but because salted butter has a higher water content than unsalted butter. This in turn means the fat content is lowered, which can affect the result of whatever you are baking. Worse still, the amount of salt varies from brand to brand.
So if your go-to recipe suddenly doesn’t work out how it used to, your oven is fine, & nothing else changed, chances are there has been an increase in water content in your usual brand of butter.


Sugar
As mentioned above about why these are called Digestives, these biscuits are very low in added sugar. Less than 8% of the ingredients are made up of sugar and we are using light brown sugar. Unrefined Coconut Sugar would be a good substitute.
Chocolate
You can use milk (semi-sweet) chocolate, dark/plain (bitter) chocolate or a combination of both depending on your taste. I like to used 100g/3.5oz milk chocolate & 50g/1.75oz of dark chocolate.

Coconut
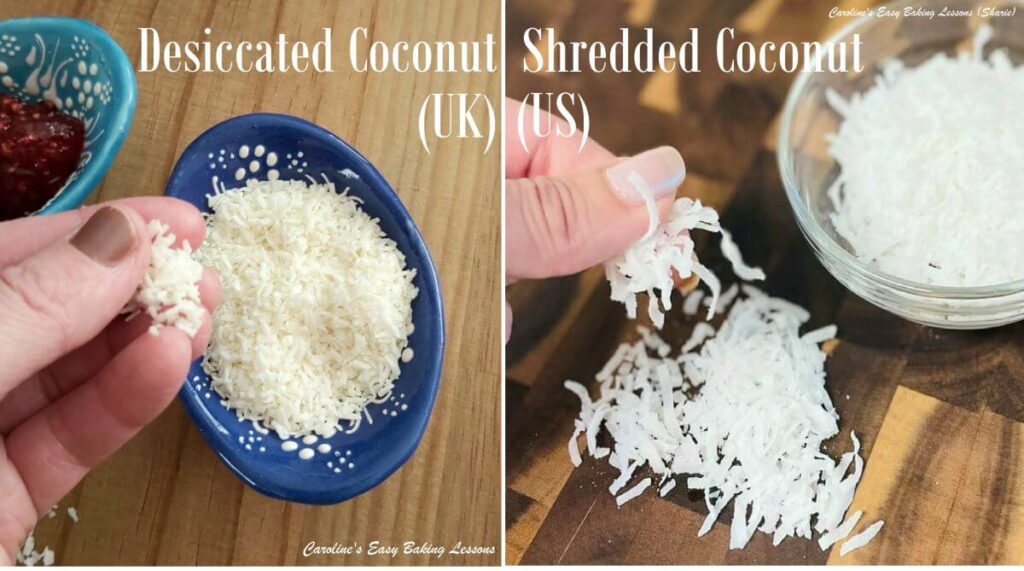
I used some desiccated coconut in the biscuit dough, as well as on top of some of the Digestives, but this is optional. The US alternative would be unsweetened shredded coconut. Note however, that UK desiccated coconut is smaller in size than shredded US coconut, so you might want to process this a little, at the same time as doing the oats. See my comparison photo.


Recipe Yield
This recipe will make about 18 biscuits, assuming you roll to the correct thickness and use a similar sized cookie cutter as recommended below.
Equipment
A full list of equipment is included in the Recipe Card below, but just a note here on a few things:
Cookie Cutter – for these chocolate digestives recommend using a round, (not flutted), 6-6½ cm, (2⅓ –2 ½”) cookie cutter. Not only to best resemble Digestives, but to also maximize the recipe yield.


Food Processor – while this is not essential, a processor is great for making the oats fine oats, which can be harder to find and more expensive to buy. ‘Cutting In’ of the butter can be done by hand or with a pastry cutter/pastry blender, but if using the processor already, it is fine to use that here too. The processor can also be used to blitz US unsweetened shredded coconut to resemble UK Desiccated coconut.
Step-By-Step Instructions


1. While weighing or measuring out the cold butter, cube to about 1cm, (⅓”) and then pop back in the fridge till ready to use it. You can also now prepare 2 baking trays/sheets with baking/parchment paper, (grease in place if no lip on these, or your cookies can slide off).
2. Measure/weigh out all other ingredients. At this stage you can process the porridge oats (rolled oats). Note that for rolled/porridge oats size, it’s 1⅓ cup of oats, before processing. If you have fine oats, that would be nearer to 2/3 cup. Or just use a scale and make things much easier & more accurate. Process the oats a little till a finer consistency like in Photo 1.


3. Next, mix together in a large bowl, all the ‘dry ingredients’ – flour, processed oats, salt & bicarbonate of soda (baking soda).
4. Grab that cold cubed butter from the fridge and add to the dry ingredients, before giving the butter a toss in the dry ingredients.
5. The next stage is to ‘cut the butter’ into the dry mixture. This basically just means breaking the butter up into smaller pieces, whilst combining with the other ingredients, till of a ‘breadcrumb’ consistency.
You can use 2 butter knives to do this, your fingertips, or the food processor. Normally, I use a Pastry Cutter/Pastry blender, as it saves my fingers that get sore easily. For pastry and scones, I use this inexpensive tool all the time. (See Photo 2).


In the video, I show you how to use the pastry cutter and how to use your fingertips. But since we used the food processor to blitz the oats, I tend to use that for ‘cutting in the butter’. See video and Photo 3 for the consistency you are aiming for.
6. Next, mix in the light brown sugar and coconut if using. Just note that if using US unsweetened shredded coconut, you might want to add in to the processor in step 2 above, as it is larger in size than our UK desiccated coconut. (Or you could lightly chop instead).


7. Finally add in small drops of the milk or water, a 1 tsp or so at a time, and knead into the dough until enough to make the dough come together as one mass. Note you don’t want a sticky dough. Alternatively, you can add in the milk/water gradually and mix in the food processor till it comes away clean from the sides of the processor. **Note that doing this by hand is hard if you suffer with hand pains.
8. Form the biscuit dough into a ball and then a flat disc, followed by wrapping in cling film/plastic wrap, before placing in the fridge for 30 minutes, or 15 minutes in the freezer. See Photo 4.


9. Cut out some baking/parchment paper and roll out the dough to a 3mm (1/8 “) thickness. If the edges are cracking, it means the dough is a little too dry. So simply, as the cracks appear, dip your fingertips in water, and pat onto the cracks. Then squash the dough and ends together. Only add the tiniest of drops, or you will end up having to chill your dough again.
10. Dip a 6-6.5cm (2 ⅓ – 2 ½”) round cutter in a little flour and shake off the excess, before pushing down on the rolled out biscuit dough. Give a slight twist and then lift up the cutter with the biscuit, and transfer to the prepared baking tray/baking sheet. Continue cutting out, re-rolling the scraps, and placing on the trays/sheets. (Note if the dough does not come up with the cutter, just leave to the end and pull away the excess dough, before transferring with a palette knife). See Photo 6.


11. ‘Dock’ the biscuits by piercing the surface with a BBQ skewer, cocktail stick or fork. You can make just 6 holes or the pattern I made in Photo 6, to resemble a McVitie’s Digestive. Chill for 30 minutes, or 15 minutes in the freezer. This recipe makes about 18 biscuits.
12. Take this opportunity to heat up your oven, depending on how long yours takes to come to temperature. Heat to 190°c/170°c Fan oven/375°f/Gas Mark 5.
13. Pop in the centre of the oven and bake for 12-18 minutes, till ever so slightly coloured, but will be set and the underside a little bit more of a golden shade. Check them after 10 minutes to be safe. See Photo 5.
14. Leave on the tray/sheet for 2–3 minutes, transfer to the cooling rack, paper and all & cool down completely.
15. If not coating with chocolate now, store the biscuits in a tin or other air-tight container.


Coat The Biscuits
1. Melt the chocolate for coating the biscuits, by first chopping the chocolate into small pieces to speed up the melting process.
2. Next place the chopped chocolate in a microwave-safe bowl and microwave on 30 second bursts, stirring in-between each burst, until melted. This may take several minutes, but don’t be tempted to heat for more than 30 seconds at a time, as this can result in burnt and wasted chocolate. Alternatively, place a heat-safe bowl over a pan of barely simmering water, and heat till melted. Photo 7.


3. Place some baking/parchment paper under a cooling rack for catching drips of chocolate. (Or just use the paper). Have a small spoon, some paper towels/kitchen paper ready and a wooden cocktail stick.
4. Take one of the biscuits and either dip completely into the melted chocolate and give a twist to get chocolate up the sides, or you can spoon it on, spreading to coat. Either way, give the biscuit a little shake to even out the chocolate and coat the sides if you want. Place on the paper or rack to start to set. See Photo 8.
**Note a flatter and not overly thick layer of chocolate will set quicker.


5. Dip about 6-8 of the biscuits, leaving to set, before trying to mark the lines on the first biscuit coated. You can do rough lines but if you want them to be more defined, letting the chocolate set a little helps with this. Use a wooden cocktail stick and draw 3 parallel lines (you can do vertical or horizontal depending on whichever you are most comfortable with). See Photo 9.
6. If the chocolate is not cooperating, leave to set a bit more. **Tip – clean the cocktail stick every set of lines you do.
7. If the lines are good, move on to do the same to the other 5-7 coated biscuits.


8. After this, start to coat the next 6-8 biscuits and repeat the process. Once the first 6-8 have had lines drawn & left to set, you can try the ‘feathering’, by drawing 3 lines perpendicular to the original 3 lines. Pull the cocktail stick from above the horizontal lines, to just below them, one at a time, & this should drag the first line, just enough to create a feather effect. If this does not happen the chocolate needs to set up a bit more.
No specific time can be given, since it is depending on how thick the chocolate layer is & the consistency of the chocolate at the time, which is determined by your particular room temperature.
On doing this on multiple occasions, I also found that you can dip & use a 3-pronged cake fork to spread the chocolate on, whilst also creating the initial 3 lines


9. Leave to dry on some baking/parchment paper till set or you can speed this up by placing in the fridge for a little while. Then work on the lines of the 2nd set of 6 coated biscuits & repeat.
10. The easiest method is to just spoon/dip the biscuit in chocolate, skip the feathering lines and top with coconut.


Serving & Storing
1.Once set, enjoy with some tea, coffee or cold milk!
2. Store leftovers in a tin or airtight container and will last for at least 7 days.
3. Digestive biscuits (without the chocolate), can be frozen if flash-frozen on a lined tray for 2 hours till solid (make sure not touching each other). Remove & wrap individually or in pairs, with cling film/plastic wrap, before placing in a labelled & dated food bag or airtight container, for up to 3 months2. Defrost on the worktop/counter for a few hours, making sure to only serve or chocolate dip when fully defrosted & at room temperature.


DIFFICULTY LEVEL: beginner, easy
More British Biscuits & Cookies
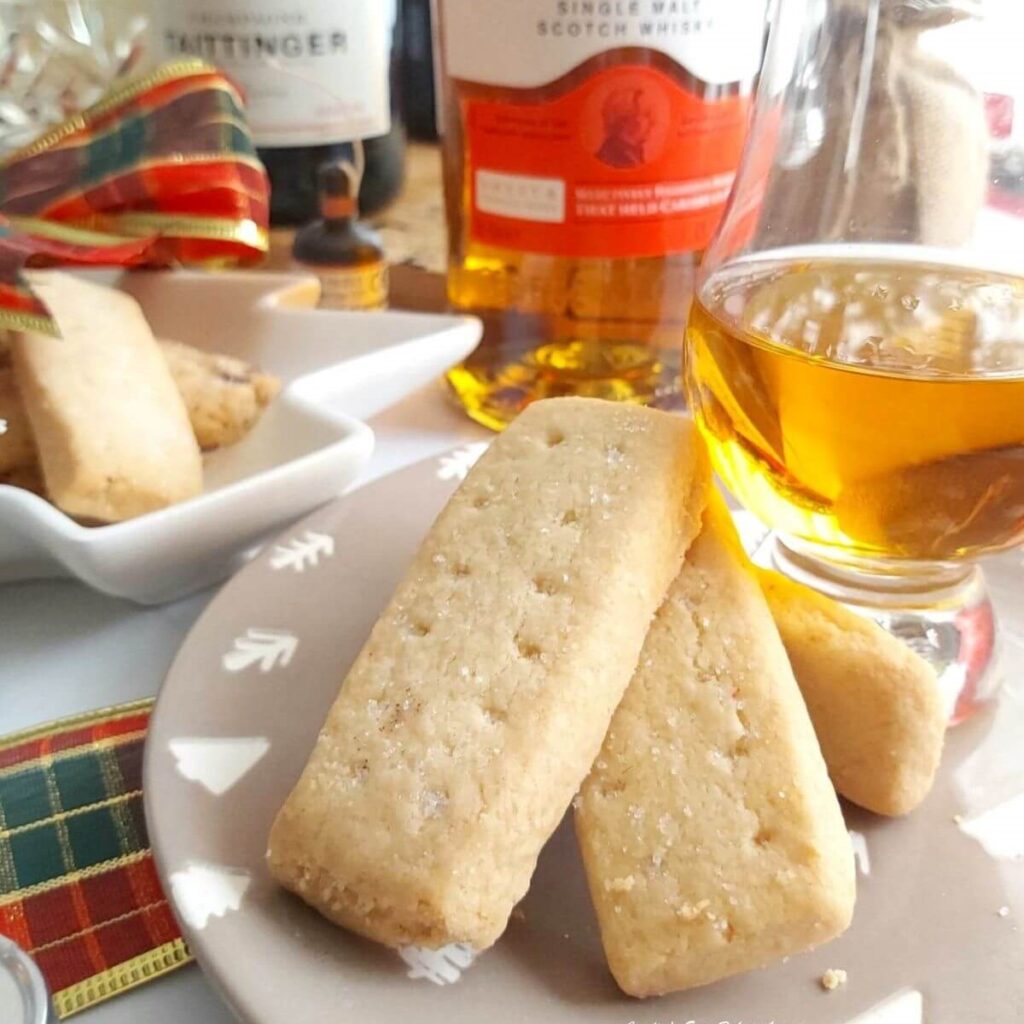
Check out my other biscuits, including popular & traditional Scottish Shortbread, on the biscuits & cookie page. Or via the photos below, by clicking on the picture.
Reader Photos – Diana W’s chocolate digestive biscuits below:


Recipe Card
Chocolate Digestive Biscuits (Popular British Cookie)

Equipment
- Scales or measuring cups
- Measuring Spoons
- Chopping board and knife
- Food Processor (optional, or Pastry blender/cutter, 2 butter knives)
- Large mixing bowl
- Mixing spoon
- Small dish/jug for milk/water
- Baking/parchment paper
- 2 Baking trays/sheets
- Round Cookie Cutter (6-6½ cm. 2⅓ –2 ½”)
- Fork, Wooden cocktail stick or Skewer
- Cooling rack
- Microwave-safe bowl (or bowl & pan on stove/Bain Marie)
- Mixing spoon
- Small spoon (optional)
Ingredients
For The Biscuit Dough:
- 115 grams Unsalted Butter (cold & cubed, 4 oz, 1 stick, or ½ cup)*
- 150 grams Wholemeal Flour (Wholewheat Flour, 5¼ oz, 1⅓ cup)*
- 150 grams Porridge Oats (plain oats, 5¼ oz, 1⅓ cup Rolled Oats/Old Fashioned Oats)*
- ¼ tsp Bicarbonate Of Soda (Baking Soda)
- ¼ tsp Salt
- 38 grams Light Brown Sugar (3 tbsp, 1¼ oz)
- 29 grams Desiccated Coconut (1 oz, ⅓ cup, or process ½ cup unsweetened shredded coconut)*
- 2-3 tbsp Milk (or water, added gradually)
For The Topping:
- 150 grams Milk/Dark Chocolate (5¼ oz semi-sweet and/or bitter chocolate)*
- Coconut (optional)
* denotes see notes
Instructions
Forming The Dough:
- Measure out the cold 115 grams Unsalted Butter, cube about 1cm, (⅓") & place back in the fridge till ready to make.
- Paper line 2 large baking trays/baking sheets with baking/parchment paper (& grease in place if there is no lip).
- Measure out the other ingredients & process 150 grams Porridge Oats (Rolled Oats/Old Fashioned Oats) to a finer consistency. Alternatively use fine oats. **Please see notes below on cup amounts).
- In a large mixing bowl, mix together all the dry ingredients – 150 grams Wholemeal Flour (wholewheat flour), ¼ tsp Bicarbonate Of Soda, (Baking Soda), ¼ tsp Salt, 29 grams Desiccated Coconut (if using) & the processed oats.
- Remove the cold cubed butter from the fridge now, add to the dry ingredients & toss to coat. Using a pastry cutter/pastry blender, food processor, your fingertips or 2 butterknives to 'cut the butter' into the dry mix, till a 'breadcrumb consistency'. (See the video or step-by-step instructions for more details).
- Mix in the 38 grams Light Brown Sugar (& 29 grams Desiccated Coconut if using – but remember to process or chop roughly if using shredded coconut – see notes).
- Gradually add 2-3 tbsp Milk until the dough comes together into a manageable & not sticky mass, kneading to bring together, or using the food processor until it comes away clean from the sides of the processor bowl. Form into a disc, wrap in cling film/plastic wrap & chill for 30 minutes (or freeze for 15 minutes).
Cutting Out The Biscuits:
- Roll out the dough between 2 sheets of baking/parchment paper, till 3mm (⅛") thick. Using a flour dipped round cutter, (6-6½ cm, 2⅓ –2 ½”), cut out the biscuits & transfer to the prepared baking tray/sheet, leaving a little gap in-between. Roll up the scrap dough and cut out more biscuits until all the dough is used.
- 'Dock' the biscuits with a BBQ skewer, cocktail stick or fork, minimum 6 holes or replicate the pattern in the photos. Chill for 30 minutes in the fridge or 15 minutes in the freezer.
- Set the oven to: 190°c/170°c Fan oven/375°f/Gas Mark 5 & to coincide with the end of the chill time.
Baking & Cooling:
- Bake in the centre of the oven for 12-18 minutes, till just slightly colouring & set, & the underside slightly darker.
- Leave on the tray/sheet for 2-3 minutes, transfer via the paper to a cooling rack & leave to cool completely.
Coating The Digestives:
- If not coating in chocolate or doing later, store the cooled biscuits in a tin or air-tight container for up to 3 days before decorating.
- Chop the 150 grams Milk/Dark Chocolate before microwaving in a heat-safe bowl, in 30-second bursts, mixing well in-between each time, until melted. **Do not heat chocolate for any longer than 30 seconds or the chocolate will burn & ruin. Alternatively use a double boiler or Bain Marie with barely simmering water.
- Dip the plain side of the Digestive biscuit in the melted chocolate or spread on with a small spoon, scraping the excess off the edge. Dip 6 biscuits at a time, leaving to set up a bit before drawing parallel lines on the chocolate with a cocktail stick or 3-prong fork. **Tip – clean the cocktail stick every set of lines you do. Leave to set a little before repeating lines, perpendicular to create a 'feathering' effect.
- Leave to set on paper and repeat with the rest of the biscuits. Alternatively you can skip the feathering & sprinkle Coconut on top.
Serving & Storing:
- Serve the Digestive biscuits as they are, with your favourite tea, coffee or cold milk. Plain Digestives are great sandwiched together with raspberry jam.


- Store leftovers in a cake or cookie tin, or other airtight container for at least 7 days. Digestive biscuits can be frozen but best frozen without the chocolate. Flash-freeze on a lined tray for a few hours, then remove, wrap individually before placing inside a labelled and dated freezer bag or airtight container for up to 3 months2. Defrost on the counter at room temperature in a few hours. Ensure fully defrosted & at room temperature before serving or dipping in chocolate.

Video
Notes
 Butter – unsalted butter always recommended in baking & for better results. See notes at beginning on issues with salted butter.
Sugar – light brown sugar used & not much, but unrefined coconut sugar will work too.
Chocolate – a combination of milk (semi-sweet) & dark/plain (bitter) chocolate is recommended for best results. 100g/3.5oz milk to 50g/1.75oz dark chocolate.
Butter – unsalted butter always recommended in baking & for better results. See notes at beginning on issues with salted butter.
Sugar – light brown sugar used & not much, but unrefined coconut sugar will work too.
Chocolate – a combination of milk (semi-sweet) & dark/plain (bitter) chocolate is recommended for best results. 100g/3.5oz milk to 50g/1.75oz dark chocolate.

 Coconut – desiccated coconut used, & US equivalent is unsweetened shredded coconut. However, the latter is larger size than desiccated, so either process when processing the oats, or roughly chop. See comparison photo at beginning of the post.
Recipe Yield – makes about 18 decent sized biscuits.
Coconut – desiccated coconut used, & US equivalent is unsweetened shredded coconut. However, the latter is larger size than desiccated, so either process when processing the oats, or roughly chop. See comparison photo at beginning of the post.
Recipe Yield – makes about 18 decent sized biscuits.
 Cookie Cutter – 6-6½ cm (2⅓– 2½“) round cutter.
More Digestive Biscuit information (including the reason for the name, & step-by-step instructions & photos, before this Recipe Card).
Check out my other biscuits, including popular & traditional Scottish Shortbread, on the biscuits & cookie page.
Cookie Cutter – 6-6½ cm (2⅓– 2½“) round cutter.
More Digestive Biscuit information (including the reason for the name, & step-by-step instructions & photos, before this Recipe Card).
Check out my other biscuits, including popular & traditional Scottish Shortbread, on the biscuits & cookie page.

Nutritional Information – all nutritional values are approximate and based on making 18 biscuits with all the ingredients listed above. 1 serving is one biscuit with chocolate coating. Make more or less biscuits & these values will change. Plain, no chocolate Digestive Biscuit will be 125 calories. All values calculated via website MyFitnessPal.com


Subscribe For More Recipes
Want more great recipes, tips, baking information and newsletters? Then please consider subscribing by adding your email address below. Be sure to check for a confirmation email & respond back, so you can follow me & receive your free emails. Your personal information will not be shared with a third party.
Join My Facebook Group
Why not also join my – Facebook group Easy Online Baking Lessons, dedicated to this baking lessons website, as well as providing one-on-one support with myself & my team? Be sure to answer all security questions when requesting to join.
Follow me on social media:
Happy Baking & Making
Happy Memories & Tummies!
Caro x

Easy Chocolate Digestive Biscuits (Classic British Cookie)
Sweet Lesson No.6
Search For Something You Fancy!
Caroline’s Easy Baking Lessons
References:
- Benefits of bran & wholegrains via website Healthline/9 benefits of wholegrains ↩︎
- Freezing Digestives information from website FreezeIt.Co.UK-freezingbiscuit ↩︎


So I’m a transplanted Canadian in the US. When Caro posted this recipe my little Canadian heart had to make them!
Oh my gosh the recipe was so easy to follow, and they tasted so much like the ones I would enjoy growing up! Now I make them when I feel nostalgic and don’t want to run to the store and hope I find them! (We have some stores that carry them in their international department)
I have made these before. And they were so good. Just about the same as store bought. (I miss having them regularly like I did when I lived in Canada. ) the recipe is easy to follow and pictures are fabulous!