Chocolate Truffles With Protein

Try these Protein Power-Ball Chocolate Truffles. An easy no-bake chocolate truffle, using home made chocolate ganache. A great protein snack with chocolate, cream, & nuts.
Chocolate Truffles With Protein
A Great No-bake Treat


*** Click link to jump to section
*Posted 26/01/21, updated photos 12/02/24


What Are Chocolate Truffles?
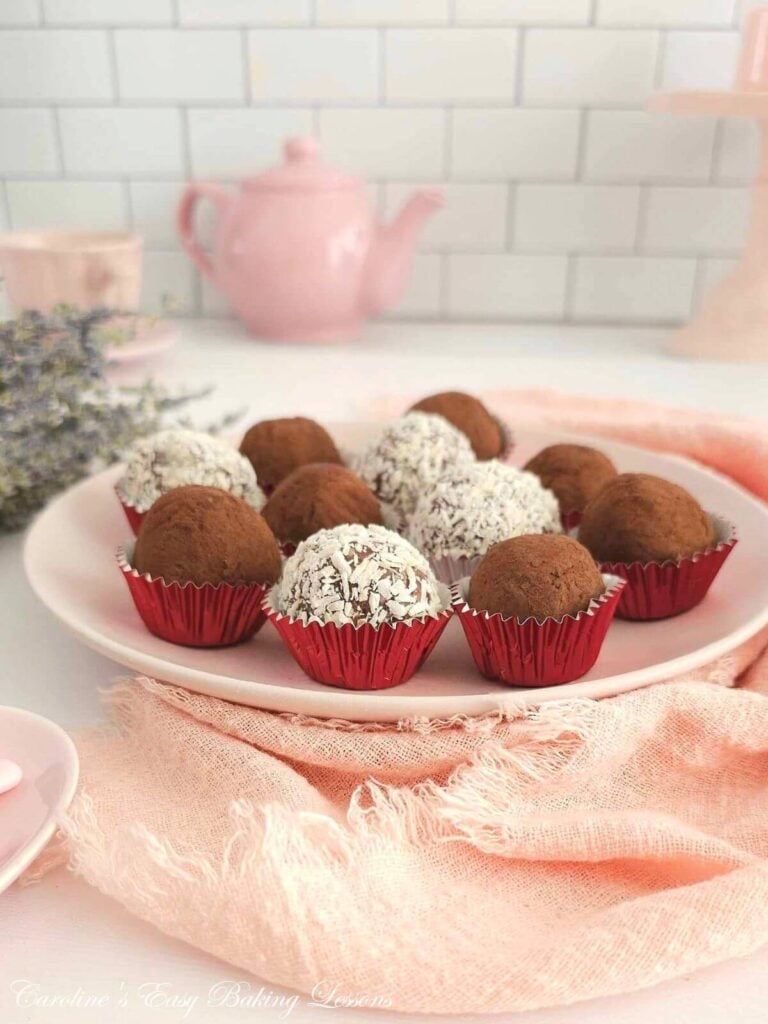
Chocolate truffles are soft balls of rich chocolate, made from chocolate ganache. Some recipes will add other ingredients likes chopped nuts & these ones here have added protein powder.
The ganache is simply made up of chocolate and double (heavy/whipped) cream. When ganache is firm, you can roll it up to make a simple truffle. Which is then coated in cocoa powder or coconut.
Make As A Gift
These would be good for an afternoon energy snack and even as a gift for Valentine’s day, birthdays or even as a food gift at Christmas. Just keep them somewhere cold.
See photos below where you can add to a Valentine’s table or place inside a little gift box, tied with a bow!


Ingredients & Substitutions


These chocolate truffles with protein, are made from the following:
- Chocolate Ganache
- Dried Fruit
- Nuts
- Protein Powder
- Coated In – cocoa, coconut or chocolate
The base ingredient is Chocolate Ganache, which is made from:
- Double (Heavy/Whipping) Cream
- Chocolate


This chocolate ganache is chilled to firm up & the following is added:
- Dried Cranberries
- Dried Dates
- Walnuts
- Pecans
- Protein Powder
Once the chocolate truffles are rolled, they are coated in one of the following:
- Desiccated Coconut (unsweetened shredded coconut)
- Cocoa Powder
- White Chocolate
Some can also be topped with seasonal sprinkles, such as hearts for Valentine’s day, red white & blue sprinkles for 4th July or some Christmas themed sprinkles. The choice is yours. See some example sprinkles below.


You can read a lot more about the chocolate used for making these truffles, in the Chocolate Ganache recipe, but here is a brief overview:
Chocolate
Not need for expensive high cocoa content chocolate if you use a 50/50 combination of dark (bitter) & milk (semi-sweet) chocolate. But make sure it is proper chocolate made from cocoa butter. The ratio of cream to chocolate in this recipe is 1:1.
For white chocolate, the ratio is 3:1, that being 3 parts white chocolate to 1 part cream. And if the environment is hot or humid, a 4:1 ratio might be better.
Dried Fruit & Nuts
You can omit the dried fruits and nuts, but it does taste great with them and you can either chop them or process them lightly for different textures. And nuts or combination of nuts will work well.


Protein Powder
While the protein (whey) powder is optional, it does help bring the truffles together and obviously increase the protein content. You can use any protein powder you have. We happened to have chocolate flavoured whey protein powder by Serious Protein.
Note that the protein powder should be added gradually and enough to make rolling the truffles easier. For the recipe I used 1 scoop that the protein comes with. This was 30g, about 3 tbsp, providing 24g (0.85 oz) protein.
***Please note that full ingredient amounts (in grams, ounce & tested cup measurements), as well as all equipment needed, are listed in the Recipe Card below. Click to skip to the abbreviated recipe, or continue reading for step-by-step directions & process photos.
Jump to RecipeStep-By-Step Instructions
1. Begin by making the chocolate ganache. Break up the chocolate and then chop into smaller pieces (see Photo 1).


2. Heat the cream on the stove or microwave till warm. On the stove top, use a medium heat just until it starts to bubble, but not boiling. For the microwave, use a large microwave-safe bowl, heat in 1-2 minute intervals, mixing in-between because there can be hot spots. This can take about 3-4 minutes depending on the power of your microwave.
3. If you warmed the cream on the stove, transfer to a large mixing bowl. Add the chopped chocolate to the warm cream and leave for 10 minutes but DO NOT STIR!
4. After 10 minutes, you can now stir the chocolate into the cream, until the chocolate is all melted and is evenly combined (or homogenized) with the cream. See Photo 1.


5. Leave the liquid ganache to cool down for about 30 minutes. Then place in the fridge for at least 3 hours (or overnight if you like – just cover with cling film/plastic wrap on the surface of the ganache). You can even just leave out on the counter/worktop if the room temperature is cool.
*COOLING/SETTING TIP*
Transfer the warm ganache to a wide shallow pan, giving the ganache a larger surface area, allowing it to lose heat quicker and hence cool & set quicker. I used a new KitchenAid cookie tray (cookie sheet) and placed in the fridge. It only took 30 minutes for it to cool and firm to a ‘medium firm set‘ ganache. The thick metal tin was quite cold and so worked very well. Your tray & fridge might take nearer to 45 minutes. See Photo 2 for reference, where the ganache is kind of like smooth peanut butter consistency, as opposed to a liquid consistency. Scrape the ganache into a bowl for the next stage.


Whipping The Ganache
This stage is optional, but whipping the ganache gives more volume, and a lighter colour and texture. (Check my Whipped Chocolate Orange Ganache recipe), where you can also add some orange extract for more flavour.
Simply whip the medium firm set ganache until noticeably paler in colour, increased in volume & with a more aerated texture. See Photo 3, top 2 photos.
Place the whipped ganache in the fridge to chill for 30 minutes or till a ‘firm set’ consistency as in Photo 3. You can leave in the fridge overnight at this stage if you wish. Just cover the surface of the ganache with some cling film/plastic wrap & then some more over the bowl.
The Truffle Mixture


1. Begin by placing dates in a food processor (and nuts & cranberries if using) and pulse until of a fine consistency. (See Photo 4 above where I tried out my small processor attachment for the Kenwood stand-mixer). Please note you can process the nuts & dried fruit a little less for a less smooth truffle texture if you like.


2. Add the nut/dried fruit mixture to the ganache in 2 or 3 increments, stirring in-between each addition. This will help get an even distribution of ingredients.
3. Now is the time to add whey protein powder if you are using some. Add about 1 tbsp of protein at a time & work into the truffle mixture. With some gloves on, test a little of the mixture to see if you can roll a ball.
4. Add the remaining 2 tbsp of protein in 2 increments, until you have a firmer mixture that you can roll easier, with just a little sticking to your hands. (Cold hands are best for this). I needed 1 scoop, that was a little over 3 tbsps. See Photo 5.


5. Now to get messy. Prepare a small bowl with the cocoa &/or coconut, which ever you are using. Then get a tablespoon and place baking/parchment paper on top of a tray or plate that will fit in the fridge. Also have a 2nd piece of paper ready.
6.Wearing gloves, scoop some of the truffle mixture into the tbsp, to make a rounded tbsp. Then use a small spoon or your fingers, to remove it, into your hand and roll into a ball. See Photo 6.


7. Place on some paper and then make more truffles from all of the mixture.
8. Roll a truffle ball in cocoa or coconut, (or even sprinkles or coloured sugar crystals), and place on the paper lined tray. See Photo 7. The coconut ones were easy to just roll, but for less mess and waste of the cocoa powder, I used 2 small spoons to turn the truffle and coat it, before picking up with the 2 spoons and shaking the excess off. Alternatively, you can use a small sieve to shake the excess.
**Icing (Powdered) Sugar – please note that the sugar is absorbed by the truffles with time, so best to apply after chilled & firm and before serving.


9. Finally, place the tray of truffles into the fridge for at least 30 minutes to firm and set up nicely after the handling.
10. After chilling, the truffles are ready to serve! (You can place inside little petit four cases (found in the baking section), now or before chilling.
11. Store the chocolate truffles on paper (or in their cases), in the fridge until ready to serve. They will still be a soft inner texture when eating directly from the fridge. You can also store in an air tight container in the fridge for up to 2 weeks1 or outside the fridge for 3 – 4 days2.


DIFFICULTY LEVEL: easy, beginner
Top Tips
Use a cold plate/tray you had in the freezer, to place your prepared truffle onto, while you roll some more truffles. Coldness and cold hands are great for truffle making.
Click to see more Food Gifting & No-bake Recipes


Share The Love
Please see the sharing options or even printing, at the right/bottom of your screen (bottom of your screen for mobiles, and down the right-hand side on computers). You can even pin this to your own Pinterest page. Alternatively, you can download this article, see below. You could also leave some feedback if you like.
Join My Facebook Group
Why not also join my Facebook group Easy Online Baking Lessons , dedicated to this baking lessons website, as well as providing one-on-one support with myself & my team? Be sure to answer all security questions when requesting to join.
Recipe Card
Chocolate Truffles With Protein

Equipment
- Scales or measuring cups
- Medium pan or Microwave-safe Bowl
- Chopping board and large knife
- Medium mixing bowl
- Mixing spoon
- Hand/stand mixer (optional)
- Cling Film (Plastic wrap)
- Food Processor (optional)
- Tbsp
- Gloves
- Small dipping bowls
- Baking/parchment paper
- Small spoons/forks for coating
- Tray/Large plate (that fits in the fridge)
- Tin or airtight container for storing
Ingredients
For The Ganache
- 300 ml Double Cream (10 fl oz, 1¼ cup Heavy/Whipping Cream*)
- 150 grams Milk Chocolate (5¼ oz semi-sweet chocolate*)
- 150 grams Dark Chocolate (5¼ oz plain/bitter chocolate)
For The Filling
- 70 grams Dates (2½ oz, ½ cup, 12-14 pitted dates, not Medjool that are bigger and heavier)
- 70 grams Hazelnuts (2½ oz, ½ cup, optional or other nut*)
- 50 grams Dried Cranberries (¼ cup, 1¾ oz, optional)
- 30 grams Protein (Whey) Powder (1 scoop, about 3 tbsp, optional*)
For Coating/Decorating
- 25 grams Cocoa Powder (0.8 oz, ¼ cup)
- 33 grams Desiccated Coconut (1 oz, ½ cup, Shredded unsweetened coconut roughly chopped)
- 100 grams White Chocolate (3½ oz, optional*)
- Sprinkles (optional)
* denotes see notes.
Instructions
Prepare The Ganache
- Heat 300 ml Double Cream in the microwave till warm (about 3 -4 minutes). Stove top on medium heat just until it starts to bubble, not boiling. Meanwhile break up & chop the chocolate into smaller pieces. Add the 150 grams Milk Chocolate & 150 grams Dark Chocolate to the warm milk & leave for 10 minutes WITHOUT STIRRING. After that, mix till all melted and combined.
- Leave the liquid ganache to cool for 30 minutes. Place in the fridge for at least 3 hours (or overnight with the surface covered in cling film/plastic wrap). Alternatively, transfer the warm ganache to a wide shallow pan, (such as a metal cookie tray/cookie sheet), to cool/set quicker. Place in the fridge for 30-45 minutes until similar to smooth peanut butter consistency & no longer a liquid consistency.
- Scrape the ganache into a bowl and it is now ready to make truffles. You can whip the ganache till noticeably paler in colour, increased in volume & with a more aerated texture (but this is optional).
Make The Truffle Mixture
- Add the 70 grams Dates, 70 grams Hazelnuts & to a food processor & process lightly before adding in the 50 grams Dried Cranberries. Then blitz again to a fine consistency. (You can leave in larger pieces if you like a truffle that is less smooth).
- Add to the nut/fruit mixture to the ganache in 3 increments, mixing well between each addition. Wearing some gloves, try and roll the mixture into a ball. Now gradually add 30 grams Protein (Whey) Powder to the mixture until enough to make rolling easier, with just a little of the mixture sticking to your hands. Place in the fridge for about 10 minutes while you prepare to roll the truffles. Place a large plate in the freezer to chill.
Form The Truffles
- Paper line a tray that will fit in your fridge, add paper to the chilled plate and add some coconut and cocoa to small bowls for dipping. Scoop out 1 tbsp worth of the truffle mixture & use a small spoon or your gloved fingers, to remove the mixture, and gently roll into a ball about 1" (2½cm) in size.
- Place the truffle on the paper lined chilled plate, and proceed to roll more truffles until all the mixture is used up. You should get about 30 truffles from the batch.
Coat The Truffles
- Take one truffle and roll in the cocoa or coconut, using a small spoon to help you. Shake off the excess into the bowl and place the covered truffle on the paper lined tray this time. Continue with the rest of the truffles & then place in the fridge for at least 30 minutes to chill. **If you have petit four cases, you can add the truffles to them now if you like.
- Alternative Decoration – you can chocolate dip the top half of the truffles if you like. (They are too soft to completely cover – if you want to do that, see my Cake truffles recipe). Simply melt broken chocolate pieces on a double boiler, or in the microwave, in 30 second intervals, mixing well in-between. Dip just one end of the truffle in the melted chocolate, twist and lift up, then use a small spoon to either cut the excess drip of chocolate, or use the spoon to swirl the chocolate around the top of the truffles. You can also use a spoon to swirl the chocolate on the top of the truffle instead of dipping in the chocolate. Add your sprinkles as soon as you add the chocolate.


Serving & Storing
- Store the chocolate truffles on paper (or in their cases), in the fridge until ready to serve. They will still be a soft inner texture when eating directly from the fridge. You can also store in an airtight container in the fridge for up to 2 weeks1 or outside the fridge for 3 – 4 days2.
Video
Notes
 Dried Fruits & Nuts – You can omit these, and a combination of nuts. Walnuts & pecans work well. You can chop them or process them lightly for different textures.
Protein Powder – is option & we had chocolate flavoured whey protein powder by Serious Protein. 1 scoop from this brand was 30g, about 3 tbsp, & provided 24g (0.85 oz) protein.
Dried Fruits & Nuts – You can omit these, and a combination of nuts. Walnuts & pecans work well. You can chop them or process them lightly for different textures.
Protein Powder – is option & we had chocolate flavoured whey protein powder by Serious Protein. 1 scoop from this brand was 30g, about 3 tbsp, & provided 24g (0.85 oz) protein.
 Icing/Powdered Sugar – the truffles can be dipped in this sugar, but best if dipped just before serving as the sugar melts into the truffles.
Time To Make – based on chopping chocolate while cream heating & using the quicker cool & set method for the ganache.
Icing/Powdered Sugar – the truffles can be dipped in this sugar, but best if dipped just before serving as the sugar melts into the truffles.
Time To Make – based on chopping chocolate while cream heating & using the quicker cool & set method for the ganache.

 Try my other Tropical Cake Truffles recipe, that doesn’t require any cream cheese or buttercream to bind the truffles. (Photo above). Healthy Almond Truffles, or Tasty Cue’s Chai Truffles, 2 recipes that I reviewed. Or check out my candy page for more sweet treats.
References – 1,2 from website Sally’s Baking Recipes @https://sallysbakingaddiction.com/homemade-chocolate-truffles/
Try my other Tropical Cake Truffles recipe, that doesn’t require any cream cheese or buttercream to bind the truffles. (Photo above). Healthy Almond Truffles, or Tasty Cue’s Chai Truffles, 2 recipes that I reviewed. Or check out my candy page for more sweet treats.
References – 1,2 from website Sally’s Baking Recipes @https://sallysbakingaddiction.com/homemade-chocolate-truffles/

Nutritional Information –I am not a qualified nutritionist, and all values, are approximate, via website ‘MyFitnessPal.com’. For convenience, 1 serving is calculated as 1 truffle with a recipe yield of about 30 truffles. Big or smaller truffles and these values will change.

Subscribe For More Recipes
Want more great recipes, tips, baking information and newsletters? Then please consider subscribing by adding your email address below. Be sure to check for a confirmation email & respond back, so you can follow me & receive your free emails. Your personal information will not be shared with a third party.
Follow me on social media:
Thanks for reading
Happy Learning & Baking!
Caro xx


Leave some feedback if you like 🙂
Chocolate Truffles With Protein
Search For Something You Fancy!
Caroline’s Easy Baking Lessons
References
- Fridge storage length from website Sally’s Baking recipes @ https://sallysbakingaddiction.com/homemade-chocolate-truffles/ ↩︎
- Storing outside of the fridge, same website as above. ↩︎


These are to die for!!!!
These are so easy to make and so delicious. The step-by-step instructions are excellent. They make a lovely gift too for any occasion. Thank you for sharing.
Thanks Diana, so pleased you love the truffle recipe, means a lot.