Easy Chocolate Cookies – Chunky Or Crispy

Here's my super simple beginner recipe for making double chocolate cookies. These cookies are big. Originally developed as chunky & soft, you can also make thin and crispy. Whichever way you prefer or split the batch. You can add whatever chocolate chips or nuts you would like. They are also easily customised to any season or theme, by adding some simple quick decoration.
Easy Chocolate Cookies
Chunky Or Crispy – You Decide
Original post 11 October 2019, updated February 2022.


WHY USE THIS RECIPE?


Quick & Easy recipe

Thorough instructions & photos

Thoroughly tested before publishing

Less additives & Preservatives

Home-made Is Always Better

Easily customized

Can be used with Gluten Free flour


Notes On The Ingredients
This recipe uses butter, sugar, eggs, vanilla extract, cocoa, flour, cornflour (Corn Starch) & bicarbonate of soda (baking soda). You can choose to add chocolate chips, any type or speciality ones and even peanut M&Ms.
Vanilla Extract
I use just a little Vanilla Extract to bring out the taste of the chocolate. I make my own vanilla as I was fed up trying to get the good brands on offer. Read my article on How To Make Your Own Home-made Vanilla Extract. Alternatively, you can add a level tsp coffee granules as this too brings out the chocolate flavour, just as the touch of salt does.


Choice Of Chocolate
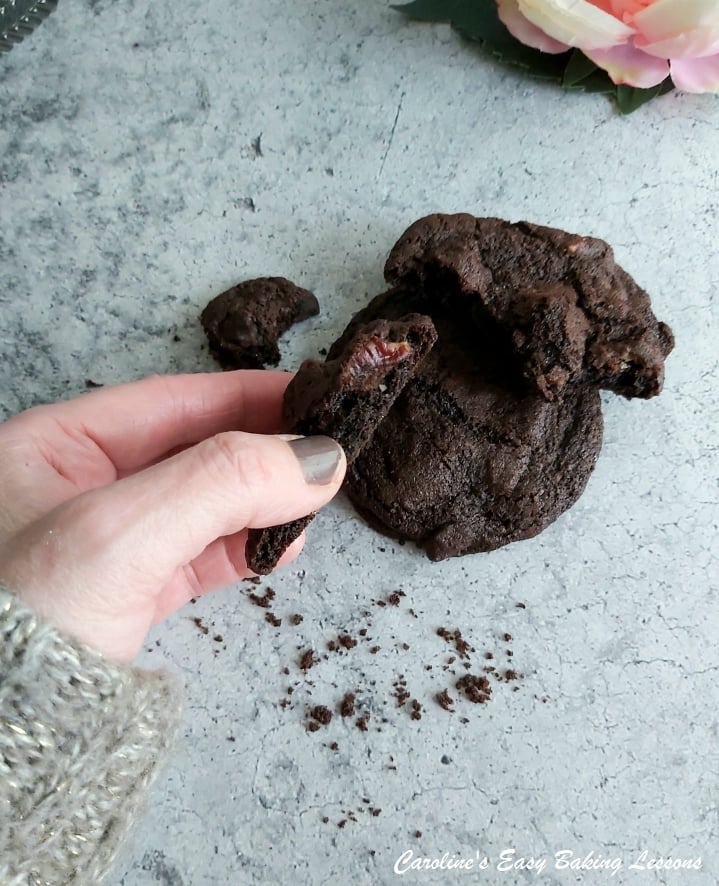
You can use any chocolate chips you like. Bitter/dark, semi-sweet/milk, or even white chocolate chips. I in some of the pics use Nestle Espresso bitter chocolate chips that were gifted to me, all the way from America, by my friend Terri! I used in half of the batter and also added nuts to that batch. To the other I added milk/semi-sweet chocolate chips. You can even use bars of chocolate and chop into pieces, a little larger than the chip size.
Can I use Gluten free Flour?
Yes you can make these cookies using Gluten Free Plain/All Purpose flour, adding 3/4 tsp of Xanthan Gum (make the 3rd 1/4 tsp a rounded one). Also be sure to use gluten free cornflour (Corn Starch).


Add Nuts If You Like
I love hazelnuts and broken up pecans in cookies. The pecans were nice for a soften cookie. See recipe for how much I used.
Decorated For Seasons Or Occasions
These cookies can be decorated for any season or occasion with the help of some glaze and some sprinkles. Choose some red or pink sprinkles for a nice Valentine’s Day cookie. Add Easter sprinkles and colours for a Spring theme. And go to town with Christmas sprinkles for the holidays. Note that the flatter, crispy cookies are easier to decorate than the chunky soft ones.
(See more Easter & Spring recipes)


Go to more Valentine’s Recipes


Make Chunky & Soft Or Thin & Crispy
Originally developed as big chunky & soft cookies, made with Peanut M&Ms, it’s super easy to adjust and make thin & crispy ones.
The soft chunky cookies, are best made with some nuts or bigger pieces of chocolate. They won’t get baked too long either.


The thin crispy cookies, work best with the small chocolate chips and don’t need chilling and should be baked just a few minutes longer.


The Easy Process At A Glance
These cookies are so simple to make. Just ‘creaming’ the softened butter and sugars together till spreadable (no need for extra smooth like for cakes). Then add in the eggs & vanilla till combined, before adding in the dry ingredients of flour, salt, baking soda/bicarbonate of soda, cornflour (cornstarch) & flour. Only mix until all the dry ingredients are incorporated and it is a heavy thick dough so even doing some of the mixing by hand is advised.


Then it’s a case of simply scooping the cookie dough onto prepared baking sheets/trays and chilling while the oven heats. Pop in the oven to bake and removed when set at the edges but still soft in the centre. Note you will not be able to move the cookies when gently pushed. If you can, they will set up harder and not be as soft. For thin crispy ones you can omit the chilling and bake a few minutes longer.
Leave on the baking tray/sheet for only a few minutes, before allowing to cool and then it’s eating time!
And decorate once cooled if you wish!


How To Store Soft Cookies
For soft cookies, I find baking not too much, getting of the tray as soon as you can and storing as soon as cooled down, as the key elements to soft cookies. By if you place in food bags, they will go hard. So I prefer to store all my baked goods (if going to be around for more than a day), in cake tins.
How Long Will They Last
Nothing ever lasts long in my house and often have to hide things if I want some! But if stored as advised above these cookies would be fine for a week or longer. They have enough sugar to keep them preserved for long enough to be consumed.


Make A Half Batch
You can easily make a half batch if you don’t think you will finish quick enough. In my old video I made a batch of 12 -13 cookies.
Join My Facebook Group
Why not also join my Facebook group Easy Online Baking Lessons – Easy Online Baking Lessons, dedicated to this baking lessons website, as well as providing one-on-one support with myself & my team? Be sure to answer all security questions when requesting to join. Click to join the Facebook group.

SIGN UP FOR MY NEWSLETTER – I would love it so much if you could sign up for my newsletter. I will send out monthly emails, showing the latest recipes and articles, and latest info. Being a site without ads, building a following, is even more important and will keep it up and running and for free to everyone.
Occasionally there will be the odd seasonal emails, but is really a means of reaching you, if you are not already in one of the Facebook groups I admin. Please note too, that these email addresses are not shared or sold onto another party. Thanks so much Caro xxx


Share The Love
Please see the sharing options or even printing, at the right/bottom of your screen (bottom of your screen for mobiles, and down the right-hand side on computers). You can even pin this to your own Pinterest page. Alternatively, you can save or print this article, via the Recipe Card below. You could also leave some feedback if you like.
Cook Mode On Recipe Card
On the Recipe Card below, be sure to toggle (slide) the button next to ‘Cook Mode’. This stops the screen from going dark if you are following the recipe online while baking. A great tool! Make sure you slide it and it turns blue, then you know it’s activated.
DIFFICULTY LEVEL: easy, beginner, kids


Recipe Card
Easy Chocolate Cookies

Equipment
- Scales or measuring cups
- Measuring Spoons
- Stand or hand-held mixer (or by hand with a mixing bowl)
- Other mixing bowl for dry ingredients
- Baking sheets/trays x 2 or 3
- Baking paper/parchment
- Cooling rack
- Timer or Phone Timer
- Sprinkles of choice (optional)
- Glaze for adding sprinkles (60g/½ cup/2 oz Icing/Powdered Sugar for about 8 cookies, double if decorating 16 or times 3 if you want to decorate all 24)
Ingredients
- 170 grams Butter, unsalted, softened & cubed. (¾ cup, 6 oz)
- 200 grams Light Brown Sugar (1 packed cup, 7 oz)
- 50 grams Granulated Sugar (¼ cup, 1¾ oz)
- 2 Eggs, medium to large (US large to XLarge)
- ½ tsp Vanilla Extract (Click blue link for how to make home-made Vanilla)
- 200 grams Plain Flour (1 ⅔ cups, 7 oz All Purpose Flour)
- 1 tsp Bicarbonate Of Soda (Baking Soda)
- 2 tsp Cornflour (Corn Starch)
- 60 grams Cocoa Powder (½ cup, 2 oz)
- 130 grams Chocolate Chips, Espresso Chocolate Chips, Nuts, M&Ms etc. (Use any you like or combination of, to total 4½ oz. )
Instructions
Prepare The Cookies Dough
- Begin by cubing your butter & letting it soften & come to room temperature. Cubing roughly to about 1cm (less than ½”) cubes as a smaller surface area will soften faster. See Photo 1. If you forget to take the butter out to soften, here’s a hack I reviewed to soften butter in about 10 minutes.


- Once softened enough (see my video of how to check if the butter is soft enough), combine the butter & sugars in a large bowl and mix briefly by hand just to let the butter take on the sugars. Then on low speed (or by hand) mix for about 30 seconds, before increasing the speed to medium & beat until lighter and spreadable (approx. 2- 3 minutes depending on the power of your hand/stand-mixer.) See video.

- Add in the eggs and mix just until incorporated, followed by the Vanilla Extract (Click to learn how to make your own Home Made Vanilla Extract). See Photo 2 above.
- In a separate bowl, add the flour, salt, Bicarbonate Of Soda (Baking Soda) & cocoa powder & mix together to combine. With the mixer on low, slowly sprinkle in the dry ingredients until it forms a relatively thick, stiff dough. (You can use a splash guard or tea-towel on top if needed). Note it will be quite a thick stiff dough, so you can even use your hands or a spatula once nearly all coming together. Be sure to scrape the sides of the bowl and check there is not flour at the bottom of the bowl. See Photo 3 below.

- Finally fold in the chocolate chips and/or nuts that you have chosen. You can divide the cookie dough in half and do 2 different kinds. I did one half with milk/semi-sweet chocolate chips (60g/2 oz), and the other half with chopped pecans (40g/1½ oz) and Nestle Espresso Chocolate Chips (40g/1½ oz). See Photo 4 below.

- Line the baking sheets/trays with baking/parchment paper. If it's a tray with no lips, I hold the paper in place with some baking spray. I have learned the hard way, that without it, the paper & dough or baked cookies can fall off and we don't want that!
- Using a tbsp and small spoon, scoop out cookie dough and place on the prepared baking tray/sheet. I used a tbsp and a small spoon to release onto the paper. You could also use a small scoop. I did about a rounded tbsp worth and got 25 cookies from the batch. Remember to leave plenty space in-between to allow the cookies to spread. (at least 1½" /4cm). See Photo 5 below.

- Once you have filled your first baking tray/sheet, turn the oven on to heat up: 180°c/160°c Fan Oven/350°f/Gas Mark 4. Place the first tray in the fridge, & then carry on scooping more cookies and placing in the fridge while the oven heats.


Bake The Cookies
- Once the oven is ready, bake the first and second tray of cookies you prepared, for about 10 – 12 minutes. Bake until the cookies look let at the edges but still soft in the centre. You won't be able to move them yet. See Photo 6.

- Place on top of a cooling rack for 2 minutes, and place the next tray of cookies waiting to be baked, into the oven.
- After 2 minutes, remove the cookies, paper and all, and allow to cool down on the cooling rack alone. As soon as cooled down, place in a cake tin for them to keep soft. Food bags or plastic tubs, can make cookies hard.
- If wanting to decorate, you can do so same day or day after, just make sure to store correctly.


Decorate The Cookies
- Just make up the glaze by adding water to sieved icing/powdered sugar, very gradually in small drops till smooth and thick but pourable consistency. Place in a piping bag (or small food bag if only using a little amount – snip a tiny hole at the end or add a very small tipped piping nozzle before adding the glaze).
- Have your chosen sprinkles ready and use place the cookies you want to decorate, onto some of the already used baking/parchment paper from baking the cookies.
- Twist the piping bag or and hold above the cookie (at least 2"/5cm) and let a fine drizzle of glaze land on the cookie as you move across, letting it make lines on the cookies. I added about 3 or 4 diagonal lines to the top left corner of the cookies.

- Only pipe one at a time and immediately add your sprinkles on adding the glaze. if the cookies are flat enough, you can turn over and dip in the sprinkles. If using nuts and the cookies are more chunky, you need to either sprinkle by hand or pour on top of where the glaze lines are. I tend to add more than I think I need to get a good coverage. Then lift the cookie onto it's sides, tapping it on the table for the excess to fall off. Then just place on some more paper and let set. Repeat with the rest, glazing and decorating one at a time. See Photo 8 above.
- Another idea is to add small candies, or mini chocolate eggs immediately after baking. I added some small ones that were in a sprinkle set. When the cookies are still soft, you can add some to the top. These tend to be candies that you are unable to add to the batter as they would melt on baking. See Photo 9.


Storage
- Once set, store in a cake tin, with paper in-between the layers and they will last past 3 days. Would be perfect for ice-cream sandwich cookies, if you bake for 2 more minutes.


Video
Notes

 Try making your own Home Made Vanilla Extract). It is so good and works out less expensive in the long run.
Decorate some, none or all of the cookies. It’s up to you. I have listed the amounts glaze needed for 8, 16 and 24 cookies.
Try making your own Home Made Vanilla Extract). It is so good and works out less expensive in the long run.
Decorate some, none or all of the cookies. It’s up to you. I have listed the amounts glaze needed for 8, 16 and 24 cookies.

 Use for any time of the year as a quick sweet fix, or add seasonal sprinkles for a touch of colour and texture.
Refer to video for more information.
Go to Valentine’s Day Recipes
Go to Christmas Recipes
More Cookie & Biscuits
Use for any time of the year as a quick sweet fix, or add seasonal sprinkles for a touch of colour and texture.
Refer to video for more information.
Go to Valentine’s Day Recipes
Go to Christmas Recipes
More Cookie & Biscuits


Follow me on social media:
Thanks for reading
Happy Learning & Baking !
Caro xx


Easy Chocolate Cookies
Caroline’s Easy Baking Lessons


