Chewy Chocolate Orange Soft Cookies

These chewy chocolate orange soft cookies are not only tasty but a super simple recipe that they had to be used as Sweet Lesson 4 as my introduction to biscuits & cookies. Perfect to make with the kids or for beginner bakers.
Chewy Chocolate Orange Soft Cookies
Sweet Lesson 4
*Original posted 19/08/2018, updated photos & video 11/05/2024


**Click link to jump to section**


What Are These Cookies?
These chewy chocolate orange soft cookies are a simple but yummy, chocolate and orange flavoured large cookie. About 3″/7.5cm in diameter, these soft chewy cookies are similar to the fresh cookies you find in the likes of Asda, Tesco etc.
Why Make These Soft Cookies?
- Introduction to cookie/biscuit making
- Easy & quick to make & a beginner’s recipe
- Taste great
- Adjust the flavour/inclusions
- Step-By-Step Instructions & photos
- Video Tutorial


Origin Of The Recipe
These soft & chewy chocolate chip cookies are based on Anna Olson’s recipe. I have re-written the recipe in more detail & in my own wording, as well as making a few small changes.
These cookies make a great starting point as an introduction to making cookies or biscuits. Hence, why I have including these in the lessons section & the first of the cookies/biscuit recipes.
Recipe Yield
This recipe makes 14 large, soft cookies (about 3″, 7.5cm wide). Use the Recipe Card below, to easily increase & double or triple the recipe.
Ingredients & Alternatives


Here are the ingredients for soft chocolate orange chewy cookies:
- Butter, unsalted
- Granulated Sugar
- Light Brown Sugar
- Egg
- Orange Extract
- Flour
- Cornflour (Corn Starch)
- Bicarbonate Of Soda (Baking Soda)
- Chocolate Chips
**Note ingredient amounts listed in the Recipe Card below.
Jump to Recipe

Sugar
Be sure to use the specified combination of light brown sugar and regular white granulated sugar. Using less or no brown sugar, & you run the risk of the cookies not being soft & chewy.
Butter
Unsalted butter should always be used in baking, unless specifically stated to use salted. This not only controls the salt intake, but the percentage of salt in salted butter, varies from brand to brand. Not only this, but salted butter contains more water, which can affect the end result of some bakes.
Make sure to have softened & let the butter come to room temperature before using. Cutting in smaller pieces (about 1cm, ⅓”) is a good tip, as a smaller surface area will make the butter soften faster. Otherwise, you can try this hack for softening butter in about 12 minutes, that I reviewed in a quick video.


Eggs
Like butter, eggs should always be at room temperature when used in baking. So if you store in the fridge, remember to remove same time as your butter.
UK size medium or large, are about the same size as US large to extra large eggs.
Flour
These chocolate orange cookies have been developed using Plain Flour/All Purpose Flour as UK self-raising flour would produce a smaller but thicker more cake-like cookie with no chewy texture.


Cornflour
Also known as Corn Starch, cornflour is very important for these cookies and even my Traditional Scottish Shortbread biscuits. Even with a small amount, cornflour helps produce a very soft delicate texture of biscuit/cookie & should not be omitted.
Orange Extract
To take these cookies to the next level, using a nice orange extract, pairs beautifully with the chocolate chips and makes them smell great too. You can alternatively use vanilla and read my article on Homemade Vanilla Extract For Baking.
Chocolate Chips
Any kind (milk or dark, semi-sweet or bitter) baking chocolate chips can be used. Alternatively, roughly chopped baking chocolate or even Aldi’s basic dark/plain/bitter chocolate works great too.


FAQs & Tips For Soft Cookies
“What is the key to soft cookies?”
“What is the secret to making cookies soft and chewy?”
“What makes a cookie chewy & soft?”
“How do you make cookies soft instead of crunchy?”
Most biscuits and cookies, and in particular for soft biscuit, the key is to slightly under-bake. This ensures they are not only over-baked, but the cookies will also continue to bake, out of the oven, from residual heat from the baking tray/sheet.
Cornflour (Corn Starch) is also very important for soft & chewy cookies. It reduces the protein content slightly, but like brown sugar, it helps make them softer. Brown sugar attracts & absorbs more moisture than white sugar and this in turn produces a moist & chewy cookie, that does not dry out & become crispy quite as easily.


“Why do my homemade cookies go hard?”
As mentioned above, it is best to slightly under-bake biscuits & cookies. Over bake & by the time they are cooling, they are less moist, dry up quicker and become crispy or hard. Storing cookies in plastic food bags can also make your once soft cookies now a hard cookie. So metal cake or cookie tins work best.
Beginner Baker Instructions
As I mentioned, this is Sweet Lesson No.4 for beginner bakers. If you are not a beginner baker, you can jump to the recipe. But for beginners, please read the recipe instructions thoroughly & check out the How The Lessons Structure Works for more guidance & the order to complete the lessons.
Step-By-Step Instructions


1. Begin by cubing the butter in small pieces (about 1cm, ⅓”) for the butter to soften. (This is because a smaller surface area will result in the butter coming to room temperature quicker). **Be sure to have the egg at room temperature too.
2. Using a hand-mixer or stand-mixer, beat the softened cubed butter till paste-like (see Photo 1).
3. Add the brown & white sugar & ‘cream together’. This involves beating till the mixture is combined and a relatively smooth consistency as seen in Photo 1. **Note that since we are making cookies and not cakes, you don’t need to beat quite as long.


4. Next add the egg to the mixture, as well as the orange extract (or Vanilaa extract) and beat just until incorporated.
5. Add the flour & bicarbonate of soda (Baking Soda) and mix just until combined and no more flour remains at the bottom of the bowl.
6. Heat the oven to: 180°c/160°c fan oven/350°f/Gas Mark 4 .
7. Add about ⅓ of the chocolate chips to the cookie batter & ‘fold’ in using a spatula or spoon. (See the video for how this is done).


8. Repeat with the remaining ⅔ of the chocolate chips, adding in the same manner. **Adding in increments results in a more even distribution of the chips.
9. Now paper line your baking trays (baking sheets), being sure to grease the paper in place if there is no lip on the trays/sheets. See in Photo 3 where my new pink tray I used Frylight one cal cooking spray to grease in position. **DO NOT bake without baking/parchment paper or a silicone baking mat as we want the cookies to spread.
10. Scoop rounded tbsp worth of the cookie dough per cookie, and place on the prepared tray, leaving at least 5cm/2″ gap in-between each cookie. (See Photo 3). **DO NOT flatten the cookies, leave as ‘rough balls of dough’.


11. Place the cookie trays in the fridge only until your oven has come to temperature. (**Do not let the cookie dough chill for any longer than 10 minutes).
12. Pop both trays in the centre-most area of the oven and bake for 8-10 minutes. If your oven does not bake evenly, you can swap and turn the trays after 6 minutes, but not before this.
13. The cookies should be removed once golden around the edges, set on top, but still soft in the centre. For soft chewy cookies we want to slightly under-bake them, as they will continue to cook out of the oven, because of residual heat from the baking tray/sheet.


14. Once out the oven, place everything on a cooling rack & leave for just 3-5 minutes, before transferring the cookies, paper & all, onto the cooling rack & removing the tray.
15. Leave to cool for about 5-10 minutes and then you can enjoy your freshly baked cookies.
16. If not having right away, it is best to store the cookies in an airtight container such as a metal cake or cookie tin. This will keep them soft but placing in plastic containers of food bags, runs the risk of the cookies going hard.


17. They can be stored in a tin for up to 10 days. Unbaked cookie dough can be frozen in portions by flash freezing on a tray & then transferring to a labelled food bag, for up to 4 months1. I have not tried freezing the baked cookies so can’t advise with certainty on this one.
DIFFICULTY LEVEL : easy, beginner
Lessons bakers – now that you have read the detailed step-by-step instructions, make the cookies, take notes as you go & proceed to Theory Lesson No.8 – Whipping Cream.


Reader’s Photo
See here a photo of these chocolate orange cookies, made by my friend Diana. Love the presentation! More reader photos can be viewed on the Readers’ Feedback & Photos page.
More Easy Biscuits & Cookies
Try my British classic bakes like Digestive Biscuits, several Scottish Shortbread recipes, or check out the cookies & biscuits page .
Recipe Card
Chewy Chocolate Orange Soft Cookies

Equipment
- Scales or measuring cups
- Measuring Spoons
- Hand/stand mixer (or Large bowl & wooden spoon)
- Spray Oil (Butter or cake release spray for greasing – optional)
- Baking/parchment paper
- 2 Baking tray/sheet
- Tbsp or small scoop
- Cooling rack
- OVEN: 180°c/160°c fan/350°f/Gas Mark 4
Ingredients
- 85 grams Unsalted Butter (cubed & soft, 3 oz, ⅓ cup)
- 100 grams Light Brown Sugar (3½ oz, ½ packed cup)
- 25 grams Granulated Sugar (scant 2 tbsp, ¾ oz, or ⅛ cup)
- 1 Egg (medium – large UK, large – extra large USA)
- 1½ tsp Orange Extract (or homemade Vanilla Extract)
- 125 grams Plain Flour (4½ oz, 1 cup All Purpose Flour)
- ½ tsp Bicarbonate of Soda (Baking Soda)
- 1 tsp Cornflour (Corn Starch)
- 90 grams Chocolate chips (3 oz, ½ cup, or chopped chocolate)
Instructions
Prepare The Cookie Dough
- Cube the 85 grams Unsalted Butter small (about 1cm, ⅓") & allow the butter to soften & come to room temperature quicker. Make sure the egg is at room temperature too.
- Add the softened butter to a mixing bowl & beat before adding in the 100 grams Light Brown Sugar & 25 grams Granulated Sugar & creaming together. Heat the oven to 180°c/160°c fan oven/350°f/Gas Mark 4 .
- Beat in 1 Egg & 1½ tsp Orange Extract (or homemade vanilla extract), mixing until combined. Add the 125 grams Plain Flour, ½ tsp Bicarbonate of Soda (Baking Soda) & 1 tsp Cornflour (Corn Starch), mixing only until everything is incorporated. Fold in ⅓ of the 90 grams Chocolate chips at a time until all evenly distributed.
Prepare Baking Trays/Cookie Sheets
- Paper line the 2 baking trays/cookies sheets, holding in place with Frylight cooking spray, butter or cake release spray. DO NOT bake without paper or a silicone baking mat.
Baking The Cookies
- Add rounded tbsp worth of cookie dough to the prepared baking tray/sheet, leaving at least 5cm/2" in-between each cookie, making sure not to flatten the dough. The cookie dough should yield about 14 large cookies.
- Place in the fridge only until the oven is ready (but not for longer than 10 minutes). Bake in the centre of the oven, for 8-10 minutes until golden brown, edges are set, the middle is soft, slightly under-baked and the cookies have spread to about 3"/7½cm wide. **If your oven bakes uneven, rotate and swap the trays after 6 minutes of baking.
- Leave to cool on the tray, on top of a cooling rack for 3 minutes before transferring with the paper, to the cooling rack only, & leaving for about 5 minutes.
Serving & Storing
- Enjoy freshly baked cookies with a cold glass of milk, or your favourite hot beverage.


- To last longer, these chocolate orange soft cookies should be stored in a metal cake or cookie tin. (Make sure to add to the tin, within 1 hour of baking if not consuming). Where they will remain soft and good for up to 10 days. Plastic containers or food bags are not recommended as they can make the cookies go hard. Unbaked cookie portions can be flash-frozen on a tray before adding to a labelled food bag & frozen for up to 4 months1.

Video
Notes
 Cornflour – (Corn Starch) should not be omitted as helps with the cookie texture.
Orange Extract – pairs beautifully with the chocolate, but Homemade Vanilla Extract works great too.
Chocolate Chips – baking chocolate chips or roughly chopped plain/dark/bitter chocolate works too.
Recipe Yield – makes 14 large cookies.
More detailed information, process photos and tips for soft & chewy cookies, can be found before this Recipe Card.
Cornflour – (Corn Starch) should not be omitted as helps with the cookie texture.
Orange Extract – pairs beautifully with the chocolate, but Homemade Vanilla Extract works great too.
Chocolate Chips – baking chocolate chips or roughly chopped plain/dark/bitter chocolate works too.
Recipe Yield – makes 14 large cookies.
More detailed information, process photos and tips for soft & chewy cookies, can be found before this Recipe Card.

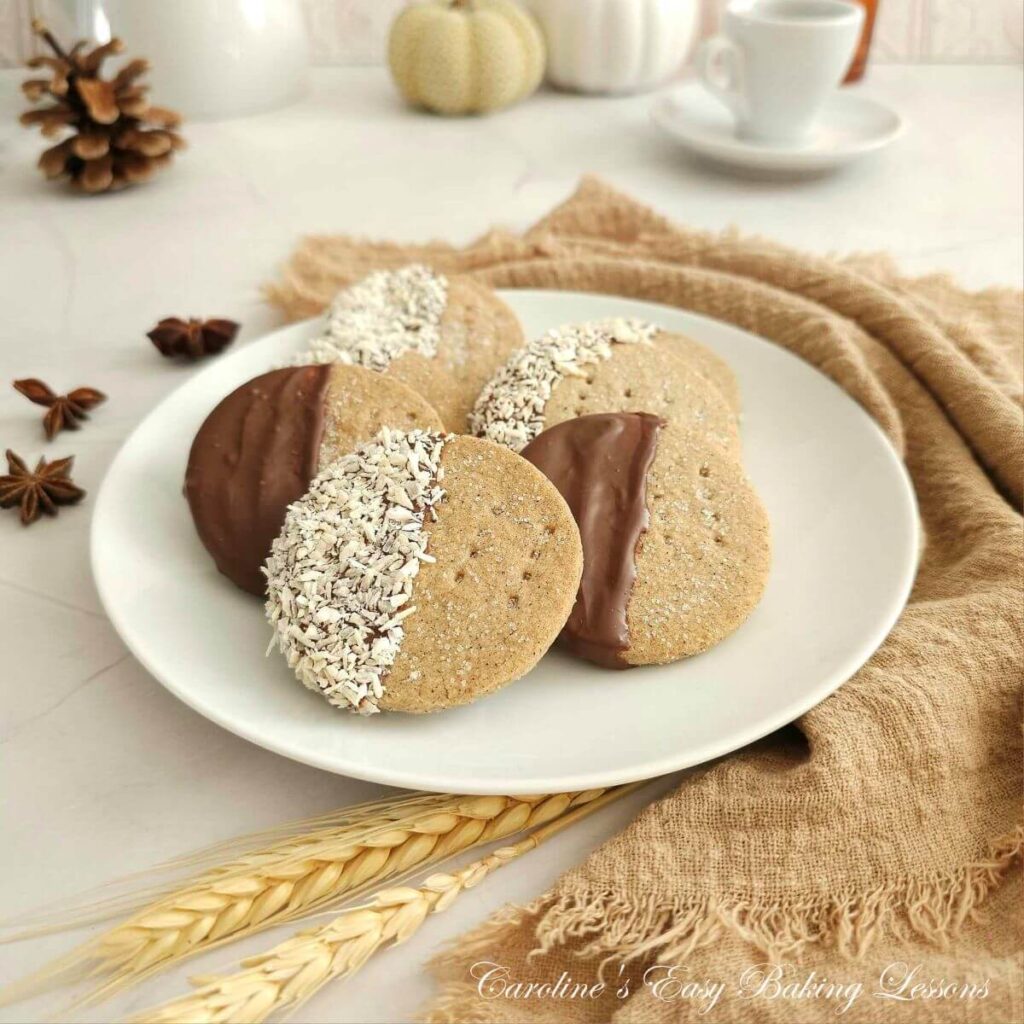 Try my British classic bake Digestive Biscuits, (above) but with a coconut twist. Check out the cookies & biscuits page for more easy recipes or view the Readers’ Feedback & Photos section.
Nutritional Information – all information is approximate & from website MyFitnessPal.com. Calculations are based on using ingredients as specified above, with a yield of 14 cookies, where 1 serving is one cookie of 14. Make bigger or smaller cookies and these values will change.
Subscribe For More Recipes
Want more great recipes, tips, baking information and newsletters? Then please consider subscribing by adding your email address below. Be sure to check for a confirmation email & respond back, so you can follow me & receive your free emails. Your personal information will not be shared with a third party.
Join My Facebook Group
Why not also join my – Facebook group Easy Online Baking Lessons, dedicated to this baking lessons website, as well as providing one-on-one support with myself & my team? Be sure to answer all security questions when requesting to join.
Follow me on social media:
Happy Learning & Baking!
Caro x


Chewy Chocolate Orange Soft Cookies
Sweet Lesson No.4
Search For Something You Fancy!
Caroline’s Easy Baking Lessons
Reference:
- Freezing cookies: more information @Freezit.com ↩︎ ↩︎


thinking of baking a batch to donate this week! will let you know….
Oooh so pleased. Will be no sweat for you and Thor!
Love these soft cookies and the recipe is so easy too, I always recommend them.
Thank you so much for taking the time to rate and comment on the recipe. Appreciate it! SO pleased you love the cookies.
These are amazing. The instructions are excellent with step by step instructions. Thank you Caro
Thanks so much for the lovely feedback Diana!
Thanks you, so glad you like them.