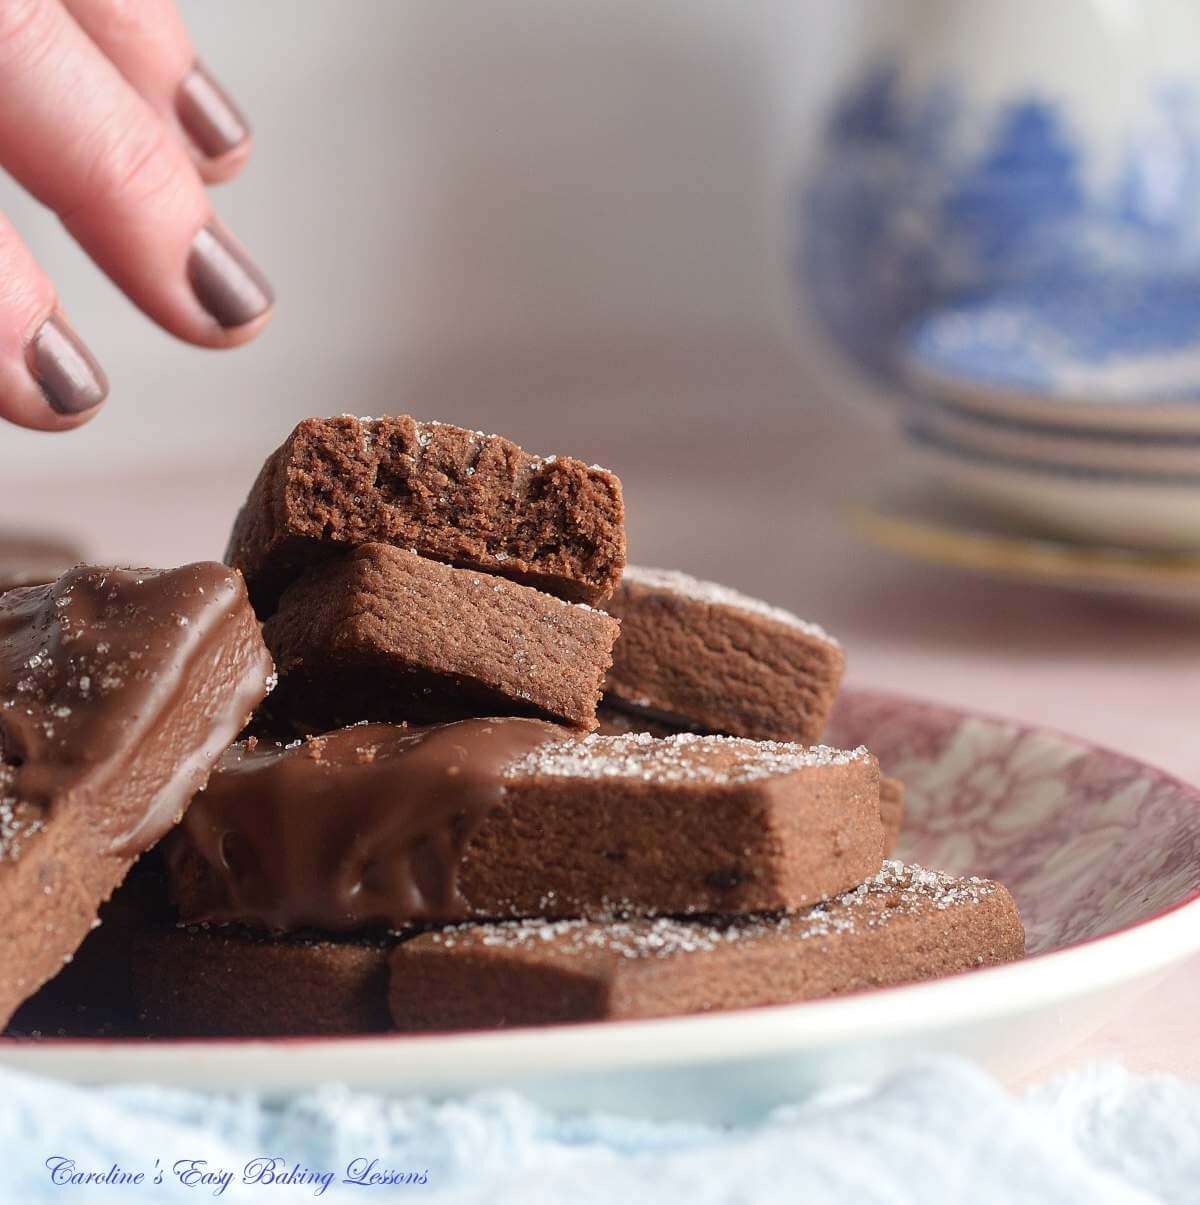
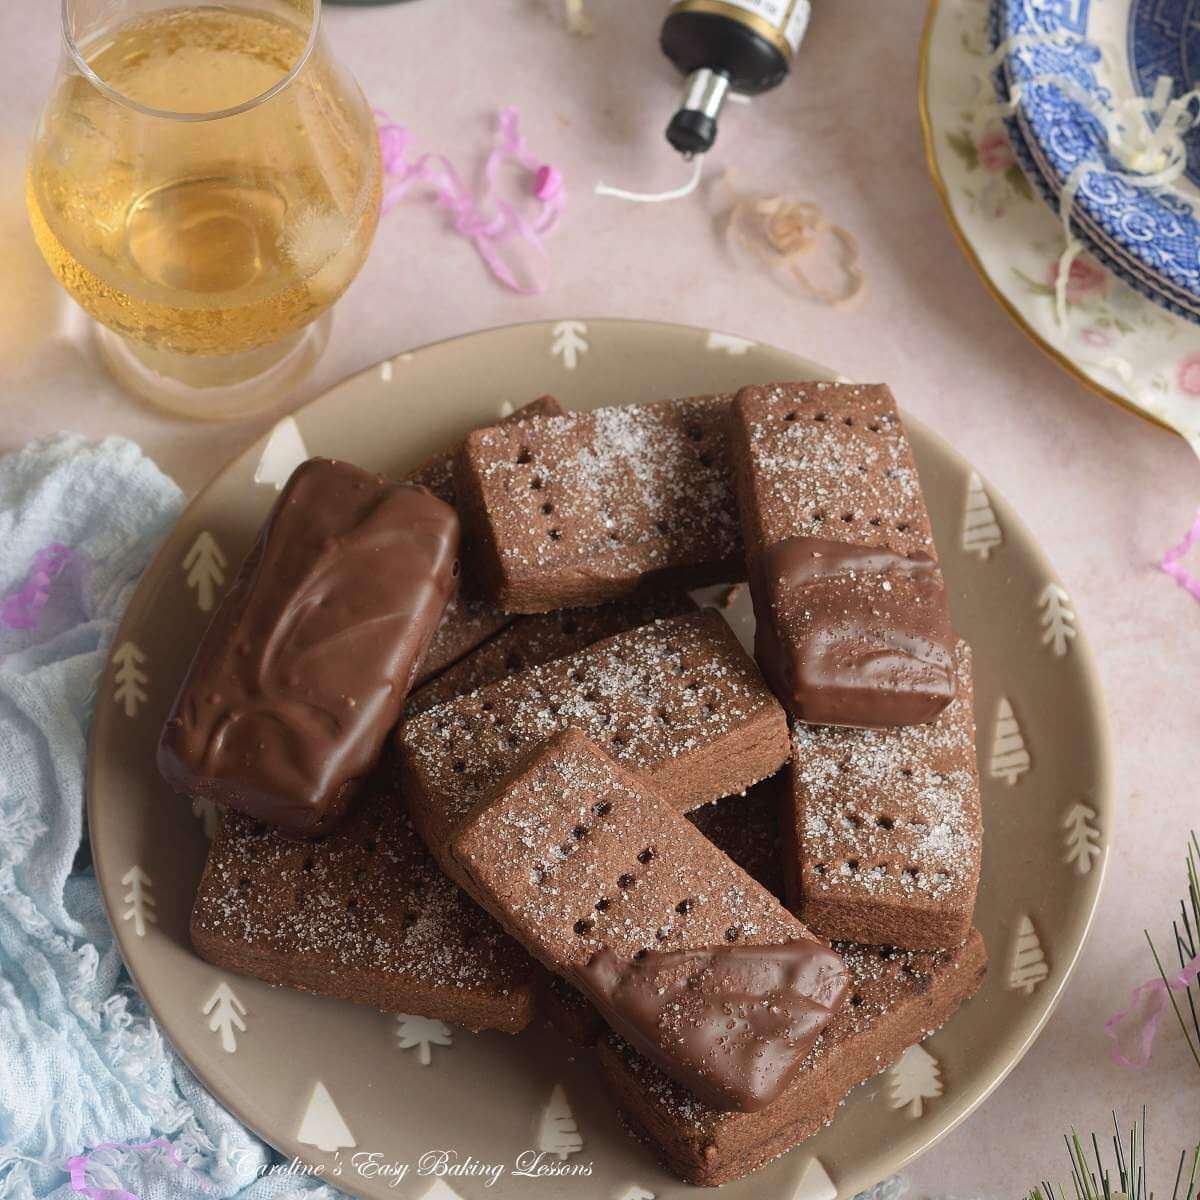
Chocolate Scottish Shortbread

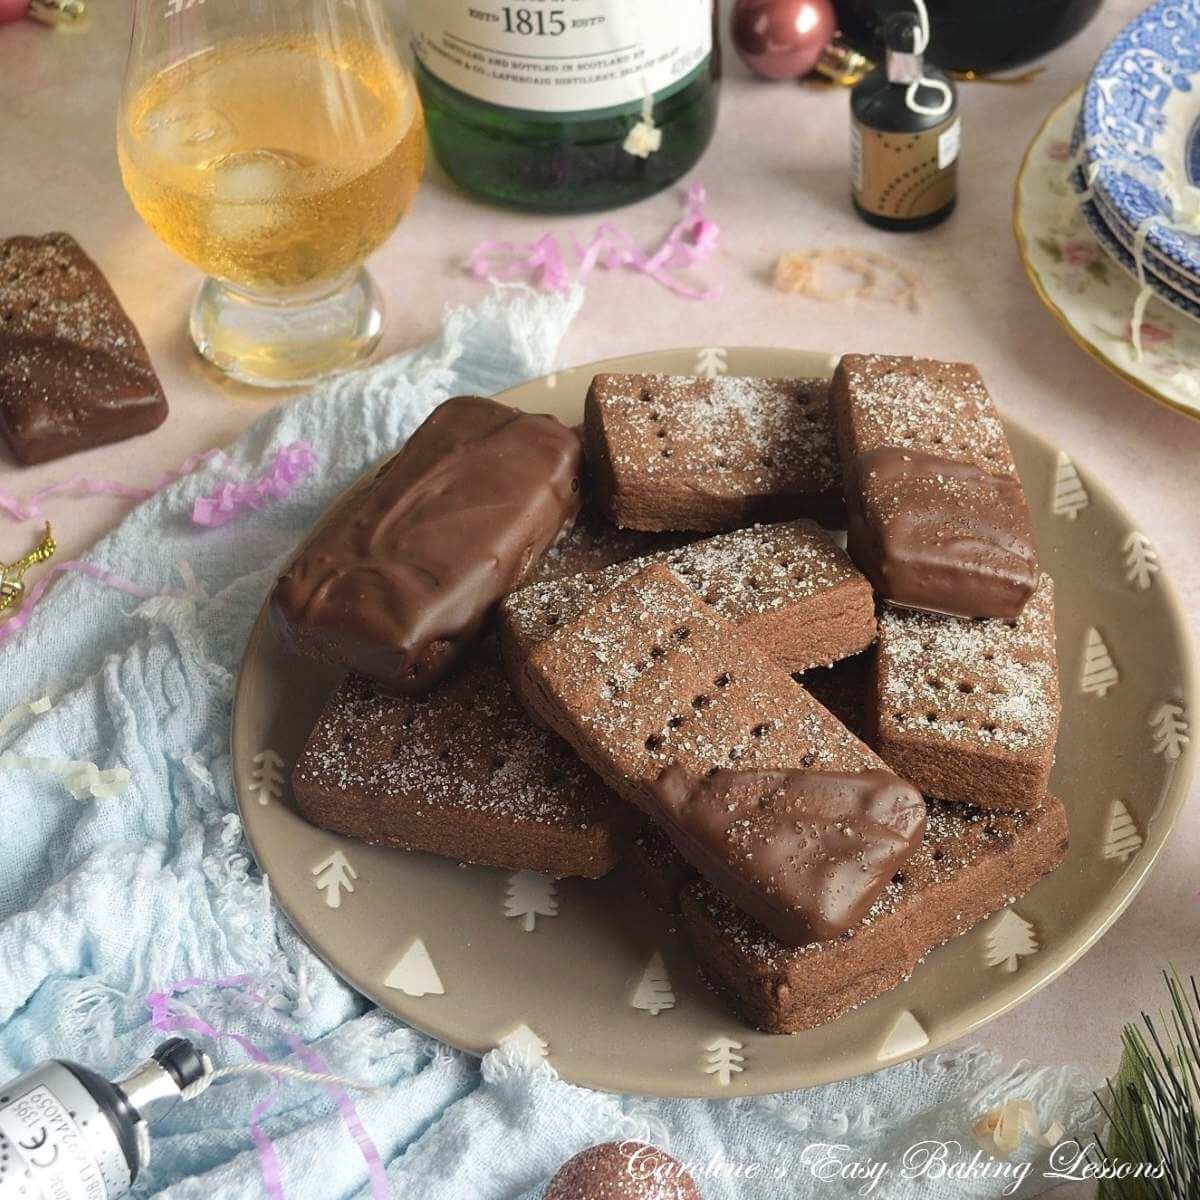
Here is my new Chocolate Scottish Shortbread recipe. Based on my very popular traditional Scottish shortbread recipe, these biscuits are chocolate flavoured & half-coated in chocolate too!
Chocolate Scottish Shortbread
Chocolate Version Of Authentic Scottish Shortbread By A Scot

***click to jump to section

What Is Chocolate Scottish Shortbread?
To start off, Scottish shortbread is different to regular shortbread biscuits/cookies. Scottish shortbread is often thicker and has a ‘melt-in-the-mouth’ texture. This classic texture, comes from the use of Cornflour (Corn Starch) in the dough. The use of Caster Sugar (Extra/Super Fine sugar) also contributes to the texture, as opposed to using icing/powdered sugar like many regular shortbread recipes use.
Using butter is a must too, for an ‘all-butter’ biscuit/cookie.


My chocolate Scottish shortbread is unique and a first. Still with the same base recipe, but with chocolate flavour. A soft chocolate biscuit that is even better, half-dipped in some melted chocolate.
Why Make This Recipe?
- Based on a truly authentic Scottish recipe for original shortbread, like we make here in Scotland
- Super Easy Process
- No experience Required
- Egg-free Recipe
- Great For Sharing
- Can Be Made Ahead Of Time
- Soft Texture & Easy To Eat
- Serve as is, or add some sprinkles for seasonal gifting

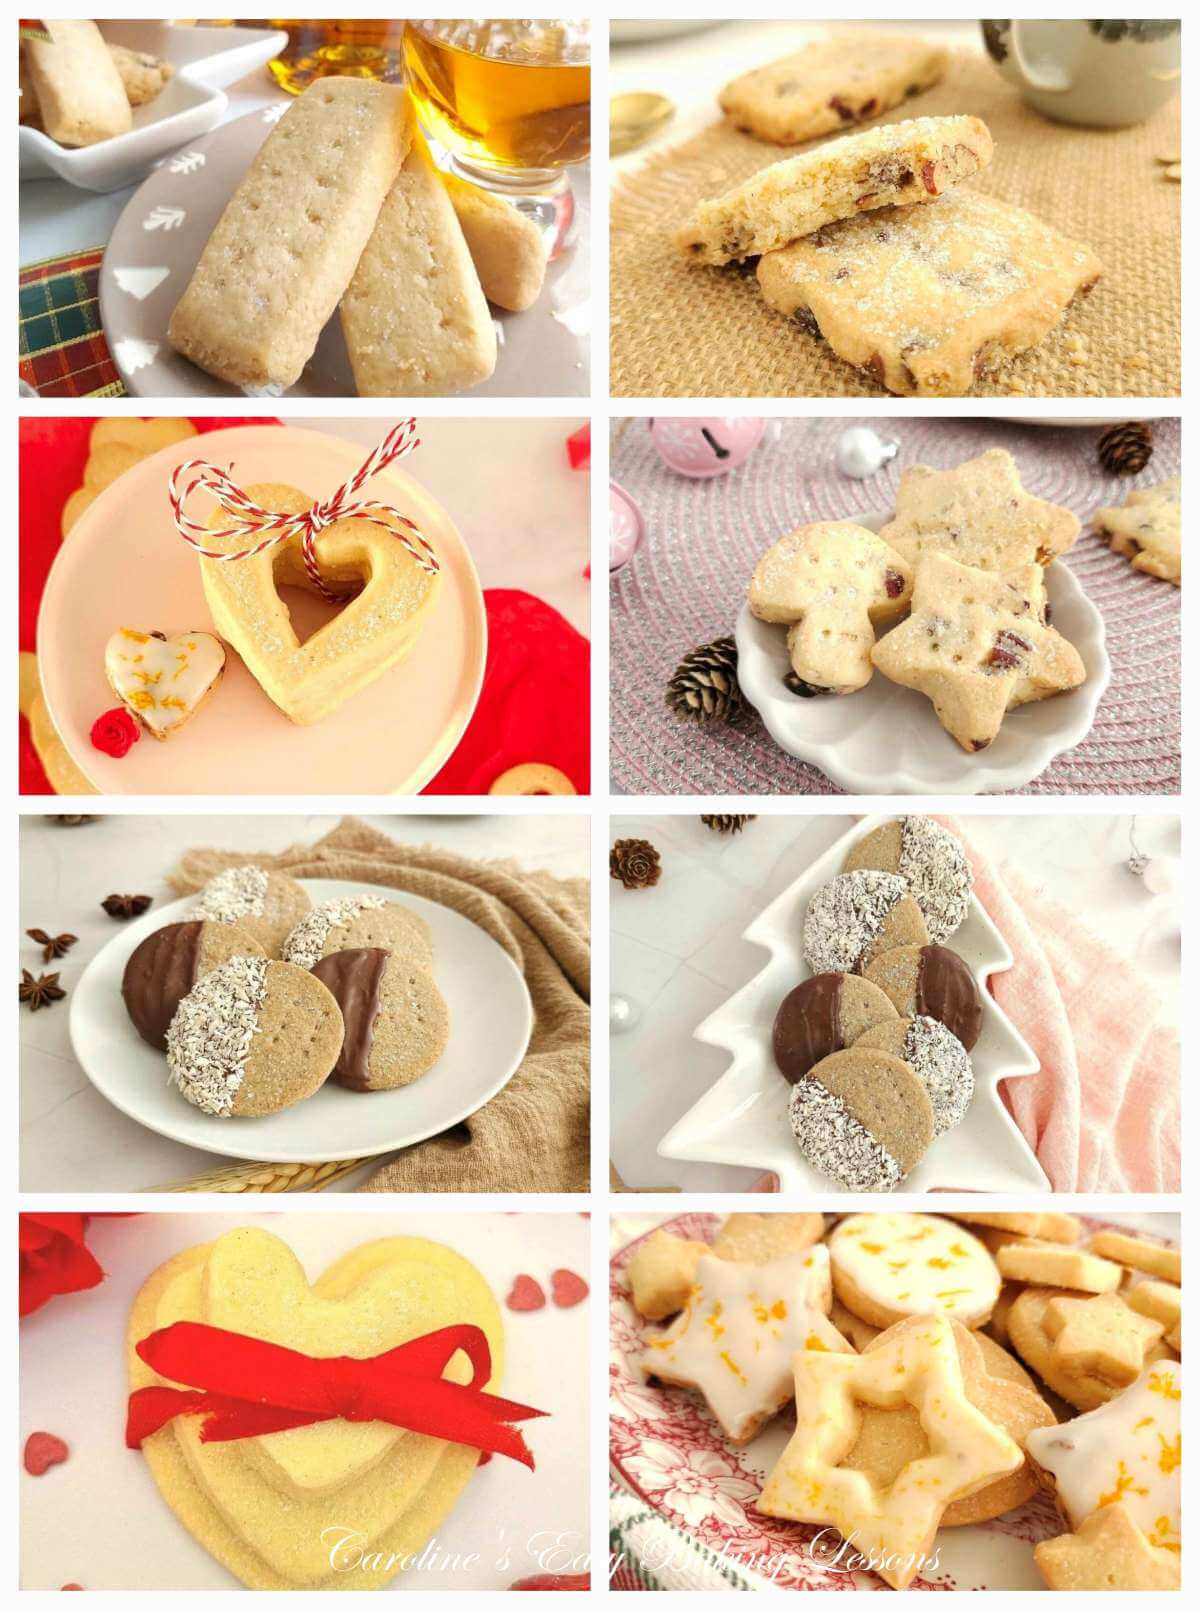
The Classic Shortbread version
Here is a collage of my other Scottish shortbread recipes.
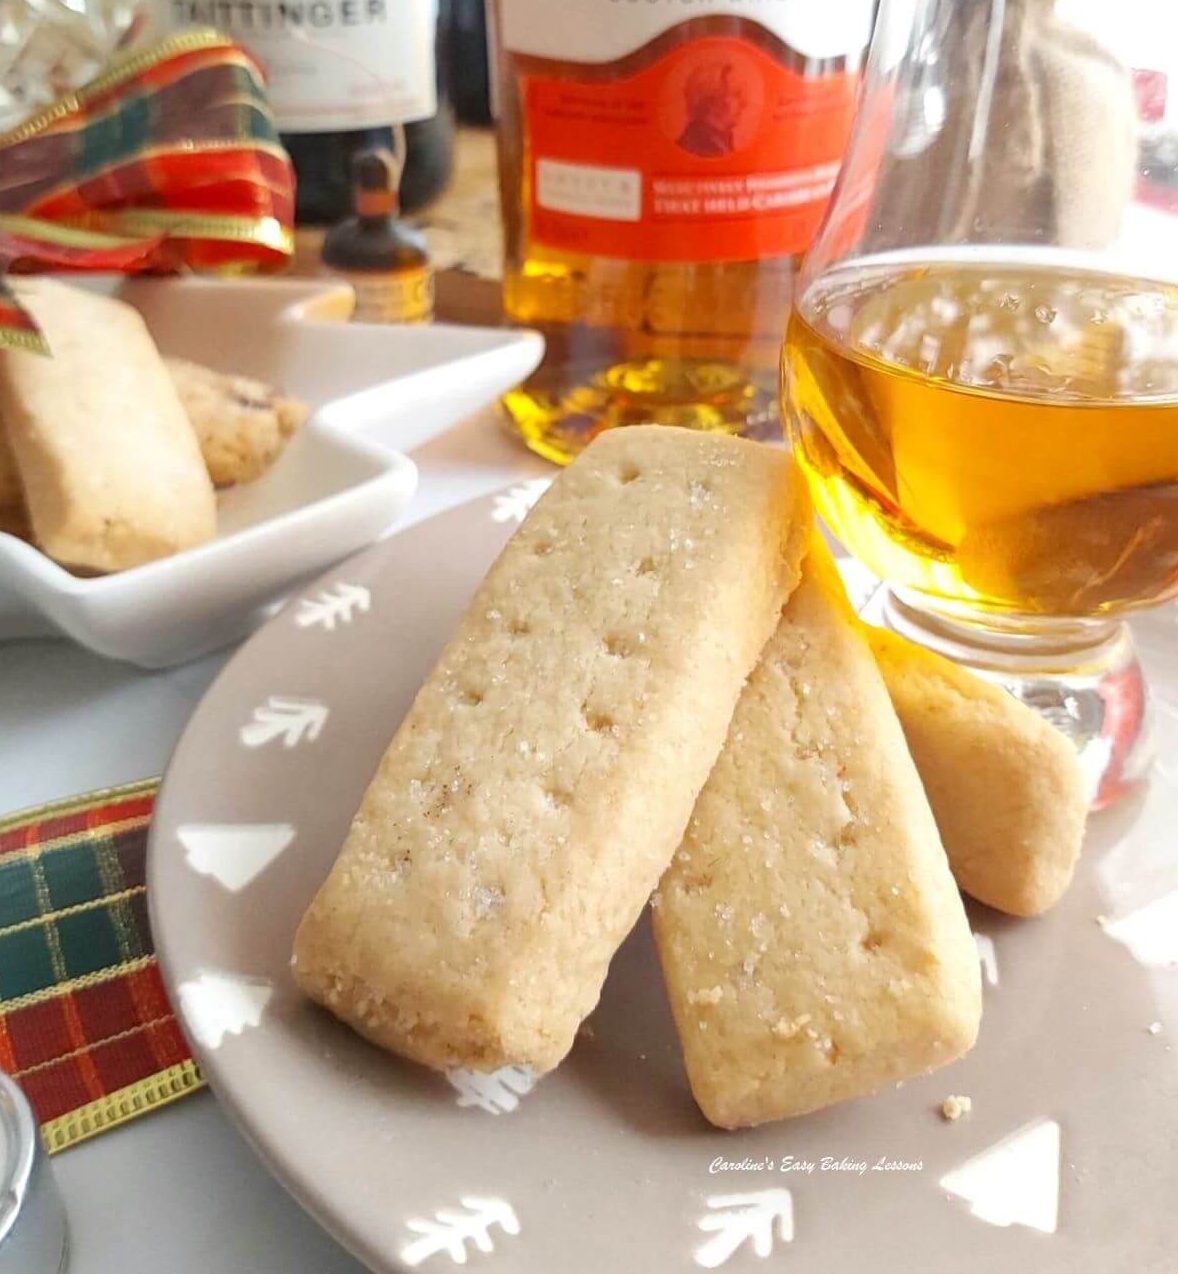
The classic, and authentic Scottish shortbread recipe, baked as fingers or petticoat tails.
The next recipe developed was with cranberry, pecan and orange extract. Go to Cranberry Orange Pecan Scottish Shortbread.
Round biscuits this time, with a hint of anise, and half coated in chocolate and coconut. Go to Chocolate Coconut Scottish Shortbread.
To elevate the shortbread, try cutting in shapes and topping with glaze – go to my orange zest glazed Scottish shortbread recipe.


Ingredient Notes
My new chocolate Scottish shortbread recipe is made up of the following ingredients:
- Unsalted Butter
- Caster Sugar *
- Flour
- Cornflour (Corn Starch)*
- Cocoa powder
For The Topping:
- Granulated Sugar
- Chocolate
- Orange Extract (optional)
*see notes below


Unsalted Butter
Unsalted butter is always recommended for best and consistent results. Especially so, in recent times. Salted butter has a higher water content and this can sometimes affect a bake, (even one you might have been making for years). So save your time and money by using unsalted.
Save even more, by making your own butter if you find double/whipping cream on sale or about to expire. And butter freezes really well.


Flour
Plain Flour (All Purpose Flour) is used for this chocolate version of Scottish shortbread.
Cornflour
British Cornflour is another name for Corn Starch and not to be confused with yellow corn flour from corn.
Caster Sugar


UK Caster Sugar is used in all Scottish shortbread and the US equivalent is Extra/Super Fine Sugar. You can make your own from granulated sugar and blitz it a little. Just don’t go as far as making it a powder. See my image above of our 3 white sugar types in the UK.
This small granule of sugar should not be replaced with standard granulated sugar or icing/powdered sugar. The smaller granule size, when ‘creamed’ with the butter creates friction and helps with the light soft texture of these biscuits.

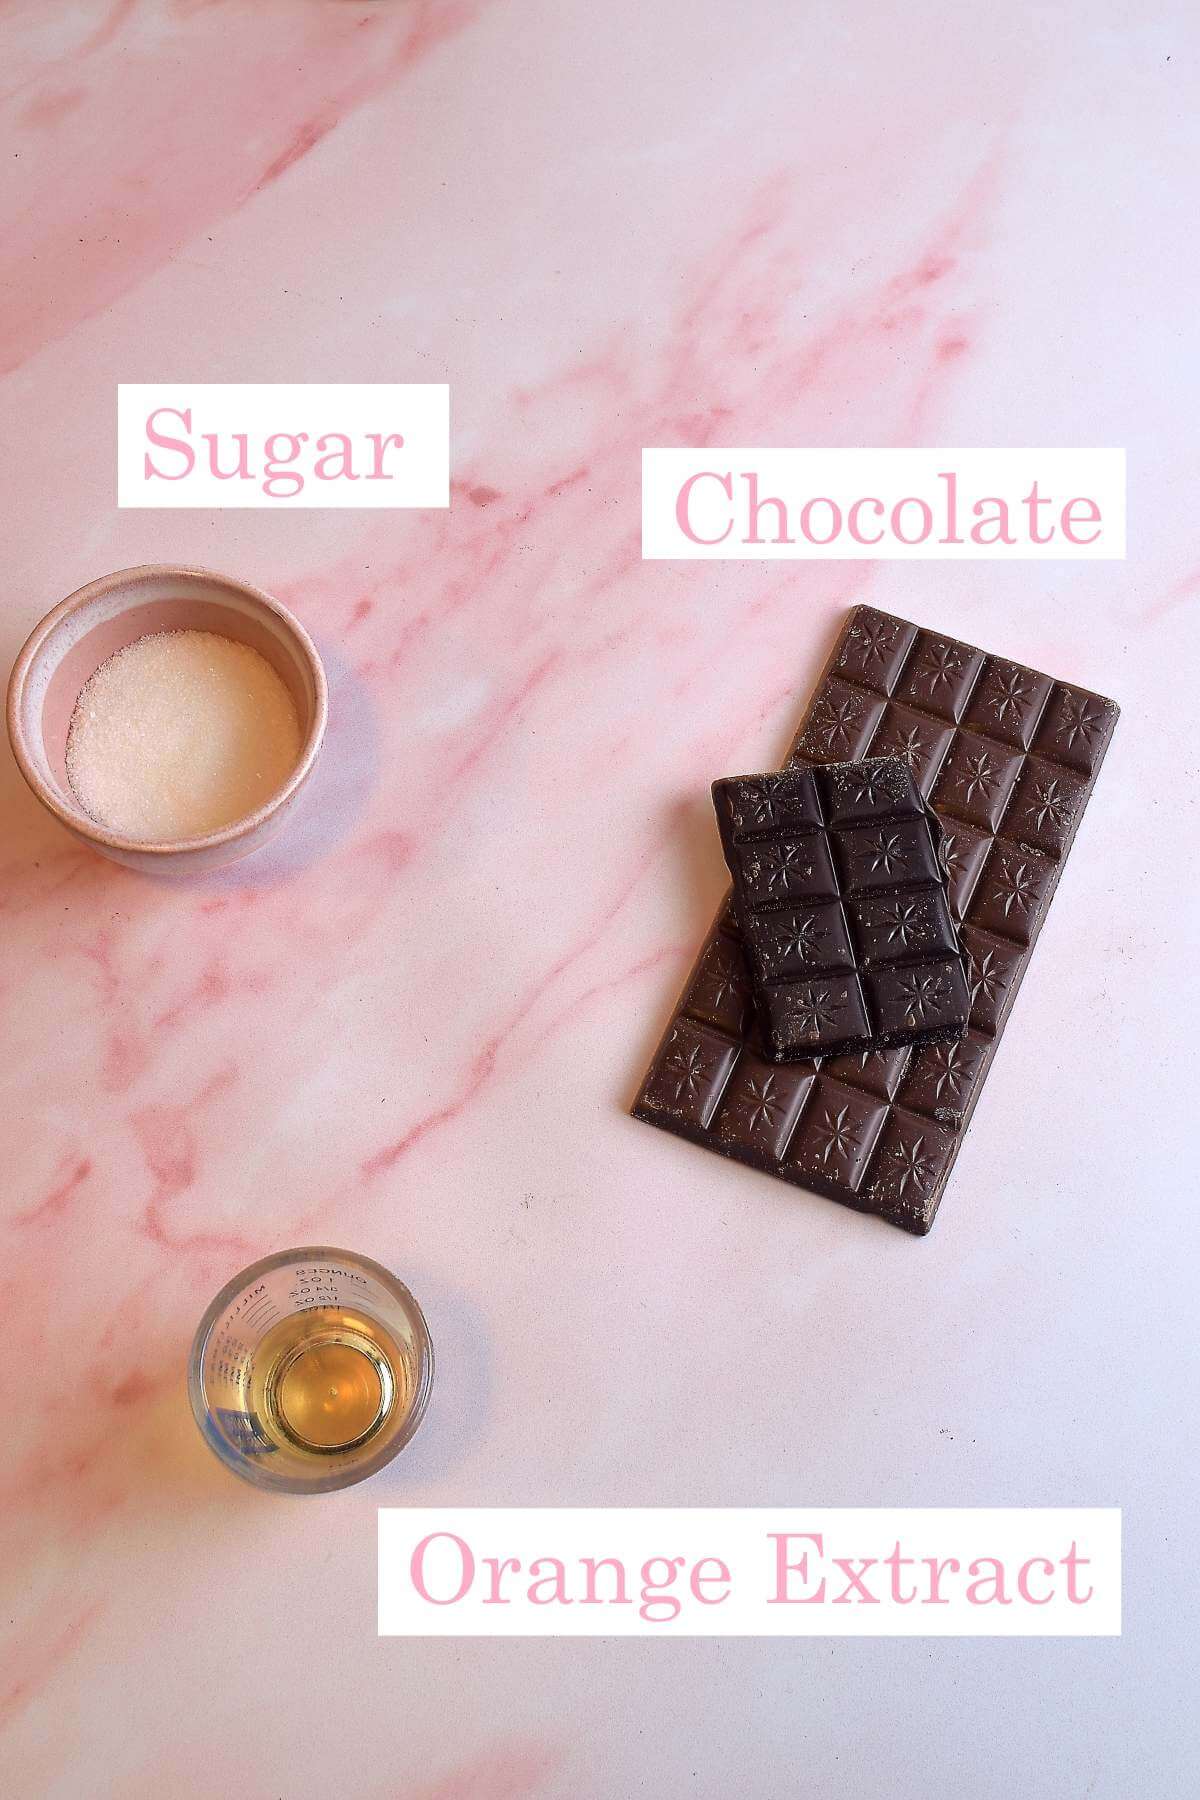
Chocolate
Half-dipping in chocolate is option, but so worth it. Use any kind of chocolate you like – milk & dark (semi-sweet & bitter), mixed together is good especially if using basic chocolate, less expensive than high coco content types.
Sprinkles
For a seasonal twist, you can add some sprinkles right after dipping the Scottish shortbread in chocolate. We felt it nicer without the sprinkles, but coconut instead would be great alternative.
Equipment
A pastry cutter (also known as a pastry blender) is recommended for ‘cutting-in’ the butter & flour. But you can instead use 2 butter knives or your fingertips. And if making a bigger batch, you can using a mixer.

Digital scales are always going to be more accurate than measuring cups, but all my recipes have cup measurements, hand-measured by myself during recipe development.
An electric mixer is good for ‘creaming’ the butter and sugar together but not essential.
Traditionally Scottish shortbread in the ‘finger’ or ‘slab’ shape, are made just with a knife. However, I have found using a rectangular cutter produces more neat biscuits. (3 x 6.5cm, 1.25 x 2.5″). And it is quicker to cut out too. You could alternatively make in the shape of petticoat tails (for this, see the cutting method in my Traditional Scottish Shortbread recipe).

Recipe Yield
This recipe makes 40 finger’/’slab’ shaped biscuits. If you roll the dough thicker or use smaller sized cutter/shapes, this number will change.
Top Tips
- don’t skip the cornflour (corn starch) as it gives the ‘melt-in-the-mouth’ texture.
- don’t skip ‘docking’ (making holes in the cut-out biscuits). It is not for design but to let steam escape when baking.
- don’t skip chilling the shortbread cut-outs for at least 1 hour, to help them keep their shape. *A little spreading & puffing is expected, so try and cut a little smaller than wanted.
- add the sugar to the baked shortbread, right out of the oven so it adheres better.


Step-by-Step Instructions


Prepare The Dough:
1.Start by weighing or measuring out your unsalted butter. Cube it quite small (about 1cm or ⅓” ) & this smaller surface area, means the butter softens faster.
2.Once soft enough, add the butter to a mixing bowl, with the Caster Sugar (Extra/Super Fine Sugar). With an electric mixer, ‘cream’ the two ingredients till combined and relatively smooth. Do this by beating for a minute or so. *Does not need to be beaten as much as when making cakes.
3.Lightly grease or oil a baking tray/baking sheet before adding some baking/parchment paper, if your tray does not have a lip edge. **We don’t want the shortbread falling off!


4. In a separate bowl, combine the flour, cornflour (Corn Starch), cocoa powder & a pinch of salt.
5.Add the dry mixture to the creamed butter and sugar and gently start to mix in by hand.
Traditionally (and with all my recipes), you use a pastry cutter (pastry blender), to mix the wet and dry ingredients. This is also used when making scones or pastry. It really helps with creating the ‘short’ texture of the shortbread, or shortcrust pastry etc.
To use, press the cutter down on the ingredients and do a twisting left and right motion, (making sure to keep contact with the bottom of the bowl). You repeat this to ‘cut in’ the butter. Repeat across the bowl until the butter had taken on all the flours.
(See my cranberry shortbread recipe & video)

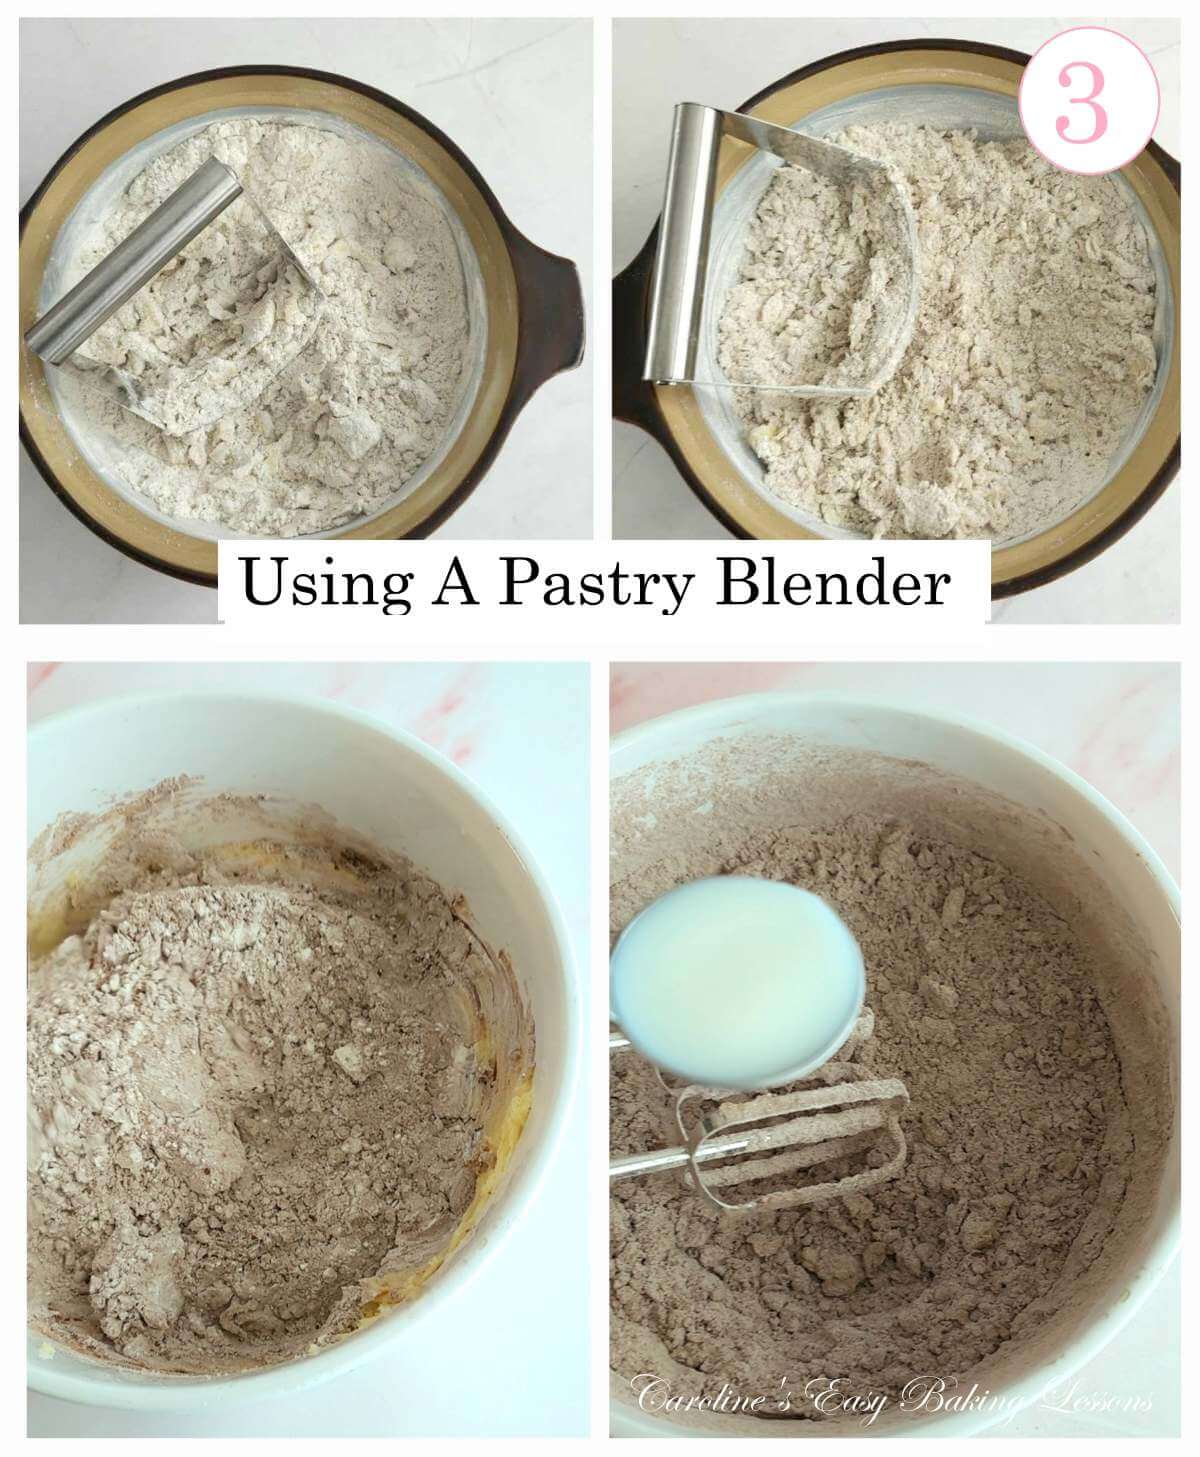
It won’t quite look the same as rough breadcrumbs like in scones because we creamed the butter and sugar. But will be crumbly and will have not come together yet. (See top 2 images in Photo collage 3 from making anise shortbread.).
Avoid using a food processor, but you can use your hands, 2 butter knives, or very quickly run through the mixer you used. Just don’t over mix it. (See Photo 3 for reference – best to under-mix).
6.For this chocolate version, we need to add a little moisture. Add in 1 tsp of milk & give a little mix with a spoon or spatula. You can also add 1 – 1.5 tsp orange extract if you want. Then gradually add in more small drops of milk until the dough is starting to bind.
7. Gently knead the crumbly dough to bring it together.


8.Test if it has been kneaded enough, by pinching off a piece, rolling to a ball and flattening, observing if it stays together. If too dry, you can add some drops of milk or just rub on your hands when kneading the dough.
9. It will transform from a very pale brown colour into a solid dark brown colour at this stage.
10.The dough should be formed into a disc and you can cover in cling film/plastic wrap if you want to make another day or even freeze it (just be sure to double wrap it).

Cutting Out The Shortbread
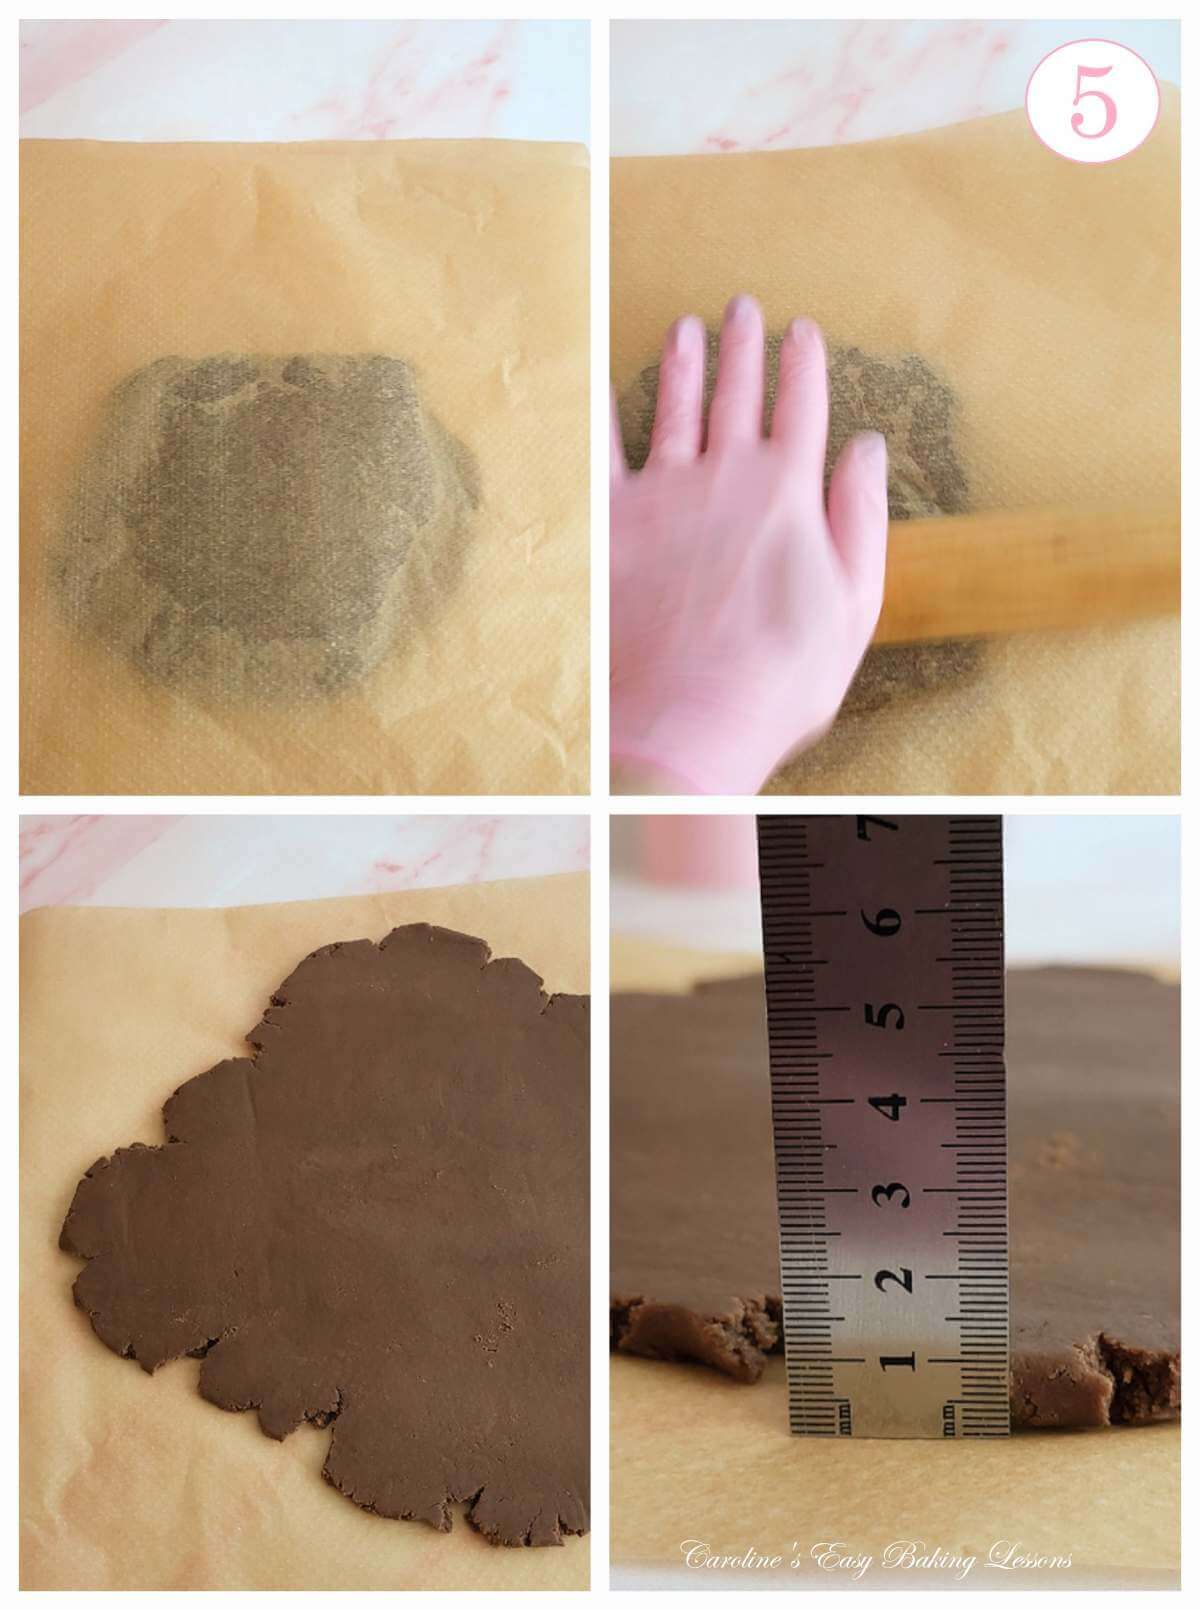
1.Either flour an area to work on or as I prefer, place a large sheet of baking/parchment paper down. Then flour & place the disc of dough on top.
2.Sprinkles some flour on top of dough and place a second sheet on top. (Or use flour dusted on your rolling pin).
3.Roll out the dough till a thickness of at least 1cm (over 1/3″). You want to be thicker than regular biscuit or cookie dough.


4.Flour dip a rectangular cutter and cut out your chocolate Scottish shortbread fingers. (Mine is 3 x 6.5cm). Alternatively, you can roll out into a square or rectangular shape and use a knife to cut out your fingers. Aim for a size of about 2.5-3cm by 6.5-7cm (1-1.2″ x 2.5-2.75″). Just note the larger size will yield less biscuits.
5. Take a fork and ‘dock’ the biscuits making 4 or 5 rows of holes. This is not for decoration but rather to let steam escape when baking.
6.Transfer the cut-out biscuits to the paper-lined baking tray, with no need to leave any space just now. Sprinkle lots of granulated sugar on top & press down.


7.Re-roll scrap dough and cut out more shortbread.
8.Once all the dough is used up, place in the fridge (you can stack on top of each other, with paper in-between).
9.Leave to chill and firm up for at least one hour. Or cover with cling film/plastic wrap and store in the fridge for up to 2 days before baking from chilled.


Baking The Shortbread:
1.Preheat the oven to: 180°c/160°c Fan/350°f/Gas Mark 4, to coincide with the 1 hour chilling time ending.
**Do not skip chilling the dough as it is essential or they will spread out way too much. It also relaxes the gluten in the dough.**
2.Now separate the chilled shortbread cut-outs out onto several baking trays/baking sheets, leave a space of at least 1″/2.5cm in-between each.
3.Place in the oven and bake for 14-20 minutes. Harder to tell when the shortbread is done with it being chocolate. But it is not something to over-bake. The shortbread will have swollen and spread a tiny bit, and is ready when you are able to gently push one and it moves.
*Just don’t try to lift as they will be very delicate.*

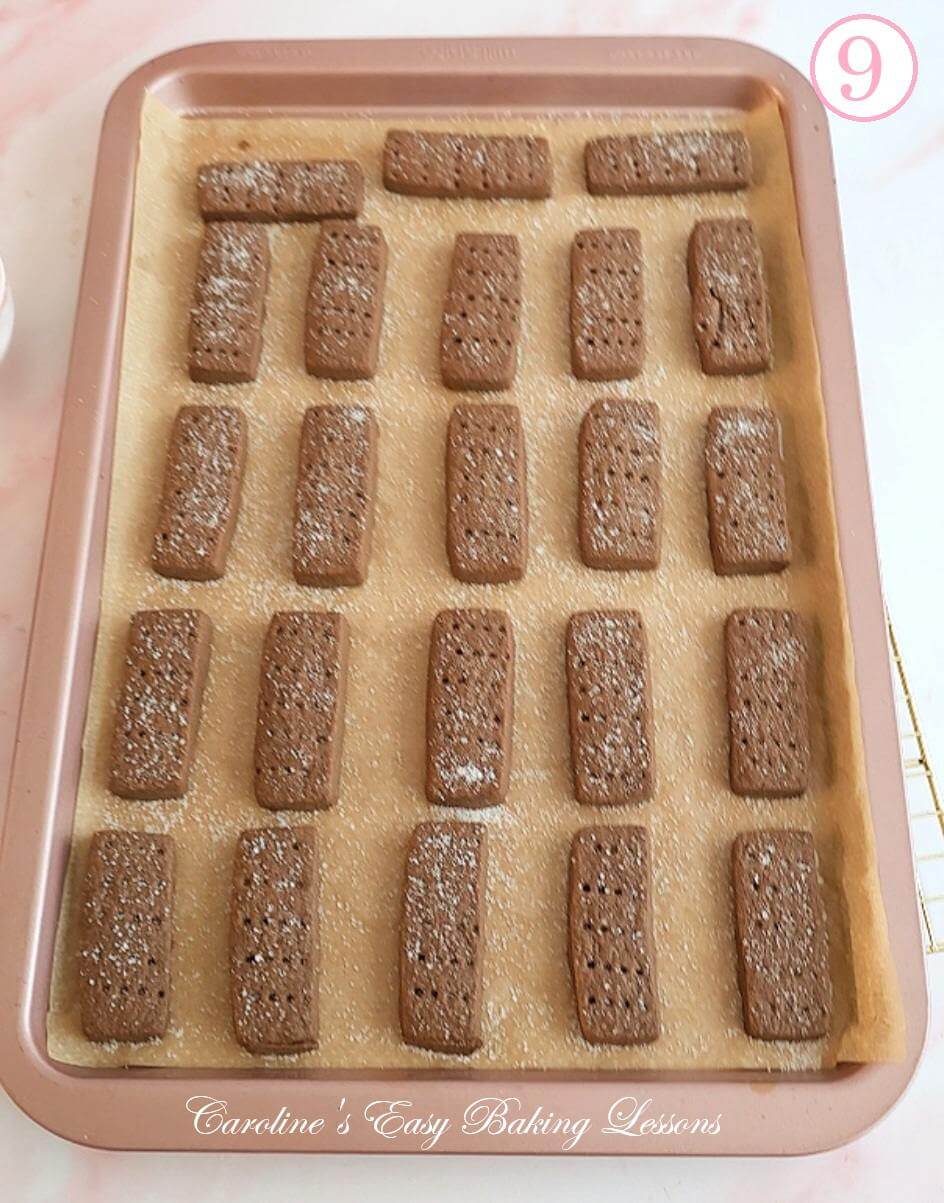
4.Place on a cooling rack and immediately sprinkle on more granulated sugar, on top of all the cooked shortbread biscuits.
5.Leave in the baking tray/baking sheet, on the cooling rack for 5-7 minutes and then very carefully transfer out of the tray/sheet onto just the cooling rack, by using the paper to help you.
6.Leave to cool completely before doing any decorating. But don’t leave out any longer than 1 hour as you want them to keep their soft texture.
You can store in a metal cake or cookie tin till ready to decorate.

Decorating The Shortbread:
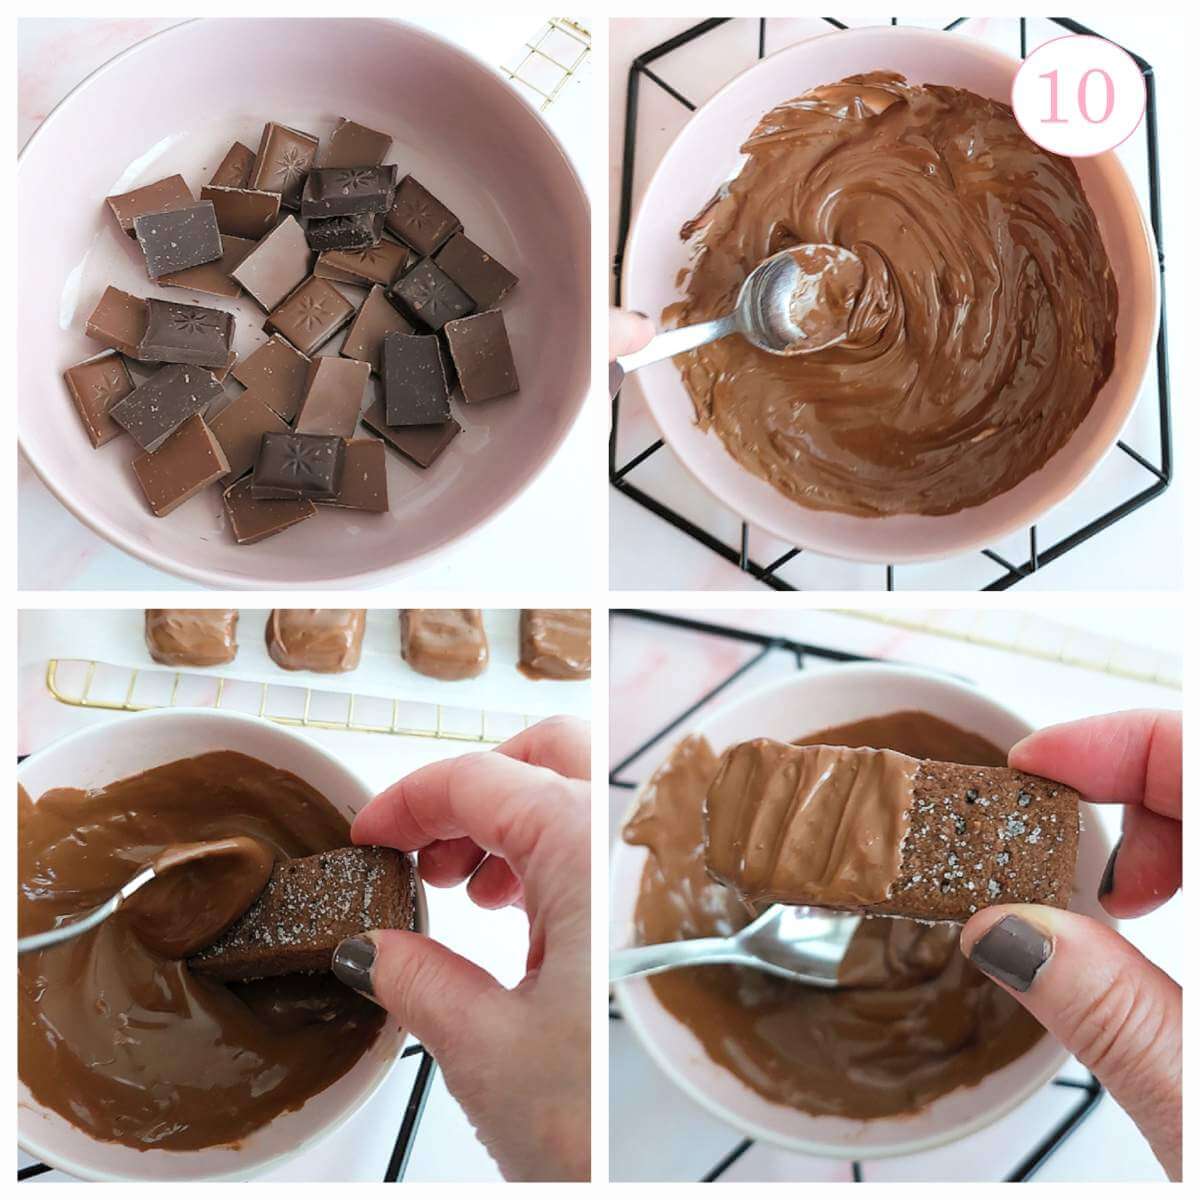
1.Start by breaking up the chocolate bar and placing in a microwave-safe bowl. Heat the chocolate for 30 seconds at a time, mixing-in-between each burst until melted. Do not heat for any longer than 30 seconds at a time or you will burn and ruin your chocolate.
2.Leave to cool down a little before adding any orange extract (optional).
3.Prepare for the chocolate dipping by placing baking/parchment paper under the bowl and having a small spoon ready. Cut another sheet of paper for letting the chocolate to set, & place on top of a cooling rack/tray.


4.Use one hand to half dip the shortbread in the melted chocolate and use the other hand to help coat with chocolate.
Also use to guide to where you want the chocolate to cover & use to draw a line to stop the flow of chocolate.
Use to help coat the sides and back. See my video for ways to do this.
5.Give a little shake and place down on the paper and if using sprinkles add now.
6.Repeat until all the chocolate is used up. Leave the chocolate to set before moving the biscuits. **Place the biscuits on paper, (like in the video), rather than the rack directly (like in Photo **) as the chocolate will firm and stick to the rack!
Serving & Storing
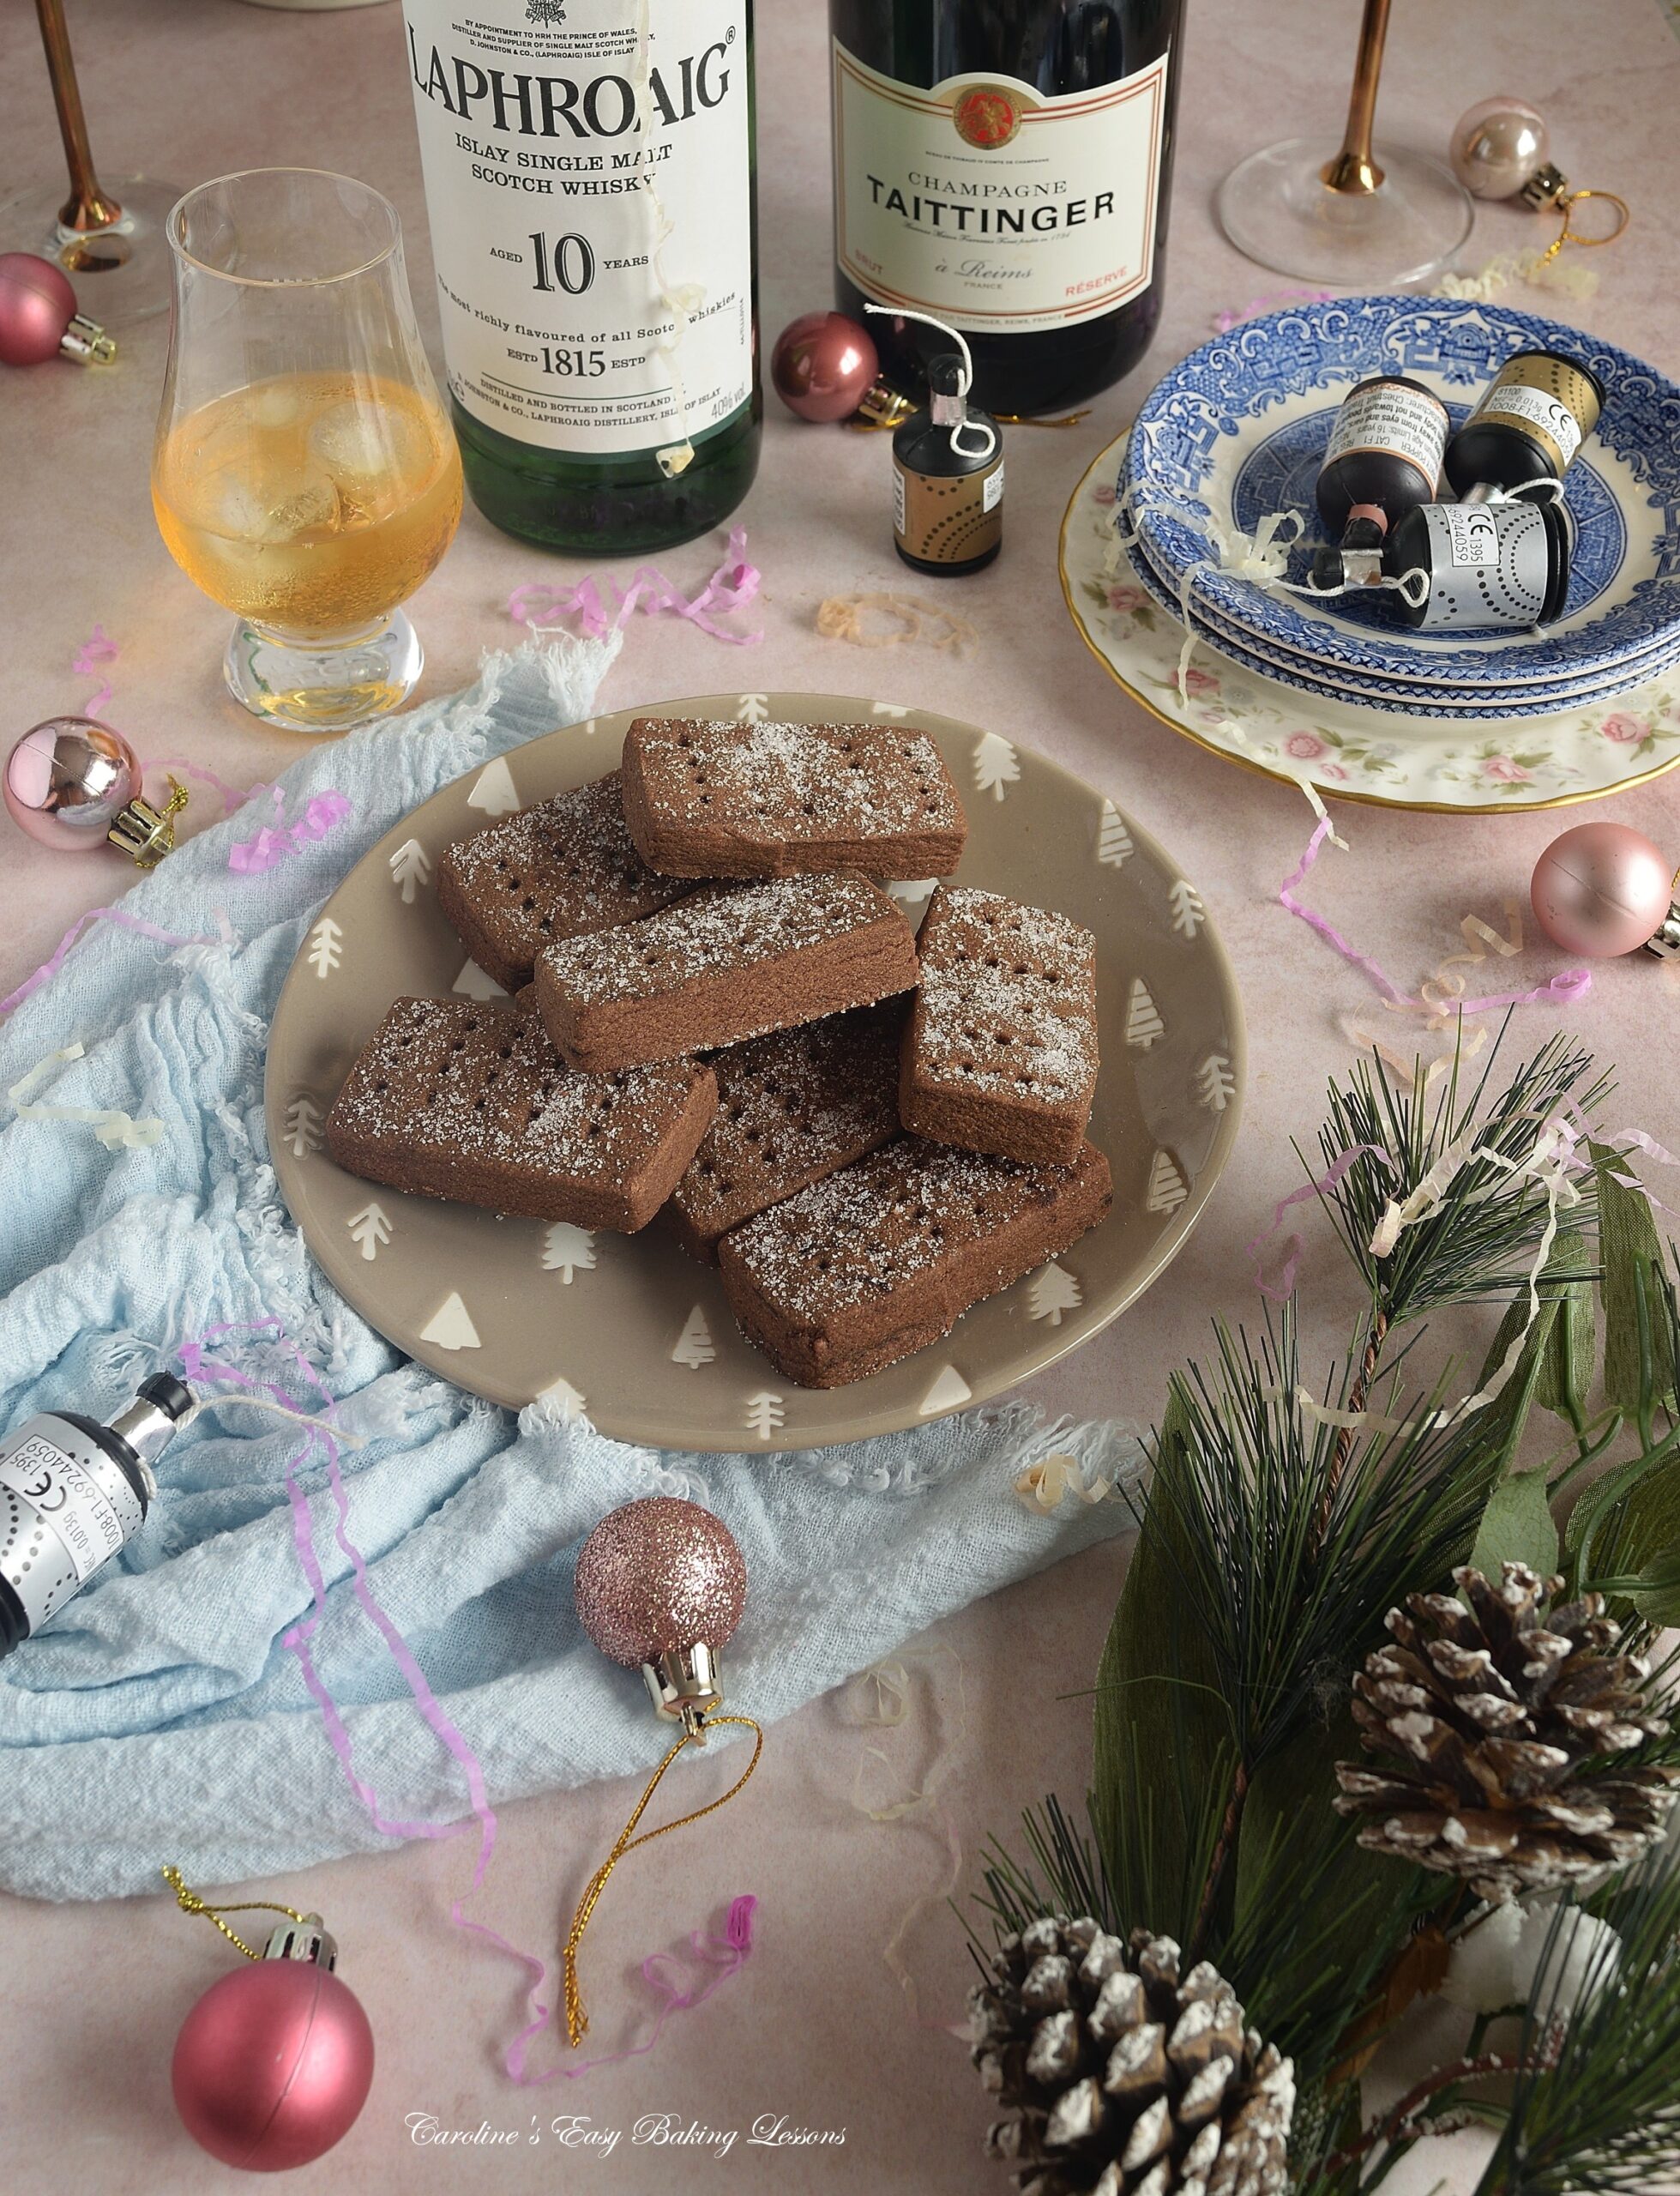
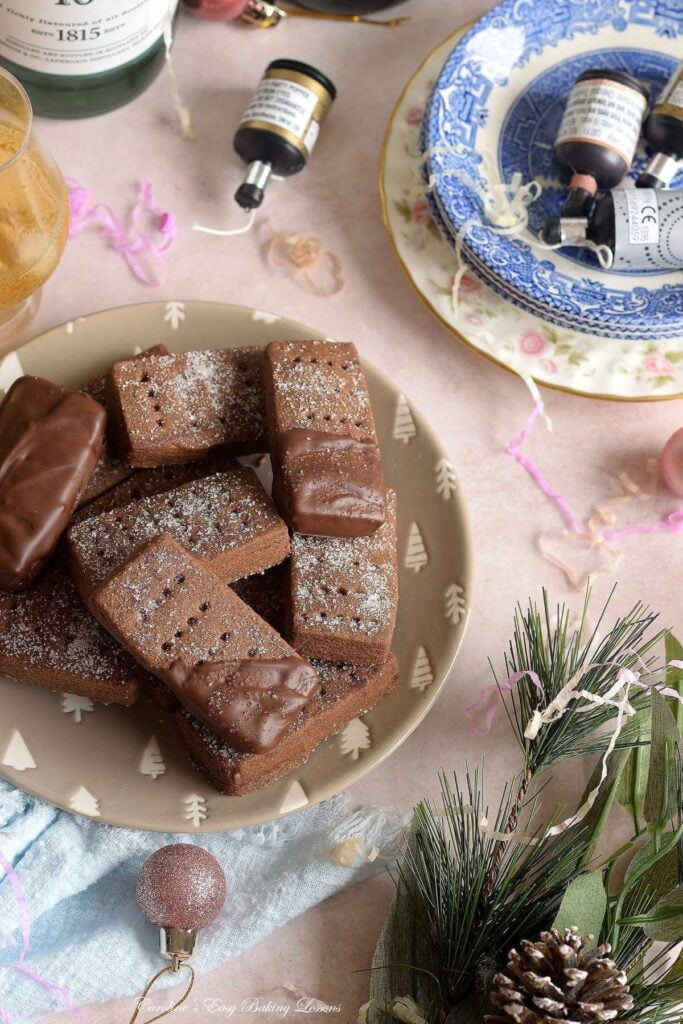
1.Serve the chocolate Scottish shortbread with tea or coffee, a glass or milk of whisky!
2.Great for Christmas and New Year celebrations. Or add to your cookie plate this year for something a little different.
3.Store these biscuits in a metal cake or cookie tin. Use the paper you used already, to line the tin & in-between layer.
4.Keep somewhere cool just to stop the chocolate melting. And they will be fine for as long as 2 weeks if not more.
DIFFICULTY LEVEL: Easy, beginner
Other Easy Biscuit/Cookie Recipes
Click an image to jump to the recipe, or go to the Biscuits/Cookies page.


Recipe Card
Chocolate Orange Scottish Shortbread

Equipment
- Scales or measuring cups
- Large spoon or spatula
- Electric mixer
- Medium mixing bowl
- Pastry Cutter/Pastry Blender (optional)
- Baking/parchment paper
- Rolling Pin
- 2-3 Baking Sheets/Trays
- Rectangular Cookie Cutter (optional, but used a 3 x 6½cm. 1¼ x 2½")
- Fork
- Palette knife
- Cooling rack
- Microwave-safe bowl (or use a double-boiler)
Ingredients
For the dough:
- 225 grams Unsalted Butter (1 cup/2 sticks or 8 oz, cubed & softened)
- 110 grams Caster Sugar (3¾ oz, ½ cup Extra/super fine sugar)*
- 225 grams Plain Flour (8 oz, 1 ¾ cups All Purpose)
- 110 grams Corn Flour (3¾ oz, 1 cup less 1 tbsp Corn Starch)*
- 4 tbsp Cocoa Powder (1 oz, ¼ cup)
- Pinch of Salt
- 2 tbsp Milk (up to)
- 1-1½ tsp Orange Extract (optional)
For decoration (optional):
- 200 grams Chocolate (7 oz, milk & dark combo*)
- 1-1½ tsp Orange extract (optional & once chocolate cooled a little)
- Sprinkles of choice (optional)
Instructions
Preparing The Dough:
- Cube the 225 grams Unsalted Butter about 1cm or ⅓” and leave to soften. Lightly grease your baking trays/baking sheets to hold baking/parchment paper in place, especially if they don't have a lip, or your biscuits will fall off!
- Combine the softened butter & 110 grams Caster Sugar (Extra/Super fine sugar) in a mixing bowl & 'cream' together until relatively smooth. **Not as long as when making cakes.
- In another bowl, combine the 225 grams Plain Flour, 110 grams Corn Flour, (corn starch), 4 tbsp Cocoa Powder & a Pinch of Salt. Then add to the sugar/butter mixture & start to mix in by hand.
- Now you can use a pastry cutter/pastry blender to ‘cut-in’ the butter like when making scones or pastry. You can also use 2 butter knives or your fingertips to do this. Or, use the mixer just briefly. It will be very crumbly & needs some milk to bind it together. Add 1 tsp of the 2 tbsp Milk & give a mix. Then add 1-1½ tsp Orange Extract (optional). Gradually add some more drops of milk until the dough is starting to come together & now a dark brown colour.
- Gently knead the crumbly dough to bring it all together. Test it is ready by pinching off a piece, forming a ball & flattening it. It will hold together if it is ready. Otherwise continue gently kneading. If too dry, wet hands a little with the milk or water. Form the shortbread dough into a disc and if you want to cut-out later, wrap in cling film/plastic wrap and place in the fridge.
Cut Out The Shortbread:
- Flour an area to work or use 2 large sheets of baking/parchment paper. Sprinkle flour on the paper, place the disc of dough in the centre and top with another sheet. Roll out to a thickness of at least 1cm (over ⅓") **Should be thicker than regular cookies or shortbread.
- Dip your rectangular cutter in some flour and cut out as many biscuits as you can. Alternatively, form the dough into a square or rectangular shape to the correct depth and use a knife to cut out slim rectangular ‘fingers’. Size about 2.5-3cm by 6.5-7cm (1-1.2" x 2.5-2.75). Make a little slimmer than you want as they will expand just a little. ‘Dock’ the biscuits with 4 or 5 rows, using a fork.
- Transfer to the paper-lined trays (no need for gaps). Pull back excess dough, reroll and cut out more biscuits till all used up. Sprinkle lots of granulated sugar on top & press down.
- Chill the cut-out shortbread, stacking in the fridge if needed and leave chilled for at least 1 hour. **Do not skip this chilling or they will spread too much.
Baking The Biscuits:
- Preheat the oven to: 180°c/160°c Fan/350°f/Gas Mark 4. to coincide with the chilling time ending. Spread the chilled shortbread out onto 2 or 3 baking trays/baking sheets, leaving at least 1″/2½ cm in-between each.
- Bake in the centre of the oven for 14-20 minutes. The shortbread will have spread a tiny bit and swollen a little and we don’t want to over-bake. Test by very gently pushing one and if it moves it is ready. Otherwise bake 1 – 2 minutes longer. **Just don’t try to lift as they will be very delicate.*
- Leave to cool on a cooling rack & immediately sprinkle on some more granulated sugar on top. After 5 minutes remove the baking tray & leave to cool before decorating. *Store in a metal cake or cookie tin after 1 hour if not decorating.
Decorating The Shortbread:
- Break up the 200 grams Chocolate & melt in the microwave, 30 seconds at a time, mixing in-between each burst. **Do not microwave any longer than 60 seconds at a time or you can risk burning the chocolate. Cool a little before adding 1-1½ tsp Orange extract (optional).
- Work on some parchment paper and half-dip the biscuits in the melted chocolate. Or use a small teaspoon to guide the chocolate. Place on the paper to set, adding some sprinkles too if you wish.
Serving & Storing:
- Serve the chocolate orange Scottish shortbread with some coffee, tea, milk or Scottish whisky!
- Store in a metal cake or cookie tin for up to 2 weeks.
Video
Notes

 Cornflour – UK cornflour is exact same as US Corn Starch & should not be omitted.
Equipment – use a pastry cutter/pastry blender or use the mixer briefly. I used a rectangular cookie cutter (3 x 6.5cm, 1.25 x 2.5″) for speed, but using a knife is more traditional.
Cornflour – UK cornflour is exact same as US Corn Starch & should not be omitted.
Equipment – use a pastry cutter/pastry blender or use the mixer briefly. I used a rectangular cookie cutter (3 x 6.5cm, 1.25 x 2.5″) for speed, but using a knife is more traditional.

 Recipe Yield – this chocolate orange Scottish shortbread recipe makes about 24 thick biscuits, when using the rectangular cookie cutter. Use a knife and there will be a bit slimmer and yield more. If you roll thinner, you can get as many as 40 finger biscuits. But thicker is true to Scoittish shortbread style and texture.
Other Scottish Shortbread – try my popular and original Scottish shortbread recipe or one of my other varieties. See images below.
Recipe Yield – this chocolate orange Scottish shortbread recipe makes about 24 thick biscuits, when using the rectangular cookie cutter. Use a knife and there will be a bit slimmer and yield more. If you roll thinner, you can get as many as 40 finger biscuits. But thicker is true to Scoittish shortbread style and texture.
Other Scottish Shortbread – try my popular and original Scottish shortbread recipe or one of my other varieties. See images below.
Nutritional Information – I am not a qualified nutritionist and all values are approximated. These are based on using all the ingredients listed, same size cookie cutter, with a yield of 40 biscuits & where 1 serving is 1 biscuit finger. Make more or less biscuits and these values will change. All values calculated via MyFitnessPal.com.
Check out some more biscuit/cookie recipes. Click an image to jump to the recipe, or go to the Biscuits/Cookies page.
Subscribe For More Recipes
Want more great recipes, tips, baking information & newsletters? Then please consider subscribing by adding your email address below. Be sure to check for a confirmation email & respond back, so you can follow me & receive your free emails. Your personal information will not be shared with a third party. PLUS: a FREE oven & air fryer temperature conversions table as a thankyou!
Join My Facebook Group
Why not also join my – Facebook group Easy Online Baking Lessons, dedicated to this baking lessons website, as well as providing one-on-one support with myself & my team? Be sure to answer all security questions when requesting to join.
Follow me on social media:
Happy Learning & Baking!
Caro x

Chocolate Scottish Shortbread
Search For Something You Fancy!
Caroline’s Easy Baking Lessons


