Homemade Buttermilk & Butter

Ever had cream you need to use up, past its date or got on clearance? Then make your own homemade buttermilk & butter. Can be money saving and not wasteful, and is a super easy process of agitating the double/whipping cream until it separates and becomes buttermilk & butter.
Homemade Buttermilk & Butter
Savoury Lesson 11
How To Use Out Of Date Cream


*Click link to jump to section


Why Make Homemade Buttermilk & Butter?
- Very easy to make
- Use up out of date cream
- Make butter & buttermilk
- Can be money saving*
- Homemade is always best
- No additives or preservatives
- Butter can be frozen
- Use Butter in your baking
- Buttermilk works great in baking & more
- Buttermilk tastes just like milk


Money Saving
If you have double/whipping or heavy cream that is about to go out of date, or past the best before date, don’t bin the cream. Make some homemade butter and buttermilk.
Better still, if you are lucky enough to see the cream on sale in the shops for a very low price (with the same day or following day’s best before date), use that to make butter and you will save yourself the cost of buying butter. Us bakers use a lot of butter and the cost keeps going up, so if you can make your own for less, all the better. You can freeze the butter1, and you will have buttermilk at the end too! Win win.


Money Saving Example
In some of the photos, I got Extra Thick Double Cream from Morrisons, (you don’t need to get the extra thick type), with next day’s date, for 33p each 300ml (10 fl oz) tub. I bought them all (which was 7 of them) and got 1076g (1.08kg/38 oz) of homemade butter, as well as at least 800ml (27 fl oz) buttermilk for a cost of £2.31.
For 250g butter (8.8oz) at the time of making the butter, the average cost to buy butter was £1.69 at the less expensive stores.
**Check out my Baking On A Budget Series**


The cost of buttermilk at that time was about 99p per 300ml (10 fl oz) tub. But since I don’t buy buttermilk and use a lot of regular milk, the cost of that would have been about £1.45 for a bigger bottle, or about 90p for a 1 litre (568ml). So unless you buy buttermilk, can’t do a 100% accurate comparison unless you go by per ml/g and even then you can’t buy like that. (**note being the mathematician, I have worked out how much buttermilk & butter you can get depending on the amount of cream you have – check the table further down).


But for me I paid £2.31 for the cream, and got a little over 4 blocks of butter that would have cost me £7.21 at the best price I can find. That saved me £4.90. Add just 17p to that and I could buy 3 blocks of butter (making a total of 7 blocks of butter for lots of baking!!). With the extra bonus of the buttermilk that would have cost 99p to buy. Making an overall saving of £5.90.
Is It Worth Making?
For me it was worth making the butter. I have a powerful stand-mixer (Kenwood Chef XL), a true workhorse. If you have Mason jars and are strong or want a good workout, then it is worth it. Great to get kids involved too, teaching them the benefits and feel-good feelings of homemade goods, not to mention the surprise when they see the magic happen. A great science project and life skill in my humble opinion.


As for financially, running the mixer won’t cost you anything really, same for making manually with a jar. So the other obvious thing to consider is the cost. If you get the cream on a good sale price when at sell by date and won’t use in time as cream, then it is in most cases going to be money saving. Especially with the cost of living crisis. And as an added bonus, the butter can so easily be frozen, making it last longer and avoid even more food waste.
Same goes if you bought cream and the date is close, or if it is past the date but still looks, smells and tastes ok, go ahead and make butter.
Buttermilk too is great for a baker as the acid within it, interacts with bicarbonate of soda (baking soda), to produce light bakes, with a tang and a tender crumb.2 It also works great with cocoa powder, and is wonderful used in my Air Fryer Double Chocolate Orange British Scones. Or try some American Biscuits made with the buttermilk.


What You Need
- Double (Heavy/Whipping) Cream
- Stand Mixer (or Mason Jar & energy!)
- Ice Cubes (2 – 3 trays)
- Bowls Of Cold Water
- Muslin Cloth, Cheese Cloth
- Sieve
- Large Jug or Bowl
- Baking/Parchment Paper
- Tin Foil (Aluminium Foil)
- Freezer Bag & Pen (if freezing)


Cream
You need to use cream that will whip up – in the UK it is known as Double Cream, and you can find Extra Thick Double Cream too (like in some of the photos). In the States it is known as Heavy Cream, or Whipping Cream. Single cream, or Half-&-Half won’t work.
You don’t need a specific amount of tubs of cream to make butter, but for small amounts, you might be better using a Mason jar instead of a stand mixer. Some stand mixers you can lower the beater to touch the very bottom of the bowl, or near to it. So bear this in mind if you have less than one pot of cream.
**For how much cream to use, see my table further down.


Temperature Of Cream
When whipping cream I usually take the cream straight from the fridge and have never had any issues with whipping.
However, when researching how to make my own butter, I read a range of about 50-65°f3 being best as too cold or too warm and the process is harder. This temperature equates to about 10 to 18°c and our UK fridges are set at about 3 to 5°c (37-40°f). So I just take the cream out first, before gathering everything else together and by the time I start whipping the cream it is fine. This is what I have done both in the summer and winter time.


Which leads me on nicely to the next thing you need – a stand mixer or Mason jar.
Stand Mixer
A stand mixer will be quicker, and more efficient for making your homemade buttermilk and butter. Especially if you have a lot of cream to use. And please note you will need a whisk attachment, not the mixing (K paddle).
The alternative to a stand mixer is a Mason jar, or any wide necked jar with a tight-fitting lid. You can use any size of jar, just don’t fill more than half-way with cream. The drawback to using a jar is you have to stand and shake the jar vigorously, for quite some time until the magic happens. From my research, depending on your personal strength, it can take up to 20 minutes to do by hand.4


Muslin Or Cheese Cloth
I happened to have some cheese clothes when my husband decided he wanted to try cheese making a few years ago. And of course I was the first to use them. (You can get different thicknesses (Grade) on Amazon, as well as size etc).
I do however, have a lot of muslin napkins for my food styling in my photos as they sit and behave so much better than stiffer napkins. So these are ideal too and only a little smaller than the cheese cloths I have. You want a very thin material, but that is porous too, for the liquid to drip out of.
If you want to do without a cloth, see this website Homesteadersupply.com, where it explains how to push out the buttermilk by working the butter.


Importance Of Washing Homemade Butter
After you have made the butter, washing of the butter is essential. In the words of Mr W.H. Lynch & his book “Scientific Butter Making”:
“The reason why the dairyman washes butter is to remove all foreign matter ……….(Butter) is still surrounded with many impurities,……… particles of casein…….more liable to spoil or become tainted than the butter itself. .“
Mr. W.H. Lynch, “Scientific Butter Making”, Blackett Robinson 1883.5
In other words, it rids the butter of any impurities, as well as casein, that can cause your lovely homemade butter to become putrid and go off far sooner than the butter would ever go rancid. So be sure not to skip the washing, and not just once either.
He also recommends not kneading the butter into a smooth mass until all the washing is complete.
How Much Cream Is Needed?
| CREAM | BUTTERMILK | BUTTER |
| 300ml (10 fl oz) | 125ml (4.25 fl oz) | 125g (4.5 oz) |
| 600ml (20 fl oz) | 250ml (8.5 fl oz) | 250g (8.75 oz) |
| 8 fl oz (236ml) | 3.3 fl oz (98ml) | 3.25 oz (98g) |
| 16 fl oz (1 pt/ 473ml) | 6.6 fl oz (197ml) | 7 oz (197g) |
| 32 fl oz (1 qt, 946ml) | 13.3 floz (394ml) | 14 oz (395g) |
“How Much Buttermilk & Butter Is Made?”
You can use any amount of cream, and the table shows approximately how much buttermilk & butter you will get, from various amounts of cream, as sold in the UK & the US.
*1 cup cream = 240ml/8 fl oz


Storing Homemade Butter & Buttermilk
Your homemade buttermilk and butter is always going to be best stored chilled, or in the case of preserving the butter, stored in the freezer. It is impossible to say how long homemade butter would last if left at room temperature, but since there is no preservatives, best to be cautious and not risk wasting the butter.
The general consensus and how I have been storing butter, is to well cover the butter and then in a container. Be that a butter saver (closed butter dish), food bag or container to preserve the life of the butter. I use baking/parchment paper, then foil and place in a labelled food bag for the freezer, or in an airtight container for the fridge.


Homemade butter will last 2 to 3 weeks6 if stored correctly, & kept away from heat & light as these can make butter go bad much faster.
As for buttermilk, this can be stored in a jar, glass milk bottle or any other air-tight container, in the fridge for up to 2 weeks7. I happened to have a glass milk bottle so used that and made a tight stopper with a ball of paper and some foil to make air-tight. I go through a lot of milk, so was finished within 24 hours, but would imagine it would have been fine for up to 1 week like that. Just make sure to check the smell of the milk if unsure if it has gone off. If it has, you will ‘just know’!
Lesson Students
Lesson students, please follow the step-by-step instructions below & save/print the recipe via the Recipe Card. Experienced bakers can skip the step-by-step and go to the abbreviated Recipe Card instead.
Jump to RecipeStep-By-Step Instructions

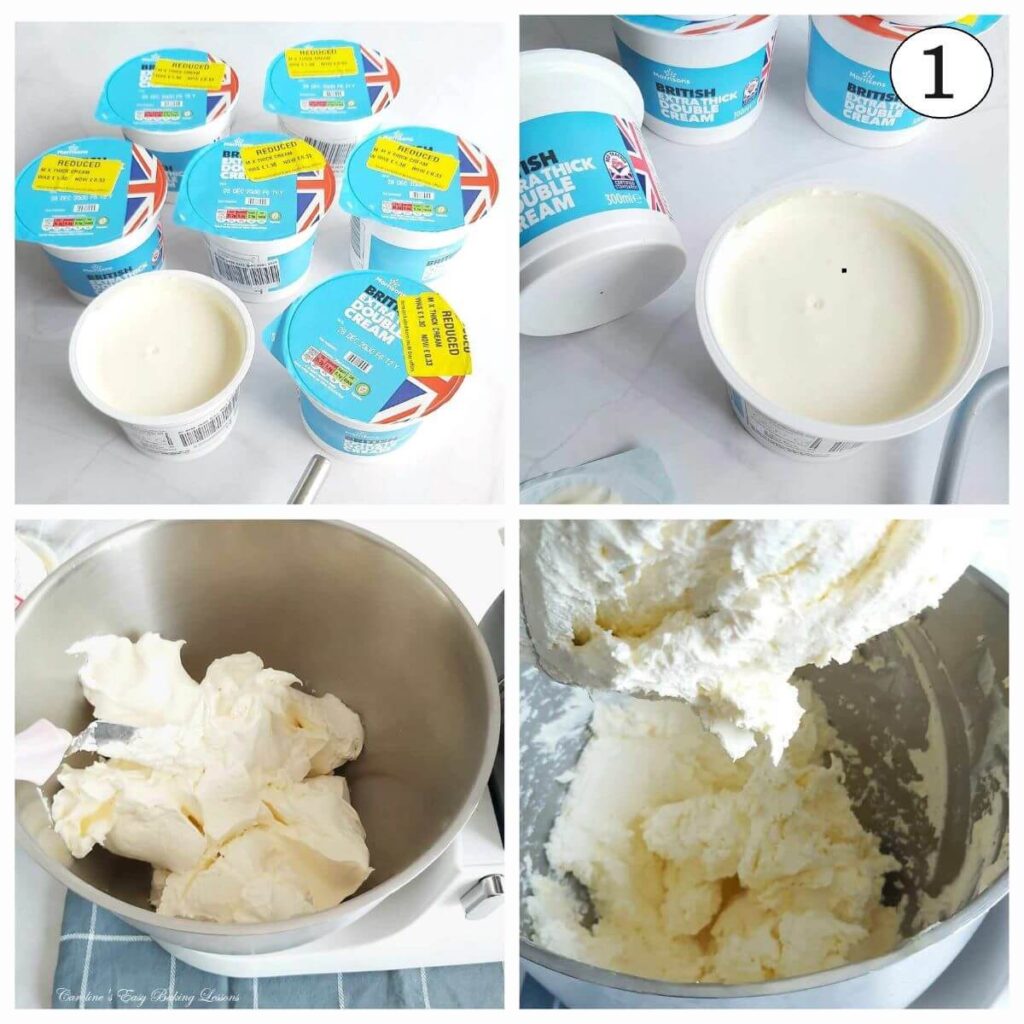
1. Begin by leaving your cream out on the counter/worktop about 10 minutes before you start preparing to make the butter. Add the double cream (heavy/whipping cream) to a stand mixer.
**Note in some photos I used ‘Extra Thick Double Cream’, as seen in Photo 1.
2. Add the whisk attachment to the mixer – not the k-paddle.
3. Begin beating the cream on medium to high speed until very thick and with peaks, just like when whipping cream. (How long this will take depends on the power of your stand mixer).


4. Continue beating the cream at medium to high speed for a few more minutes until the cream starts to look ‘curdled’ and like a split batter or mixture. Note too that the mixture will start to change colour – as you can see in photos 1 & 2, it went from a pure white colour to a creamy almost yellow shade. Note that UK cream will make a more yellow coloured butter than US cream, because of differences in levels of carotene, determined by the cow’s diet.
5. Continue at medium speed but be very careful, waiting for the sign that the butter is coming.
6. As soon as you see or hear any strong splashing, stop the mixer. The fats & liquids are separating now – butter being the fat and buttermilk being the liquid.

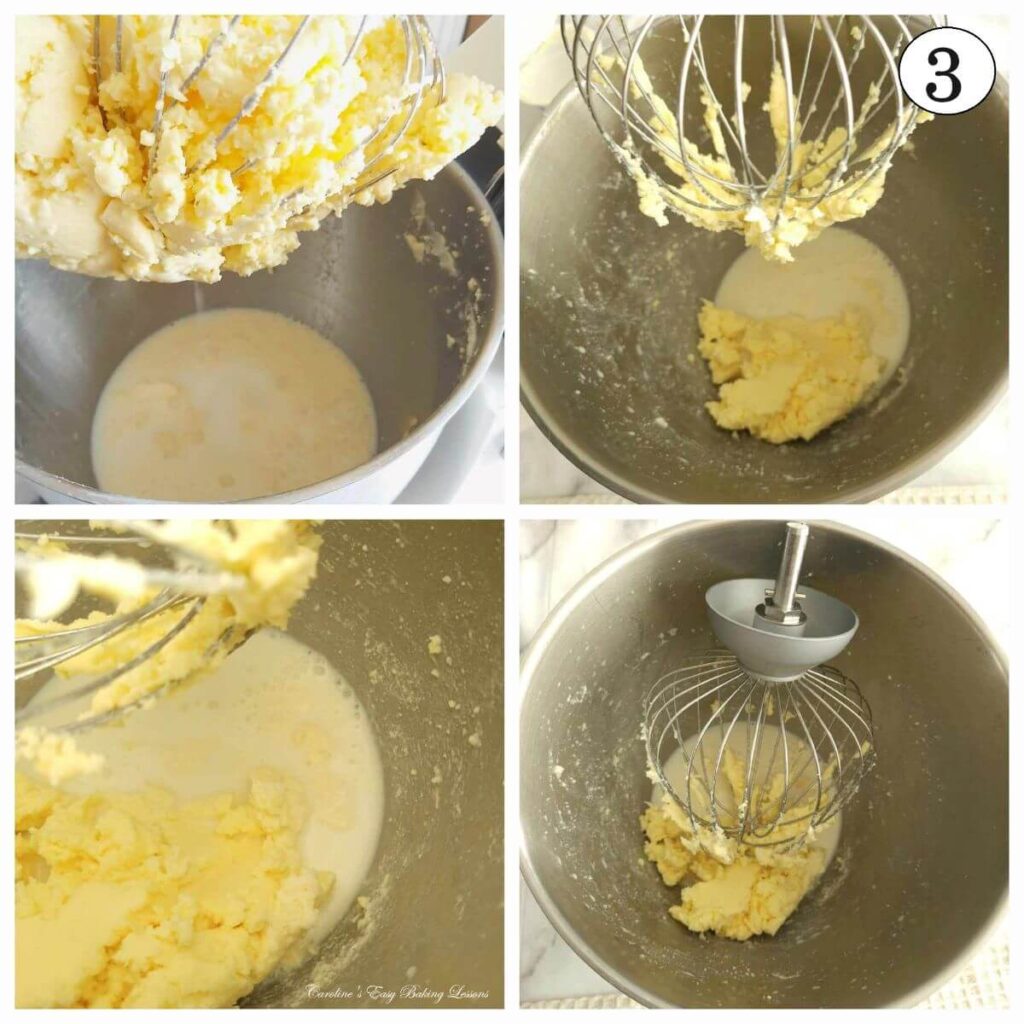
7. Let the mixer continue on low speed for another 5 seconds until more buttermilk appears like in Photo 2.
8. Lift up the beater and let the buttermilk drip into the bowl. Most of the butter will be in the beater and will have a lumpy consistency – this is normal. See Photos 2 & 3.
9. While the buttermilk drips, prepare a large bowl with cold water and ice cubes. (Note you will need clean water and ice another 1 or 2 times after this).
10. Once all the buttermilk has pooled at the bottom, (in this case about 3/4 cup (180ml), remove the beater and shake as much of the butter pieces from it, into the bowl. (Some small pieces will stick to the beater but we can remove later).


11. Using your hands (I like using disposable gloves a lot in my baking and cooking), scoop out the mass of butter and place into the bowl of ice-cold water. (See Photo 4).
12. Use your hands to gently wash the mass of butter in the ice-cold water. You shouldn’t knead the butter into a smooth mass at this stage according to Mr W.H. Lynch & his book “Scientific Butter Making”8 You only want to remove the buttermilk & other residue to help preserve the butter longer.
13. There maybe will be some small pieces of butter left on the beater, so dip that in the cold water, shake to remove, or use your hands for any tricky bits & scoop out.


14. The cold water should be cloudy now and should be rinsed out so you can repeat washing a second time with clean cold water and ice cubes. (Tip – place the butter mass on some baking/parchment paper while you clean out the bowl).
15. Now add all the butter to a clean muslin cloth or cheese cloth, wrap while gently forming into a rough ball shape and twist at the top.
16. Hang over a sieve suspended on top of a jug or bowl, tie the ends of the cloth if needed and give a gentle squeeze to start the buttermilk draining.
17. Leave at least 1 hour for more buttermilk to drain off.


18. Meanwhile, collect the other buttermilk from the bottom of your mixing bowl.
19. You can sieve this buttermilk if you can see tiny pieces of butter, like in Photo 6.
20. Store the fresh buttermilk in a tightly sealed jar, bottle or container in the fridge for up to 2 weeks9
21. I happened to have a glass milk bottle so used that and made a foil stopper from tin foil (aluminium foil).


22. Once all buttermilk has been drained from the butter balls, open up the muslin cloth.
23. The butter will be soft, so gently scrape any butter that is on the cloth, onto the butter ball.
24. You can dip the butter in clean ice cold water again if you want, but since I was freezing my butter, I skipped this 3rd wash.
25. Gently knead & form the butter into whatever shape suits you best. I divided my butter into 2 logs for easier storage in the freezer.
**Adding Salt – add a little now if you want to.


26. You can weigh the butter logs before or after wrapping them, which ever suits your needs best.
27. Cut a strip of baking/parchment paper 2 or 3″ (5 or 7.5cm) wider than the width of the butter log, and long enough to wrap around the butter several times. You want to wrap really well.
28. Roll the butter inside the paper and twist the ends closed.
29. Wrap on top with tin foil (aluminium foil), again closing the ends shut.


30. If freezing the butter, label a food bag with the date and weight of the butter. (UK blocks of butter are usually 250g (8.8 oz), but sometimes I weigh out 226g (8 oz) which is equivalent to one cup of butter).
31. Make sure to date the bags so you know how long is safe to freeze them. Up to 4 months10 is recommended by website Freezeit.co.uk. They do mention it can be frozen for up to 1 year, but that the taste can degrade after 4 months. Top Tip – add the use by date to the bag if you like to save looking up the recommended freeze time again.


33. If not freezing, you can wrap as above, less the bag, or inside a butter jar. Note also using the paper & foil will preserve the life of the butter.
34. Be sure to store homemade butter in the fridge, not sitting out or it will deteriorate quicker. Stored in the fridge, it will last 2 – 3 weeks6
Using Buttermilk & Butter
Use the buttermilk just like you would milk, or use in your baking in place of water in things such as breads & rolls or in cakes & in buttercream icing. Or in buttermilk biscuits.
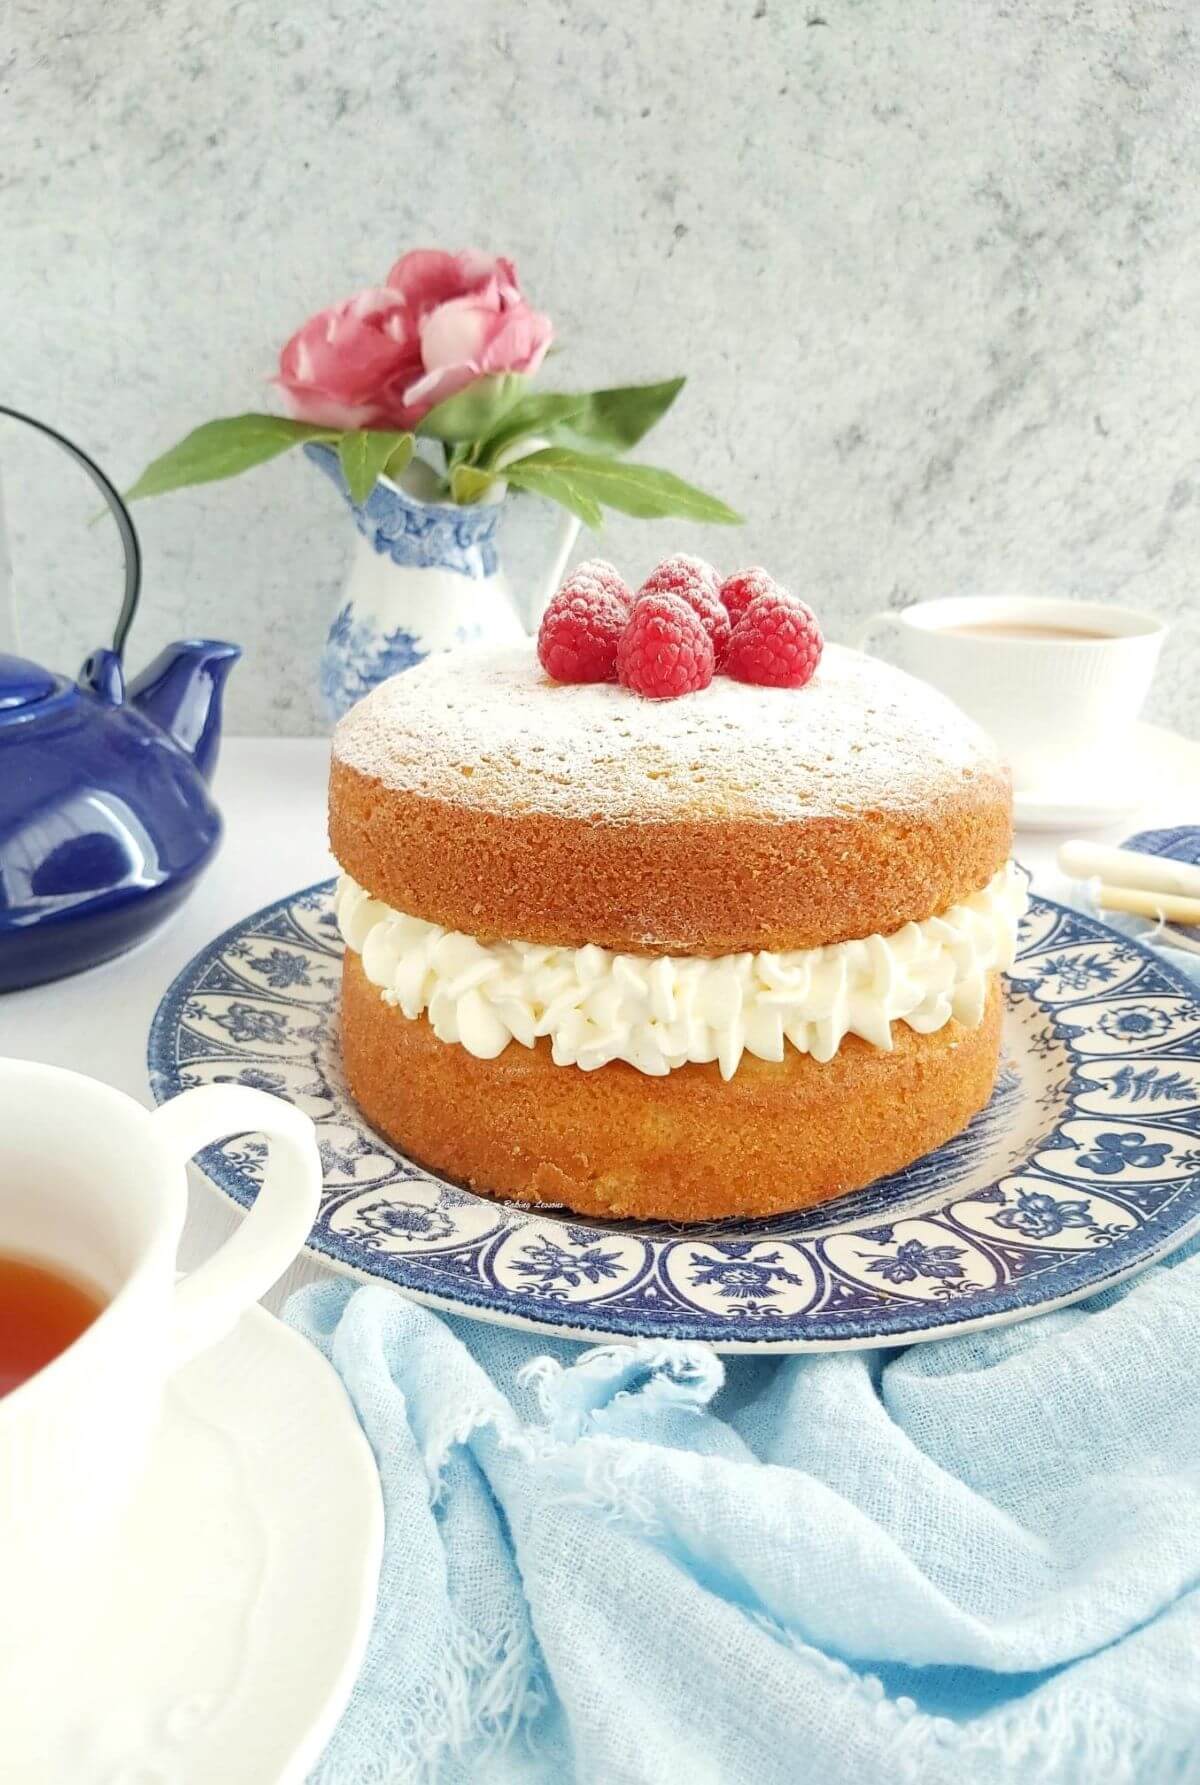
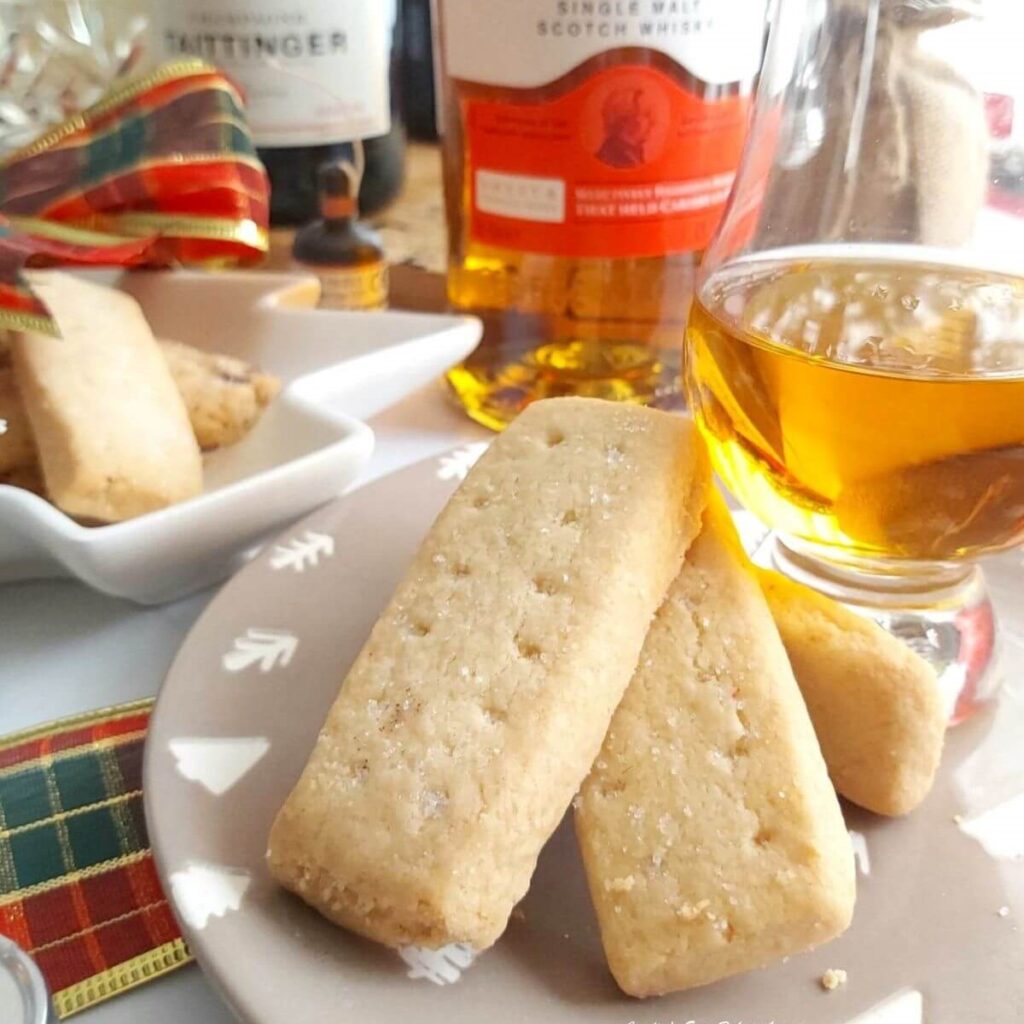
Use the homemade butter in any recipe requiring butter, such as Classic Victoria Sandwich Cake, buttery Scottish Shortbread or in a Pastry recipe.
Recipe Card
Homemade Buttermilk & Butter

Equipment
- Stand-mixer (Mason Jar or Food Processr)
- Bowl Of Water
- 3 Trays Of Ice Cubes
- Muslin Cloth or Cheese Cloth
- Sieve
- Large Jug Or Bowl
- Baking/parchment paper
- Tin Foil (Aluminium Foil)
- Freezer Bag & Pen (Optional – if freezing)
Ingredients
- 600 ml Double Cream (20¼ fl oz, Heavy/Whipping cream – for other amounts see notes*)
- Ice Cubes (3 trays for cleaming)
Instructions
Agitate The Buttermilk & Butter
- Begin by removing the double (heavy/whipping) cream from the fridge 10 minutes before starting. Then gather your equipment while the cold edge comes off the cream.
- Place the cream in a stand mixer with a whisk attachment (*not the k-paddle) and beat the cream as you would to make whipped cream. Beat on medium to high speed depending on your own mixer.
- Once the cream is like whipped cream with peaks, continue beating until butter looks like a curdled mixture. The mixture will have changed from a pure white colour to more of a yellow colour. (Note with US cream, this might not be as bright a yellow colour, just because of differences in the diet of the cow).
- Continue beating but being ready for the magic to happen – suddenly you will start to hear some splashing as the buttermilk and butter separates. Once it starts, be ready to turn off the mixer & once it splashes more vigorously stop the mixer. Most of the butter will be in the beater & in not a smooth mass either, which is normal (see step-by-step photos before this recipe card)
Washing The Butter
- Lift the attachment and let more buttermilk drip and pool at the bottom of the mixer while you prepare to wash the butter.
- Fill a large bowl 3/4 full with cold water and a tray of ice cubes.
- Remove the mass of butter from the beater, letting it fall into the bowl, scoop it out and plunge into the ice-cold water. Gently wash the butter ball but don't knead it yet. Place on some baking/parchment paper before dipping the beater into the cold water, shaking it to release any butter pieces. These can easily be scooped out and added to the mass of butter.
- Wash out the bowl and add more cold water and another tray of ice, before washing the butter for a second time. Wash until the water is cloudy and remove from the water.
Drain The Butter
- Now place the butter mass in a clean muslin cloth or cheese cloth, twisting at the ends and placing in a sieve, suspended over a jug or bowl. Give the butter a squeeze to release some more buttermilk, before leaving for at least 1 hour for the buttermilk to drain off.
Collecting & Storing The Buttermilk
- While the butter is draining, collect the buttermilk from the bottom of the mixing bowl and sieve off any particles, before adding to a glass jar, bottle or air-tight container.
- Store in the fridge for up to 2 weeks9.
Forming The Butter
- Once all the buttermilk has been removed from the butter, add that buttermilk to what you already collected & put back in the fridge.
- Open the muslin cloth and gently scrape any butter that is on the cloth, onto the mass of butter. If you are not going to freeze the butter, I recommend a 3rd wash in ice-cold water before storing. This will preserve the life of your butter.
- Form the butter into whatever shape suits you best – I did logs of butter & weighed them before wrapping in a strip of baking/parchment paper, then foil on top. **If you want some salty butter or compound butter, add some salt to taste now.


Storing The Butter
- Place in a labelled food bag if freezing, or in an air-tight container in the fridge. Well wrapped, the butter will last up to 12 months10 (4 months being when some taste can deteriorate). Stored in the fridge, the homemade butter can last 2 – 3 weeks6.
Using The Butter & Buttermilk
- Use homemade buttermilk like you would milk, or use in baking in place of water – for example in breads & rolls or in cakes & in buttercream icing. Try in my Heritage Buttermilk American Biscuits. Butter in any recipe requiring butter, like Classic Victoria Sandwich Cake, buttery Scottish Shortbread or in a Pastry recipe.
Video
Notes

 Recipe Yield – For 600ml (20¼ fl oz) cream, approximately 250ml (8½ fl oz) buttermilk & 250g (8¾ oz) butter, which is same as a standard block of butter in the UK. See table below for more.
No Muslin/Cheese Cloth – instead use a spatula & press the butter against the sieve, letting the buttermilk drip through into bowl.
Washing The Butter – as well as the ice water helping the buttermilk & butter separate, washing cleans the butter of buttermilk residue, but more importantly casein which can lead to purification and make the butter go off far sooner than the butter would ever go rancid itself. So be sure to wash at least twice. See before recipe card for more & references.
Recipe Yield – For 600ml (20¼ fl oz) cream, approximately 250ml (8½ fl oz) buttermilk & 250g (8¾ oz) butter, which is same as a standard block of butter in the UK. See table below for more.
No Muslin/Cheese Cloth – instead use a spatula & press the butter against the sieve, letting the buttermilk drip through into bowl.
Washing The Butter – as well as the ice water helping the buttermilk & butter separate, washing cleans the butter of buttermilk residue, but more importantly casein which can lead to purification and make the butter go off far sooner than the butter would ever go rancid itself. So be sure to wash at least twice. See before recipe card for more & references.
 Problems – Cream Not Separating? Or taking way too long? Make sure your cream is not too cold, but too warm and it will be problematic too.


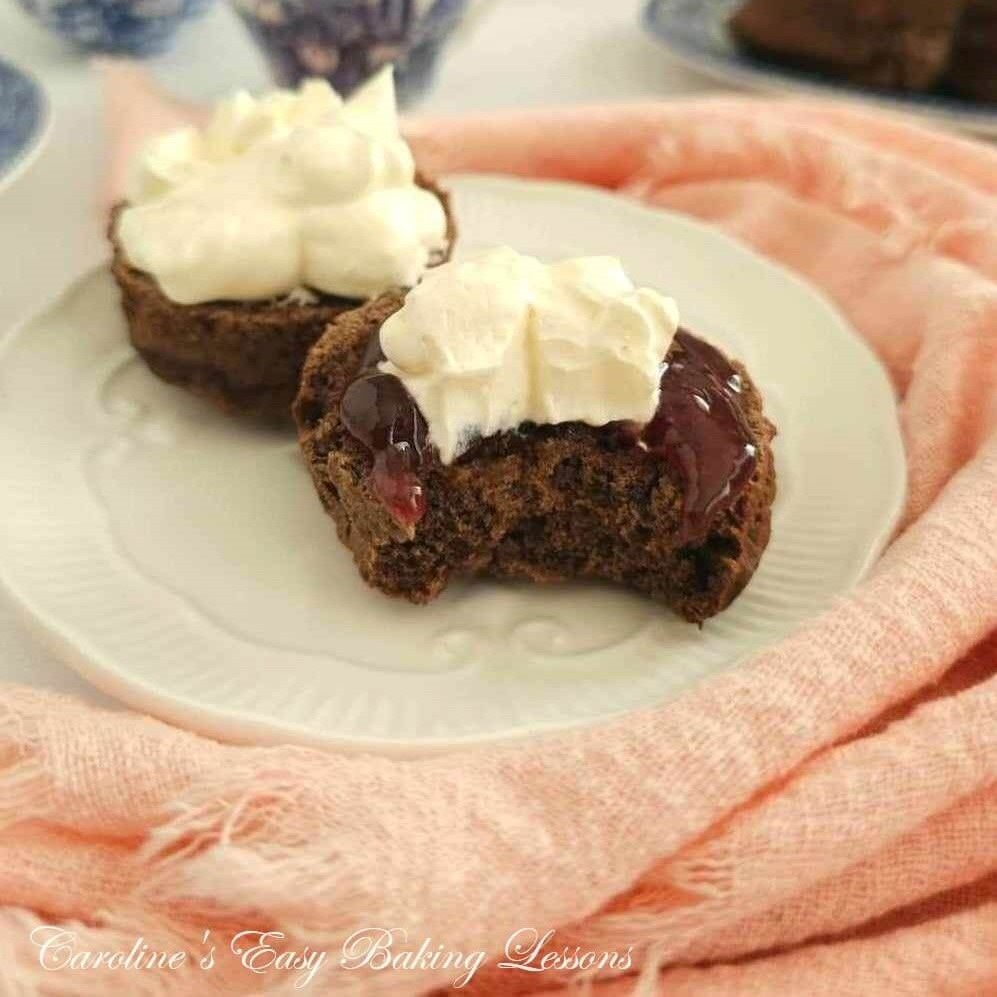 Use the buttermilk when making Air Fryer Double Chocolate Orange British Scones (above) or Heritage US Biscuits. For more uses, see below.
**See before this Recipe Card for more details & step-by-step photos.
Number Of Servings – this obviously can vary, so in this case servings was used as recipe yield, ie 250g butter & 250ml buttermilk, where 250g butter is standard UK butter block weight.
Use the buttermilk when making Air Fryer Double Chocolate Orange British Scones (above) or Heritage US Biscuits. For more uses, see below.
**See before this Recipe Card for more details & step-by-step photos.
Number Of Servings – this obviously can vary, so in this case servings was used as recipe yield, ie 250g butter & 250ml buttermilk, where 250g butter is standard UK butter block weight.
Nutritional Values – values in the table below are based on 250g (8¾ oz, 1 cup plus 5 tsp) butter only. 100g butter would be 718 calories & 41g fat. 1 tbsp would be 105 calories & 12g fat. For 250ml (8½ fl oz, just over 1 cup) buttermilk, it is 104 calories, 2g fat, 13g carbs, 10g sugar & 8g protein. I am not a qualified nutritionist & all calculations are approximate and based on information from website MyFitnessPal.com. Paste the amount of butter or buttermilk into the app & check for yourself with any serving size.
Ideas To Use The Buttermilk & Butter
Use the homemade buttermilk & butter is a variety of ways. Use the buttermilk as you would milk, use instead of water in bakes such as breads or rolls or add to cakes or scones with cocoa powder. Use the butter in cakes such as Victoria Sandwich Cake, in buttery Traditional Scottish Shortbread, for Buttercream, or in a pastry recipe. (See below).


Follow me on social media:
Happy Learning & Baking!
Caro x
Subscribe For More Recipes
Want more great recipes, tips, baking information and newsletters? Then please consider subscribing by adding your email address below. Be sure to check for a confirmation email & respond back, so you can follow me & receive your free emails. Your personal information will not be shared with a third party.
Homemade Buttermilk & BUtter
Search For Something You Fancy!
Caroline’s Easy Baking Lessons
References & Resources Used
- Freezing Butter – @ https://freezeit.co.uk/can-you-freeze-butter/ ↩︎
- Benefits of benefits in baking – @ https://www.realcaliforniamilk.com/baking/buttermilk ↩︎
- Temperature of cream for churning – @ https://cheesemaking.com/pages/butter-cultured-butter-recipe-instructions ↩︎
- Shaking Cream To Butter by hand – @ https://www.scientificamerican.com/article/bring-science-home-shaking-butter/ ↩︎
- Importance Of Washing homemade butter – taken from the book “Scientific Butter Making”, by W. H. Lynch, Blackett Robinson 1883. ↩︎
- How long butter lasts – @ https://www.bonappetit.com/test-kitchen/cooking-tips/article/is-making-your-own-butter-worth-the-effort ↩︎
- Storing & shelf life of buttermilk – @ https://stressbaking.com/how-to-make-buttermilk/ ↩︎
- When to knead the butter – see reference no.5. ↩︎
- Buttermilk shelf life – see reference no.7 ↩︎
- Freezing homemade butter – see reference no.1 ↩︎


This is such a handy recipe to know how to make. Sometimes cream is on sale in the reduced section, so now I know I should get some and make my own butter! How amazing. Love the handy table too to tell you how much butter and buttermilk different amounts of cream will make! 5 stars.