Air Fryer Double Chocolate British Scones

My Air Fryer Double Chocolate British Scones are my adaptation of popular British scones with a chocolate dough, chocolate chips & flavoured with orange. Love my Classic British Scones tutorial? Here is the next level for your afternoon tea!
Air Fryer Double Chocolate British Scones
Chocolate Orange Scones With Chocolate Chips!
Baking On A Budget Series


More Baking On A Budget recipes & tips on the Money Saving Page


*Click above to jump to section


What Are British Scones?
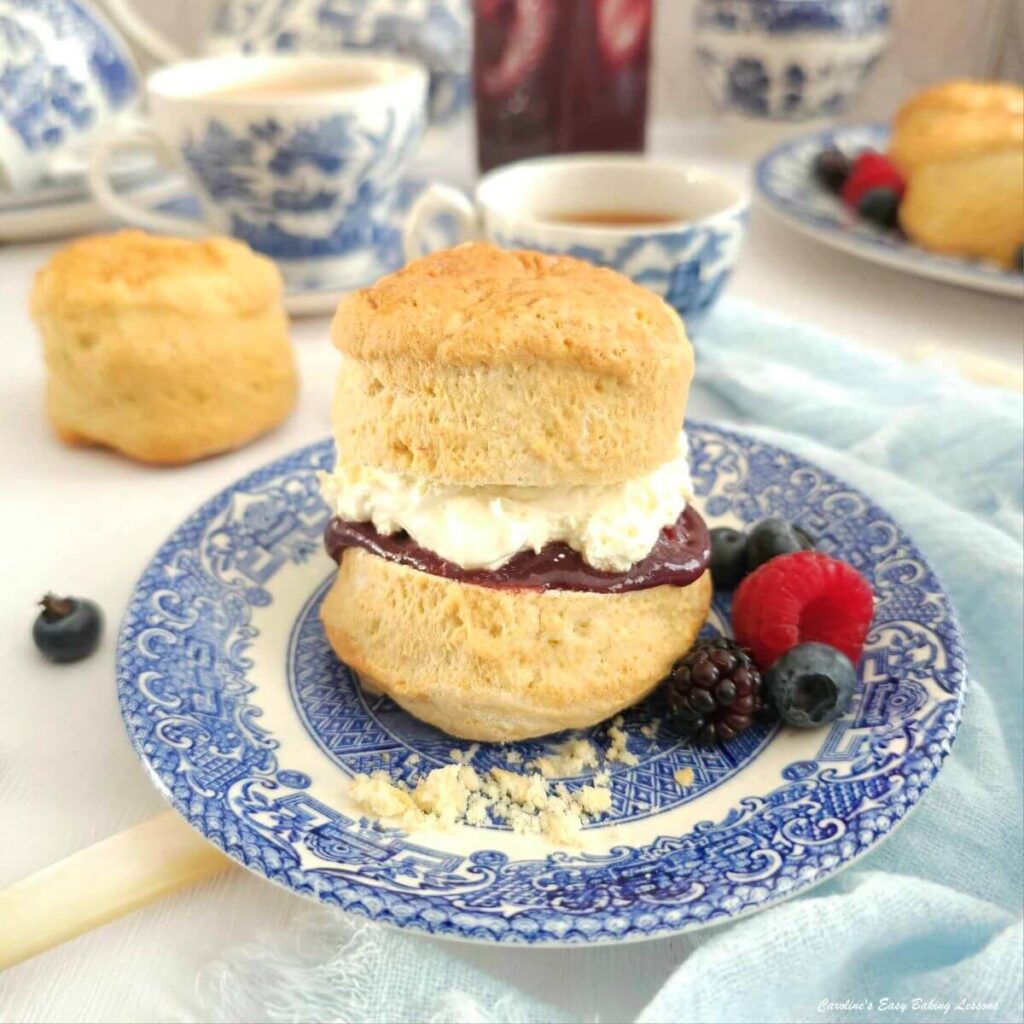
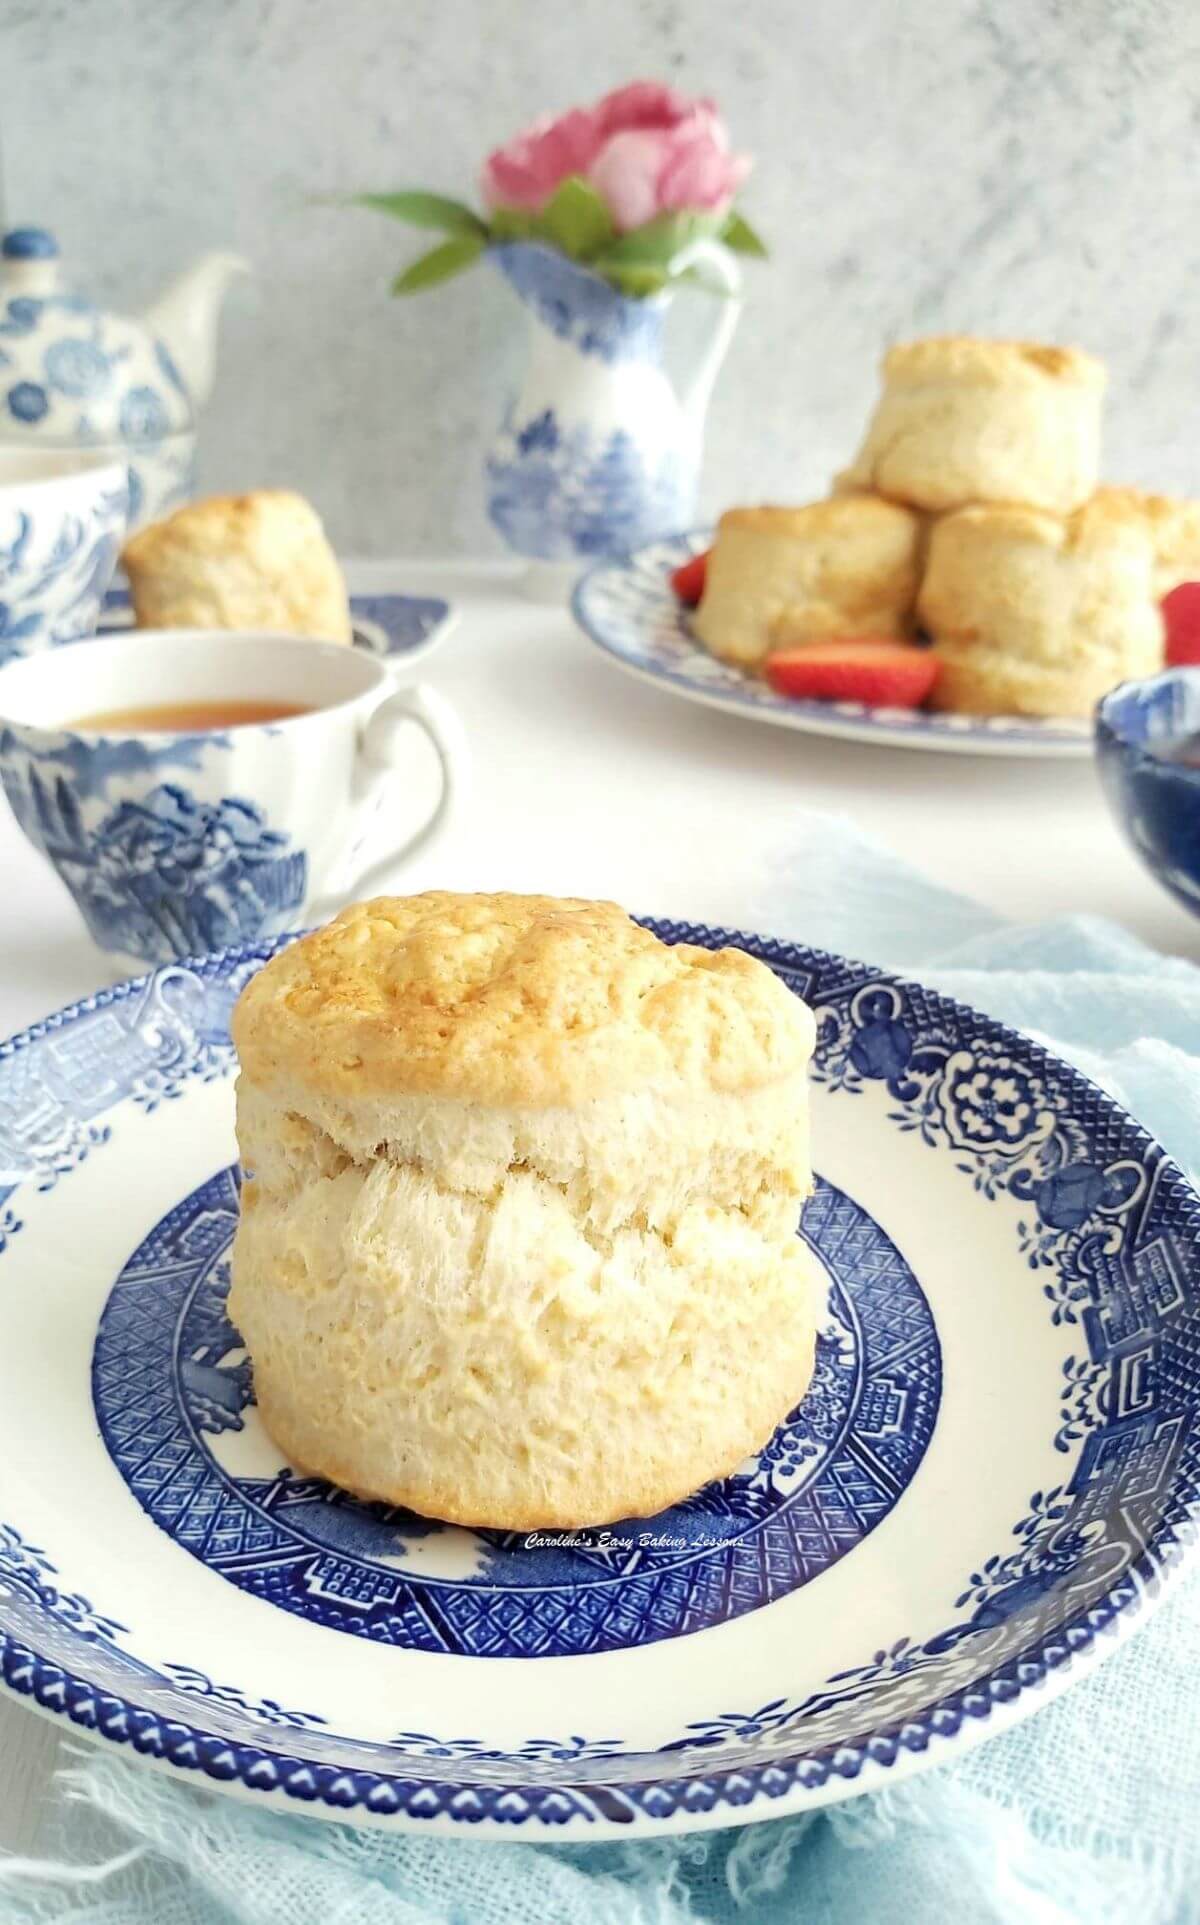
British scones are a light, not so sweet, delicate, yeast-free, technically speaking, kind of ‘bread’. Always halved and topped with butter and sweet things like whipped cream, clotted cream and jams, this is a perfect accompaniment to an afternoon tea. Click to learn more of the history of scones, High Tea & a Cream tea.
These double chocolate and orange version of the scones, are a little sweeter with the addition of chocolate chips.
“Are British scones the same as American biscuits?”


Difference Between British & American Scones & Biscuits
I hear people say British scones look the same as US Biscuits. But this is not the case & when you have made and tasted an authentic British scone you will taste the difference.
True, US Biscuits look more like a British scone, than US scones (US scones don’t have the same rise & are often cut into triangles). British scones are traditionally made round and always with a cutter rather than a knife as the knife interferes with the structure & rise.
Similarity with US biscuits however, is only the outer appearance. Yes they are made from the same general ingredients. However, the proportion of these ingredients is different. And this difference results in a different inner structure and texture when you eat them. But I digress….


Why Make My Chocolate Scones?
- This recipe results in a great rise.
- Detailed step-by-step instructions, photos & tested conversions.
- No fancy equipment needed
- Less dishes to wash
- Used in 2 world-wide scone bake-alongs with success, including gluten-free, lactose-free & alternative butters.
- Includes what NOT TO DO!
- Extensive development & testing
- Easy to make – kids can do it
- Quick to make
- Make ahead
- Great for freezing
- Simple ingredients


Ingredients For Chocolate Scones
- Butter, unsalted
- Sugar
- Flour
- Baking Powder
- Eggs
- Milk/Buttermilk
For this double chocolate & orange scones version, we also have:
- Cocoa Powder
- Coffee
- Orange Extract
- Vanilla
- Chocolate Chips
*All ingredient amounts in the Recipe Card at the bottom of the post.


Sugar
I always recommend UK Caster Sugar (equivalent is Extra/Super Fine Sugar) for scones & most British bakes.
See my UK sugars comparison photo.
However, when recipe testing these chocolate scones, I tried using light brown sugar. (See Photo below).


Not just for the difference in taste, but because it too is a finer granule size than granulated sugar. And this is great for causing friction when creaming with the butter & creating air pockets & a good rise to the scone. However, caster sugar is more expensive now & I had light brown sugar so gave it some tests.
So if you don’t have soft light brown sugar, or even dark brown sugar, use Caster Sugar (extra/super fine).
The other alternative is to grind a little granulated sugar yourself from granulated – it is only a small amount needed as seen in this photo (only a quarter cup/50g).


Flour
We usually make British scones with Self-raising Flour , but I have also developed them using Plain (All Purpose flour), with the addition of more baking powder. These were also tested in American and other countries in the group bake-along as mentioned above, with great success. Gluten free flour & Xanthan gum was even used.
Be sure to add the 2 listed amounts of baking powder if using Plain/A.P. flour. Also don’t confuse UK self-raising with US Self-rising. (Learn more about differences in UK & US baking ingredients.)


Milk
Any kind of milk & even goat’s milk & lactose-free milk has been tested. The scones just might not have as much of a golden colour.
Buttermilk also works really well with the chocolate scones because of the interaction with the cocoa powder (but is not essential). To make similar to buttermilk, add 1 tbsp vinegar or lemon juice to the milk & leave 5 minutes till it looks ‘curdled’ before using. Recipe live for making your own butter & buttermilk.
Chocolate Chips
Use any kind of baking chocolate chips you like – I used a combination of milk & dark (semi-sweet & bitter) from Aldi.


Other Flavours
Cocoa Powder, Coffee, Orange Extract & Vanilla all add flavour to the scones. Cocoa powder adds the colour & chocolate taste to the scone dough, chocolate chips extra chocolatiness. Whilst the vanilla and coffee enhances that chocolate flavour further. Which is then topped off with orange extract to pair beautifully with the chocolate.
Caution With Added More
I always advise on not adding too many extra ingredients to these scones. Too much in terms of weight, the heaviness can cause the scones to not rise as well. So don’t be tempted to add anymore chocolate.
No Fancy Equipment
Another good reason to make my scones, is that no fancy equipment is needed. No need to get the food processor out, or wash it.


Usual suspects like a mixing bowl, whisk, a cookie cutter, a pastry blender (pastry cutter like you use for pastry), or even use your hands. No special trays or tins required, just some baking/parchment paper to put the uncooked scones on. I use a 2¼” (5¾cm) wide straight-edged cookie cutter, but you can use slightly smaller like 2″/5cm.
You obviously need an air fryer (or oven), but mine is not a fancy one and small. Only 3.5 litre capacity (about 3.7 quarts) and not much wider than 6″ (15cm) inside.
With that in mind, I can get 4 scones baked at once and make a whole batch in 3 goes.


If you use the oven, or your air fryer is bigger you might be able to make in 2 batches or just half the recipe. Don’t try and bake more than one level at a time.
Before starting to make the scones, check how many scones you can fit in your own air fryer at one time. Use your cookie cutter as a guide, leaving a little gap in-between. See in the photo where I used 2 cutters to see I could get 4 in at one time. Be sure to use on the rack, with some paper, or the scones will bake into the rack. **Read my Cello double air fryer review.


Top Scone Tips
Very important tips for what NOT TO DO (more can be found in my original Scones Tutorial.
- Don’t use too much baking powder, that can cause a premature rise & sink.
- Don’t use food processor/mixer.
- Slightly sticky dough is good.
- Don’t roll out the dough, pat out with hands.
- Don’t flatten too thin (1″/2.5cm minimum depth).
- Don’t twist the cookie cutter.
- Don’t touch the sides of the scone.
- Don’t let the egg/milk mixture run down the sides
- Minimal and gentle handling as possible.
Step-By-Step Instructions


1. Begin by letting your butter soften and come to room temperature. Cubing the butter into small pieces first, and this smaller surface area will mean the butter softens quicker. See the butter cubed to roughly 1cm or ⅓” in Photo 1, where for your reference, the butter is in a teacup, and the other 2 bowls are pinch bowls. If short on time or you forget, watch this video where I tried a hack to soften butter in about 12 minutes.
2. Once the butter is soft enough, add the flour, baking powder, cocoa powder & coffee (instant or espresso powder), to your mixing bowl. **If using Plain/All Purpose flour be sure to add the 2 amounts of baking powder listed on the Recipe Card.


3. Next add in your softened small cubes of butter and mix briefly with a spoon before moving onto using a pastry cutter (pastry blender) – see Photo 2. Hold the pastry cutter, and push down on the bottom of the bowl, & rotate the cutter left & right. Repeat this motion across the bowl until the mixture resembles larger rough breadcrumbs. This only takes a minute or two with the cutter or by hand so no need for a food processor.
Alternatively, you can use 2 butter knives, or your hands to ‘cut in’ the butter as this is called. Lift the flour butter mixture up in your hands & rub if between your thumb & other fingertips. Repeat this lifting and rubbing (also known as ‘rubbing in’), until similar to Photo 2. Watch my video for this.


4. News stage is to prepare your wet ingredients. Measure out about 240ml (1 cup, 8 fl oz) milk into a jug, before adding in the eggs & whisking together. (**If you want to make similar to buttermilk, add 1 tbsp vinegar or lemon juice to the milk & leave 5 minutes till it looks ‘curdled’ before adding in the eggs).
5. Egg sizes vary, but you want the egg/milk mixture to now be at the 350ml (shy of 1½ cups, 11¾ fl oz) level. So go ahead and add more milk if lower than this amount. **Note for the chocolate scones version, I add slightly more liquid than for regular scones.
6. Whisk well before reserving 2 tbsp of the liquid mixture in separate small bowl. This will be used for an egg-wash to the top of the unbaked scones.


7. Add the light brown sugar to the dry mixture, and mix through.
8. Make a little reservoir in the centre of the dry mixture, before adding in a little of the egg/milk mixture, (about 2 tbsp worth).
9. Mix with a spoon or spatula briefly, before gradually adding in more of the wet mixture. Be sure to mix around the bowl and under the mixture, at the bottom of the bowl, regularly checking for dry areas, before adding in anymore liquid. You might not need all of the liquid or slightly more. If so, just add a touch of milk alone.


10. Once the mixture changes to a darker brown colour and is starting to come together as a dough, use your hands to gently knead the dough into one mass. Remembering to check for any dry patches before adding anymore liquid. See Photo 5.
11. Before forming into a disc, add in the vanilla extract, orange extract & half of the chocolate chips to the top of the dough, and fold the ends over to work the flavour and chips into the dough. This should take no more than 15 seconds.
12. Add in the remaining chocolate chips and knead (or squeeze), very briefly before forming into a flat disc. See Photo 6 below.


13. Leave the dough in the bowl and clean your hands before preparing some baking/parchment paper, as well as some cocoa powder for rolling the scone dough out on. Also have a small bowl or plate with some cocoa or flour ready for dipping your cutter. See Photo 6.
14. Once ready, place the chocolate scone dough onto the cocoa dusted paper. No need for a second sheet of paper or rolling pin.
15. Use your hands and knuckles to flatten the disc of dough out wider. (See Photo 6). You want the depth of the dough to be at least 1″/2.5cm deep. Slightly deeper is fine, but do not make shallower or your scones will not rise as well.


16. See photo collage 7, where I am measuring the depth of the scone dough against the end part of my thumb. That happens to be about 1″ and some taller, double-sided cookie cutters are about the same size. Squeeze the ends of the dough inwards if the depth is too small, until you get the correct depth.
17. Next dip the cookie cutter into cocoa powder, (preferably the straight edged side, as fluted edged scones sometimes don’t rise as well).
18. Shake off excess cocoa powder before pushing the cutter down onto the dough. DO NOT TWIST THE CUTTER. This is very important for British scones & a good rise.


19. Cut out as many scones as you can, before attempting to move them. I can manage 7 scones with my 2¼” (5¾cm) cutter.
20. Carefully pull back the excess dough and put to the side before lifting one scone at a time, with a baking palette knife. Transfer to the paper lined air fryer basket (or paper lined baking tray/sheet if using a regular oven).
21. Be very careful not to touch the sides of the scones – important for a good rise. I got 4 on my air fryer at one time.


22. Once in the air fryer, very gently and carefully brush the reserved egg-wash onto the top of the scones. Do not let any egg-wash run down the side.
Tap your brush, then apply from the centre of the top of the scone, working outwards. If you find it easier, brush before transferring to the air fryer.
23. Once the air fryer is full of scones (being sure to leave a space in-between them), bake the scones in the air fryer at temperature 200°c/400°f for about 12 minutes. (Some air fryers might need temperature of 220°c/425°f). Preheat your air fryer if your machine recommends this. For regular ovens use temperature of 220°c/200°c Fan Oven/425°f/Gas Mark 6.


24. After 8 to 10 minutes, open the air fryer and the scones will have risen well but not be fully cooked through at the bottom. Very carefully turn them over, (if you have any egg/milk mixture left, brush some on) and continue baking for another 2 to 4 minutes until set on the bottom. (See Photo 10 below).
*For regular oven, no need to turn the scones over after 8 minutes, simply bake for about 12 minutes until well rise and set.
25. While the first lot of scones are baking, go ahead and carefully bring the excess dough together into a rough ball and then flatten into a disc, making sure 1″/2.5cm deep, before cutting out more scones.


26. Leave these scones on some paper, or have a new square of paper ready to slide into the air fryer once the first lot are baked. You can take this opportunity to egg-wash these other scones too. Being extra carefully not to let the egg-wash drip.
27. Once the first scones are ready, remove carefully and pace on a cooling rack to cool, while you add the next lot for baking. If using the ordinary oven, they can all be baked on one baking tray/sheet, in the centre of the oven, with no need to turn them over.
See Photo 11 where the second batch of scones are baking, with one very tall, well risen scone, leaning to the left. Looks funny, but is still a perfect scone.


This can sometimes happen if the centre of your spread-out dough is a little thicker than the edges that you have measured. So a very deep one and this can happen, but shows how the depth really does play a part in how they bake upwards and result in a good rise.
Re-rolling Dough
Please also note, that by the time you have cut out a first batch, the dough has been handled a lot, and so the later scones will not look as great a shape as the first batch but they should still rise and taste the same.
It is the shear nature of these scones that don’t like too much rolling out of the dough (similar to puff pastry being re-rolled), or handling. (You can learn more about this is my original British scones video tutorial – an almost real-time video.


28. Once all baked, let cool or eat slightly warm. A perfectly risen scone will split in half with your hands and not need a knife. But most use a knife. They look great stacked with filling in the middle, but most people eat in two halves.
29. Add classic topping like whipped cream, clotted cream, jam, curd and butter. Serve with tea and this makes for a good Cream tea, or a great addition to Afternoon tea or a Tea Party. Try some homemade blueberry orange curd, easy Plum & orange jam, lemon curd or even fig curd. All of which can be made from frozen fruits.


Storing & Freezing Scones
British Scones are great for freezing. When fully cooled, simply wrap in baking/parchment paper or cling film/plastic wrap and then in a labelled food bag. Scones are fine to freeze for up to 3 months1. Defrost at room temperature or overnight in the fridge. Once defrosted, slice in half to warm slightly in the microwave for 20 seconds at the most & they are like just baked. You can also place a whole scone in the air fryer for 1-2 minutes @170°c/325°f, being careful not to dry them out. Alternatively, if a conventional oven is already on, a few minutes till warm to touch.
Check out my other scone recipes below – classic original British Scones tutorial, my Cranberry orange Scones, Cheese Scones & the classic scones in the air fryer. New for 2025, lemon blueberry air fryer scones.


Recipe Card
Air Fryer Chocolate British Scones – Double Chocolate Orange

Equipment
- Scales or measuring cups
- Measuring Spoons
- Mixing spoon
- Jug
- Large mixing bowl
- Pastry Cutter/Pastry Blender (optional – or 2 butter knives, or fingers)
- Whisk or fork
- Baking/parchment paper
- Round Cookie Cutter (5-6cm or 2-2⅓″, mine is 5¾cm or 2¼")
- Small bowl/dish
- Pastry brush or clean artist brush
- Cooling rack
- Air Fryer (Any size as mine is small, for regular oven recipe see link below)
Ingredients
- 75 grams Butter, unsalted, cubed & at softened (2½ oz or level 2/3 stick or ⅓ cup)
- 450 grams Self-raising Flour (OR 15 ¾oz , 3⅔ cups All Purpose/Plain Flour PLUS 5½ (level) tsp Baking powder ) * See notes.
- 2 tsp Baking Powder (rounded tsp) (In addition to that above if using Plain/A.P. flour – see notes*)
- 38 grams Cocoa Powder
- 2 tsp Coffee Granules/powder
- 50 grams Light Brown Sugar (1¾ oz or 1 level ¼ cup** – see notes for alternatives)
- 2 Med-Large Eggs (US – Large or Extra Large)
- 240 ml Milk or Butter MiIk (1 cup, 8 fl oz) – approx. See notes*)
- 2½ tsp Orange Extract
- 1 tsp Vanilla Extract (Make your own Vanilla Extract)
- 80 grams Baking Chocolate Chips (2¾ oz, ½ cup – I used half dark (bitter) & half milk chocolate (semi-sweet))
Instructions
Prepare Air Fryer
- Cube butter about 1cm or ⅓" size & the butter will soften quicker. If short on time, try this hack I reviewed for softening butter in about 12 minutes.
- Before preparing the scone dough, use the cookie cutter to check how many scones you can bake at one time in your own air fryer on its own rack. Mine is small, but can bake 4 at one time. *Don't bake over 2 levels.
- Prepare the rack with a square of baking/parchment paper big enough for the scones, but not touching the sides of the air fryer, to allow the air still to flow. Cut a few for when doing more than one batch. If using ordinary oven, paper line one large baking tray/sheet.
Prepare The Dough
- Add flour, baking powder, cocoa powder & coffee granules/powder, to a medium-sized mixing bowl. **Remember to add the 2 amounts of baking powder if using Plain/All Purpose flour. Whisk briefly together before adding in the softened cubed butter.
- Mix the dry ingredients with the butter, before you 'Cut the butter' into the flour with a Pastry Cutter (Pastry Blender), until the mixture resembles large breadcrumbs. Alternatively use 2 butter knives, or rub between your fingertips. (For more details, read before this Recipe Card or watch the video below). Pieces don't all need to be the same size or take too long to do. Add in the sugar and mix through.
- Add 240ml (1 cup, 8 fl oz) milk to a measuring jug, before adding in the eggs and whisking together. (**If you want to make similar to buttermilk, add 1 tbsp vinegar or lemon juice to the milk & leave 5 minutes till it looks 'curdled'). Check the level of the mixture now that the eggs have been added and top up with more milk to the 350ml (shy of 1½ cups, 11¾ fl oz) level if required. If you have more it is fine too. Reserve 2 tbsps of the mixture to a small bowl for egg-washing the scones.
- Make a reservoir in the centre of the mixing bowl before adding in a little of the egg/milk mixture and mixing with a large spoon or spatula. Gradually adding in more liquid, being careful to check for dry patches underneath. Once a darker brown colour and starting to come together, use your hands to knead together into a rough dough. Add the Vanilla Extract, Orange extract & half of the chocolate chips, before working them into the dough. Add the second lot of chocolate chips. You want a slightly sticky dough. You might not need all the egg/milk mixture or need a touch more milk. DO NOT USE A FOOD PROCESSOR OR MIXER.
- Dust some baking/parchment paper with cocoa powder to work on, before forming the dough into a disc shape. Place on the dusted paper & use your hands to open out the dough to a thickness of at least 1" (2½cm). Do not use a rolling pin.
- Dip your cookie cutter into a dish of cocoa powder before cutting out the scones. DO NOT TWIST THE COOKIE CUTTER! This is very important for a good rise. Cut as many as you can before pulling away the excess scone dough. Use a palette knife to carefully transfer the scone to the prepared paper in the air fryer basket (don't touch the sides of the scone).
- Once you have enough in the air fryer basket, carefully brush a little of the reserved egg-milk mixture on top of the scone. Tap excess off brush and brush from the centre of the scone outwards, being careful not to let any drip down the sides of the scone.
Bake The Scones
- Bake your prepared scones in the air fryer at 200°c/400°f for about 12 minutes. (Some air fryers might need 220°c/425°f). Preheat the air fryer if your machine recommends this. Regular ovens use temperature of 220°c/200°c Fan Oven/425°f/Gas Mark 6.
- After 8 to 10 minutes in the air fryer, the scones will be set and well risen, but the bottoms will need baked more. So turn them over carefully, (if you have any egg/milk mixture left, brush some on) and continue baking for 2 to 4 more minutes.
- While the first lot of scones are baking, gently bring the scraps of dough together as best you can with minimal handling, and flatten out to at least 1" (2½cm) deep. Cut more scones till all the dough is used up. You should get about 12 scones in total. Transfer these carefully to paper and brush egg-wash on top now, or when in air fryer basket.
- Once first scones are baked, transfer to cooling rack & bake remaining scones.
Serving, Storing & Freezing
- Enjoy the scones cut in half and with topping such as butter, clotted cream, whipped cream, jam & curds. Try my homemade blueberry orange curd, easy Plum & orange jam, lemon curd or even fig curd. All of which can be made from frozen fruits.
- Store left-over scones in air-tight containers – I find cake or cookie tins work best. Store with the paper you used in baking and these will last at least 3 days.
- Scones are easily frozen by wrapping in baking/parchment paper or cling film/plastic wrap when fully cooled and then in a labelled food bag. Are fine frozen for up to 3 months1. Simply defrost at room temperature or in the fridge overnight. Once ready, slice in half and warm slightly in the microwave for 20 – 30 seconds at the most & they are like just baked. You can also place a whole scone in the air fryer for 1-2 minutes @170°c/325°f, being careful not to dry them out. Alternatively, if you have a conventional oven already on, a few minutes till warm to touch.


Video
Notes
 Sugar – light brown sugar was used for these scones, but my regular scones also Caster sugar (equivalent being Extra/super fine sugar). These will all work, as does making your own caster sugar from granulated sugar.
Milk – regular milk works for scones, as does lactose-free & goat’s milk. Buttermilk works even better with the chocolate scones. To make your own, add 1 tbsp vinegar, or lemon juice to the milk & leave 5 minutes to look ‘curdled’.
Sugar – light brown sugar was used for these scones, but my regular scones also Caster sugar (equivalent being Extra/super fine sugar). These will all work, as does making your own caster sugar from granulated sugar.
Milk – regular milk works for scones, as does lactose-free & goat’s milk. Buttermilk works even better with the chocolate scones. To make your own, add 1 tbsp vinegar, or lemon juice to the milk & leave 5 minutes to look ‘curdled’.

 Coffee – powder, granules or espresso is fine, as is decaffeinated and there purely to enhance the chocolate flavour and not for a coffee taste.
Vanilla Extract – a small amount of vanilla extract enhances the chocolate flavour of the scones. Learn how to make Homemade Vanilla Extract.
Coffee – powder, granules or espresso is fine, as is decaffeinated and there purely to enhance the chocolate flavour and not for a coffee taste.
Vanilla Extract – a small amount of vanilla extract enhances the chocolate flavour of the scones. Learn how to make Homemade Vanilla Extract.
 Cookie Cutter – try to use a cookie cutter that is straight edged, and with a diameter of 5 to 6cm or 2 to 2⅓″. My cutter is 5¾cm or 2¼”.
Air Fryer – my air fryer is small so takes 4 scones at a time. **Read my Cello double air fryer review.
Yield – using the same cutter & thickness, you should get about 12 scones from the recipe.
For all other information & scone tips, please refer to the complete recipe post & my Scone video tutorial that is nearly real-time.
Cookie Cutter – try to use a cookie cutter that is straight edged, and with a diameter of 5 to 6cm or 2 to 2⅓″. My cutter is 5¾cm or 2¼”.
Air Fryer – my air fryer is small so takes 4 scones at a time. **Read my Cello double air fryer review.
Yield – using the same cutter & thickness, you should get about 12 scones from the recipe.
For all other information & scone tips, please refer to the complete recipe post & my Scone video tutorial that is nearly real-time.

 Check out my Original British Scones recipe (above), the Mango Cranberry Air Fryer Scones recipe (below), or my savoury version – Cheese British Scones. Kids can also try my super simple Tear-&-Share Cheese Scones, with no need to cut out the dough. Air Fry Classic scones or new Air Fryer Cheese Scones recipe. New for 2025, lemon blueberry scones. New for 2026, Gluten-free AIr Fryer Scones.
**Total Time to make – based on baking 3 batches of 4 scones, for 12 minutes each. If your air fryer is larger, and can bake more than 4 scones at one time, total time would be reduced by about 12 minutes.
Check out my Original British Scones recipe (above), the Mango Cranberry Air Fryer Scones recipe (below), or my savoury version – Cheese British Scones. Kids can also try my super simple Tear-&-Share Cheese Scones, with no need to cut out the dough. Air Fry Classic scones or new Air Fryer Cheese Scones recipe. New for 2025, lemon blueberry scones. New for 2026, Gluten-free AIr Fryer Scones.
**Total Time to make – based on baking 3 batches of 4 scones, for 12 minutes each. If your air fryer is larger, and can bake more than 4 scones at one time, total time would be reduced by about 12 minutes.

 Browse Recipe Index
Reference – 1 Freezing information from website Freeze It.co.uk @ https://freezeit.co.uk/can-you-freeze-scones/
Browse Recipe Index
Reference – 1 Freezing information from website Freeze It.co.uk @ https://freezeit.co.uk/can-you-freeze-scones/
***I am not a qualified nutritionist, & all nutritional values are based on a serving of 1 scone (from a batch of 12 as per recipe above), with no toppings. Bigger or smaller scones & the nutritional values will change. All values from MyFitnessPal.com.


Subscribe For More Recipes
Follow me on social media:
Happy Baking!
Caro x

References
- Freezing Scones reference from website Freeze It @ How To Freeze Scones ↩︎
Air Fryer Double Chocolate Orange British Scones
Search For Something You Fancy!
Caroline’s Easy Baking Lessons


Have made these numerous times and it is my only recipe after trying many. It has the texture, taste and rise I desire. You cannot go wrong with this fully explained recipe! These scones were a big hit at a tea party we hosted at our museum.
Thank you so much for the great feedback Joy & taking the time to comment. Looking forward to seeing photos next time you make them.
Oh wow! Not only is your scones recipe ‘The Go-to Recipe’, but now a chocolate orange one! Now I know what I am making this weekend! Looking forward to these.
What a great recipe. The chocolate and orange flavour plus the addition of chocolate chips made a lovely change from other scones. Did mine in my air fryer and was very impressed, had clotted cream and jam with ours. As is the norm with Caro’s recipes the instructions were excellent plus the addition of the video made it so easy to follow. Thank you so much for sharing.
Thank youso much for giving such lovely feedback. Appreciate that and so pleased you enjoyed them and the recipe.