Cheese Scones – Savoury British Scones

Here's my version of cheese scones (as in British Scones that we have here in the UK). Learn all the tips for a successful rise! Bonus Airfryer recipe included**
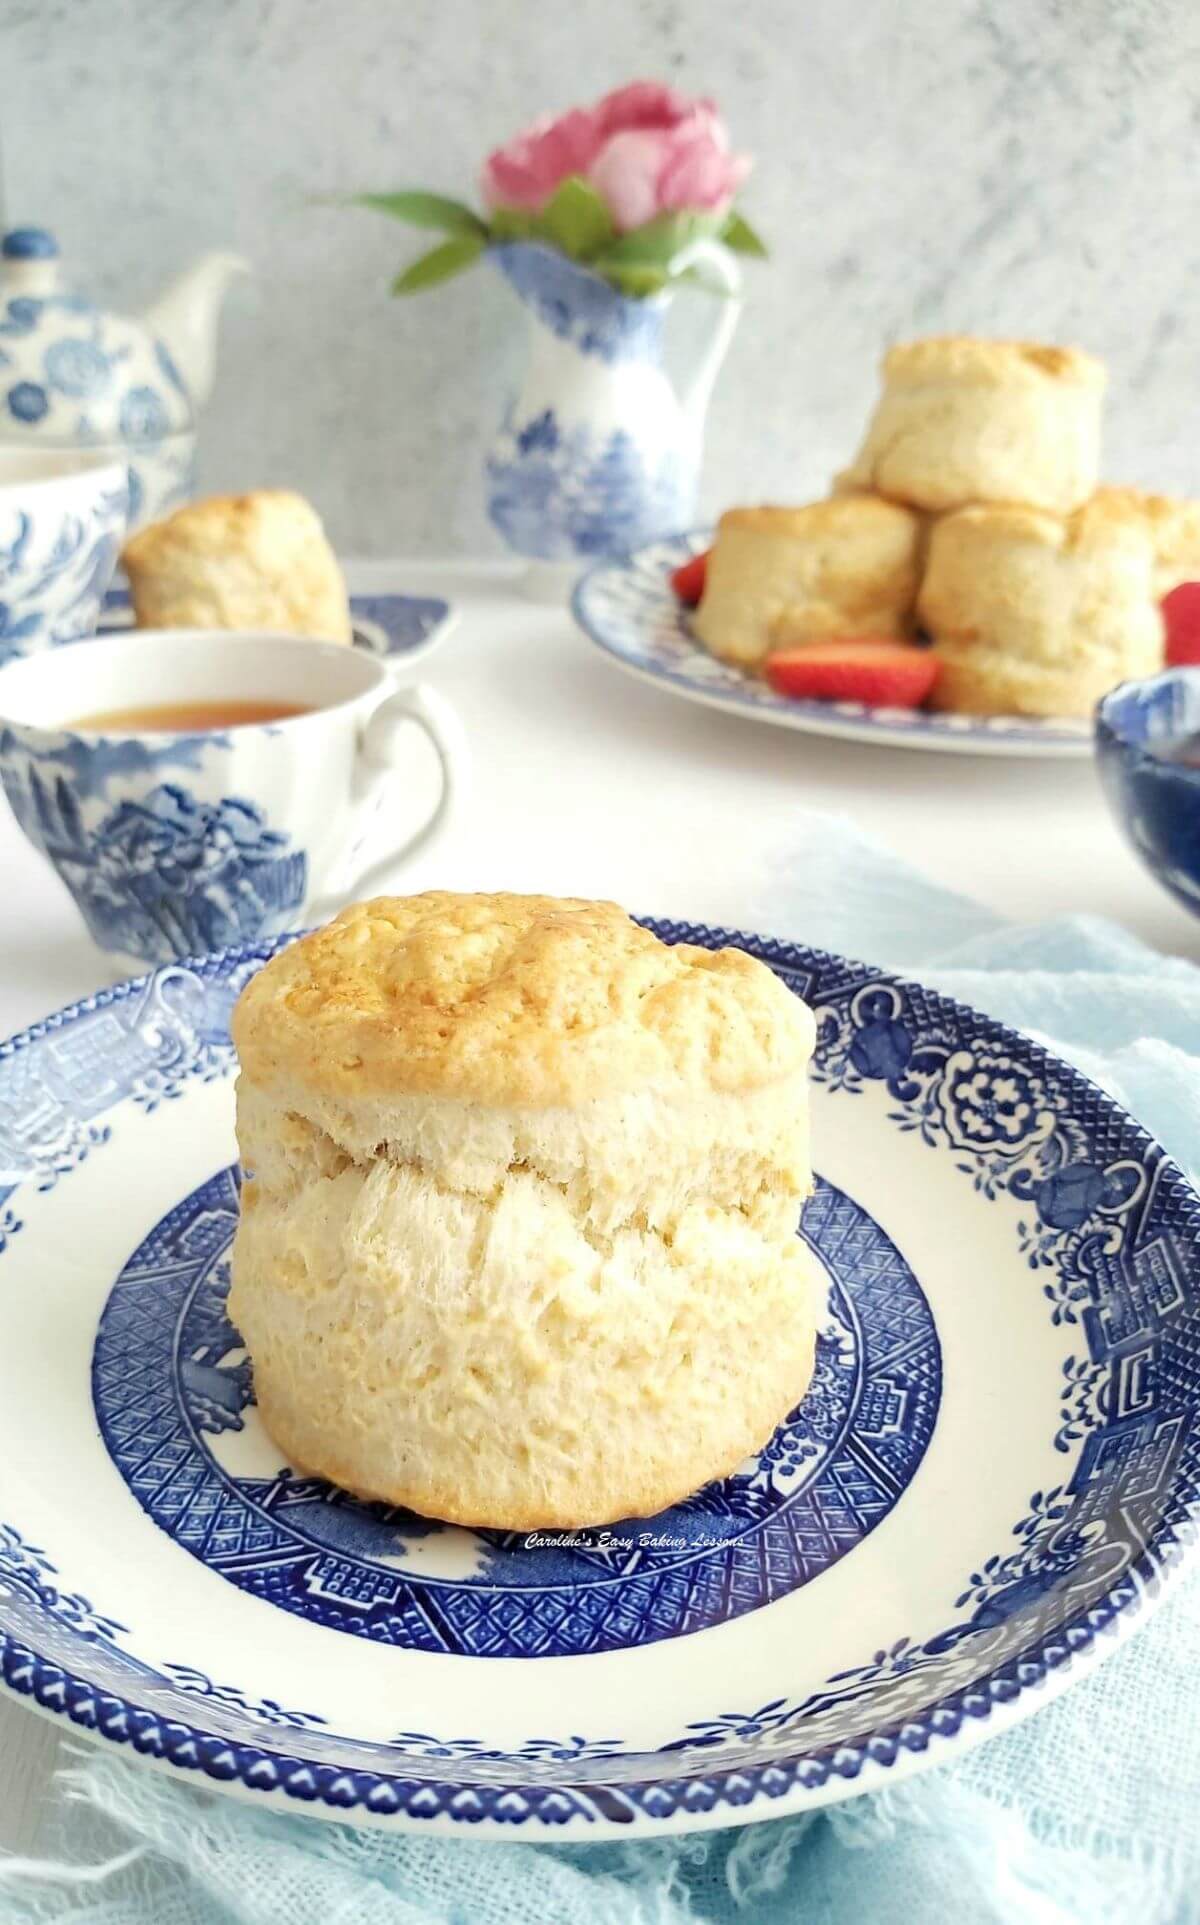
British Cheese Scones
A Savoury Version Of My Classic British Scones


How My Cheese Scone Recipe Came About
After my original scone recipe was used in a worldwide group bake along earlier this year (in a Facebook Great British Bake Off Group), I was asked to develop some flavoured versions & my cheese scones were born! To get the classic rise and split structure of this type of bake, there are important things not to do, and this also includes being very careful with any weight you add to the dough.
Cheddar Cheese
So I have developed a these Cheese Scones and I used small cubes of Scottish Extra Mature Cheddar (like a very sharp cheddar) inside the dough and near to the end of baking, added some grated/shredded cheese on top.


Other Flavourings Used In Cheese Scones
These easy cheese scones are also flavoured with mustard powder. I had never tried this before I needed it in a cheese recipe I wanted to try, and eventually found it in Asda in the condiments aisle. It really does bring out the cheese flavour.
SubstituTe For Mustard Powder
As a substitute, you can also use Smoked Paprika. I also added a little sprinkle of garlic powder in the dough and sometimes a touch of smoked paprika on the top. You can add more of these if you want, but try these as they are first and take it from there.
A NOTE ON INGREDIENTS


**All ingredient amounts listed in Recipe Card below.
Flour & Milk
Just a little note on the other ingredients in these savoury scones. I used self-raising flour and you can also use self-rising. Plain or All Purpose flour also works well. These scones were successfully baked in the States in the bake-along with generic all purpose flour. *(Just remember to add the 2 stated amounts of baking powder).
Even gluten free flour works too, (with the addition of 1 & 1/8 tsp Xanthan Gum), and some used coconut and goats milk because of intolerances. Both worked but give less of a golden finish to the scones because of lower fat and sugar content.
Caster Sugar
The recipe also uses caster sugar. Now it is only a small amount and is purely there to help with the structure of the bake and also preserves the bake a little too. Extra/ultra fine or bakers sugar is a perfect alternative or you could just pulse the sugar from regular granulated sugar. Just note that US granulated is a little finer a granule size than our UK equivalent. See photo below of our sugars in the UK.
A Look At UK Sugar


More About Baking Differences
I have an article on Differences Between UK & US Baking Ingredients . However, my recipes ALWAYS include tested measurement conversions (and sometimes my reviews too). But if you are needing help with other recipes, check out my Conversion Of Common Baking Ingredients article. It includes a handy table, easily shared or saved.


Here’s my Mango Cranberry Air Fryer Scones recipe, another great alternative to the classic, with cranberries and amazing flavour from Foodie Flavours mango extract!
SCONE VIDEO TUTORAIL – REAL-TIME
Now I also have a couple of videos on the process of British scone making. One about the things not to do, as this is where most problems arise. For more details on that, see this video on scone tips. For an almost real-time video, go to my Classic Scones Tutorial below. (My 2020 one is still on my Youtube Channel, but I made a better quality one this year which you can view below). This shows how little and gentle handling is required & the same goes for making Cheese Scones. Many people who joined in and used my recipe, have now got the rise to their scones just from watching this video, so well worth a watch.
More of my different sweet scone recipes below.
***New AIr Fryer Cheese scones recipe & lemon blueberry scones.


Go to my Scone recipes page
Click the PLAY button below on the video, or select to watch on your YouTube Google account, where you can ‘Save For Later’ if needed. Or, view my Classic British Scones recipe, with all the hints and tips you need.
DOWNLOAD the complete recipe, to save to your phone or computer, simply by clicking the ‘download’ button below.
Airfryer Cheese Scones
Mrs D who helps me with recipe testing, tried out a half batch of my cheese scones in the airfryer. Her findings, timings and costing are at the bottom of the recipe.


ENERGY & MONEY SAVING
In an effort to help people still bake, during the current cost of living and energy crisis, Diana has been testing some of my recipes in an Airfryer. More recipes suitable for an airfryer will be coming soon, to not only save on energy & in some cases time, but also be perfect is you only want a small batch for a one or two-person household. So look out for a Money Saving Page coming to the website soon, with these types of recipes, as well as hints and tips for saving money in your baking & cooking. See AIr Fryer Cheese Scones recipe.
UPDATE – check out my Traditional British Scones In An Air Fryer recipe! (photo below) , Double Chocolate Orange Air Fryer Scone or new Air Fryer Cheese Scones.


Step-By-Step Instructions
**All ingredients and equipment listed in Recipe card below**


1. Weigh out the butter whilst cubing it and leave out to come to room temperature. I like to cut my butter to about 1cm (⅓”) size as smaller surface area will soften quicker. But if you are short on time, try this hack I reviewed, for softening butter in about 11 minutes. See Photo 1.
2. Place baking/parchment paper on top of the baking sheets/trays. (Hold in position with some baking spray/butter/lining paste if they are flat and have no lip or your bake can fall off – this has happened to me with cookies 🙁 )
3. Weigh or measure in the flour into the same bowl, spoon in the baking powder & give it a mix through before you drop in the butter. See Photo 1.


4. Using your fingertips, rub the butter into the flour & continue to do this until the mixture resembles breadcrumbs, (tiny pieces). See the video for how this is done. I use a pastry cutter for this job as my fingers get sore. You push down into the bowl and do a squishing motion whilst rotating the cutter left and right. Repeat this until all the butter is now in very tiny pieces coated by the flour. Alternatively, you can use two butter knives and cut through the butter (this is where the term ‘cutting in’ comes from). See Photo 2.
5. Then add/weigh in the sugar & mix till distributed evenly. Next add in a pinch of salt, garlic, mustard powder & smoked paprika and mix till evenly distributed. (No mustard powder, then increase the amount of smoked paprika).


6. Next roughly dice the cheese into pieces about 7mm (⅓”) like in Photo 3.
7. Add in the chopped cheese and mix till coated in the dry mixture.
8. Now beat the eggs in a jug and then top up to the 300ml (10 fl oz,1 1/4 cup) mark with the milk, (depending on the size of the eggs, you might not need as much milk).
9. Give the liquid a good whisk and then take 2 tbsp of it out and place in a small bowl to use later.


10. Gradually add the egg/milk mixture to the dry ingredients, mixing with a wooden spoon or spatula, until a soft dough is formed. Be aware that the dough being a little bit sticky is good for the scones to rise. But only add enough of the liquid until just sticky.
**So you may not need all the liquid. See Photo 4, (of the dough using mustard powder – if using smoked paprika, it will have a stronger orange tinge). Do this by hand and don’t use a food processor as it can make the scones tough. Same goes for kneading, only bring the dough together until combined and soft. (See video)
11. Next flour a pastry board or worktop/counter or use some baking/parchment paper with a little flour on top.


13. Put the dough down and flatten gently with your hands until you have a level piece of dough about 1″ (2.5cm) high. Try not to go smaller than this (taller is fine). Don’t be tempted to roll out the dough as this won’t help the scones to rise. (If too sticky, just pat some flour on your hands and on top of the flattened dough. Do not roll back up or knead). See Photo 5.
14. Flour the cutter or glass and cut out the scones. Push the cutter down and DO NOT TWIST the cutter. I know it’s tempting, but twisting can ruin the outer structure of the scones – you want that characteristic ‘rise & split’ appearance of a good scone.
Use a spatula or knife to very carefully transfer to the prepared baking tray, (or let it fall onto the prepared tray). Try not to touch the sides of the scones if possible. .


15. Gently roll up the scraps of dough by hand and flatten out to cut out however more scones you can get, remembering only lightly knead and handle as little as possible. (I usually get about 12 scones per batch). See Photo 6, top pic of the scones using mustard powder and bottom using smoked paprika where it colours the scone dough.
(Note that the scones from the rolled up off-cuts, will not look as perfect as the first lot and it’s because of more ‘handling’ of the dough. As an alternative, you can divide the dough in half first and then cut out and bring the 2 lots of scrap dough together at the end.
‘Egg-wash’
16. Now using a pastry brush, very carefully brush the egg/milk liquid you reserved earlier, onto the tops of the scones only. If the liquid goes down the sides, it can ruin the rise of the scones. So, the best way to avoid it is by shaking/tapping the brush before moving to the scone and then starting to brush from the centre and going outwards, so there is less liquid on the brush to spill down the sides. Watch the video for a visual of how to do this. See Photo 6, bottom pic, egg-washed and of the scones using smoked paprika.


17. Bake for 12-15 minutes until well risen and golden in colour, on top and on the bottom. For an even bake and colouring, and depending on your oven, turning and rotating the trays can help. You can also bake just one tray at a time if you want. For even more of a cheese kick, I like to add some grated cheese about the 8-10 minute mark.
Once the scones are well risen and started to colour on top, add the grated/shredded cheese on top (about 1 tsp worth and then place on top 🙂 ) Then let them bake another 2 – 3 minutes, just long enough for the cheese to melt nicely but not burn or go too hard. Keep an eye on it as it can turn quickly. Leave on the baking tray 5 minutes. See Photo 7.
18. Then transfer to cool a little on a cooling rack and enjoy warm with whatever fillings you enjoy, such as butter. Learn how to make homemade butter & buttermilk from cream.


Freeze The Scones
You can freeze these scones and once defrosted, heat a little in a warm oven. Alternatively, slice in half and heat in the microwave for about 20 seconds.
More Scone Tips
See my Classic British Scones tutorial for more tips for success scones.
Bake Scones In The Ayrfrier
My friend Mrs D, experimented and made a half batch of my cheese scones in her airfryer. Here are her results & her directions in her own words:


“With the cost of everything going up, I decided to make Caro’s cheese scones in the airfyer. I have a tower Vizion 7 litre model, and I made a half batch from half the ingredients, and baked at 200c (400f / Gas Mark 6) for 15 minutes. I checked after 10 minutes, but they needed longer. I didn’t need to turn them over during baking and they came out lovely & light.“
My husband worked it out to be about 13p to bake a half batch in the airfryer, compared to a full batch in the oven for 30p*. I also did not need to pre-heat the airfryer.”
*based on UK prices October 2022
Thank you Diana, this is an ideal alternative for making less scones, or if you want to reduce your energy costs. Here are the ingredient amounts to make 5 scones.


Half Batch Ingredients
38g Butter, unsalted, (1¼ oz or level 1/3 stick)
225g Self-raising Flour (OR 7¾oz , 1¾ cups All Purpose/Plain Flour PLUS 2¾ (level) tsp Baking powder )
1 tsp Baking Powder (rounded) (In addition to that above if using Plain/A.P. flour – see notes*)
25g Caster Sugar (¾ oz or 2 tbsp**
1-1½ tsp Mustard Powder or Smoked Paprika
½ tsp Garlic Powder
½ tsp Salt
50g Extra Mature Cheese, (1¾ oz, 2/3 cup extra sharp cheddar)
1 Med-Large Eggs (US – Large or XLarge)
112ml Milk approx. (up to 3¾ fl oz or ½ cup)
25-30g cheddar cheese, grated (1 oz, 1/3 cup Extra sharp cheddar, shredded)
**See recipe for ingredient notes, instructions & timings. Yields 5 – 6 scones.
To make 10 classic British scones, go to my Traditional British Scones In An Air Fryer recipe.


Share The Scone Love
Please see the sharing options or even printing, at the right/bottom of your screen (bottom of your screen for mobiles, and down the right-hand side on computers). You can even pin this to your own Pinterest page. Alternatively, you can download this article, see below. You could also leave some feedback if you like.
Click the ‘Download’ button below, to save to your phone or computer.
Join My Facebook Group
Why not also join my Facebook group – Easy Online Baking Lessons, dedicated to this baking lessons website, as well as providing one-on-one support with myself & my team? Be sure to answer all security questions when requesting to join. Click to join the group.
DIFFICULTY LEVEL: Easy, Beginner


British Cheese Scones

Equipment
- Scales or measuring cups
- Measuring Spoons
- Mixing spoon
- Jug
- Large mixing bowl
- Pastry Cutter/Pastry Blender (optional – or 2 butter knives, or fingers)
- Whisk or fork
- Baking/parchment paper
- 2 Baking Trays/Baking Sheets
- Round Cookie Cutter (5-6cm or 2-2⅓″, mine is 5¾cm or 2¼")
- Small bowl/dish
- Pastry brush or clean artist brush
- Cooling rack
Ingredients
Dry Ingredients
- 450 grams Self-raising Flour (OR 15 ¾oz , 3⅔ cups All Purpose/Plain Flour PLUS 5½ (level) tsp Baking powder*)
- 2 tsp Baking Powder (rounded) (In addition to that above if using Plain/A.P. flour*)
- ½ tsp Salt
- 1 tsp Powdered Garlic (I used Aldi Garlic & Herb Seasoning mix*).
- 2 – 3 tsp Mustard Powder (found in condiments, optiona*)
- ½ – ¾ tsp Smoked Paprika (Not spicy kind*)
- 100 grams Mature (or Extra Mature) Cheddar Cheese (3½ oz Extra/Sharp Cheddar, about 7mm (⅓") small cubes*)
- 30 grams Grated/Shredded Mature Cheddar Cheese (1 oz, for on top, optional)
Wet Ingredients
- 50 grams Caster Sugar (1¾ oz, level ¼ cup Extra/Super Fine Sugar*)
- 75 grams Butter (unsalted, cubed & a little softened, 2½ oz or level ⅔ stick or ⅓ cup)
- 2 Med-Large Eggs (US – Large or Extra Large)
- 240 ml Milk or ButtermiIk (1 cup, 8 fl oz) – approx.*)
* Denotes -see notes
Instructions
Prepare Air Fryer
- Cube the butter to 1cm (⅓") size to soften quick or try this hack I reviewed for softening butter in about 12 minutes.
- Prepare your baking trays/baking sheets by paper lining with baking paper/parchment.
Prepare The Dough
- Add 450 grams Self-raising Flour , to a large mixing bowl and whisk in 2 tsp Baking Powder (rounded), ½ tsp Salt, 2 – 3 tsp Mustard Powder, 1 tsp Powdered Garlic & ½ – ¾ tsp Smoked Paprika. **If using Plain or All Purpose flour, please remember to add 5½ level tsp baking powder, in addition to the 2 tsp above.**
- Add 75 grams Butter to dry mixture, mix through briefly & 'Cut the butter' into the flour using a Pastry Cutter (Pastry Blender), until mixture resembles large breadcrumbs. Alternatively use 2 butter knives, or rub between your fingertips. (See in action, watch the air fryer video below). Then add in the 50 grams Caster Sugar and mix through.
- Add 2 Med-Large Eggs to a jug, whisk together, & add in only enough of the 240 ml Milk or ButtermiIk, to come to 300ml (10 fl oz) mark. Whisk together and reserve 2 tbsp of the mixture in a small bowl for later.
- Make a reservoir in the dry mixture, add ⅓ of the wet mixture & start to mix together with a spoon or spatula. Gradually add small amounts of the wet mixture until it starts to come together into a slightly sticky dough. **Please note you might not need all of the wet mixture or need a touch more (in which case just add milk).** Use the video as a reference point & get your hands in there to make sure there are no dry patches at the bottom of the bowl. Use your knuckles to spread out the dough a little, & add in half of the 100 grams Mature (or Extra Mature) Cheddar Cheese and briefly knead into the dough. Repeat with the rest of the cheese pieces, form into a ball then a disc shape. DO NOT USE A FOOD PROCESSOR OR MIXER.
- Lightly dust baking/parchment paper or a clean worktop/counter & use your hands to gently pat the dough out to a depth of at least 1" (2⅓cm). Do not use a rolling pin.
- Dip the cookie cutter in flour & cut out as many scones as you can get. ** DO NOT TWIST THE COOKIE CUTTER! ** This is very important for a good rise. Pull away excess dough, then transfer the scone to prepared paper lined baking tray/baking sheet. Any that stick in the cutter, carefully shake and let it fall onto the paper itself. **Try not to touch the sides of the scone if possible.**
- Pull back the excess dough & gently bring together as best you can with minimal handling & no rolling out. Just pat out to at least 1" (2½ cm) deep. Cut out more scones & repeat till all the dough is used. (Yield 11-12 scones).
- Next, very carefully brush reserved egg/milk mixture, on the tops of the scones only. DO NOT LET ANY DRIP DOWN THE SIDES – shake the brush, then start brushing from the centre of the top of the scone and work your way out to avoid drips.
Bake The Scones
- Bake @ 220°c/200°c Fan Oven/425°f/Gas Mark 6 for about 12 – 15 minutes. After 8 minutes of baking, add 1 tsp worth of the 30 grams Grated/Shredded Mature Cheddar Cheese, to the top of the scones & continue baking for another 4 – 7 minutes till risen, set and golden.
- Remove from the oven and leave for 5 minutes before transferring to a cooling rack.
Serving, Storing & Freezing
- Serve the scones in halves with butter. Learn how to make homemade butter & buttermilk
- Left-over scones should be stored in an air-tight container such as a cake or cookie tin. Store with the paper you used to bake them & they will last a minimum of 3 days.
- Freeze scones wrapped in baking/parchment paper or cling film/plastic wrap & then in a labelled food bag. These scones are fine for up to 3 months1. Defrost at room temperature or in the fridge overnight. Once defrosted, to enjoy warm simply cut in half & microwave for no more than 20-30 seconds. Alternatively, place a whole scone in the air fryer @170°c/325°f for 1-3 minutes, being careful not to dry it out.


Notes
 Seasonings – mustard powder is found with the mustard in larger supermarkets. Smoked paprika (non-spicy) is also used & helps colour the scones. No mustard powder? Increase the smoked paprika amount. Garlic powder/granules is used, but Aldi Garlic & Herb Seasoning mix is used in these photos & is a blend of garlic & rosemary.
Milk – regular milk works for scones, as does lactose-free & goat’s milk. Buttermilk works great too. Read my Homemade Buttermilk & Butter recipe.
Cheese – extra/mature cheese (extra/sharp cheddar) is used. Small pieces in the scone dough and a little grated/shredded on top of the scones, part-way through baking.
Seasonings – mustard powder is found with the mustard in larger supermarkets. Smoked paprika (non-spicy) is also used & helps colour the scones. No mustard powder? Increase the smoked paprika amount. Garlic powder/granules is used, but Aldi Garlic & Herb Seasoning mix is used in these photos & is a blend of garlic & rosemary.
Milk – regular milk works for scones, as does lactose-free & goat’s milk. Buttermilk works great too. Read my Homemade Buttermilk & Butter recipe.
Cheese – extra/mature cheese (extra/sharp cheddar) is used. Small pieces in the scone dough and a little grated/shredded on top of the scones, part-way through baking.

 Cookie Cutter – try to use a cookie cutter that is straight edged, and with a diameter of 5 to 6cm or 2 to 2⅓″. My cutter is 5¾cm or 2¼”.
Yield – using the same cutter & thickness, you should get about 12 scones from the recipe.
For all other information & scone tips, please refer to the complete recipe post before this recipe card & my Scone video tutorial that is nearly real-time.
Cookie Cutter – try to use a cookie cutter that is straight edged, and with a diameter of 5 to 6cm or 2 to 2⅓″. My cutter is 5¾cm or 2¼”.
Yield – using the same cutter & thickness, you should get about 12 scones from the recipe.
For all other information & scone tips, please refer to the complete recipe post before this recipe card & my Scone video tutorial that is nearly real-time.

 Check out the Cheese Scones In An Air fryer recipe, or my Original British Scones recipe (photo above), the Cranberry Spiced Scones recipe, or my Double chocolate orange Scones version. Kids can try my simple Tear-&-Share Cheese Scones, with no need to cut out the dough. New for 2025, air fryer lemon blueberry scones. New for 2026, Gluten-free AIr Fryer Scones.
**Total Time to make – based on making 12 scones in one batch in a regular oven over 2 levels.
Browse Recipe Index
Check out the Cheese Scones In An Air fryer recipe, or my Original British Scones recipe (photo above), the Cranberry Spiced Scones recipe, or my Double chocolate orange Scones version. Kids can try my simple Tear-&-Share Cheese Scones, with no need to cut out the dough. New for 2025, air fryer lemon blueberry scones. New for 2026, Gluten-free AIr Fryer Scones.
**Total Time to make – based on making 12 scones in one batch in a regular oven over 2 levels.
Browse Recipe Index

 Reference – 1 Freezing information from website Freeze It.co.uk @ https://freezeit.co.uk/can-you-freeze-scones/
***I am not a qualified nutritionist, & all nutritional values are based on a serving of 1 cheese scone (from a batch of 12 as per recipe above), with no fillings/toppings. Bigger or smaller scones & the nutritional values will change. All values from Whisk.com.
Follow me on social media:
Happy Learning & Baking!
Happy Memories & Tummies!
Caro x
CHEESE SCONES – SAVOURY BRITISH SCONES
Search For Something You Fancy!
Caroline’s Easy Baking Lessons


