Speedy Mince Pie Swirls

Speedy Mince Pie Swirls are the sweet version of my Speedy Cheese Swirls recipe. Filled with mincemeat (minced fruit) like in mince pies, these are quicker to make than pastries & are yeast-free too.
Speedy Mince Pie Swirls
Yeast-Free & Pastry-free

***click to jump to section***


What Is A Speedy Mince Pie Swirl?
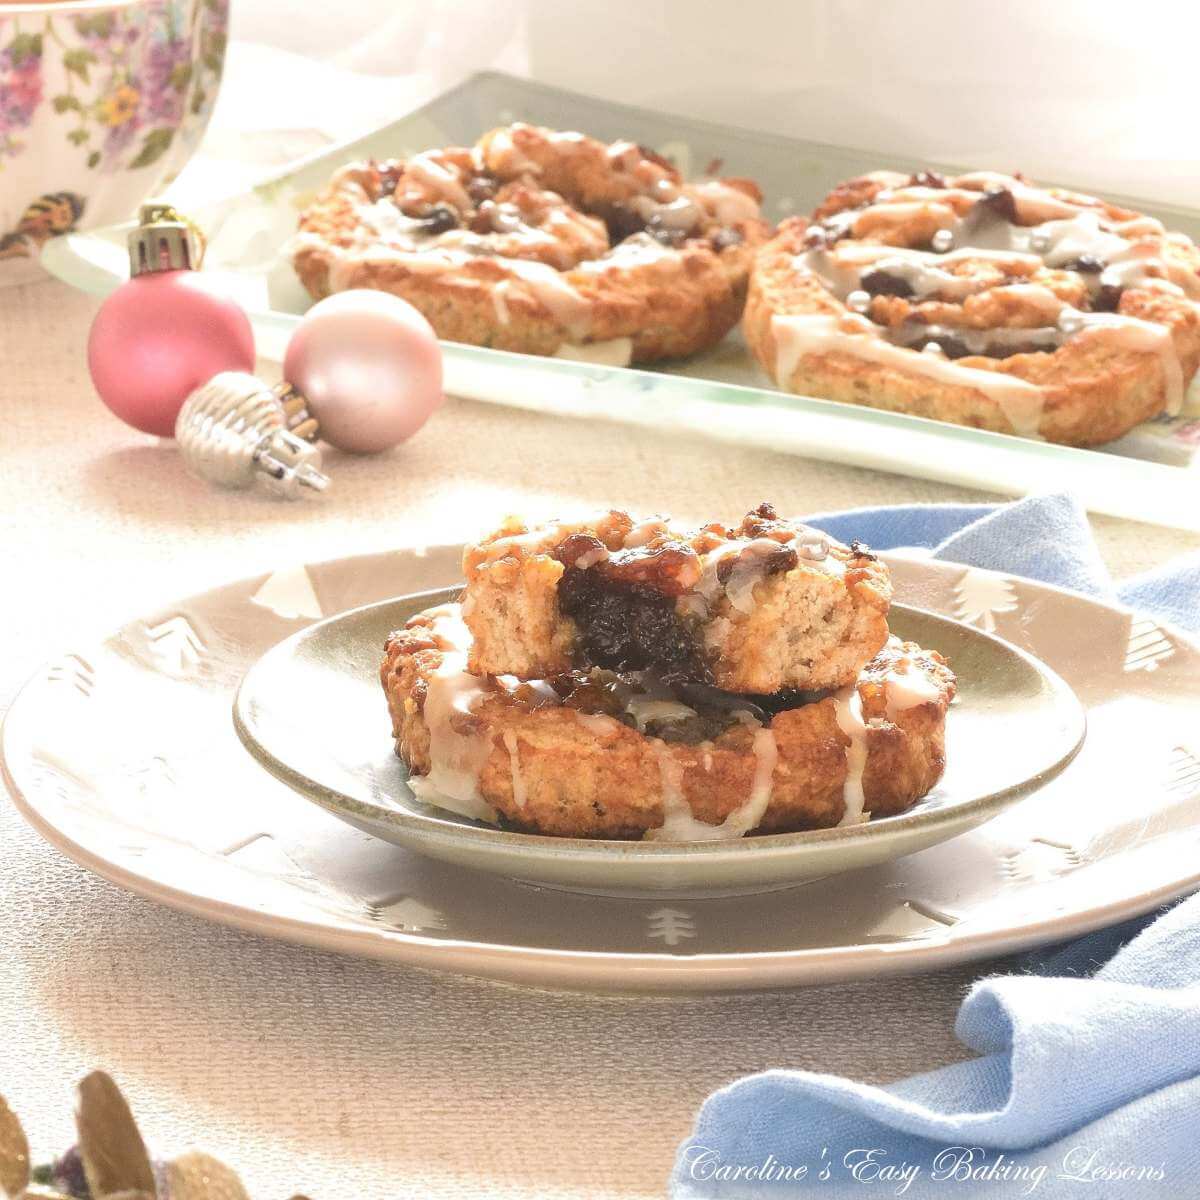
Speedy Mince Pie Swirls is an alternative to mince pies. Made in a swirl shape, filled with mincemeat, (British sugary dried fruit mixture) & topped off with a drizzle of sweet glaze.
These swirls (pinwheels or buns), are speedy to make & quicker than making mince pies, as the dough is not actually pastry. It is also yeast-free, but next day, the texture softens to resemble that of a cinnamon buns.
Ready in 1 hour, with no more than 30 minutes hands-on time, these can be made in a hurry.


Other Speedy Recipes
Try my new for Autumn 2025, another sweet version of the speedy swirls. This time filled with a pumpkin spice filling, these make a quick alternative to a pumpkin spiced bun.
Go to Speedy Pumpkin Spiced Buns
Or why not also try the original savoury recipe? Speedy Cheese Swirls, are an easy, yeast-free cheesy snack, that’s ideal for entertaining or for snaking.


Why Make Quick Mince pie Swirls?
- Easy & ideal for beginners
- Quicker to make than mince pies
- Taste great
- No baking equipment needed
- Detailed step-by-step instructions & photos
- Makes something a little different
- Great For sharing
- Great for gifting
- Yeast-free
- Pastry-free
- Perfect for cookie plates or holiday gifting
- Can be made ahead (actually better day after when texture softens)


Ingredients & Alternatives
My yeast-free mince meat swirls are made from the following basic ingredients:
For The Dough:
- Unsalted Butter
- Sugar
- Egg
- Spices
- Flour
- Salt
- Milk

For The Filling:
- Mincemeat*
To Decorate:
- Icing (Powdered) Sugar
- Milk*
- Orange or lemon zest
***see notes below
Egg
Medium to large UK sized egg is used in the dough. US equivalent is about large to extra-large size. Make sure the egg is at room temperature too.


Butter
For best and most consistent results, unsalted butter is recommended. Salted butter has higher water content and this can vary from brand to brand, causing some baking problems to suddenly occur.
**TOP TIP – if you cube the butter small (about *** ), the smaller surface areas means the butter softens quicker.
Learn how to make your own homemade butter in my article for making homemade buttermilk & butter.


Flour
The dough for the swirls is made using UK self-raising flour. You can also use US self-rising flour, but I have also tested them out using plain/ All Purpose flour, but just added some baking powder to help them rise a little. All details are given in the ingredient list.
Mincemeat
Ok so for our American readers who have never heard of Mincemeat or Mince Pies, the mincemeat is actually made from finely minced dried fruit. There is no meat in it now (many many years ago there was). There is also suet in a lot of mincemeat that can be bought here in the UK. But it is also very easy to find vegetarian versions, as well as some supermarkets do some with alcohol in them. I like Lidl’s large Belbake Classic jar, or Robertson’s Classic Mincemeat. You can also make your own mincemeat. Here’s a Delia Smith recipe for Vegetarian Mincemeat.


Spices
The dough for these quick mince pie buns, uses the following spices: : ground anise, nutmeg, ginger & mixed spice.
A lot of British recipes use Mixed Spice and in particular in Autumn & Winter recipes. It is roughly equivalent to US Pumpkin Spice and I always recommend that as a replacement.
If you can’t get Pumpkin Spice, you can use Cinnamon, ginger, nutmeg & clove or anise. I would recommend you make a mixture of ratio of: 1 tsp clove/anise & ginger, 2 tsp nutmeg & 1 tbsp cinnamon and then use accordingly.

Milk
Use any kind of milk, even a lactose-free or plant-based milk, to bring the dough together. *Note, you might not need all the milk.
Equipment
No special equipment required. A digital scale is always recommended for consistent results. However, I always include ounce and cup measurements for my recipes. Rest assured that these are not taken from Google, which can be inaccurate & inconsistent. During recipe development, I test in grams and cups for accurate results. From this I have also produced my own Baking Ingredient Conversions table that you can save, print or refer to when you need.
You don’t even need a piping bag for the glaze. That can be just drizzled across the buns.
Recipe Yield
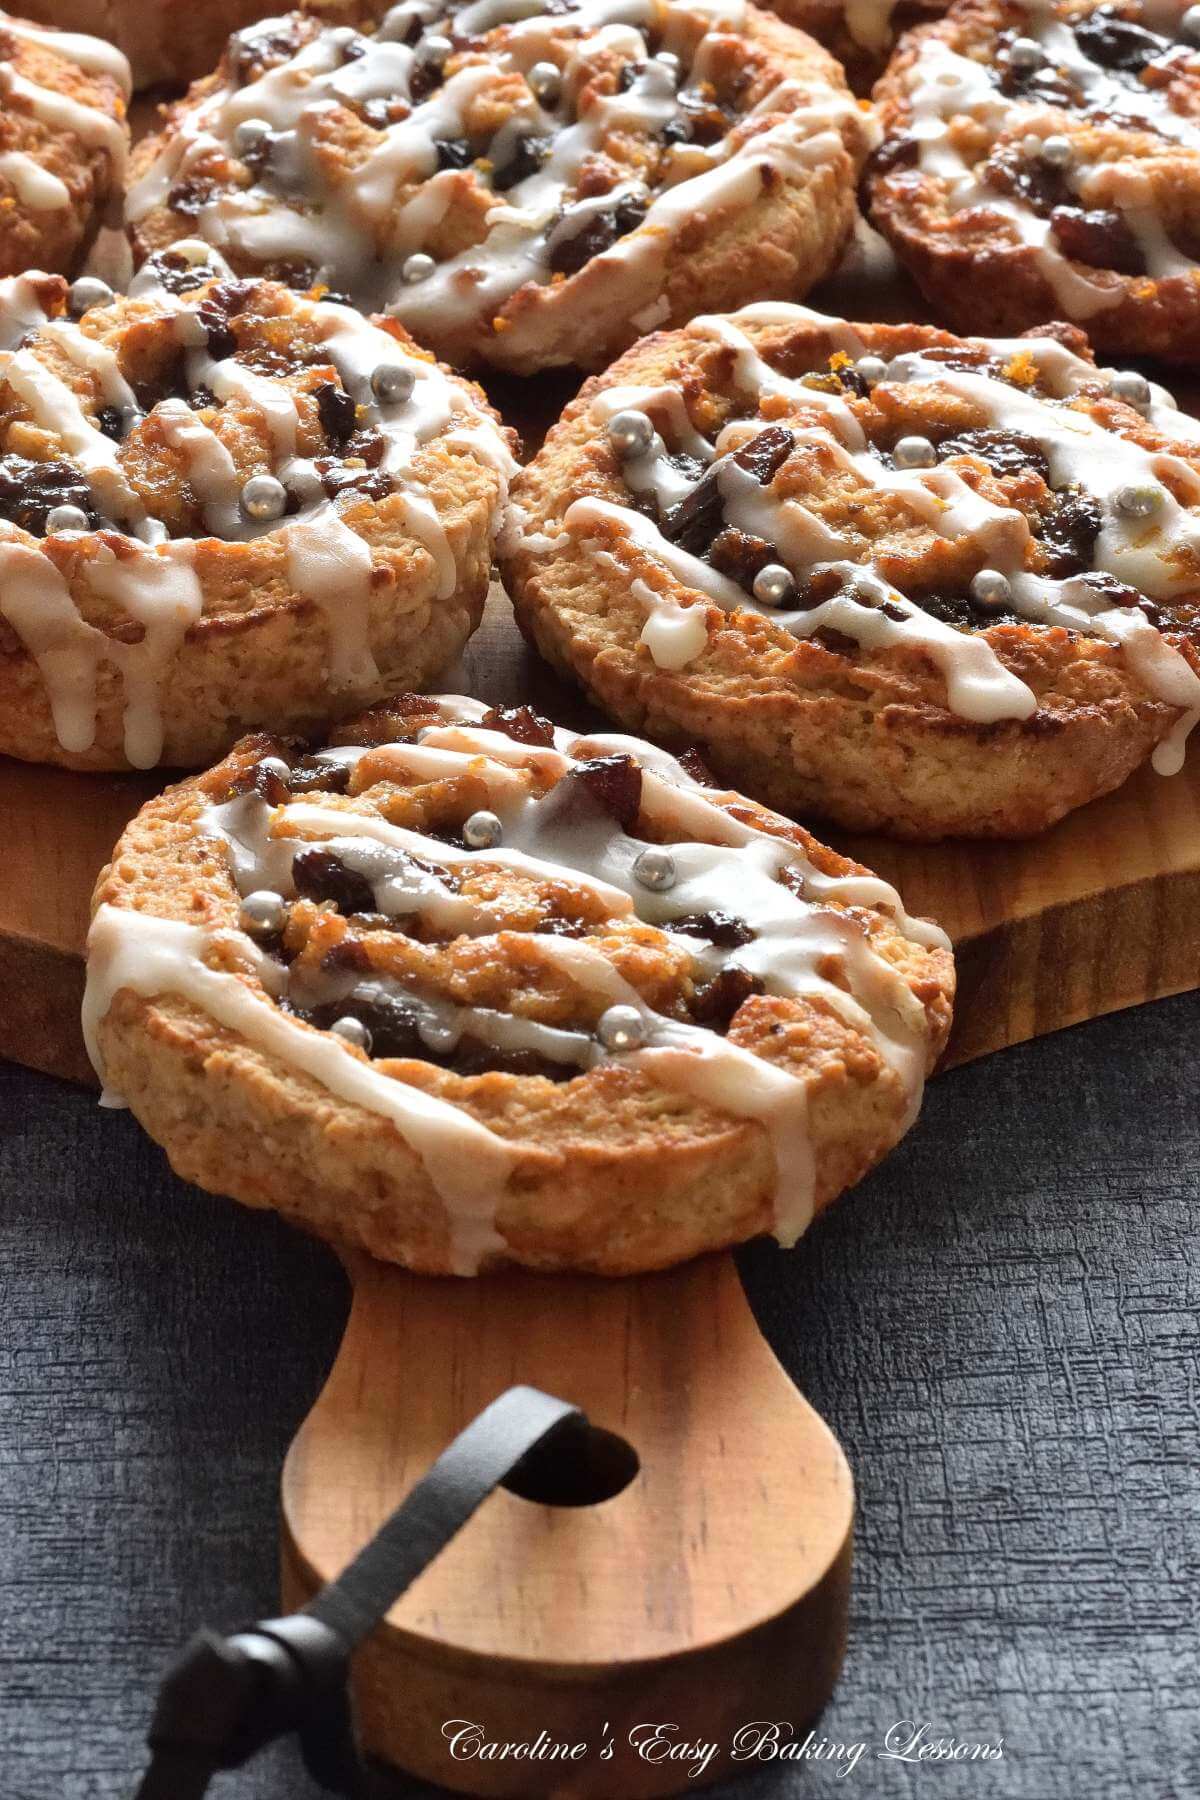
This recipe makes a yield of 16 slices, about 1.5cm (2/3″) thick. You can easily double the recipe, but would recommend halving the dough before rolling out. Rolling out twice, just to make a bit easier.


Special Presentation
These yeast-free buns can also be formed for special presentation.
Try forming into a Christmas tree shape and adding some sprinkles & sweet stars for extra sparkle.
Or you can form into a circle and make an edible wreath, for a table centrepiece. Just add a ribbon bow at the bottom.
In the photo collage, I placed on top of a round wooden chopping/serving board, on which the buns all fitted on nicely. Between the buns and th board, I scrunched I piece of tissue paper as the buns can be a bit sticky. You could add a dipping bowl in the centre, if you wanted. Or some other snacks.
Step-By-Step Instructions


1. Add the softened butter & flour (and the baking powder if using), to a medium bowl. Then by hand or using a pastry blender, ‘rub in’ the butter to the flour. This is like in pastry and scone making, where you are blending it to a ‘breadcrumb’ like consistency. However, there isn’t much butter in this recipe, so only a light rubbing of the flour and butter between your fingertips is required.
Lift up between your fingertips, rub your thumb across the tips of the other fingers, and let fall back into the bowl, before moving onto the next area and repeating. See Photo collage 1 or the video below.
With a pastry blender/cutter, just push down on the bottom of the bowl, & rotate left & right. Lift up & repeat on another area. Great if you have hands/fingers that tire easily. Not much butter in this recipe but, so only maybe 20-30 seconds is required.


2. Next, add in the spices, salt & sugar and mix through.
3..Paper line 1 or 2 baking trays/baking sheets and cut 2 sheets of paper 35cm at its longest (14″). Then pre-heat the oven to: 220c/200°c fan oven/425°f/Gas Mark 7.
4. Make a well in the middle and add in the egg.
5. Give it a whisk in this hole, and then add in half of the milk, & mix just the milk & egg together. See Photo collage 2.


6. Now use a baking spatula or wooden spoon to mix the milk and egg with the dry ingredients. Keep pushing down on the flour, & let it take on as much of the liquid as possible, before adding in any more small drops of the milk.
7. You want the mixture to come together into a very rough ball that will be just a little sticky. So very gradually add the milk.
You might not need all the milk, or might need a little more. Just make sure not a sticky dough. If you add too much milk, gradually add in more flour till the right consistency.
Test the dough by pinching a piece, flttening to see if it will hold together. (See Photo collage 3).


8. Place your ready-cut piece of baking/parchment paper down & dust that and your rolling pin with some flour or icing/powdered sugar.
9. Next gather the dough together into a rough disc shape.
10. Place onto the centre of the paper and form into a square or rectangle. Add some icing/powdered sugar on your hands if needed. Then place the second sheet of paper on top. See Photo **
11. Roll out the dough to a rectangle of about size 22.5 x 30cm (9×12″).


12. Spoon the mincemeat on top of the rolled-out dough, dividing up the mincemeat.
13. Spread for an even coverage, to very near the end of the dough. See Photo***
14. Now very carefully bend over the end of dough nearest you and begin to roll up the dough.
(Make sure you have the dough with the shortest length running across the way, as in the photo 4, so you can roll up more dough).


15. Very carefully roll the dough (you can use the paper to do this instead of using your hands directly on the dough). As you roll, neaten the ends with your hands and maintain a firm roll.
16. Roll until about 1cm (1/3 “) from the end. Use your thumb to thin the end (with no mincemeat). Then brush on some milk along this edge.
17. Use your fingers to pinch the ends together along the length of the roll of dough.
18. Roll the dough over and rock it back and forth to smooth and seal the edges. Then roll back with seam side down.


19. Keeping the dough on paper, and then slide onto a large chopping board.
20. Using a long sharp knife, cut the roll of dough in half, then into 4 equal quarters.
21. Cut each quarter into 4 to end up with 16 equal slices, about 1.5cm (2/3″) wide.
If you need to, you can coat your knife in some more flour or icing/powdered sugar.


22. For each slice, lift carefully and place on top of your prepared baking tray/sheet, & then re-shape any that have got a little squashed and lost their shape on cutting. See Photo ***
23. Leave at least 2.5cm/1″ gaps between the slices, and then pop in the oven to bake for 14-20 minutes. The Speedy Mince Pie Swirls are ready when golden and the undersides are set and firmed up. See Photo 5.
16. Remove from the oven, and place the baking sheet/tray on top of the cooling rack for 5 mins, before transferring, paper and all to the rack to cool down completely.
Prepare The Glaze


1.Now prepare the glaze by simply starting with your sieved icing/powdered sugar & add very gradually some milk, water or even lemon juice. I always begin with 1/2 tsps of liquid & push down on the sugar with a metal spoon & let the sugar take on the liquid.
2. Don’t add all liquid at once. If you want you can add some orange zest, orange or pineapple extract (I love Foodie Flavours Pineapple extract – 10 drops, 2 tsp orange extract & splash of lemon extract or lemon juice and water). Or even some mixed spice!
3.Keep mixing really well by hand, & then work down to 1/4 & 1/8 tsp amounts of liquid, till a thick but pourable consistency. Be sure to make just before you want to drizzle it, or it will thicken and harden a little. In which case, thin down just a little before drizzling on. See my video on how to make glaze or the glaze 101 tutorial.


Decorating
1. Once the swirls are cooled, simply use a small spoon (or a piping bag with a tiny hole or piping nozzle), and drizzle the glaze across all the swirls. If using a small spoon, I recommend holding the spoon high above the bake, and it will produce a thinner drizzle and look that bit better.
You could also spread it on. Add some orange zest or sprinkles on top if you like.
2. Leave to set up for 15-30 minutes if you can wait!


Serving & Storing
1.Serve with a favourite warm drink as a snack or with breakfast.
2. Store mince pie swirls in a paper lined container, stacking the swirls and covering with cling film. 99% of the time I recommend storing bakes in a metal cake or cookie tin. But these soften when not completely airtight covering, makes the texture resemble that of yeast swirls like cinnamon buns. And they will be fine for at least 3 days.
3.These freeze great too, just wrap individually in paper and then with some cling film/plastic wrap or foil and a labelled food bag. Freeze for up to 3 months1 and defrost at room temperature not the fridge. More information can be found at FreezeIt.Co.UK/pinwheels/
DIFFICULTY LEVEL: easy, beginner


Try forming the buns in a special way, for occasions like Christmas parties.
Arrange the buns into the shape of a Christmas tree as shown in th eimage. Or in a circle for a wreath, (image before the instructions above). Add some sprinkles for decorations and a bow at the bottom for the wreath.
More Easy Holiday Sweet Treats
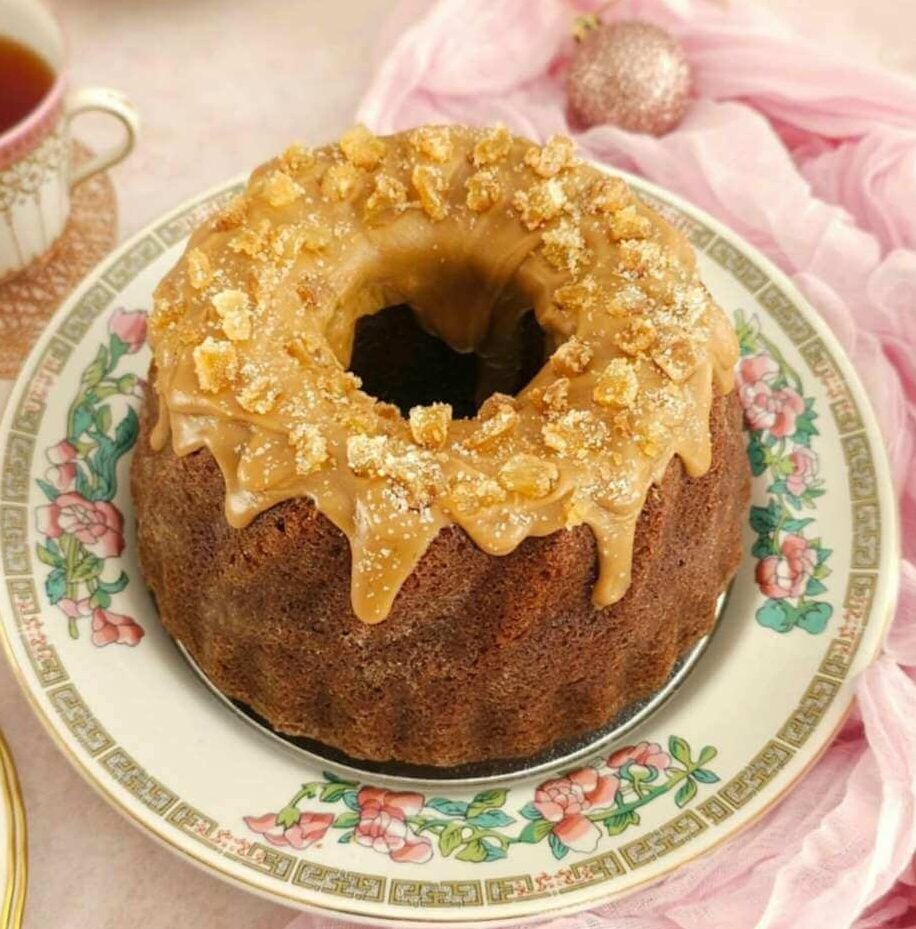
How about mini mince pies with the mince meat? Alternatvely fill with jam or peanut butter & chocolate. Or use mincemeat in my new Mince Pie Bundt Cake.
Why not try some no-bake, honeycomb? Also known as sponge candy, super simple to make and a delicious sweet treat.More sweet & savoury treats on the Christmas recipes page.


Recipe Card
Speedy Mince Pie Swirls

Equipment
- Scales or measuring cups
- Measuring Spoons
- Chopping Board
- Med-Large Mixing bowl
- Baking spatula or wooden spoon
- Measuring Jug
- Fork
- Baking/parchment paper
- Icing/Powdered Sugar for rolling out
- Rolling Pin
- Sharp knife
- Large or 2 medium baking trays/sheets
- Timer
- Cooling rack
Ingredients
For The Dough
- 350 grams Self Raising Flour (12 ¼oz, 2 ¾ cups) OR Plain/A.P. Flour plus 4 tsp Baking Powder.
- 1 tsp Mixed Spice* (Pumpkin Spice, see above recipe)
- ½ tsp Salt
- ¼ tsp Anise (optional)
- ¼ Whole Nutmeg (Or ½ tsp Powdered Nutmeg)
- ½ tsp Ginger
- 3 tbsp Granulated Sugar
- 50 grams Butter (cubed & unsalted, 2 oz, ¼ cup)
- 1 Egg, medium to large (US large – x large)
- 150 ml Milk approx. (up to 5 fl oz, ⅔ cup)
For The Filling
- 411 grams Mincemeat Filling* (14½ oz jar, see notes above recipe)
For Decoration
- 125 grams Icing Sugar, sieved (4½ oz, 1 cup Powdered Sugar)
- Milk (extracts can be added too)
- Orange or Lemon zest (optional)
Instructions
- Prepare a large baking tray/sheet or 2, by lining with baking/parchment paper. Also prepare your area that your will roll out the dough on. I like to use baking/parchment paper to save on the mess. Cut out a piece 35cm at its longest (14″). Have some additional flour or icing/powdered sugar handy for rolling out
- Heat the oven to: 220°c/200°c Fan Oven/ 425°f/Gas Mark 7.
- Add the butter & flour (& baking powder if using) to a medium bowl. By hand or using a pastry blender, ‘rub in’ the butter to the flour, to a ‘breadcrumb’ like consistency. However, there isn’t much butter in this recipe, so only a light rubbing of the flour & butter between your finger-tips is required. You can also use a pastry blender/cutter to do this.
- Next add in the spices, salt & sugar, then mix through. Make a well in the middle & add in the egg. Give it a whisk in this hole, & then add in half of the milk, & mix just the milk & egg together.
- Now mix the milk & egg with the dry ingredients. Keep pushing down on the flour, & let it take on as much of the liquid as possible, before adding in any more small drops of the milk. You want the mixture to come together into a very rough ball that will be just a little sticky. You might not need all the milk, or might need a little more.
- Place your ready-cut piece of baking/parchment paper down & dust that & your rolling pin with some flour or icing/powdered sugar.
- Next form the dough into a rough ball & place onto the centre of the paper & form into a square or rectangle. Add some icing/powdered sugar on you hands if needed.
- Roll out the dough with another sheet of paperon top. Till you have a rectangle of about 22½ x 30cm (9×12″).
- Spread the mincemeat filling on top on the rolled-out dough. Carefully bend over the end of dough nearest you (make sure it is the shorter length) & roll up the dough. Neaten the ends as you go, and stop when near the end. Use your finger to thin and lengthen the end, then pinch the dough together. Roll it over, rock back and forth to finish off the seal.
- Using a long sharp knife, cut the roll of dough in half then into 16 equal pieces, about 1½ cm (⅔") thick. If you need to, you can coat your knife in some more icing/powdered sugar.
- For each slice, lift carefully & place on top of your prepared baking tray/sheet, & then re-shape any that have got a little squashed and lost their shape on cutting.
- Leave at least 2½ cm/1″ gaps between the slices, and then pop in the oven to bake for 12-18 minutes. Ready when golden & the undersides are set & firmed up. Remove from the oven, & place on top of the cooling rack for 5 mins, before transferring, paper and all to the rack to cool down completely.
- While the swirls are cooling, prepare the glaze by simply starting with your sieved icing/powdered sugar, add in some orange zest, & add very gradually the milk or water. Don’t add all liquid at once. Start with ½ tsp then work down to ⅛ tsp till a thick but pourable consistency. See my Glaze 101 tutorial.
- Once the swirls are cooled, simply use a small spoon (or a piping bag with a tiny hole or piping nozzle), & drizzle the glaze across all the swirls. If using a small spoon, I recommend holding the spoon high above the bake, and it will produce a thinner drizzle and look that bit better. Leave to set up for 15-30 minutes if you can wait!
Serving & Storing:
- Serve the mince meat swirls at room temperature with favourite hot drink.
- Store in a container without the lid and cover with cling film/plastic wrap. Not being airtight, these buns get softer and from next day, have more of a yeast bun texture. Freeze for up to 3 months1, wrapped individually in cling film/plastic wrap & then foil or a food bag. Defrost at room temperature, not the fridge.
- Freeze for up to 3 months1, wrapped individually in cling film/plastic wrap & then foil or a food bag. Defrost at room temperature, not the fridge.
Notes

 Flour – UK Self-raising flour used, but works too with Plain/All Purpose flour, plus 4 tsp baking powder.
Spices – UK Mixed Spice US alternative is Pumpkin Spice. For a different flavour, try 1/4 tsp ground cardamon instead of anise.
Milk – any kind of milk or plant-based will be fine. You can use water for the glaze instead. The amounts for dough and glaze, are approximate amounts & to be added gradually. Not all milk might be needed for the dough.
Mincemeat – UK filling for likes of mince pies, & is a sugary finely minced dried fruit mixture, sold in jars. Or try making your own with Delia Smith’s Mincemeat recipe.
Try the savoury version below,- cheese & leek swirls,
Flour – UK Self-raising flour used, but works too with Plain/All Purpose flour, plus 4 tsp baking powder.
Spices – UK Mixed Spice US alternative is Pumpkin Spice. For a different flavour, try 1/4 tsp ground cardamon instead of anise.
Milk – any kind of milk or plant-based will be fine. You can use water for the glaze instead. The amounts for dough and glaze, are approximate amounts & to be added gradually. Not all milk might be needed for the dough.
Mincemeat – UK filling for likes of mince pies, & is a sugary finely minced dried fruit mixture, sold in jars. Or try making your own with Delia Smith’s Mincemeat recipe.
Try the savoury version below,- cheese & leek swirls,

Reference: 1 Freezing information from FreezeIt.Co.UK/freezing-pinwheels/. Try the mincemeat, layered in my Mince Pie Bundt Cake


Nutrition – I am not a qualified nutritionist & all nutritional information is approximate. Values are based on 1 serving, of 1 slice, from a yield of 16 slices/swirls, assuming all ingredients listed above are used, (including lower fat milk). Make more or less slices & these values will change. All values calculated on app MyFitnessPal.com.


Check out some other seasonal recipes by clicking on the images below, or go to the Occasions page & look at the Christmas, Autumn & Vaentine’s recipes.
Subscribe For More Recipes
Want more great recipes, tips, baking information and newsletters? Then please consider subscribing by adding your email address below. Be sure to check for a confirmation email & respond back, so you can follow me & receive your free emails. Your personal information will not be shared with a third party.
Join My Facebook Group
Why not also join my – Facebook group Easy Online Baking Lessons, dedicated to this baking lessons website, as well as providing one-on-one support with myself & my team? Be sure to answer all security questions when requesting to join.
Follow me on social media:
Happy Learning & Baking!
Caro x
Seasonal Jammie Dodgers
Search For Something You Fancy!
Caroline’s Easy Baking Lessons


I love mincemeat and make your mini mince pies, but going to use a large jar of mincemeat and make these too.