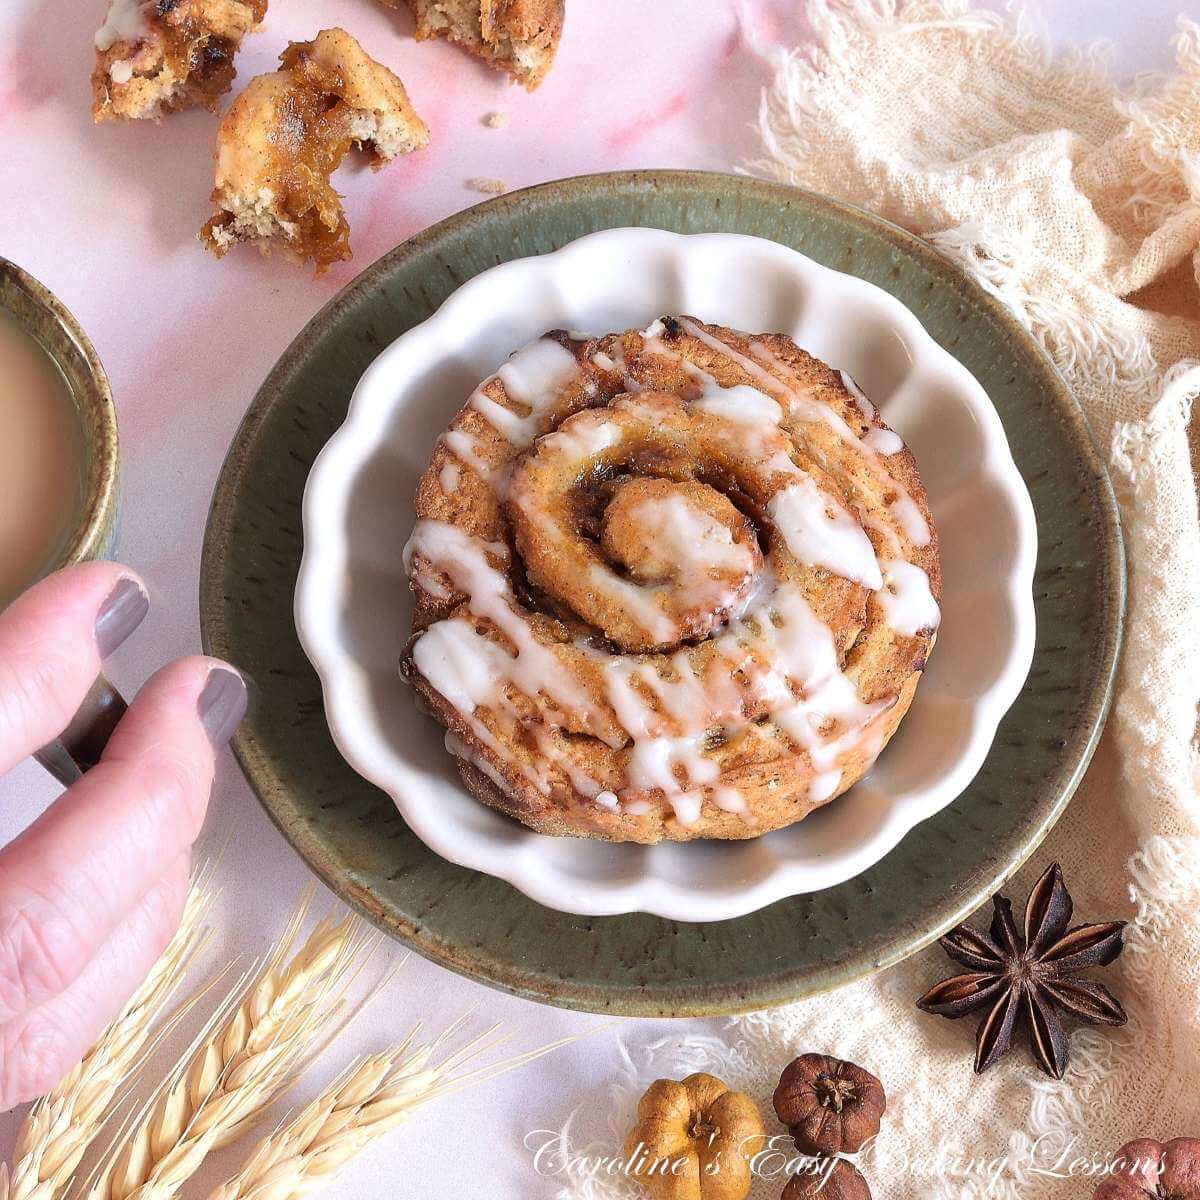
Quick Pumpkin Spice Buns – yeast-free

These quick pumpkin spice buns are like a cinnamon bun but quicker to make than a pastry or yeast dough, still made from scratch & have a seasonal spiced pumpkin filling!
Quick Pumpkin Spice Buns

**Click to jump to section**


What Are Pumpkin Spice Buns?
Quick Pumpkin Spice Buns are my way to make a pastry & yeast-free cinnamon bun! Made from a quick spiced dough, (with low sugar & butter), they are filled with sweet & spicy pumpkin puree. Think a pumpkin spice sweet bun or pinwheel, but with no need to make a pastry or wait for a yeasted dough to rise. Same day as baking they are a little firmer than a yeast dough bun, but start softening from the next day, making them a perfect make-ahead treat for the holidays.
Why Make These Pumpkin Buns?
- Quick & easy
- Pastry & yeast-free
- No processed ready-made dough – all from scratch
- Taste amazing!
- Baking On A Budget series
- Great made-ahead
- Video tutorial
Ingredients & Alternatives


These pumpkin spiced pinwheel buns are made from the following ingredients.
For the dough:
- Flour
- Baking Powder
- Salt
- Spices – anise, nutmeg & ginger
- Unsalted Butter
- Sugar
- Egg
- Milk


For the filling:
- pumpkin/squash puree*
- Spices: mixed spice*, chai , cinnamon & ginger
- Dark Brown sugar
- Unsalted butter
- Granulated sugar
For the glaze:
- Icing (Powdered) Sugar
- Milk (or water)
- Pumpkin spice or chai (optional)*
*See notes below


Spices
A lot of spices are used in the dough, the filling and in the glaze. Some are optional.
Ginger, Nutmeg & Anise
Ground ginger & anise is used in the dough & the filling. Anise is optional but so worth it, (and you can crush the seeds of a Star Anise instead).
Freshly grated nutmeg is added to the dough & you can substitute with 1/2 tsp of ground nutmeg.


Mixed Spice, Pumpkin Spice, Cinnamon & Chai
Ground cinnamon & some UK Mixed Spice is used in the filling. (Mixed Spice is similar to US Pumpkin Spice).
I also used Foodie Flavours concentrated food extracts that they kindly gifted me. They come in drops and only 10 little drops of the Pumpkin Spice & Chai were used.
Full disclosure, that I have not received any payments from Foodie Flavours, but just really love them & recommend them a lot. Try the chai in my mini gingerbread cakes or the pineapple one in my cake truffles.
Flour
Use UK Self-raising flour or use Plain (All Purpose) Flour, with baking powder. So no need to add the baking powder when using Self-raising. Both flours have been tested during recipe development.


Eggs
UK size medium to large are used, which is about large to extra-large in US sizing. Make sure the eggs are at room temperature too before using.
Unsalted Butter
Unsalted butter is always better for sweet and savoury bakes, for the best and consistent results. Top Tip – cube the butter small about 1cm, ⅓” , and this smaller surface area softens the butter quicker.
Learn how to make your own butter & buttermilk from cream, that could both be used in this recipe.
Milk
I used semi-skimmed and skimmed milk for these, but any milk or lactose-free milk will be fine. (*Just note that lactose-free milk can result in a less golden coloured bake). Milk is used in the glaze, but water or even some orange juice make good substitutes.


Sugar
Only 3 tablespoons worth of sugar is used in this dough and I just use white granulated for this. If you have a little golden granulated, caster or brown sugar, or even coconut sugar, these will all work. Just don’t use a sugar substitute as the sugar is here to help with the structure of the bake & not for sweetness.
Dark brown sugar is used in the filling (and some granulated), but you can substitute with light brown sugar, coconut sugar, muscovado, demerara, or turbinado.


Pumpkin Puree
Pumpkin puree is used in the filling. Not pumpkin pie filling. You can easily make your own pumpkin puree when pumpkins are in season (or from frozen).
Or, use butternut squash like I do. Cans/tins of pumpkin puree actually are a combination of pumpkin and squash. Butternut squash is available in the UK all year-round and inexpensive.
Roast the flesh and then puree or even like I did for these ones, I just used a fork as the roasting had absorbed most of the liquid.


If you do use a can/tin of pumpkin puree, you will have some left over, so try my Gingerbread pumpkin bundt cake with an amazing butterscotch glaze. (See the photo here). Or some chocolate pudding & pumpkin muffins.
The Glaze
These pumpkin spicy buns are topped off with a sweet drizzle of icing/glaze. You can use milk, water or even orange juice instead. Flavour the glaze with some of the Foodie Flavours Chai & Pumpkin Spice extracts and little orange extract. I like this Sainsbury’s orange extract, but you can make an alcohol-free orange extract at home.


Equipment
Basic baking equipment needed for making these pumpkin filled pinwheels. You don’t even need an electric mixer.
I use an inexpensive pastry cutter (pastry blender), like used for pastry or scones. (See the photo collage here). But you can do by hand or with 2 butter knives.
You don’t even need to use a food processor. The filling can be mixed by hand too, making it the most easy recipe.
**See my essential baking equipment article for more.


Recipe Yield
This recipe makes about 16 slices, when divided up, into slices about 18mm (2/3”) thick. Note, if you make the slices thicker, there will be less yield and the baking time will increase by a few minutes.
Next
Lets go to the step-by-step instructions next, with detailed process shots to help you succeed. Recommended for first time making these or if a beginner/new to baking.
Experienced bakers (or made these before)? Then skip to the Recipe Card below (an abbreviated version of the recipe, with all the equipment & ingredient amounts).
Jump to RecipeStep-By-Step Instructions
1. Start off by making sure to cube your butter in small rough cubes (about 1cm, ⅓″ ) as this smaller surface area will make the butter soften faster. It is ready once you can gently squeeze a piece between your index finger and thumb, leaving an indent but not so much that it falls apart or is almost melting. Do the same with the butter for the filling (and make even smaller pieces if you can).


2. Once the butter is ready, add to a mixing bowl with the flour, (and baking powder if using Plain/All Purpose flour). Give a little toss to coat and then use either a Pastry Blender/Cutter or your fingertips to ‘work in’ the butter.
For the pastry cutter, push down on the ingredients & rotate the cutter left & right, while making sure you are pushing down & making contact with the bottom of the bowl. Repeat across the bowl (unblocking every so often), until the pieces of butter are smaller and roughly large breadcrumb piece size.
To do by hand, just lift up some of the mixture & rub your thumb across the tips of your fingers. Repeat this lifting & rubbing (sometimes known as ‘rubbing in’), across the bowl till worked in. See the video.


3.Now add the sugar, salt & spices to the flour/butter mixture & mix together.
4.Make a well in the centre of the mixture and break one egg, directly into the centre.
5. Add about half of the milk to the mixture. Use a spatula to work in the liquid.
6. Push down on the flour, making it absorb as much liquid as possible. Check the bottom of the bowl for large dry patches and mix around, to move to more wet areas.


7. You will have a very dry and rough shaggy mixture with no body to do it at this stage. (See photo collage 2, image 1).
8.Very gradually start to add in more liquid, mixing in-between and making sure the flour takes on as much liquid as possible, before adding in anymore milk.
9.The dough should start to come together and be just a little sticky. **You might not need all the milk or a little bit more. Test the dough is ready by tearing a piece of dough, forming a ball & flattening as shown in photo 3, where it should hold together & not fall apart.
10. Form the dough into a ball and then flatten into a disk, before covering in baking/parchment paper or some cling film/plastic wrap & popping in the fridge to rest for 15-20 minutes.


Prepare The Filling
1.While the dough is resting, you can prepare the filling. Start with the softened cubed butter, and add to a bowl with the pumpkin puree (not pumpkin pie filling). See how to easily make your own pumpkin puree or using butternut squash.
2. Add in the brown sugar, followed by the spices. I used Ginger, Cinnamon & Mixed Spice (Pumpkin Spice), as well as Foodie Flavours extracts in the Pumpkin Spice and Chai flavours, 10 drops of each. These are optional or you could add 1 tsp ground chai mixture.
3.Wearing some gloves or by mixer, very lightly blend the ingredients together. I did by hand as I did not even use the mixer for any elements of this bake. So if doing by hand, mix and kind of rub the butter cubes & work the ingredients together. Does not need to be a an evenly mixed mixture as you can see in Photo collage 4.


Forming The Pinwheels
1.Once the dough has relaxed and the filling has been prepared, time to roll out the dough. Turn on the oven & heat to: 220c/200°c fan oven/425°f/Gas Mark 7.
2.Lightly flour a large sheet of baking/parchment paper (at least 36cm, 14” on the longest side). Cut a second sheet of paper same size.
3.Form the disc of dough into a square or rectangular shape before placing onto the floured paper. Flour the top of the dough & place the 2nd sheet of paper on top.


4. Roll out between the paper, into a rectangle about 23 x 30 cm ( 9 x 12”) with a thickness of about 3-4mm (about 1/6”).
5. Spoon the filling on top, dividing it up in spoonful’s over the dough. Then gently spread it out, (leaving just a little gap at the edges).
6. Sprinkle 2 tsp of white sugar on top of the filling.


7. Turn the paper if needed, so that the longer edge of the rolled-out dough is running parallel to you and gently fold over the dough nearest you.
8.Like a Swiss roll, best to start with a tight roll, then gently push the dough forward to start rolling it up. You can use the paper to help you roll if you prefer. (See video).
9. As you roll, use the palms of your hands to neaten the ends. And roll until almost to the end.
10. With your index finger, thin the very end of the dough to make joining easier and then brush or rub on some of the remaining milk.
11. Now give the dough one last roll over to close the seam. Use both hands to gently rock the roll of dough back and forth, and this helps smooth the join.
If this doesn’t work for you, try pinching the dough together from the top. (See Photo collage 7)


12. Prepare 1 or 2 baking sheets/trays with baking/parchment paper (grease in place if they do not have a lip or your bake can fall off).
13. Place paper from before, on top of a chopping board.
14. Take your best sharp knife & make gentle marks on the top of the dough, dividing it up into slices about 18mm (2/3”) thick. This will give about 16 slices. or you can just divide the dough several times instead and make the 16 slices.
15. Place one slice on the prepared baking tray & gently form back into the round shape (cutting does squash them a bit but are easy to re-shape and so doesn’t need chilling).
16.Add the rest of the slices & leave about 2.5cm/1” gap in-between each one.


17. Pop the pumpkin swirls in the centre of the oven & bake for about 10-12 minutes until golden & set.
18. Leave on the tray for 5 minutes, on top of a cooling rack, before cooling directly on the rack.
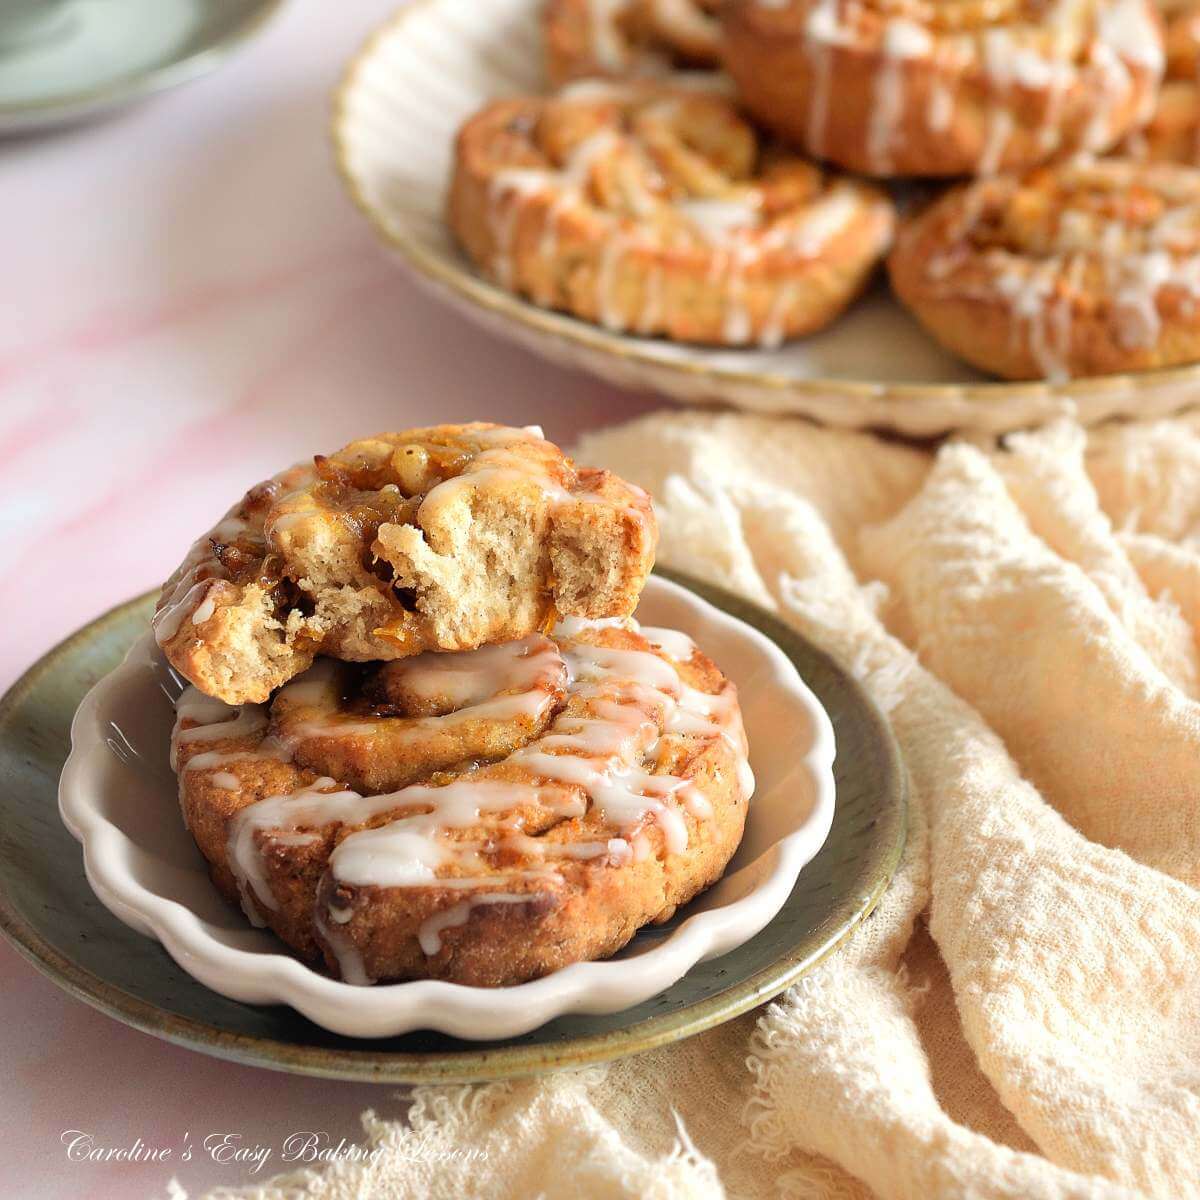
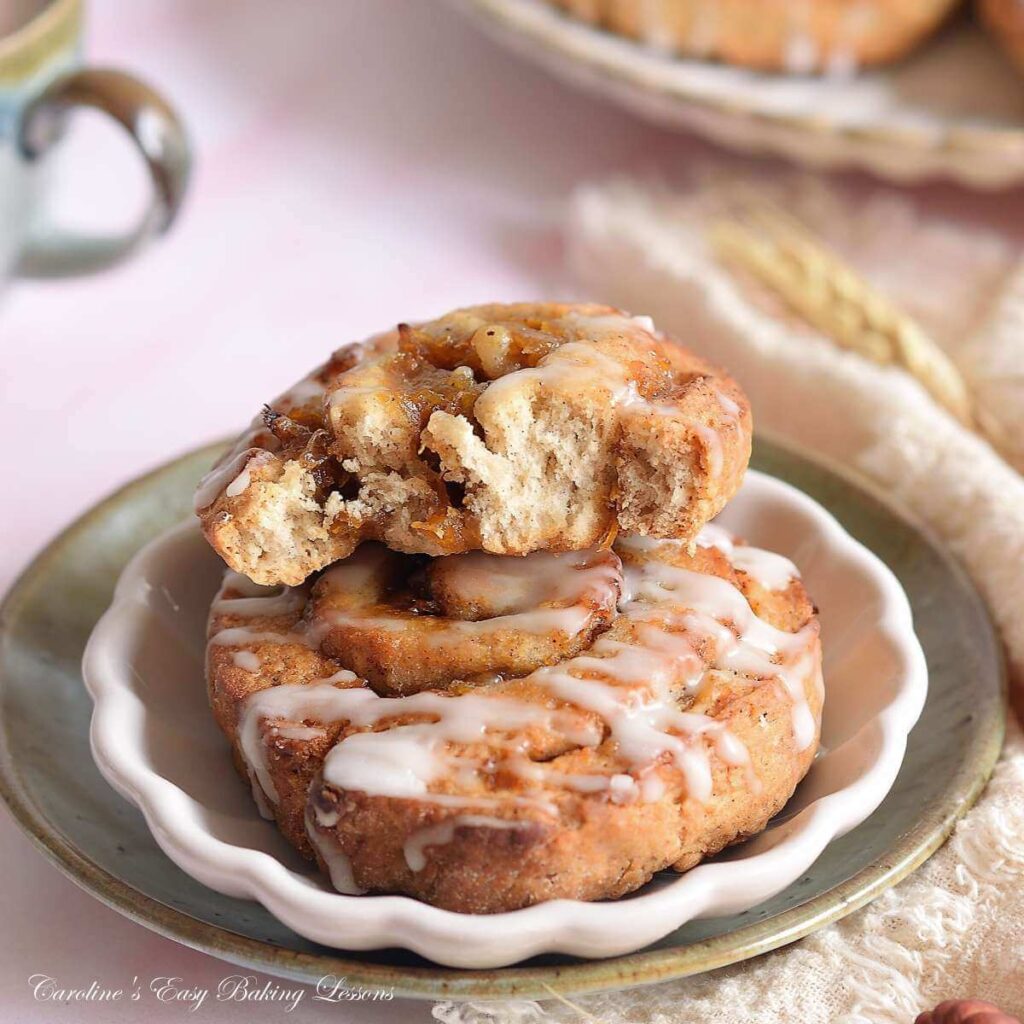
They can be decorated once cooled or left till the next day. ***Note, the texture of these swirls gets softer the next day and becomes even more like a yeasted cinnamon buns type bake.


Prepare The Glaze/Icing
1.While the buns are cooling, (or next day), you can prepare the glaze. We want a glaze that is a little runny (would create drips). You can learn more about thicknesses of glazes for different bakes in my Glaze 101 Tutorial.
2. Make sure to sieve the icing/powdered sugar before using. If you want to add a flavour or colouring, add now.
3. Very gradually add the water (or left-over milk), to the sugar, first in teaspoons (tsp) and then 1/2 tsp amounts, mixing well in-between each addition. Add until you have a smooth thick but pourable glaze that falls off a spoon easily & leaves a trail on the surface of the bowl. Then add 1/4 tsp more liquid to make a little thinner. (See my glaze thicknesses tutorial for more visuals or the video below).


Decorating The Pumpkin Buns
1.Once ready to use the glaze, place some baking/parchment paper under the cooling rack (or under the slices). If you made the glaze ahead (covered with cling film/plastic wrap), mix and add a tiny bit more water if needed).
2. Take a small spoons worth of the icing and hold it high above the swirls and drizzle it over them in a left and right motion in a diagonal angle. There might be some clumps, but higher you drizzle from, thinner it will be.


3. Alternatively, you can make the glaze a little thicker and spread on top like a cinnamon bun.
4. Leave to set a little & then serve.
Serving & Storing
1.Once the glaze has set (quite quick if drizzled, more if spread on), these can be enjoyed with your favourite hot drink. Try with a nice Pumpkin Spice Latte!
2.Store the leftover pumpkin pinwheels in a container and instead of closing with a lid, cover with cling film/plastic wrap. 99.99% of the time I recommend tins for all my bakes, but the texture of these improves and softens nicely the next day if not completely air-tight. The only downside is the glaze can lighten over time. If you have any left, you can add more or not glaze till ready to serve. Does not take away from the flavour however, if you glaze day before.

3.I have not tried freezing these, but would recommend wrapping each individually (unglazed). And then in a second wrapping such as an air-tight container if several, or in a labelled food bag. *
DIFFICULTY LEVEL: easy, beginner
Other Similar Recipes
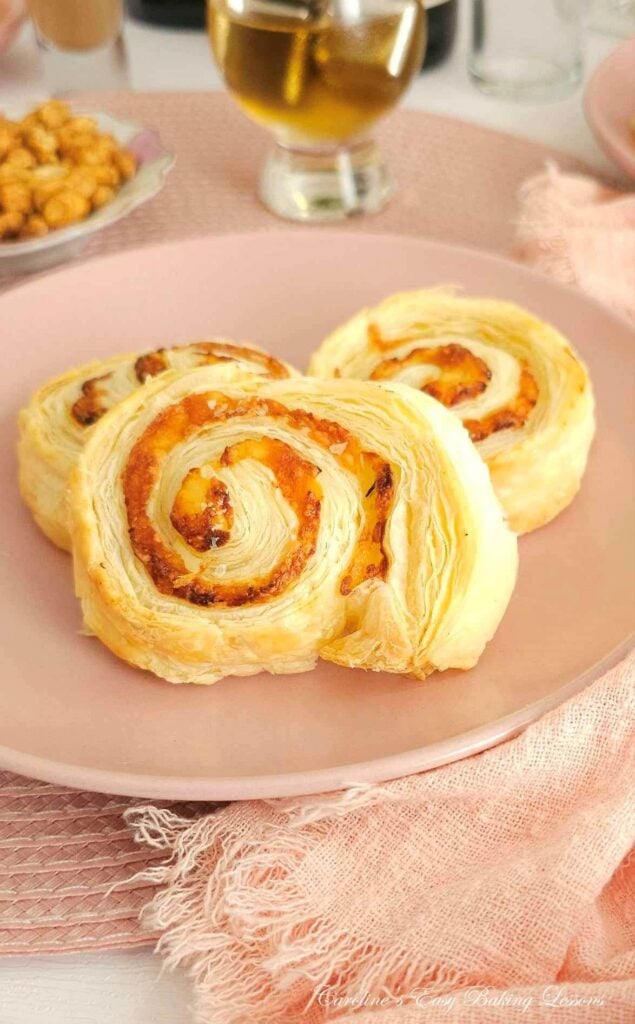
Try some other easy pastry-style snacks – just click on the photo below to jump to the recipe. **First image s these yeast & pastry-free buns, but with a minced fruit filling!


Recipe Card
Speedy Pumpkin Spice Buns From Scratch

Equipment
- Digital scales or measuring cups
- Measuring Spoons
- Medium – Large mixing bowl
- Fine Grater/Zester/Micro Planer (optional)
- Small measuring jug (or liquid measuring cup)
- Baking/parchment paper
- Spare flour
- Rolling Pin
- Measuring tape or ruler
- Knife and chopping board
- 2 Baking trays (baking sheets)
- Cooling rack
- Small bowl/dish (plus spoon for glaze)
- Small sieve
- Pastry Cutter (Pastry blender, optional)
Ingredients
For The Dough:
- 350 grams Self-raising Flour (12⅓ oz, 2¾ cups OR Plain/All Purpose Flour AND 4 tsp Baking Powder)*
- 50 grams Unsalted Butter (1¾ oz, or less than ½ stick, cubed small*)
- ½ tsp Salt
- ¼ tsp Anise (optional, or ground Star Anise pods*)
- ¼ grated Nutmeg (or ½ tsp ground nutmeg*)
- ½ tsp Ginger
- 1 Medium-Large Egg (US large-extra large egg, room temperature)
- 3 tbsp Granulated Sugar (37½ g, 1⅓ oz)
- 150 ml Milk (5 fl oz, ⅔ cup*)
For The Filling:
- 185 grams Pumpkin Puree (6½ oz, ¾ cup*)
- 30 grams Dark Brown Sugar (1 oz, 2 tbsp+ 1 tsp*)
- 32 grams Unsalted Butter (1 oz, cubed small*)
- ½ tsp Mixed Spice (US equivalent ground Pumpkin Spice)
- ¼ tsp Ginger
- ¼ tsp Cinnamon
- 10 drops Chai extract (Foodie Flavours brand, or ½ tsp chai powder)*
- 10 drops Pumpkin Spice extract (Foodie Flavours brand, or ½ tsp Pumpkin Spice/Mixed spice powder)*
- 2 tsp Granulated Sugar (9g)
For The Glaze:
- 62 grams Icing Sugar (2¼ oz, ½ cup, sieved, Powdered or Confectioners' sugar)*
- ¼-½ tsp Orange extract (optional, or ¼ tsp Mixed Spice/Pumpkin Spice for kick)
- 2 tsp Milk (at least 20ml, ⅔ fl oz, you might need more*)
* denotes, see notes below
Instructions
Prepare The Dough:
- Cube the butter in small pieces, (about 1cm, ⅓″) & the smaller surface area results in the butter softening quicker. No need to use cold butter for this, just make sure the butter cubes are not starting to melt.
- When the butter is ready, place in a mixing bowl with the flour, (and baking powder if using Plain (All Purpose flour and not UK Self-raising flour). Lightly mix & then use a pastry cutter/pastry blender, your fingertips or 2 butter knives, to 'cut the butter in'. See this in detail in the video or in the step-by-step instructions above. Work it in till roughly large breadcrumb size pieces remain.
- Next, add the sugar & spices & mix together, before making a well in the centre. Beat egg into the centre, followed by half of the milk. Push down on the flour with a spatula and work in the liquid. Very gradually add more milk until the dough comes together & might be just a little sticky. Pinch a piece of the dough, make a ball & flatten. It should hold together & not fall apart. (**Note, you might not need all the milk). Form the dough into a disc & place on some baking/parchment paper, into the fridge for 15-20 minutes.
Prepare The Filling:
- Add softened cubed butter to a bowl with pumpkin puree, brown sugar, & the ground spices. I also added 10 drops each of Foodie Flavours Pumpkin Spice and their Chai extracts for more kick. (Or add 1 tsp of chai mixture).
- Very lightly blend the ingredients together by hand (wearing gloves), or with a spatula. Just a very tough mix as it keeps the butter from melting too quickly and leaking out of the buns when baking.
Form The Roll:
- Turn on the oven now & pre-heat to 220c/200°c fan oven/425°f/Gas Mark 7. Paper line 2 baking trays/baking sheets.
- Form the dough into a square or rectangular shape & roll out on floured paper, until you have a rectangle about 30 x 23cm (12 x 9") and 3-4mm (⅙") thick.
- Spread the pumpkin mixture on top of the dough, leaving a little gap at the 2 short sides. Then sprinkle 2 tsp of granulated sugar on top.
- With the longest size parallel to you, tightly roll up the dough till near the end. Thin the end with your fingertips, brush on some milk & then finish the roll. Pinch the join, then rock the roll of dough back & fourth to close the join. Cut into 16 slices (about 18mm, ⅔" thick).
Baking The Pumpkin Spiced Buns:
- Transfer the slices to the prepared baking tray/baking sheet, re-forming them back into a better round shape, and leaving a little gap in-between them. Bake in the centre of the pre-heated oven for 10-12 minutes until golden & set.
- Remove from the oven, cool on top of a cooling rack for 5 minutes before cooling on the rack alone. Meanwhile, prepare the glaze.
Prepare The Glaze:
- The glaze can be made while the buns are cooling or ahead of time. Start by adding any flavouring to the sieved icing (powdered) sugar. (Here I used ½ tsp orange extract).
- Very gradually add milk in small amounts till you have a thick & pourable glaze, that when lifted and dropped back into the bowl, leaves a trail on the surface. Learn more about glaze thicknesses in my glaze 101 tutorial. Taste & add more flavouring is required. Cover with cling film/plastic wrap till ready to use.
Decorate The Spiced Buns:
- Hold a spoon full of glaze high above the buns and let drip down as you drizzle diagonally across each bun. It can get messy, so you can pipe instead. Or make a thicker glaze and spread a thin layer on top. Leave to set.
Serving & Storing:
- Serve the pumpkin spiced buns with a favourite hot drink or have for a quick breakfast on the go.
- Store left-overs in a container or platter, covered well with cling film/plastic wrap. Do not put in a tin or air-tight container. If stored correctly, the texture softens to similar to a yeasted cinnamon bun & will be good for at least 4 days.
Video
Notes

 Eggs – UK medium to large, US large to extra-large size & room temperature.
Milk – I used semi-skimmed and also skimmed in recipe testing, but any milk or lactose-free milk will be fine. For the glaze, you can use water instead.
Sugar – dark brown sugar used in the filling, but light brown, coconut sugar, muscovado, demerara, or turbinado can be used.
Eggs – UK medium to large, US large to extra-large size & room temperature.
Milk – I used semi-skimmed and also skimmed in recipe testing, but any milk or lactose-free milk will be fine. For the glaze, you can use water instead.
Sugar – dark brown sugar used in the filling, but light brown, coconut sugar, muscovado, demerara, or turbinado can be used.

 Pumpkin Puree – not pumpkin pie filling. You can make your own by pureeing cooked pumpkin or better still, butternut squash that is easier to find. Read my recipe for making your own Pumpkin Puree.
Equipment – basic equipment, no mixed or processor needed. A pastry blender/pastry cutter recommended but your fingertips work too.
Yield – makes 16 buns/slices.
Pumpkin Puree – not pumpkin pie filling. You can make your own by pureeing cooked pumpkin or better still, butternut squash that is easier to find. Read my recipe for making your own Pumpkin Puree.
Equipment – basic equipment, no mixed or processor needed. A pastry blender/pastry cutter recommended but your fingertips work too.
Yield – makes 16 buns/slices.

 Time to make – realistic time, based also on making the glaze when the buns are cooling.
Other Pumpkin Recipes – left-over pumpkin puree if you used a 425g/15oz tin/can? Then try my wholemeal Squash (pumpkin) banana bread, or butterscotch glazed pumpkin gingerbread bundt cake that is a little smaller and made in a small basket air fryer! (See photo below).
Time to make – realistic time, based also on making the glaze when the buns are cooling.
Other Pumpkin Recipes – left-over pumpkin puree if you used a 425g/15oz tin/can? Then try my wholemeal Squash (pumpkin) banana bread, or butterscotch glazed pumpkin gingerbread bundt cake that is a little smaller and made in a small basket air fryer! (See photo below).

Nutritional Information – I am not a qualified nutritionist & all values are approximate. I serving is one pumpkin spiced bun, from a yield of 16 slices & using all the ingredients listed, with glaze. Make bigger or smaller buns & there values will change. Calculated by MyFitnessPal.com app.
Try some other easy pastry-style snacks – just click on the photo below to jump to the recipe. Or jump to the Christmas recipes page.
Subscribe For More Recipes
Want more great recipes, tips, baking information and newsletters? Then please consider subscribing by adding your email address below. Be sure to check for a confirmation email & respond back, so you can follow me & receive your free emails. Your personal information will not be shared with a third party.
Join My Facebook Group
Why not also join my – Facebook group Easy Online Baking Lessons, dedicated to this baking lessons website, as well as providing one-on-one support with myself & my team? Be sure to answer all security questions when requesting to join.
Follow me on social media:
Happy Learning & Baking!
Caro x


Quick Pumpkin Spice Buns (Yeast-free)
Search For Something You Fancy!
Caroline’s Easy Baking Lessons
Reference:


Excellent recipe. Great instructions and so easy to make. The flavour is amazing. Thank you for sharing.
Thanks so much and leaving the feedback!