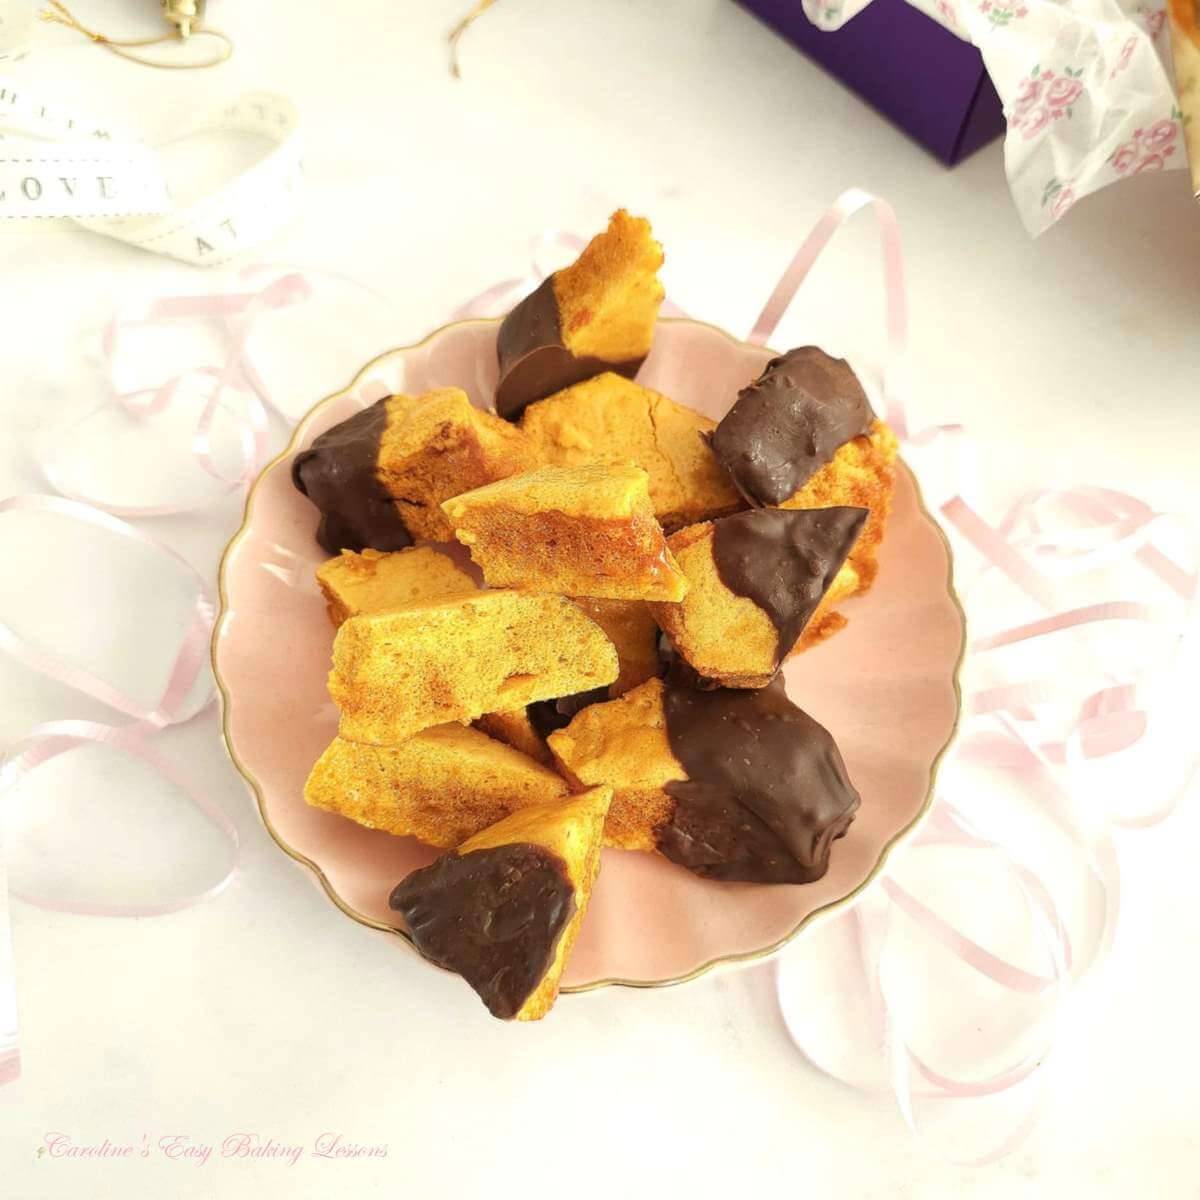
Homemade Honeycomb (AKA Sponge Candy)

Homemade Honeycomb(also known as Sponge Candy), is an easy, no-bake sweet treat to make, & perfect for the holidays and food gifting.
Homemade Honeycomb (AKA Sponge Candy)
The Easy No-bake Sweet Treat
By Guest Writer Mrs D
***Original recipe 29/11/2021, updated photos & video 21/11/2024


***click to jump to section***


What Is Honeycomb?
Honeycomb, also known as sponge candy, is a sweet treat with a crunchy airy texture. Made from sugar & Golden syrup (or corn syrup), bicarbonate of soda (baking soda) is added to the cooked mixture, which in turn reacts with the sugar, producing carbon dioxide. This gas creates the characteristic hexagonal (Bee honeycomb) texture classic to honeycomb/sponge candy.
Honeycomb is also be known as cinder toffee, sponge toffee, seafoam, hokey-pokey and sponge candy in various countries. In the UK, Cadbury make a popular chocolate coated honeycomb bar called a Crunchy.

Why Use This Recipe?
- Tastes great!
- Quick & Easy
- Step-by-step instructions
- Video tutorial
- Easy decoration (optional)
- Great For sharing
- Great for gifting
- No-bake sweet treat
Ingredients & Substitutes

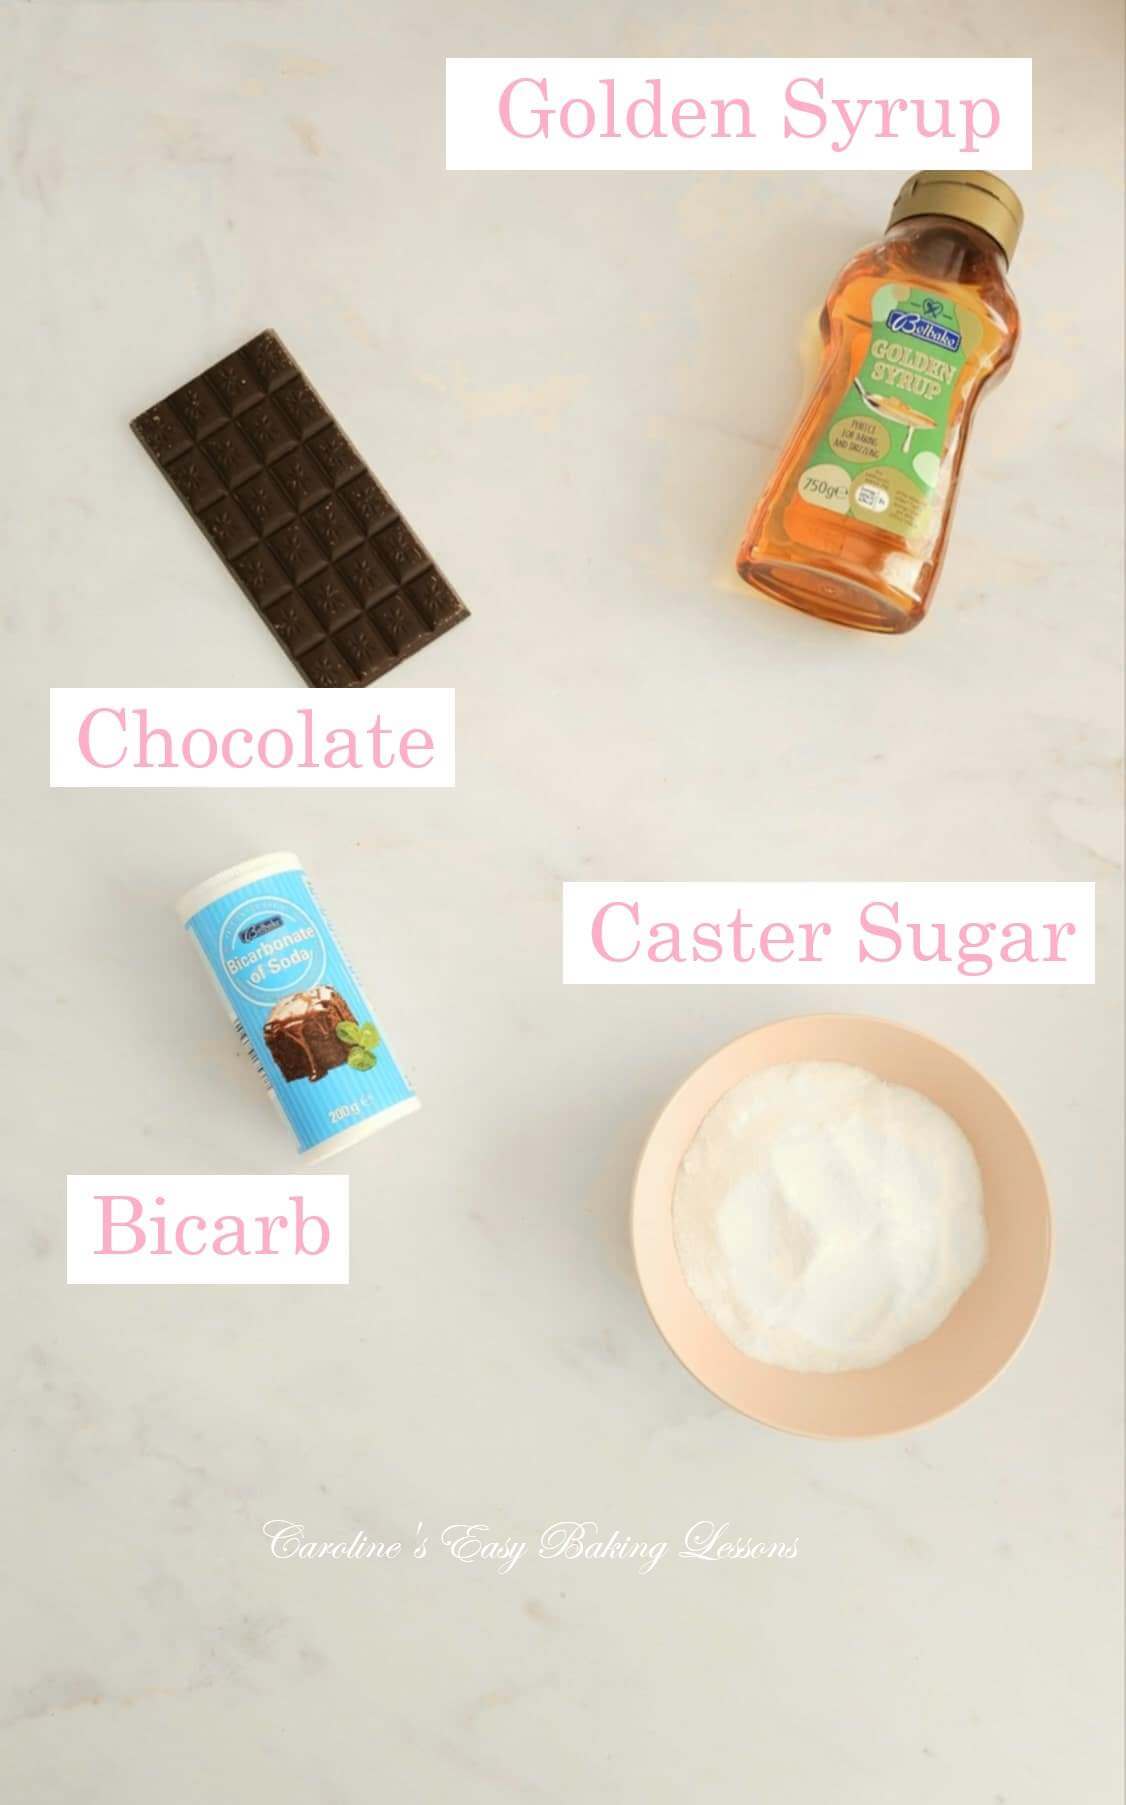
This Honeycomb (Sponge Candy), is made up of the following basic ingredients:
(*note ingredient amounts are listed in the Recipe Card*)
- Caster Sugar (Extra/Super Fine Sugar)
- Golden Syrup*
- Bicarbonate Of Soda (Baking Soda)
- Chocolate (optional)
*see notes below
Golden Syrup Or Corn Syrup?
Golden Syrup is not the same as Corn Syrup or Dark Corn Syrup. The texture is slightly different and Golden Syrup has a great flavour. Golden Syrup is used in a lot of Caro’s recipes, such as all her Gingerbread cakes. These Gingerbread Cake recipes include a list of where to buy Golden Syrup in the States & Canada. So click – Where To Buy Golden Syrup.


However, for honeycomb, many US recipes use light corn syrup. I just would not recommend it when making baked goods.
For measuring the Golden Syrup or corn syrup, you can measure in grams if you have a squeezy bottle. Alternatively, with a tin of the syrup, use a tbsp. But first oil the spoon and the syrup slips off really easily. Great tip for any syrup you might be measuring out. I like to use Frylight cooking spray for this.

Sugar
This recipe, like most British recipes, uses Caster Sugar as opposed to granulated sugar. The equivalent in the US is Extra/Super Fine Sugar. The finer texture of the sugar in this instance, means the sugar will dissolve quicker. So in this instance you could use granulated and be aware it will take a little longer for the sugar to dissolve.
If you want to learn more about UK & US baking ingredients, check out my Differences Between UK & US Baking Ingredients article.
Chocolate
Dipping the honeycomb pieces in chocolate is optional. Use any kind of chocolate you have. Doesn’t need to be baking chocolate. I tend to use a 50/50 mix of milk (semi-sweet) & plain/dark (bitter) chocolate & use Aldi or Lidl’s basic chocolate.
Equipment
Not much needed for this recipe but 2 important pieces to mention.


Cake Tin/Pan
Use a 8″ (20cm) square cake tin/cake pan or even a oven dish of the same dimensions. If you use larger tin/dish, the honeycomb will be shallower. You could use a smaller dish, but would not recommend any smaller than 6″ (17cm). If you want to increase to a specificsize, see my how to increase a recipe calculator.
Cooking Pot
Do not use a non-stick cooking pot for any sugar work or caramel making. Most non-stick pans can’t tolerate the extremely high temperature and so this can ruin the non-stick coating, which can release toxins into the food. And since you are not using a non-stick pan, we advise pouring boiled water in the pan, immediately after pouring out the honeycomb, just to make it a bit easier to clean the pan once you come to it.
You also want a large pot, larger than you think you would need. Partly because the honeycomb mixture expands and also for safety. A heavy bottomed pot is best.

Recipe Yield
This recipe makes a 20cm (8″) square sheet of honeycomb. No exact number of portions is possible and depending on the size of broken prices. For convenience, & nutritional purposes, an estimate of 12 servings of 3 small pieces is made.
Decoration
This Honeycomb is absolutely fine undecorated, but does taste even better with a half coating of chocolate. I recommend a 50/50 mixture of milk chocolate (semi-sweet) & dark/plain (bitter) chocolate. Before the chocolate sets, you can add sprinkles or finely chopped nuts or sea salt.

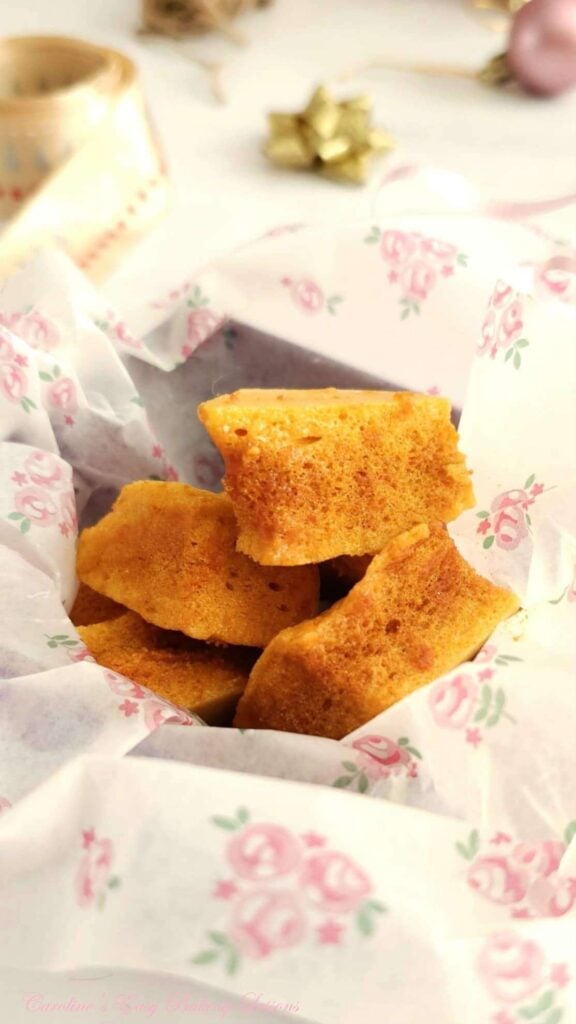
Give As Holiday Gifts
This honeycomb is ideal for holiday gifting, not just because it’s super simple to make, but is vegan, gluten free & dairy free, (be sure to take that into account when greasing the tin).
Give plain honeycomb or chocolate dipped ones, tailor to the recipients taste & favourite chocolate and place in cellophane bags, tied with some ribbon. Would be a nice addition to a food hamper/basket.
For more, read my Last Minute Food Gifts article. Or jump to the Christmas recipes page.
Step-By-Step Instructions

Prepare The Honeycomb
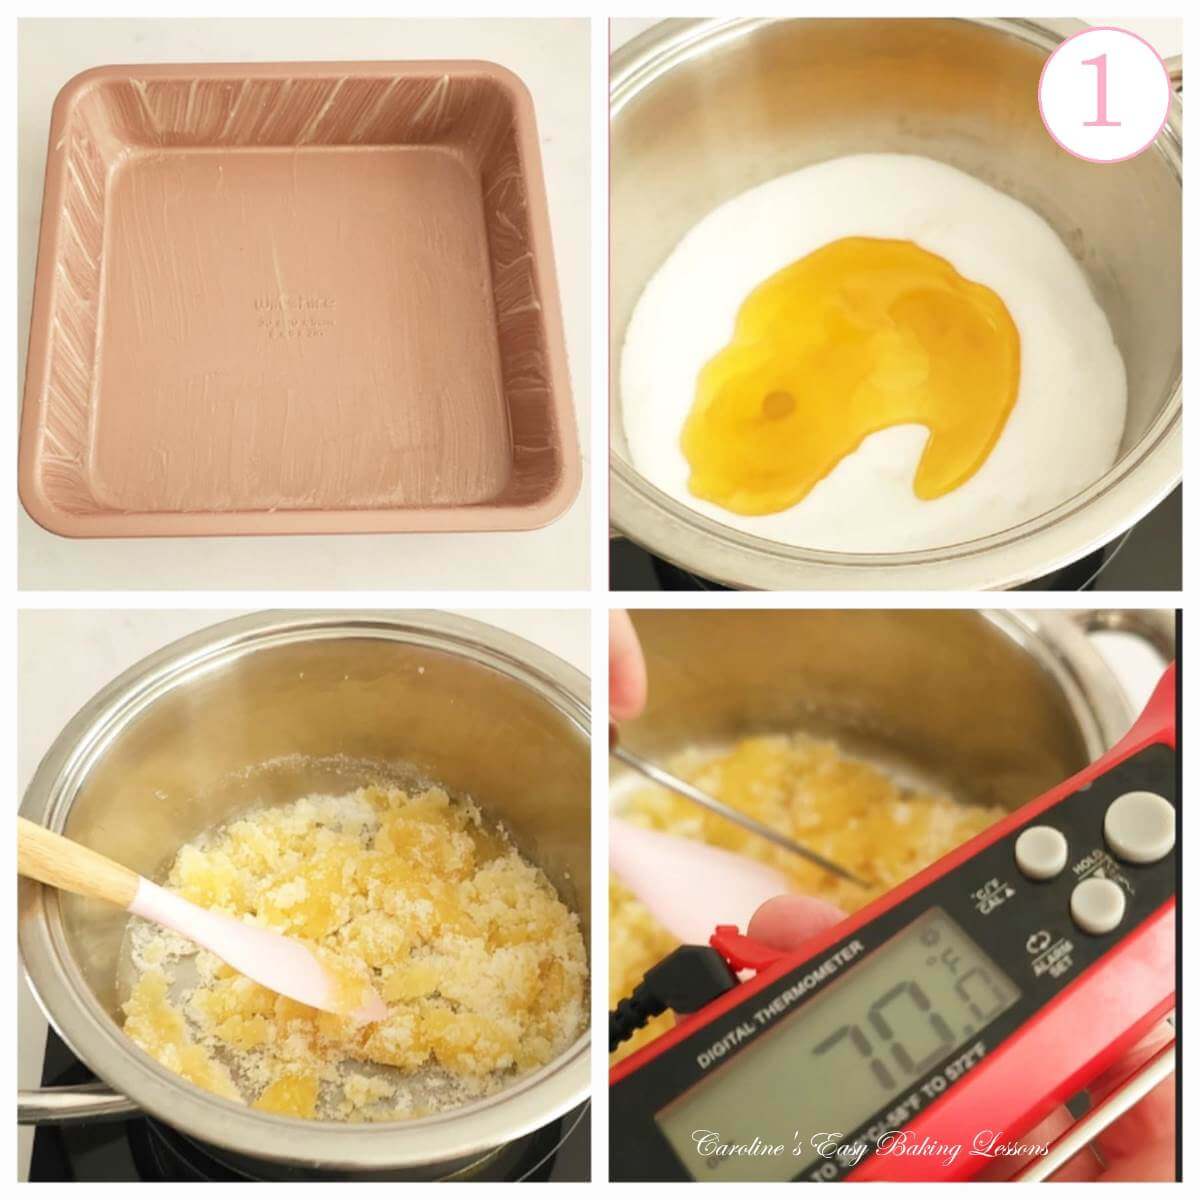
1. Start by preparing a 8” (20cm) square cake tin/cake pan. Grease well with butter, cake release spray or as I used – homemade Lining Paste (Cake Goop) – perfect for bundt cakes. (**For other tin/pan sizes, see notes).
2.Place caster sugar & Golden Syrup in a deep, heavy bottomed pan that is not non-stick, before mixing together.
*Tip – to use the syrup easily, coat the spoon in oil (such as Frylight cooking spray cooking spray) & it will just drop off.


3. Dissolve the mixture on a low-medium heat. (Have a candy/sugar thermometer or food thermometer ready).
4. After the mixture has melted, increase the heat to medium & cook until the sugar turns an amber colour. This will be at the ‘hard crack stage’ – sugar/candy thermometers have this printed on them for reference.
Otherwise, you are looking for a temperature of 146°c (295°f). Monitor this closely, as higher temperature runs the risk of the honeycomb disintegrating.

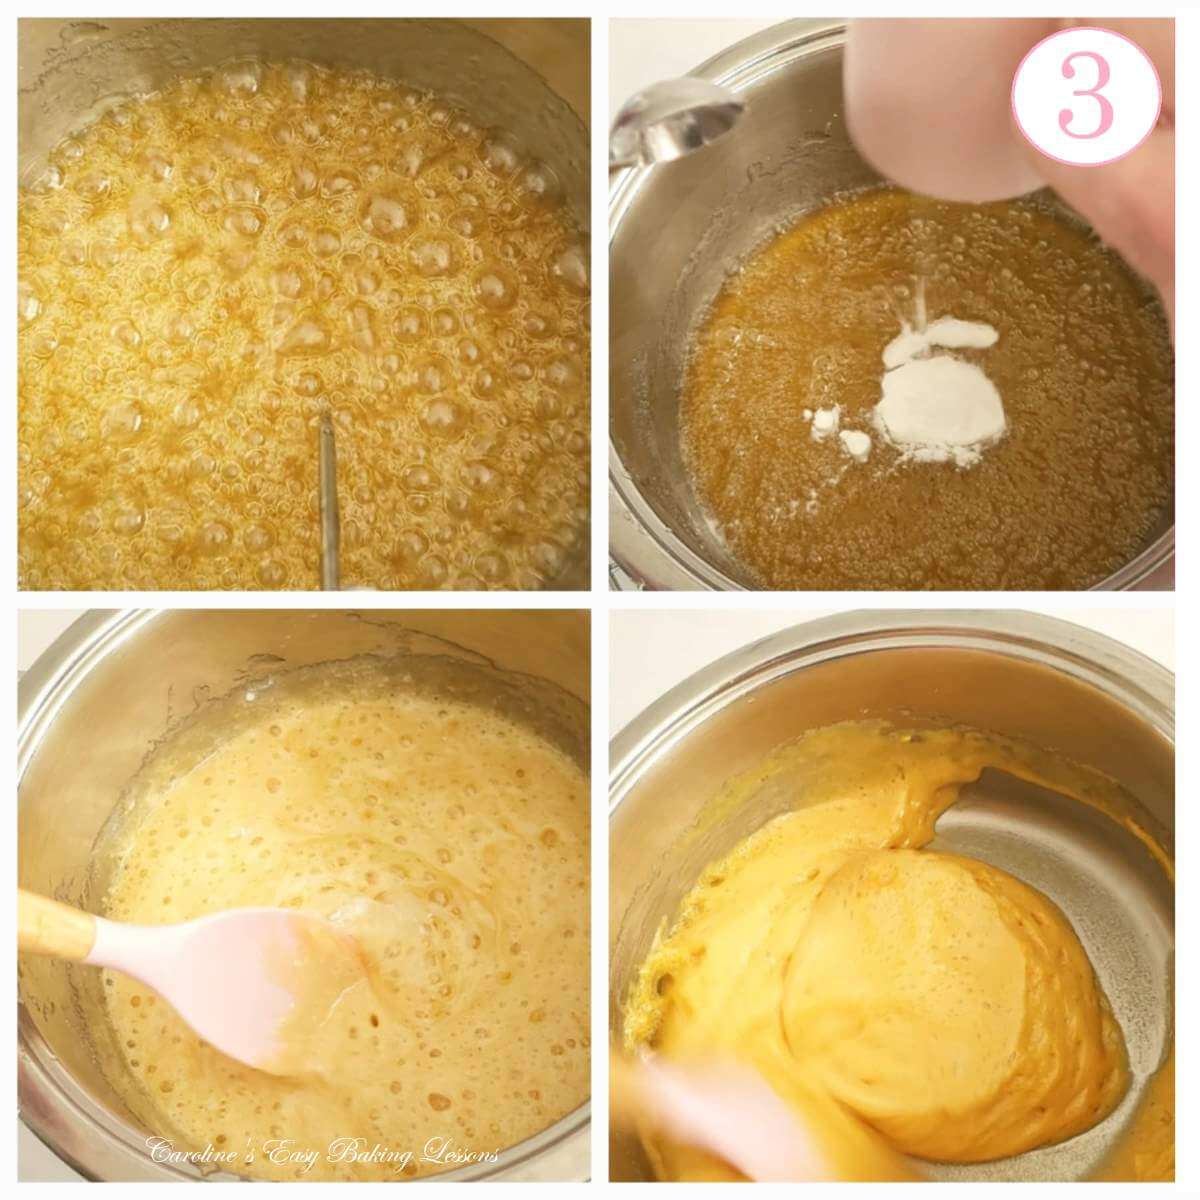
5. Working quickly & carefully, immediately remove the mixture from the heat.
6. Add the Bicarbonate of Soda (Baking Soda).
7. Mix vigorously until all combined & the mixture had started foaming and visually changing texture & consistency. (See Photo 3).
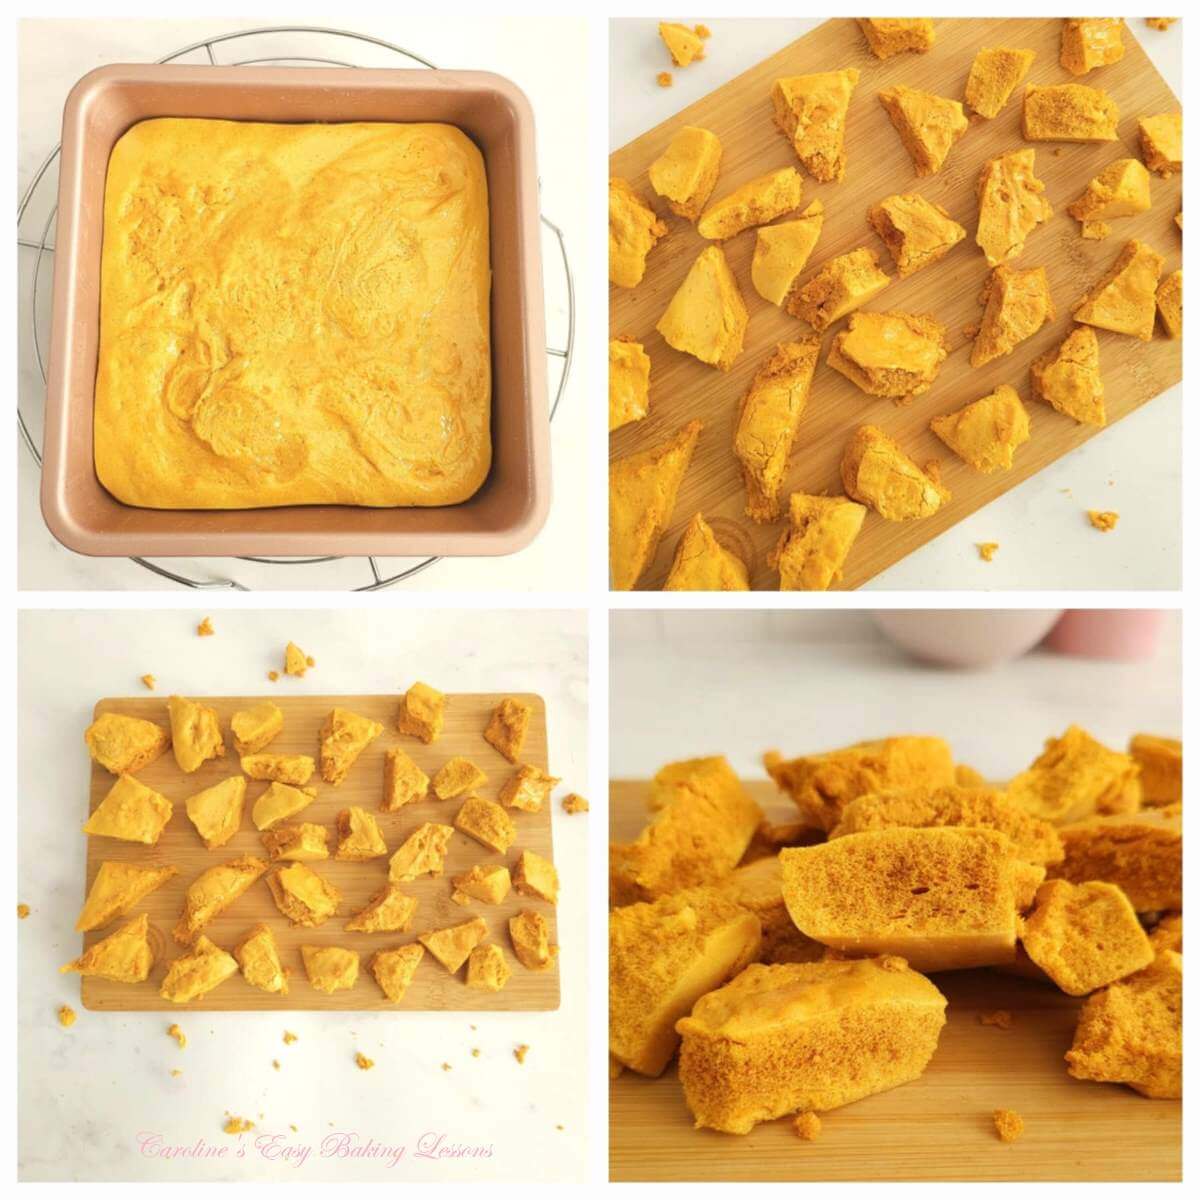
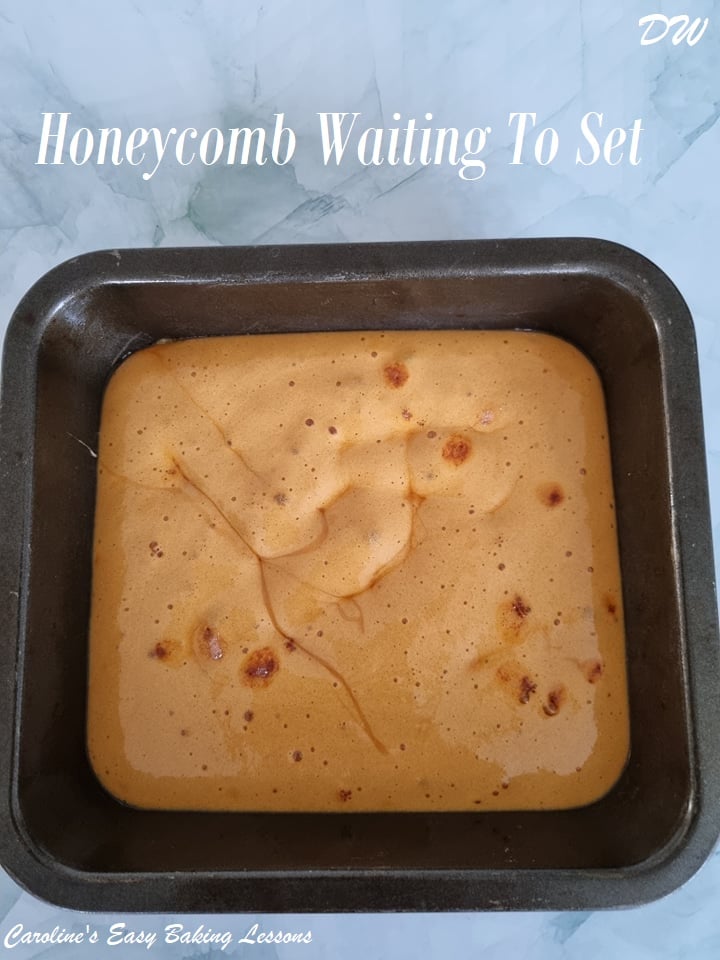
8. Quickly scrape the mixture out & into the prepared cake tin/pan (be sure to place on a heat-safe surface).
See Photo 4 below.


9. Immediately pour boiling water & washing liquid into the cooking pot & leave to steep. Otherwise it will be extremely hard to clean later.
10. Leave the mixture to set for about 1½ hours, (during which time it will continue to bubble & harden).
See Photo 4.


Breaking Up The Honeycomb:
1. Run a cocktail stick or silicone spatula around the edges of the honeycomb and release onto a chopping board.
2. On a clear work surface, use a large knife, rolling pin or toffee hammer to crack and break up the honeycomb into random sized/shaped pieces. (Be careful as pieces will fly).
See Photo 5.

Decoration (optional):
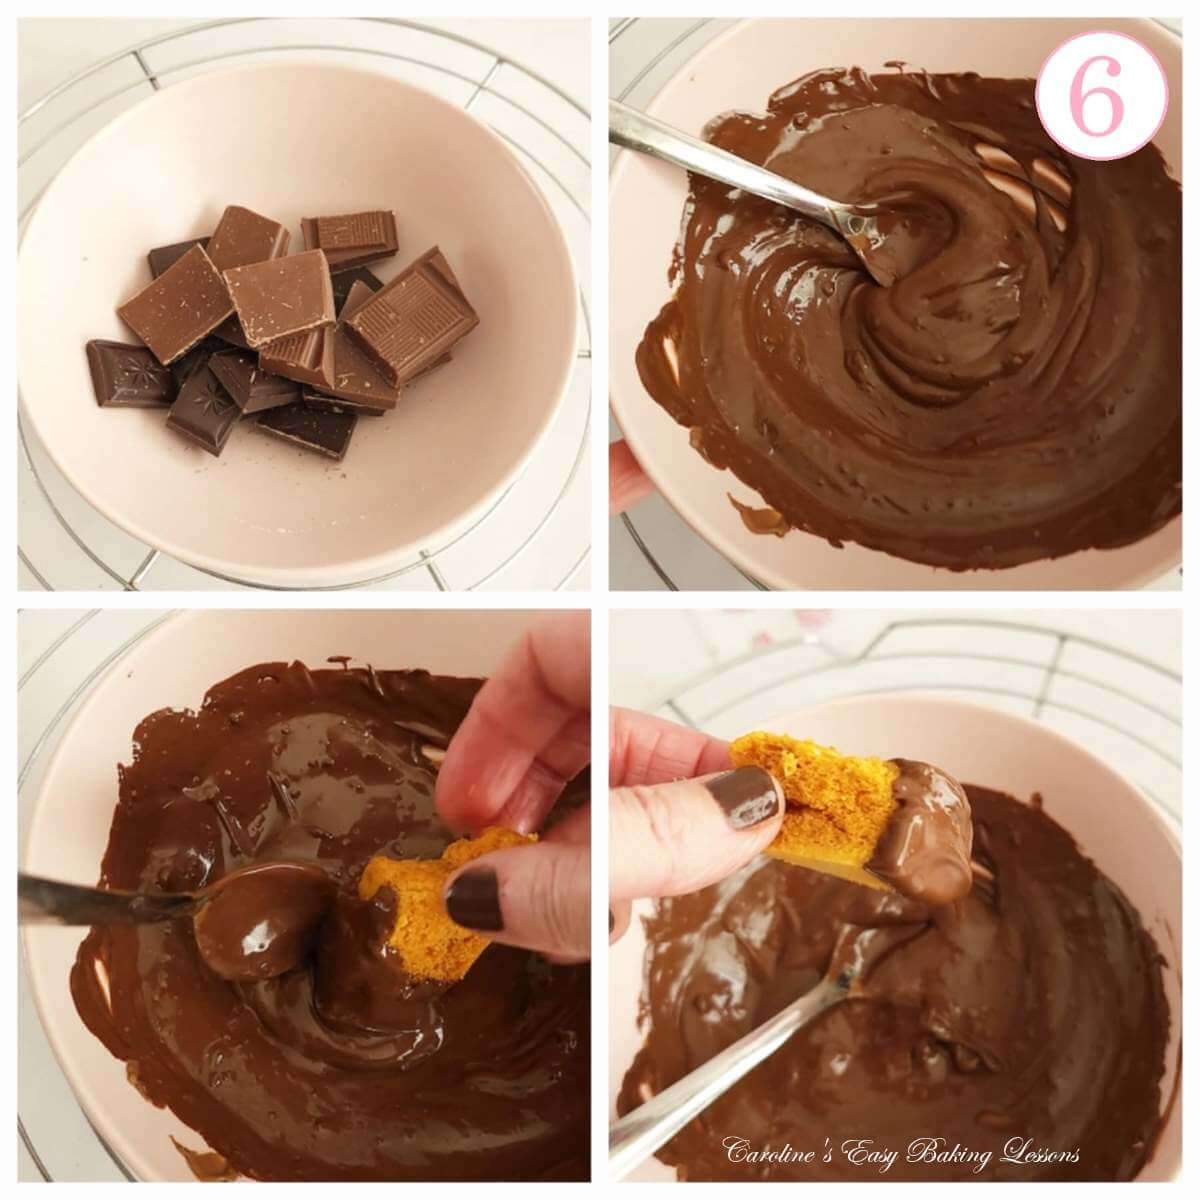
1. You can half coat the honeycomb pieces in chocolate by breaking up the chocolate and melting in the microwave or double boiler.
2. Microwave in 30 second bursts only, mixing well in-between each burst. (Otherwise you run the risk of burning & ruining the chocolate).
3. When all melted, either dip the honeycomb piece in the chocolate or use a small spoon to coat.
See Photo 6.


4. Leave to set on baking/parchment paper & repeat with the rest of the honeycomb pieces.
See Photo 7.
5. For extra special honeycomb, coat the wet chocolate end in sprinkles or fine chopped nuts.


Serving & Storing:
1. Once set, enjoy this crunch treat or gift for a special occasion.
2. Store honeycomb in an air tight container, at room temperature or somewhere cool for about a week, (warm area and the honeycomb texture softens and loses its crunchy texture).
3. Honeycomb also freezes well. Wrap portions in baking/parchment paper, then cling film/plastic wrap or a food bag, (to prevent freezer burn). Label and date and freeze for about 12 months1. Defrost at room temperature for a couple of hours
DIFFICULTY LEVEL: easy, beginner
Original photos by Mrs D


Recipe Card
EASY HONEYCOMB AT HOME – Chocolate Dipped

Equipment
- Weighing Scales or Measuring Cup
- Measuring Spoon
- 20cm/8" square tin (or 10"x6" – 25½ x 15¼cm)
- Deep, heavy-bottomed cooking pot (not non-stick)
- Wooden spoon
- Food thermometer
- Timer
- Toffee hammer, knife or rolling pin
Ingredients
- 200 grams Castor Sugar (8 oz, 1 cup, extra/super fine sugar or granulated)
- 125 grams Golden Syrup (5½ tbsp, 4½ oz, *see notes)
- 2 tsp Bicarbonate of soda (Baking Soda)
- 100 grams Plain or milk chocolate (3½ oz, bitter or semi-sweet, optional)
Instructions
Prepare Honeycomb (Sponge Candy)
- Prepare a 20cm/8" square tin by greasing with butter, cake release spray or Lining Paste. (For other tin sizes see notes).
- Add the sugar and Golden Syrup to a deep pan (not a non-stick one), and mix together. On a low-medium heat, stir the mixture until the sugar has dissolved. I find the best way to get the golden syrup off the tablespoon is to coat it in oil, then the syrup falls off the spoon easily. You need to not use a non-stick pan because the high temperatures ruin the non-stick coating and can release toxins into the food.
- Once the sugar and syrup have melted turn the heat up to medium. Cook until the mixture turns amber & is at the hard crack stage. Some sugar/candy thermometers have this on it, but if not, you are looking for a temperature that reads 146°c or 295°f. And for me it takes about 10 mins. You need to be keeping a close eye on this as any higher the mixture will disintegrate very easily and will lack a nice crunch.
- Now this is where you have to be really quick and careful. Once the mixture reaches the correct temperature immediately remove the pan from the heat and add the Bicarbonate of Soda (Baking Soda) and beat vigorously until no longer visible and the mixture is foaming.
- Scrape the mixture into the greased tin right away & be careful as the mixture is very hot.
- Clean the pan straight away – pour in boiling water to help dissolve the sugar and make it easier to clean.
- Leave the honeycomb to bubble away, for about 1½ hours, at which point it will become hard. Then attack it with either a toffee hammer or end of a rolling pin! Be careful as it does splinter a bit so do it on a clear work surface.
Decorating:
- I liked to do some with chocolate on so just melt some broken chocolate in the microwave in 30 second bursts, mixing in-between each burst. Alternatively, melt in a bowl over a pan of barely simmering water. Just dip the end of the honeycomb into the melted chocolate and place on some baking/parchment paper till set.
Serving & Storing:
- Once set, enjoy this crunchy treat or gift for a special occasion.
- Store in an air tight container, somewhere cool or room temperature. (heat softens the textur eof the honeycomb).
- Freeze portions in paper, then cling film/plastic wrap or food bag, labelled and dated, for about 12 months.1 Defrost for a few hours at room temperature.
Video
Notes

 For the home-made Lining Paste used to grease the tin – Go To Lining Paste
Servings/Yield -Yield is one 8″ (20cm) square thick slab of honeycomb. For nutrional purposes, 12 servings of 3 pieces is estimated.
Step-by-step instructions & photos, as well as more information, can be found before this recipe card.
For the home-made Lining Paste used to grease the tin – Go To Lining Paste
Servings/Yield -Yield is one 8″ (20cm) square thick slab of honeycomb. For nutrional purposes, 12 servings of 3 pieces is estimated.
Step-by-step instructions & photos, as well as more information, can be found before this recipe card.

 Check out some more Christmas Recipes.
Click for a direct link back to this recipe
Check out some more Christmas Recipes.
Click for a direct link back to this recipe


Subscribe For More Recipes
Want more great recipes, tips, baking information and newsletters? Then please consider subscribing by adding your email address below. Be sure to check for a confirmation email & respond back, so you can follow me & receive your free emails. Your personal information will not be shared with a third party.
Join My Facebook Group
Why not also join my – Facebook group Easy Online Baking Lessons, dedicated to this baking lessons website, as well as providing one-on-one support with myself & my team? Be sure to answer all security questions when requesting to join.
Check out more Christmas Recipes
Follow me on social media:
Happy Learning & Baking!
Caro & Mrs D x
Honeycomb (AKA Sponge Candy)
Search For Something You Fancy!
Caroline’s Easy Baking Lessons
- Freezing Honeycomb information from website FreezeIt.Co.UK-freezing-honeycomb ↩︎


