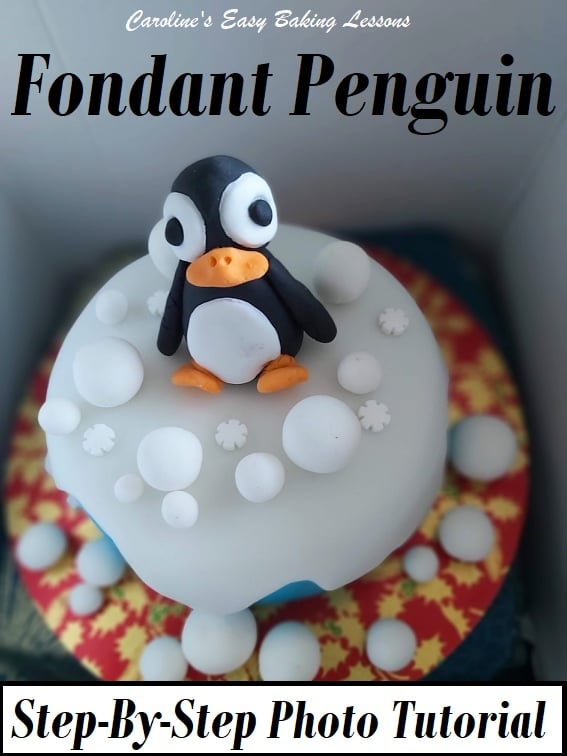
Fondant Penguin Christmas Cake Topper

Here's my photo tutorial to make a really easy but cute, fondant penguin Christmas cake topper. Includes how to cover your Christmas cake for this cute winter scene.
Fondant Penguin Christmas Cake
Full Tutorial On Decorating A British Christmas Cake

WHY USE THIS TUTORIAL?

1. Simple
2. Quick
3. No Special Equipment Needed
4. Step-by-step Instructions
5. Make In Advance
6. Inexpensive
1. Simple To Make
Many reasons to use this fondant penguin tutorial, one of which is how simple it is to make. Rolling fondant, making balls and putting together, is all it takes.
2. Quick To Make
The process to make the fondant penguin is also very quick. Quick to form and put together, lots of drying time isn’t required and so can easily be made in one go. I actually made this penguin and snow balls, one night in bed, (when I wasn’t well) and used a tray on my lap, with some baking/parchment paper on top.
3. No Special Equipment Is Required
No special equipment is required to make the penguin fondant topper. You can use food glue, or water to attach pieces. No rolling pin? Use a glass bottle. Colour fondant yourself or buy ready made.
4. Step-by-step Instructions Provided
My tutorial provides step-by-step clear instructions, as well as process photos to guide you. Leaving no details unclear. You can easily save the tutorial too (see below).
5. Can Be Made In Advance
As with all fondant models/decorations, they can be made in advance. If stored correctly, they can be made weeks if not months before. See tips for that below.
6. Inexpensive To Make
Since there isn’t lots of things to buy for making this fondant topper, it can work out less expensive. Less expensive if say you had them handmade on Etsy for example. Yes you will have to buy fondant, but if you are making more than one topper or Christmas cake, then it will work out even cheaper. You can also store unused fondant too for a future project.
Click ‘download’ button below to save the tutorial to your phone or computer:
Covering A Christmas Cake In Marzipan
If you are following the Bake-together for a Traditional British Christmas cake, here’s how I covered the mini cake in marzipan. All Christmas cakes should be covered in this first, before adding either fondant or Royal Icing. **Be sure to leave a day in-between coverings (3 -4 for the Royal icing, or it can sometimes take on a ‘greyish’ tinge to it).
1.Begin by kneading the marzipan, before rolling out to wider than the size of the cake, plus the depth too, ensuring the marzipan isn’t too thick. Ideally about 3mm (1/8″) thick. See Photo 1. Next brush on some thinned down warmed apricot jam (this is the traditional flavour), on the top and sides of the cake.


2. I rolled out on top of a 2 piece, clear rolling mat, that has guides on it. Here’s a link to it – Iced Jems Fondant Rolling Mat Set. Alternatively roll out on baking/parchment paper (you can dust with icing/powdered sugar if needed). Then place the cake upside down on to the centre of the marzipan and turn everything over. (See Photo 1)
3. Using a fondant smoother (see Photo 1), your hands, or something else flat, that won’t jag into the marzipan, smooth the top of the cake. Dust the smoother first with icing/powdered sugar and smooth in circular buffing motions from the centre out. Once happy with it being flat enough, trim off some of the excess marzipan, but leave some to tuck under the cake. (See Photo 1). Work your way down the sides, making them as smooth as possible. It doesn’t need to be 100% perfect as you top with fondant too. Let the excess sit at the bottom of the cake.
4. Turn the cake over (onto baking/parchment paper), and smooth the ends of marzipan onto the bottom of the cake. Make as flat as possible. See Photo 1.
5. Leave out at room temperature to dry, for at least 12 hours and up to 2 days.
Covering The Cake In Fondant


1.Once the marzipan has dried, you can add fondant. Add one whole piece of fondant, like above for the marzipan, or try this easier method for making a snow scene for the fondant penguin.
2. Roll out a strip of fondant long enough to go round the cake and wide enough to be higher than the height of the cake. I used a patterned mat for the first time, but this is not essential (see Photo 2, top left pic.).
3. Trim straight, one long side of the fondant that will be at the bottom of the cake. Take the fondant strip and wrap around the cake (you can brush on a little water to help it stick if needed). Cut off the excess length and smooth down with your fingers to blend in.
4. Trim some of the excess from the top off, enough to be able to make it flat like in Photo 2, final pic. Then smooth & thin down with your finger tips.


Adding The Snow Top
1. Roll out white fondant, to about the same width as the marzipan was initially. For these smaller cakes, you can roll quite thin to 3mm (1/8″), but for bigger cake you roll a bit thicker, up to 5mm (1/5″). Cut out a pattern such as in Photo 3. You need to make sure though that there is fondant to cover the top of the cake, and that the ‘drips’ begin down the sides. You can play about with this and just try on top of the cake first, and see if you are happy. If not roll back up and repeat.
2. Once happy with your shape, smooth down the edges with your finger tips. See Photo 3.
3. Wet the top and edges of the cake with just a little water or even clear alcohol, and then place the fondant ‘snow’ on top of the cake. Smooth the top and then the sides in place. Leave out to dry at room temperature.
How To Make The Fondant Penguin
What You Will Need – Black, white and orange fondant, in small quantity. Food glue/vodka or water, very small paint brush, wooden cocktail stick, baking/parchment paper, rolling pin/glass bottle.
1. Begin with black fondant. The sizes will depend on the size of your cake, but for my 41/2″ cake, I rolled the body into a ball, then a log, tapering in at one end (that will be the neck). This was about 2″/5cm high, and a little over half that width wise.
Smooth the edges by holding in the palm of your hand and use the opposite hand to smooth down the edges with your finger tips – a kind of gentle buffing action. Make a black head for the fondant penguin, a bit wider than the neck area but smaller than the bottom of the body. (less than 1″/2.54cm). See Photo 4.


Take a wooden cocktail stick or bbq stick and trim to the right size for inserting into the body of the fondant penguin, with just enough coming out of the top to secure the head in place. (See Photo 4).
2. Roll some white fondant and cut out 2 eyes for the penguin, these will be quite big in proportion to the face. You can also just roll 2 small balls and flatten. Try them against the head for sizing – see photo 4. (Mine were about 8mm or 1/3″ in diameter). When happy with the size, stick in position with food glue, water or clear alcohol. See Photo 4, second pic.
3. Use the end of a small artist paintbrush or something similar, and press indents into these eyes (See Photo 4).
4. Roll 2 very small balls of black fondant for pupils for the fondant penguin figure, that will fit nicely into the indents you just made in the white fondant. Glue in position.
5. Take a small piece of orange fondant and roll into a fat sausage shape. Using your finger tips, squeeze from just past the mid point, to thin the ends to make a beak. See Photo 4 last pic. Make 2 holes for the nostrils (see Photo 5 below).


6.Roll a thin piece of white fondant and cut out a circle (my circle was about 1″/2.54cm), then use your finger tips to extend the top part to make it a little longer, and thinner too. See Photo 5 and hold against the penguin body as a guide.
7.Place in position on to the front of the fondant penguin’s black body.
8. Roll 2 small pieces of black fondant into sausage shapes, for the wings. They need to be just a little shorter than the body length. Tapper them at one end (see Photo 5)
9. Roll small pieces of orange fondant into balls and then taper at one end, as in Photo 5, for the penguin feet. Flatten with your fingers to like in Photo 5, final pic.


10. Finally add some glue or water/alcohol onto the exposed wooden stick and carefully place the penguin head on top (make sure it is not too long to poke out the top. Smooth the bottom of the penguin so it will sit and then attach on the feet as in Photo 5, with them bent. Attach the wings, and press in place at the top. Leave sitting upright or against something for support, for it dry and set. Keep away from direct sunlight and don’t place in the fridge.
Making Fondant Snowballs
1.Roll various sizes of white fondant, into very smooth balls. Lots of them are good. See Photo 6.
2. Leave out to dry and harden and away from direct sunlight.


Constructing The Scene
Once ready, simply place the set fondant penguin onto the top of the cake. If it won’t stay in place, you can try adding a wooden stick through the cake and the figure, but it might be difficult if the fondant penguin is set hard. You can also attach with food glue, water or clear alcohol.
Add various sized snowballs around the penguin, and also on the cake board. You can also cover the cake board in white fondant too (I ran out of time). Glue the snowballs in position too if transporting the cake.
Your Penguin Snow Themed Cake is complete.


Fondant Tips
- Once the fondant decorations are made, let dry at room temperature. Then cover well with cling film/plastic wrap and store at room temperature, away from direct sunlight as this can fade the colouring.
- Store as above, they will be fine for weeks if not months.
- If you would like a shine finish to your fondant decorations, brush on clear alcohol and leave to try. This also helps preserve the fondant a little longer too. You can use egg whites or water, but these evaporate quicker.
- Do not store in the fridge as it will sweat and weep.
- Use household objects in place of fondant tools – knife and wooden cocktail stick as examples.
- Leave to dry a little if too soft to work with – expose to air & it will harden a little. Too hard, knead till soft.
- Baking/Parchment paper is good for working on – also means no staining to worry about.
- ALWAYS use gloves when using food colouring & new ones for each colour – it stains really badly.
- Use colouring paste or gel – less moisture makes working with fondant easier & a paste is best.


For more tips or tutorial on working with fondant – go to my Fondant Lessons Page.
Or check out some other Christmas Cake Fondant Topper Ideas
Traditional British Christmas Cake Bake-together
Or jump to the Christmas recipes page.
Fondant Penguin Christmas Cake
DIFFICULTY LEVEL: Easy with guidance, beginner
Follow me on social media:
Happy Learning & Baking!
Caro x


Fondant Penguin Cake Topper
Search For Something You Fancy!
Caroline’s Easy Baking Lessons


