Beginners’ Guide To Piping Bags – assembling & filling

As part of my structured baking lessons website for beginners, here is a beginners' guide to assemble and fill a disposable piping bag. Learn the names for the parts, phrases and terms you will read in recipes, as well as some handy tips.
Beginners’ Guide To Piping Bags – assembling & filling
Theory Lesson No.15


What You Will Learn
- Names for the parts of the piping bag
- How to cut the piping bag
- How to use a nozzle & coupler
- How to easily fill the piping bag
***Note this lesson will only cover constructing & filling the piping bag, & not teach you how to pipe. That will be covered in the following lessons. There is also great resources on YouTube where you can actually see it in action.
Top Tip – go to the setting on YouTube, and play in slower motion.
Parts To A Piping Bag
Here are the pieces for the piping bag and their associated names.


Piping Bag
Also known as a pastry bag, piping bags can be disposable, or reusable ones, made of cotton, nylon or silicone. (The blue piping bag in the photo is a large disposable one). Disposable are obviously less hassle, but not as good for the environment as reusable. I have reusable but find them a pain to wash and need a lot of airing. I don’t pipe a lot, so I am happy to use larger disposable bags that last me a long time.
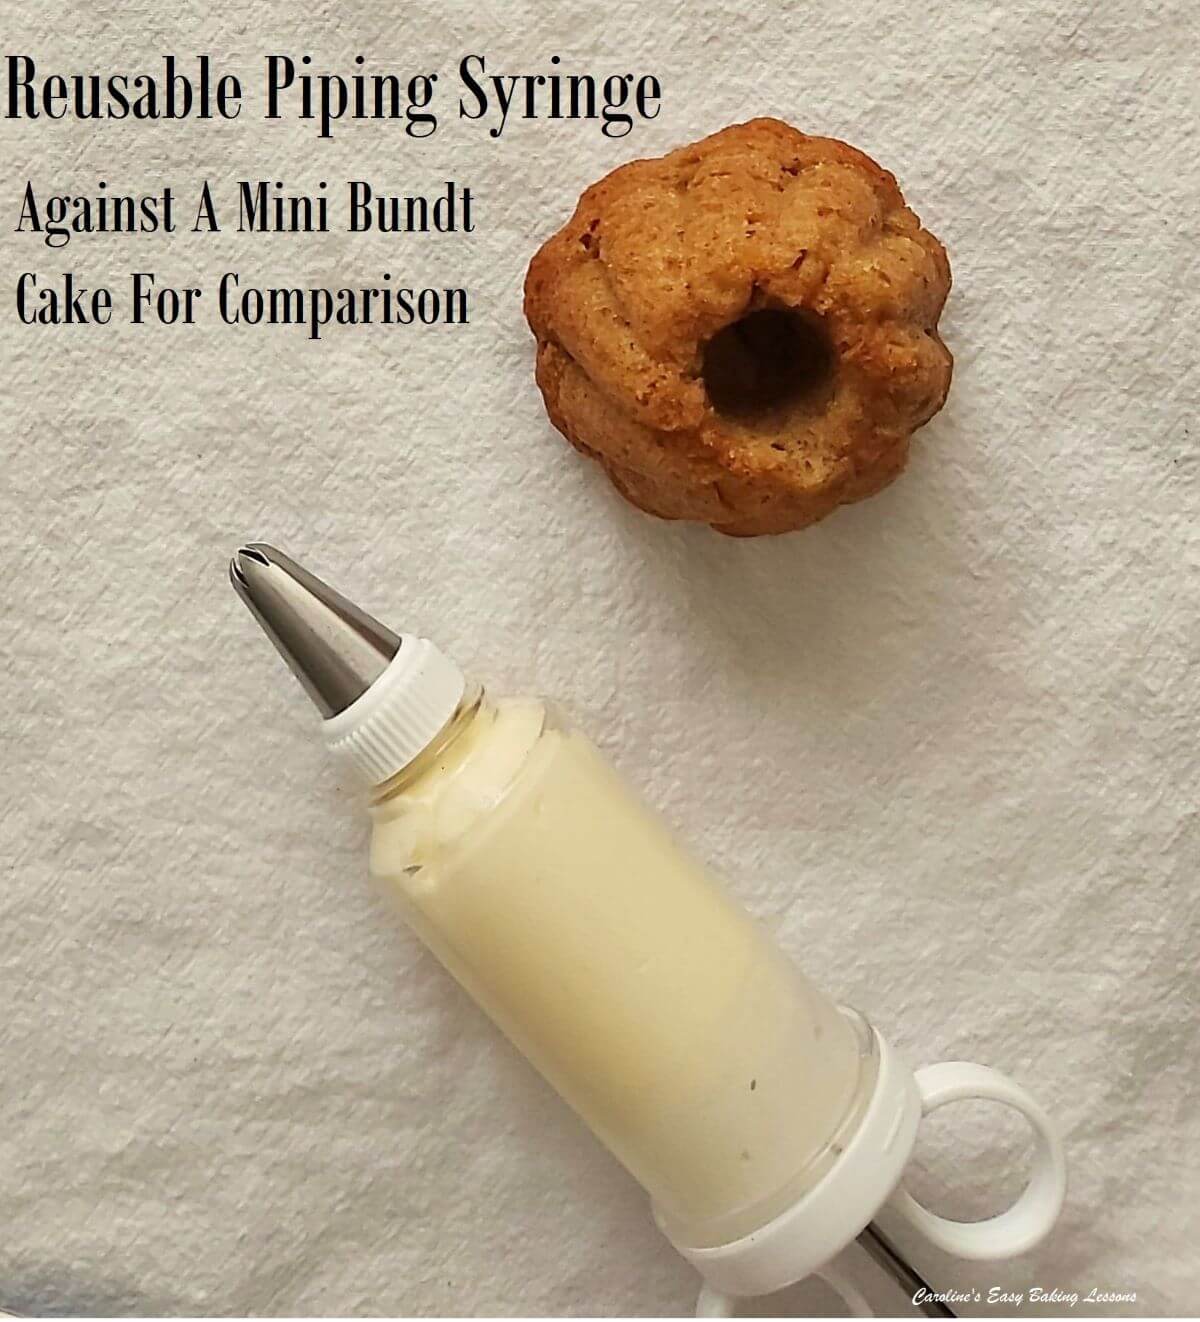
If I am using a very small nozzle, just doing a drizzle, or only a very small amount of buttercream or cream, I do use a reusable, plastic piping syringe. For this no bag is needed, and is good if you have problems with your hands. You are using your thumb with this to push the filling down the barrel to pipe it out, rather than hold a larger piping bag with all of your hand and squeezing. (See photo below of a piping syringe).

Piping Nozzle
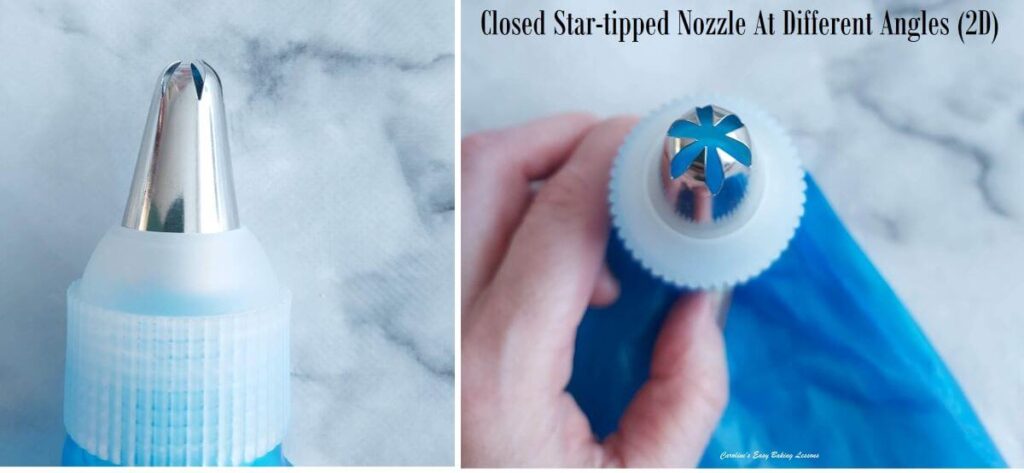
The piping tip is the piping nozzle. The buttercream or cream comes out of this and in a different form or pattern, depending on the end of the nozzle. The simplest is a plain round opening, there are lots of star tips, some open-ended, some closed-tip. All words or terms you might come across in recipes. You can get so many different types and sizes too, for piping absolutely anything you want. Even special ones for piping grass, that can also be used for piping fur of animals. Check YouTube for lots of videos on different piping tips.
Coupler Set
The coupler set makes changing and using different nozzle tips possible from the same piping bag. No need for more than one piping bag if you want to use more than one type of nozzle.


The larger piece, the coupler ‘neck’, goes inside of the pastry bag. The coupler ‘collar’ goes on top, holding the nozzle in position. (See labelled photo above). Note that the coupler is not an essential piece for using a piping bag with a nozzle.
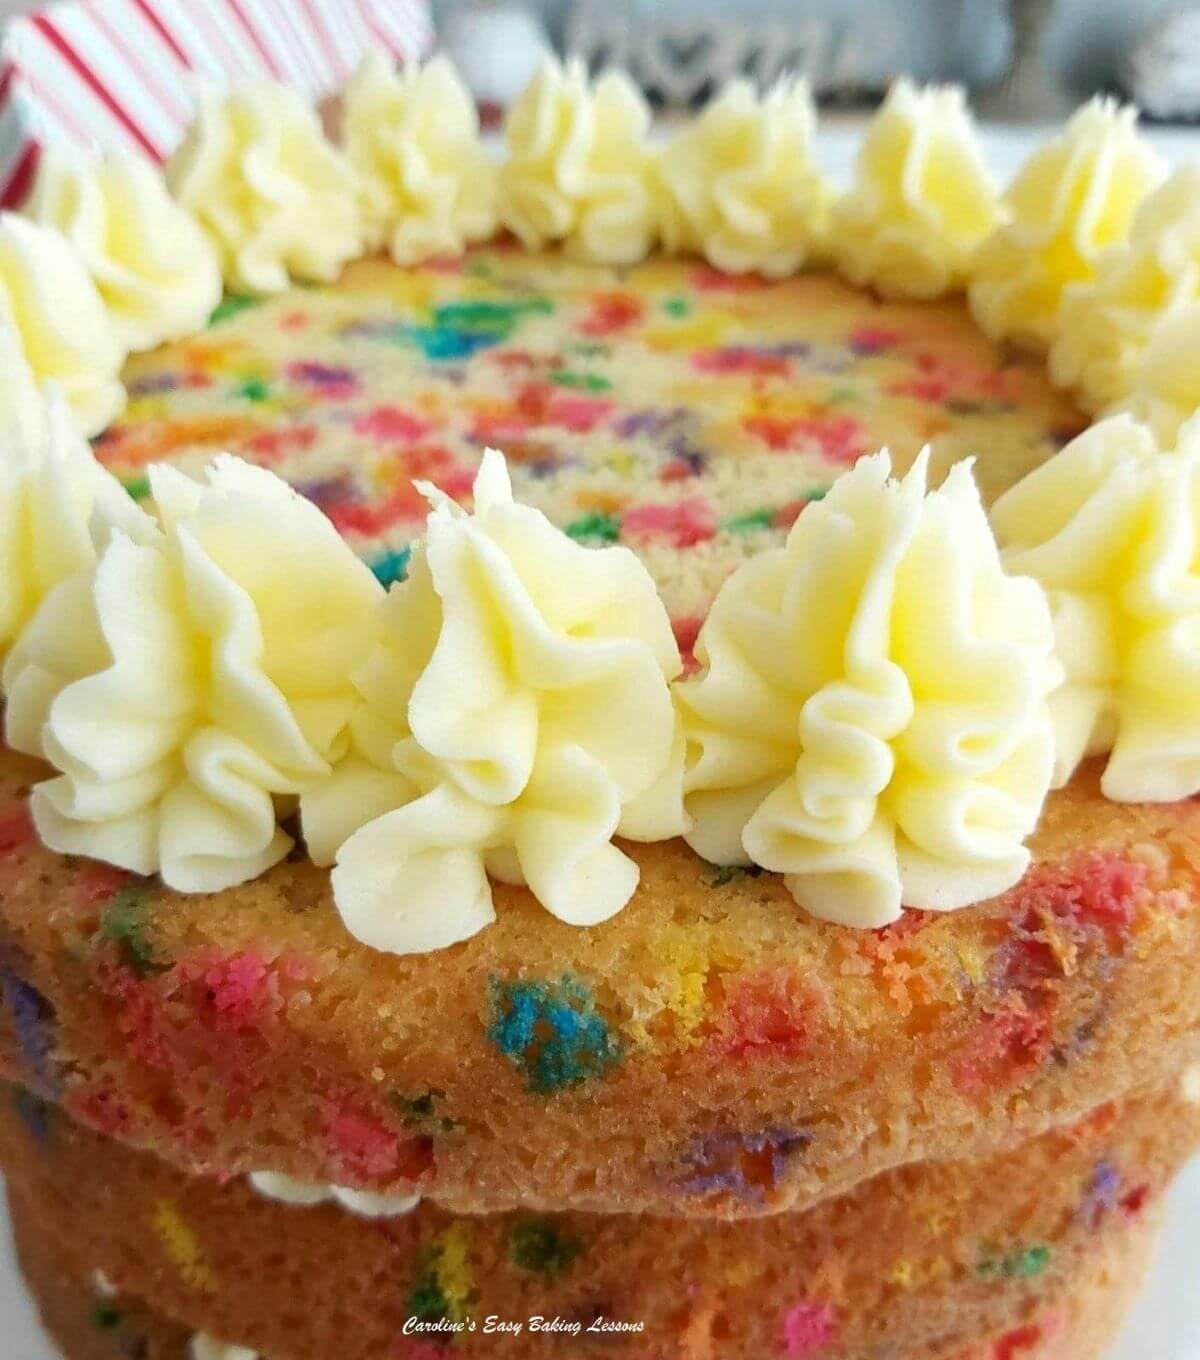
See photo where I removed the coupler collar & nozzle, so I could pipe a layer of buttercream in the centre of the cake, & easily add the nozzle back on for piping rosettes around the edge. This was for a 3 layer funfetti cake (photo at beginning of the lesson), so this was much easier than using 2 piping bags.
A Little On Nozzle Sizes
The world of piping nozzles can be confusing. As well as so many different types for piping borders to flowers, there are also different sizes and they are not always universally named according to their size or style of tip.


Some have numbers and letters printed on them, but many generic ones don’t. No universal sizing unfortunately. See my photo above of 3 different sized nozzles. They are all what are referred to a star tipped, left 2 closed star tip and the other open star.
I use the middle nozzle for my layer cakes, and the largest if I want to be quicker. You would think they were sized small, medium & large, but no. The smallest ones, are what you get in inexpensive sets. These are ideal for the likes of royal icing cookies and for very small details, or thin drizzles. (Note that these smaller nozzles fit piping syringes).


For cupcakes and bigger you want the medium/middle sized nozzles. But these can often be referred to as ‘Large’ piping nozzle when looking online at what to buy. Wilton brand label them as Extra Large. See what I mean by confusing? For reference, what I referred to as the ‘largest’ of my 3, are about the width of Russian piping nozzles if you have those, but a little longer.
See my photo of the sizings of some of these nozzles, their dimensions, and the names/numbers of most commonly used ones.

Note that the smallest ones, often come with a coupler set too. And piping syringes come with these smaller sized nozzles. Sometimes I can get away with using a coupler, that is meant for the really big nozzles (my 3rd biggest in the photo above), but with the medium sized nozzle. If you don’t have a coupler, or one that fits, you can still use the piping bag without it and just the nozzle. Or just use the piping bag with the tip cut off.
Piping Bag Assembly
1. Fitting The Nozzle
Begin by cutting the end tip off your disposable piping bag/pastry bag. How much you cut off is determined by the size of the nozzle you are going to use. Some recipes will tell you the type of nozzle (ie open star-tip etc), but for the actual sizing of the nozzle, some have numbers and letters, and some it is stamped on the actual nozzle. Here, for my 8″ 3 layer cake, I used a 2D closed-star tip.
Line the nozzle up alongside the tip/end of the piping bag, and you want to cut a straight line at the point where the nozzle ends (the wide open end).


If using a coupler, you will have the ‘collar’ piece that goes inside the piping bag, and you want to cut the end of the piping bag wide enough for the coupler ‘neck’ to fit inside, similar way to cutting for the nozzle alone.
Better to cut off not enough to start, then try placing the nozzle or coupler ‘neck’ inside the bag, and to come out of the cut end of the bag, but not too much that it falls out. If the cut hole is too small, simply trim off a little more until it fits. See Photo 1 – top 2 pics.
If using the coupler, next step is to place the nozzle on the end of the coupler ‘neck’ that is peaking out the end of the cut piping bag, holding in place with one hand. Then place the coupler ‘collar’ on top of the nozzle, and twist it on, so that it holds the nozzle in position. See Photo 1 – bottom 2 pics.


2. Filling The Piping Bag
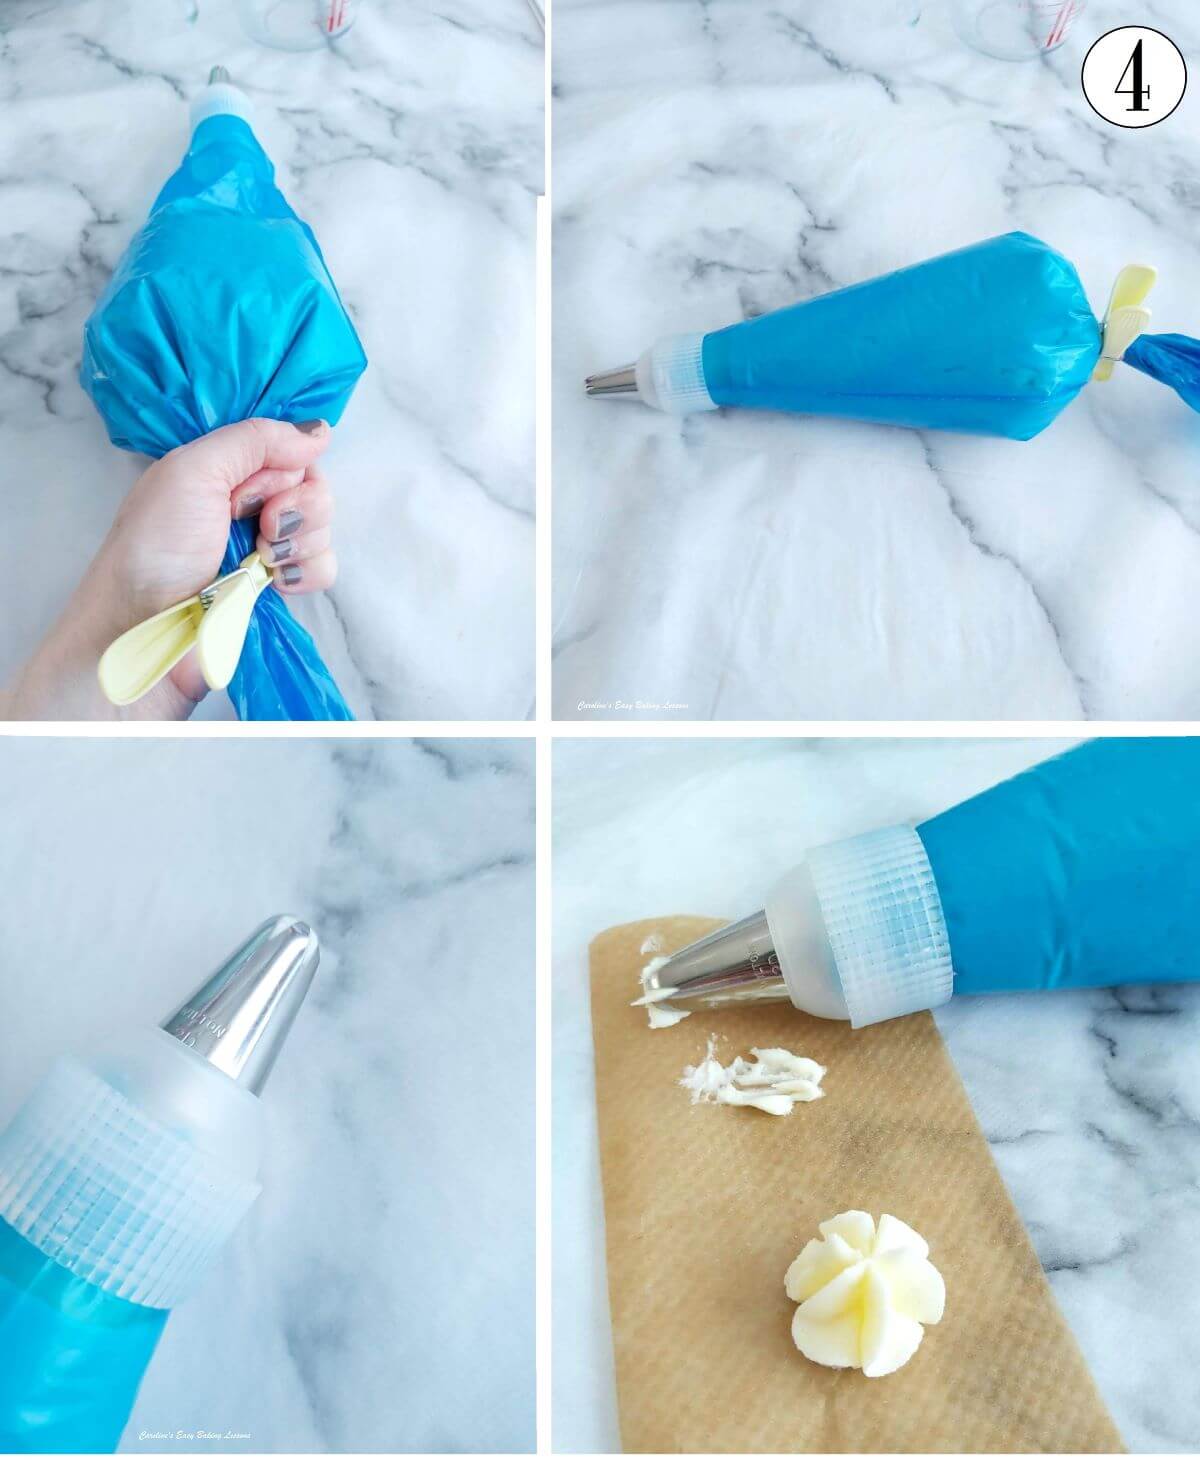
To fill the piping bag, first open the bag up, and then turn the open end down over itself, as in Photo 2 – top right pic.
Then to help the filling process, I like to use a large jug of something similar, to hold the bag open. Start by placing the bag, nozzle end inside the jug (and because the bag is cut, I like to bend the nozzle end up so no buttercream will come out – see pic 3). Then use the turned over part of the bag, and place it over the sides of the jug – see pic 4. Then make sure the bag is open and ready for the buttercream or cream.
Professionals use their hand in a cup-shape, in place of the jug, to hold the piping bag open. Using a jug is much easier.


Use a spatula and a spoon, to spoon the buttercream into the open bag, using the spoon to scrape it in if need be. If you have a lot of buttercream to add, you can push it down, or lift the sides of the bag up and give it a few taps to get the buttercream to go further down. Just make sure you don’t over-fill the piping bag or it could get messy.
Once full, unfold the overturned piping bag, (see Photo 3 – 2nd pic), and then twist the piping bag closed, just above where the buttercream ends. You can buy clips just for this purpose, but I often just use clothes pegs. Then carefully lift the piping bag out of the jug and place it down on your worktop/counter. See Photo 3.

Now hold the piping bag with one hand, below the peg, and use your opposite hand to hold the end of the piping bag, to squeeze the buttercream further down the bag. Repeat, until the buttercream is about to come out of the nozzle.
Now let go of the bag, and twist again tight shut, till there is no air left in the bag and hold in position with the peg. (See Photo 3, and difference in top 2 pics).
Now have some baking/parchment paper ready, and do some practice piping of the buttercream before you do the real thing on the cake. The process is basically holding the piping bag taught with one hand, around where the peg is, and squeezing at this point. This releases the buttercream onto your cake, and when you want to end it is simply a case of releasing the pressure and swiftly pull up at the same time.
As the bag gets less full, simply undo the peg, let air out and twist it tight again.


If using a couplet set, the benefit here is that you can pipe using more than one style of nozzle from the same piping bag. You simply, unscrew the coupler ‘collar’, put on a new nozzle, then put the ‘collar’ back on and pipe.
If only using a nozzle tip, to use a different one, you would need to use a second piping bag. Use the same process above if just using a nozzle and bag, or just a bag with no nozzle.
Cleaning Afterwards
The messy bit is the cleaning up afterwards. Using disposable piping bags reduces this, but the messiest bit is getting the nozzle & coupler out to wash. I often cut of the bag as near to the nozzle as possible, and then try and cut the remaining piece of the piping bag off. A very messy business.


I recently saw a video that might help in this – you were to place the buttercream in some cling film/plastic wrap, roll up and have ends, kind of like a sweetie/candy wrapper. One end of this was then placed inside the prepared piping bag, trimmed off, and essentially you were using this as a 2nd piping bag and piping as normal. But when finished, you were simply removing the used up inside ‘bag’, and only having to clean a little buttercream off the nozzle.

The hack I will link below, and you can see in it that she is using a coupler too, but sure it would still work with just the nozzle end. The video is by Bakerstreetsociety – go to Piping Clean Up Hack Video. Here is a link to their website – Baker Street Society. If you try this out, please let me know how you get on and I of course will update the post when I try it.
DIFFICULTY LEVEL: Easy, beginner
Next Lesson: Buttercream Tutorial For Beginners
Baking Lessons Students
If you are following the structured lessons, please now proceed to the next sweet or savoury lesson. Click for how the lessons work. And also download the lesson below. To practice filling a piping bag, go to Buttercream Tutorial For Beginners.
Subscribe For More Recipes
Want more great recipes, tips, baking information and newsletters? Then please consider subscribing by adding your email address below. Be sure to check for a confirmation email & respond back, so you can follow me & receive your free emails. Your personal information will not be shared with a third party.
Join My Facebook Group
Why not also join my – Facebook group Easy Online Baking Lessons, dedicated to this baking lessons website, as well as providing one-on-one support with myself & my team? Be sure to answer all security questions when requesting to join.
Follow me on social media:
Happy Learning & Baking!
Caro x


Beginners’ Guide To Piping Bags – assembling & filling
Search For Something You Fancy!
Caroline’s Easy Baking Lessons


Join My Facebook Group
Why not also join my Facebook group Easy Online Baking Lessons – Easy Online Baking Lessons, dedicated to this baking lessons website, as well as providing one-on-one support with myself & my team? Be sure to answer all security questions when requesting to join. Click to join the Facebook group.
Baking Lessons Students
If you are following the structured lessons, please now proceed to the next sweet or savoury lesson. Click for how the lessons work. And also download the lesson below. To practice filling a piping bag, go to Buttercream Tutorial For Beginners.


Thank you so much for this blog of information. I usually just ice a cake with a spatula as I don’t do anything fancy. I am making a Biscoff layer cake and the top has to be just right (I’m in a competition haha). I had bought all the piping supplies, but had a bit of a meltdown when it came time to pipe/ice. where does this go? How do I get this on? What to use? I ended up putting everything aside, almost giving up until I saw this. I will keep this page up as I go. Thanks for the boost in confidence with your easy, well thought out instructions with pictures. Much appreciated. Cheers, happy baking!
Thank you so much for taking the time to leave feedback Claire. So pleased you found the tutorial beneficial. Good luck with your competition and do not hesitate in reaching out for further help.