Oreo Style Bat Cookies

Oreo style bat cookies are my homemade version of the popular shop bought chocolate sandwich cookie. This time in the shape of a scary big bat for some Halloween baking! These bat cookies are perfect for a Halloween party. So easy to make, try making with the kiddies or give out to the 'trick or treaters'.
Oreo Style Bat Cookies
Original post 27/09/2018, updated photos & structure 07/10/2023


What Makes This A Great Recipe?


Why make this?
- Quick & easy, straight forward cookie recipe.
- Taste Great
- No artificial, sugars, additives or preservatives.
- Works with Gluten Free flour too.
These will not taste identical to those Oreos people love, but that is because my recipe doesn’t have a long list of ingredients, that you have never heard of.
However, I don’t think you will be disappointed with the taste and texture. It’s also not just a standard buttercream filling. You are clarifying the butter before making the buttercream.
BUT, don’t worry, as it is so simple to do and worth the extra 10 minutes. It makes the filling a little firmer and so the logical choice for sandwich cookies.


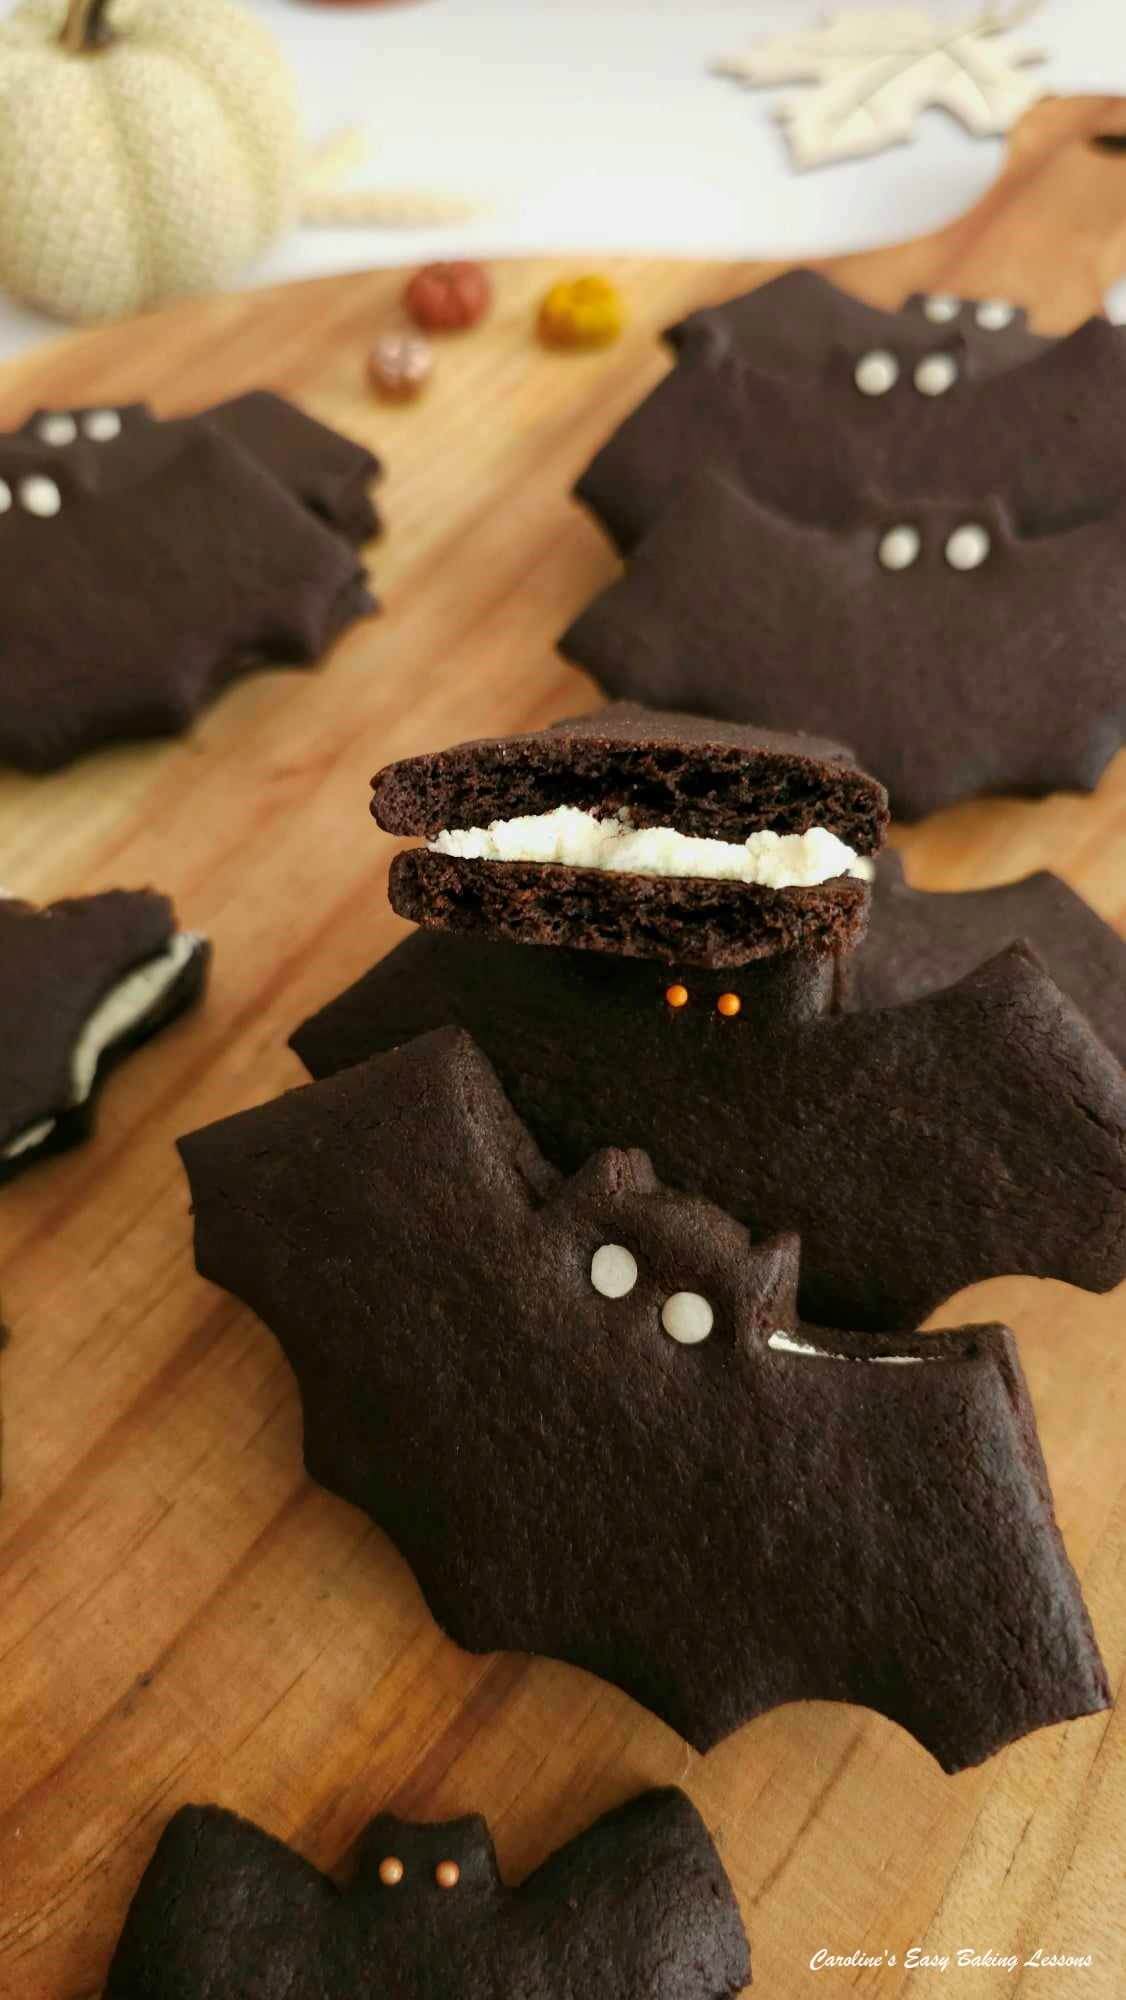
It’s also a versatile buttercream filling that can be flavoured – I made a chocolate version for some Chocolate Filled Vanilla Sandwich Cookies, (see photo). And I also made peppermint & even some orange flavoured ones for Easter Themed Chocolate Sandwich Cookies.
These chocolate cookies also work well with generic gluten free flour, (Plain or All Purpose Gluten Free flour). Just add ½ + ⅛ tsp Xanthan Gum.


Which Cookie Cutters To Use?
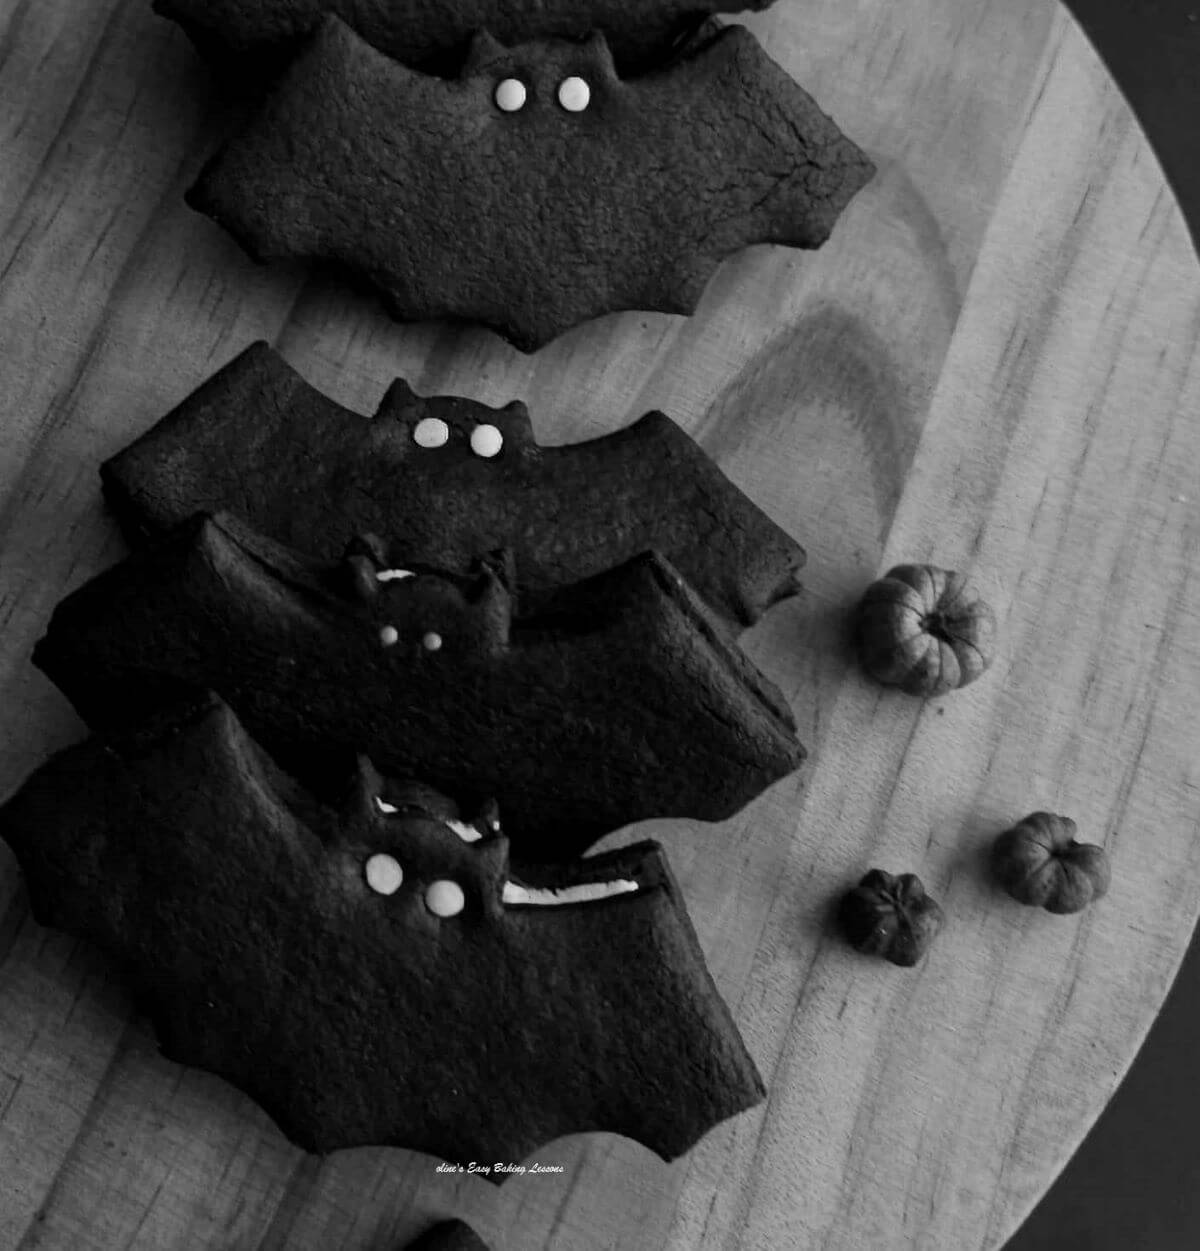
You can of course use any cookie cutter you might have to make Halloween themed Chocolate Sandwich Cookies. This bat cutter was 11 cm x 5cm (4 ⅓ inch x 2 inches) at its widest points.
I would just advise though on not using the push-release/stamp cookie cutters that are the complete shape, and have an imprint on them, as the dough has a tendency to stick to it when trying to cut them out.


Using Other Cookie Cutters
You can see some other Halloween & Autumn/Fall shaped cutters in the photo. Just remember that the baking time will be a bit less if using a smaller cutter. But on the plus side, there will be a greater yield of sandwich cookies!


Note On Ingredients
These bat sandwich cookies contain:
- Butter, unsalted
- Sugar, granulated
- Flour, Plain/A.P.
- Bicarb. (Baking Soda)
- Cocoa Powder
- AND Golden Syrup
The Golden Syrup is optional for this particular recipe but you can purchase this in some US/Canadian shops, (such as World Market), or online. See my Gingerbread Cake recipe for where to buy Golden Syrup.
Substitute for Golden Syrup for this particular recipe, that works well is some Maple Syrup or Honey.


For The Filling:
The filling is a buttercream made from ‘clarified butter’. Here are the ingredients:
- Butter, unsalted
- Icing/Powdered Sugar, sieved
- Salt
- Vanilla Extract*
*Learn how to make homemade vanilla extract for baking.
Sprinkles
For the bat eyes, and for them to stand out more from the ‘black’ cookie, I found sprinkles ideal. Note however, than the tiny tiny little coloured balls (the orange ones in the photos), completely melted on baking. So I went for the larger, harder, disc shaped white ones that were oven-safe.
Jump to Recipe
Alternatively, you can add any sprinkle on after baking, with a little water, vodka, water or even a dot of the buttercream if the sprinkles are big enough.
Tips – Chilling Cookie Dough
Be sure to chill the cookie dough, as there is baking soda (bicarbonate of soda) in it. Do this, and there will be minimal spreading whilst baking. Most cookies/biscuits should be chilled before baking.
It also relaxes the gluten in the flour that has been worked during mixing and rolling out and in turn helps avoid a tough cookie. Ideal opportunity too for you to have a break.
You can also cover with cling film/plastic wrap and chill overnight if you want. Just bake direct from the fridge and bake a few minutes longer.


‘White’ Buttercream Filling
Our butter in the UK is much more yellow in colour than US butter I have noticed, and so if you want a white buttercream, similar to real Oreos, you have 2 options:
- Add some WHITE food colouring
- Add tiny amount of PURPLE colouring
I used Sugarflair brand of ‘Extra White’ concentrated colouring paste. I highly recommend Sugarflair, as it is a paste (full disclosure, I am not being sponsored by Sugarflair, but use them all the time). Add tiny amounts during the buttercream mixing stage.
Alternatively, a tiny amount of purple colouring can make the buttercream more ‘white’. I tried with Sugarflair’s Grape Violet colouring. **Be sure to use gloves as it will stain.


Experienced Bakers
For experienced bakers, you can skip to the Recipe Card for an abbreviated version of the recipe, that you can save, share or print (with/without the photos or notes). Just click the jump-to option below.
Jump to RecipeLearner bakers, read on for the detailed recipe process.
**Note – ingredient amounts & equipment listed in Recipe Card.


Instructions
Make The Cookie Dough
1. Combine the softened butter, sugar, syrup, baking soda (bicarb) & salt in a large bowl and mix on low (or by hand) until it starts to become moistened. Then increase the speed to medium and beat until light and fluffy (approx. 3 minutes). The ‘creamed’ butter will be paler in colour now too. See Photo 1 below.
**Tip – for butter to soften quicker, cut into smaller pieces (about 1cm, ⅓″ size), as smaller surface area will come to room temperature quicker. Alternatively watch this Video for softening butter in about 12 minutes.


2. Next sieve the flour & cocoa powder over the creamed mixture, & with the mixer on low, (or with a spoon), start to mix the ingredients together.
3. Pushing down on the mixture with the back of a metal spoon will make the butter take on more of the dry ingredients. Repeat this, or use the mixer on low, until it starts to come together. Then bring the dough together with gentle squeezing and kneading by hand, while still in the bowl, before finally forming into a smooth flat disc. (See Photo 2 below).


4. Next line the baking trays/sheets with baking/parchment paper. (If there is no lip on these, best to hold in place with some baking spray or grease with butter, so the cookies don’t go sliding off the tray).
5. Place the dough on a large sheet of baking/parchment paper, with a little icing/powdered sugar if needed. Then a second sheet of paper on top & use a rolling pin to roll out the dough to a 4-5mm (⅙” – ⅕“) thickness. (I used 2 x 10p coins that I measured, as a guide). Be careful not to make any thinner than this or you will over cook the cookies. A little thicker is ok. (See Photo 3 below).


Cut Out The Cookies
1. Dip the cookie cutter in a plate with some icing/powdered sugar or even cocoa powder and cut out as many cookies as you can, remembering to dip the cutter every so often.
2. Instead of lifting the cut-outs, leave to the end, and simply peel away the excess dough from around the outside. Use an off-set spatula, baking palette knife or butter knife to help if needed, and once removed, transfer the bat cutouts carefully to your prepared baking trays/sheets. (See Photo 4 below).


3. Re-roll the excess dough and repeat cutting until all cookie dough is used up, remembering to try to make pairs for the sandwich cookies. Tip: if any of the bats are not cut sharp, (and this can happen with plastic cutters), go back over the bat cookie, pushing down and twisting a little, to make sharper edges.
4. The cookie dough will be chilled before baking, so if short on fridge space, you can squeeze as many onto 2 baking trays/sheets as you can manage & then spread out over 3 baking trays/sheets when you come to bake them. Alternatively, you can place on something flat that does fit in your fridge, just make sure to paper line first.
5. Add some ‘eyes’ to the bats, with some oven-safe sprinkles. Note the tiny orange sprinkles melted completely on baking. The harder flat white ones were fine. You could alternatively add on after baking with some food glue, vodka, water or tiny drop of buttercream
Chill The Cookies Before Baking
1. Chill the prepared cookie dough, for 1 hour before baking, to ensure they keep their shape and don’t spread out. (As a shortcut, you can also place in the freezer for 25 minutes, after 5 minutes in the fridge first). This chilling should be done with most cookies/biscuits.
2. Heat up the oven up to 180c/160c Fan Oven/350f/Gas Mark 4, to coincide with the 1-hour chilling time ending.


Bake The Cookies
1. If you squeezed all the cookies onto 2 baking trays/sheets for chilling, now spread out over 3 trays/sheets, with a space in-between each bat cookie (about 1 cm or ⅓”).
2. Bake the cookies for about 10 – 15 minutes till ready. (I bake 2 trays/sheets at one time, with the 3rd left in the fridge). They should be firm enough that you can push them gently with a spatula & they don’t stick. They should still be soft but it is easy to over-bake chocolate cookies because of their colour & because they continue baking out of the oven. If they crack when trying to push, bake a minute or two longer. Remember to turn and rotate the baking trays/sheets during cooking if need be, after the 8 minute mark. (See Photo 5 above).
3. Remove from the oven, place on top of a cooling rack & leave on the baking sheet/tray for no more than 2 minutes. Then transfer using the paper, to the cooling rack. If you think you have baked too much, don’t allow any cooling on the tray and move to the rack immediately.
Make Buttercream Filling


1. Melt the butter in a small to medium cooking pot on the stove top on a medium to high heat. Turn the heat down to low-medium heat, letting it simmer and remember to stir. The butter will hiss & pop and there will be a lot of bubbles & foam. If browning reduce the heat further. Continue until the butter is silent and then strain through a sieve into a bowl. There will be foamy fat residue sticking to the sides of the bowl and in the bottom of the sieve. See Photo 6 above of the process. This is just the fats and liquids separating and normal.
2. Add the vanilla extract and salt. The mixture will sizzle again so be careful when mixing through. Check out my article for How To Make Homemade Vanilla Extract


3. Add in the sieved icing/powdered sugar and mix by hand until all sugar is incorporated and a smooth paste is formed. I like to use a fork or metal spoon for this. See Photos 7 & 8. This will only take a few minutes, so no need to get the mixer out again.
4. Part-way through, add some white food colouring if you are wanting a more ‘white’ filling. Alternatively, you can use a tiny amount of purple colouring to off-set the yellow tinge to the buttercream. Leave till ready to fill the cookies, but don’t put in the fridge or it will set up too hard.


Assemble The Cookies
1. Using an off-set spatula, baking palette knife or butter knife, spread a generous amount of buttercream onto the underside of one of the Oreo bat cookies. Spread as near to the edges as you can.
2. Place a second cookie on top and squeeze together gently. You can let a little of the buttercream squeeze out if you want, and then use the end of a small spoon to smooth around the edges. Another option is to smooth the ends of the buttercream before adding the 2nd cookie on top. See Photo 9 below. Alternatively apply with a piping bag and small nozzle. You might have to thin the filling down a little, with a small amount of milk to do this.


3. Alternatively apply with a piping bag and small nozzle. You might have to thin the filling down a little, with a small amount of milk to do this.
4. Repeat sandwiching all the rest of the cookies together, before placing in the fridge for at least 30 minutes.


Serving & Storage
1. Serve the Oreo-style bat cookies with a tall glass of cold milk, or some hot tea!
2. Store the cookies in a metal cookie/cake tin or airtight container, preferably in the fridge or somewhere cold. If stored in the fridge, these will last up to 7 days. At room temperature, they should last about 3 days.


DIFFICULTY LEVEL: easy, beginner
SIGN UP FOR MY NEWSLETTER – I would love it so much if you could sign up for my newsletter. I will send out monthly emails, showing the latest recipes and articles, and latest info. Being a free site, building a following, is even more important and will keep it up and running and for free to everyone. Occasionally there will be the odd seasonal emails, but is really a means of reaching you, if you are not already in one of the Facebook groups I admin. Please note too, that these email addresses are not shared or sold onto another party. Thanks so much Caro xxx


Recipe Card
Abbreviated Recipe
Oreo Style Bat Cookies

Equipment
- Scales or measuring cups
- Measuring Spoons
- Stand/Hand-mixer
- Mixing bowl for dry ingredients
- Sieve
- Baking sheets/trays (2 or 3)
- Baking/parchment paper
- Rolling Pin
- Small bowl to dip cutter
- Bat Cookie Cutters (large bats were 11 cm x 5cm (4 ⅓″ x 2″), but smaller/other cutters can be used)
- Cooling rack
- Timer or Phone Timer
- Small Cooking Pot
- Palette knife/Baking Spatula (Off-set spatula, butter knife, small spoon or piping bag)
Ingredients
For The Cookie Dough
- 113 grams Butter, unsalted, cubed & soft (4 oz, ½ cup, 1 stick)
- 100 grams Granulated Sugar (3½ oz, ½ cup)
- 3 tbsp Golden Syrup (60g/2 oz, *see notes for alternatives)
- ½ tsp Bicarbonate of Soda (Baking Soda)
- ⅛ tsp Salt
- 157 grams Plain Flour (5½ oz, 1¼ cup All Purpose)
- 48 grams Cocoa Powder (1¾ oz, ⅓ cup + 1 tbsp)
For The Buttercream Filling
- 128 grams Butter, unsalted & melted (6 oz, ¾ cup)
- ¾ tsp Vanilla Extract (Try some homemade vanilla extract)
- 1 Pinch Salt
- 187 grams Icing Sugar, sieved (6½ oz, 1½ cup Powdered sugar)
For The 'Eyes'
- 20 Sprinkles, oven-safe (see notes)
Instructions
Prepare The Cookie Dough
- Combine butter, sugar, golden syrup, bicarbonate of soda, (baking soda) & salt in a large mixing bowl and mix on low (or by hand), before increasing to medium speed & beating until light & fluffy.
- Sieve flour & cocoa powder on top of the mixture, & start to mix on low speed. Use the back of a spoon to push down on the mixture, to let the flour take on the moisture. Alternatively use a mixer on low to medium speed, until the thick dough starts to come together. Then knead by hand against the sides of the bowl, and form a smooth flat disc shape.
- Next line the baking trays/sheets with baking/parchment paper.
Cut Out The Cookies
- Between 2 sheets of paper, & some icing/powdered sugar if needed, roll out the dough to a 4-5mm (⅙" – ⅕″) thickness. Note I used 2 x 10p pieces as a guide.
- Dust the cutter in flour or icing/powdered sugar and cut out the cookies. Go over the cuts again if needed for a neater edge. Carefully transfer to the prepared baking tray/sheet with just a little gap in-between. Re-roll the excess dough and make enough cookies for pairs.
- Press your chosen oven-safe sprinkle in position for the bat eyes, or add after baking. Chill in the fridge for 1 hour, (or 5 minutes fridge, followed by 25 minutes freezer). Do not skip the chilling stage. Heat up the oven to 180°c/160°c Fan Oven/350°f/Gas Mark 4, to coincide with the 1-hour chilling time ending.
Bake The Cookies
- Bake the cookies for 10 – 15 minutes until ready. They will still be soft, but after 8 or 9 minute mark, check by seeing if they will move when gently pushed with the spatula. If they stick or crack, bake a few minutes longer and check again. Chocolate cookies are easy to over-bake so better to remove before completely set.
- Leave on the baking tray/sheet a few minutes & then transfer to a cooling rack with the paper, to cool down completely.


Make The Buttercream Filling
- Melt cubed butter in a small cooking pot, on medium to high heat, before turning down to low-medium, letting simmer & stirring occasionally. The butter will hiss and bubble and eventually foam will be formed on the surface as well as fat residue on the sides of the pot.
- Remove from the heat, carefully add the vanilla extract & salt, before mixing through. Then sieve the melted butter until you have a relatively clear golden coloured butter liquid. Leave to the side for 5 minutes. (See photos before recipe card for photos).
- Meanwhile, prepare for making the buttercream by sieving your icing/powdered sugar into a mixing bowl, and having white or purple food colouring if you want to make the buttercream more 'white'.
- Very gradually add in the clarified butter to the sugar, mixing well in-between each addition. You can do by hand with a metal spoon or by mixer, just note you might not need all the melted butter. Add white or even a tiny drop of purple food colouring if you want, and mix the buttercream until you have a smooth, spreadable consistency. Thin with a little milk if you want to pipe it.


Assemble The Cookies
- Using a baking off-set spatula, palette knife or butter knife, spread a generous amount of filling on top of the underside of one of the cookies. Place a second cookie on top & squeeze together very slightly & gently. You can use the end of a small spoon to scrape excess buttercream along the edges if you want.
- Or, you can smooth the edges of buttercream, before applying the top cookie. Another option is to apply with a piping bag and small nozzle. You might have to thin the filling down a bit to do this though, with a little milk.
Serving & Storing
- Once the Oreo-style bat cookies are all filled, place in the fridge for at least 30 minutes, the filling to set up again (this is optional). You can serve now or serve directly from the fridge if the room temperature is warm.

- Store in a tin or airtight container and they will be good for at least 3 days. Store in the fridge and they will last nearer to 7 days.

Notes
Tips
•For butter to soften quicker, cut into smaller pieces (about 1cm, ⅓″ size). Alternatively watch this How To Soften Butter In 12 minutes Video. •If you think you have baked too much, don’t allow any cooling on baking tray/sheet and move to the rack immediately. •UK butter is much more yellow in colour, so for a white buttercream, add white food colouring, or a tiny amount of purple. More Oreos – Red Velvet Oreo Style Cookies, or Chocolate Orange Oreo Cookies. **See note & detailed instructions & process photos, before this Recipe Card.
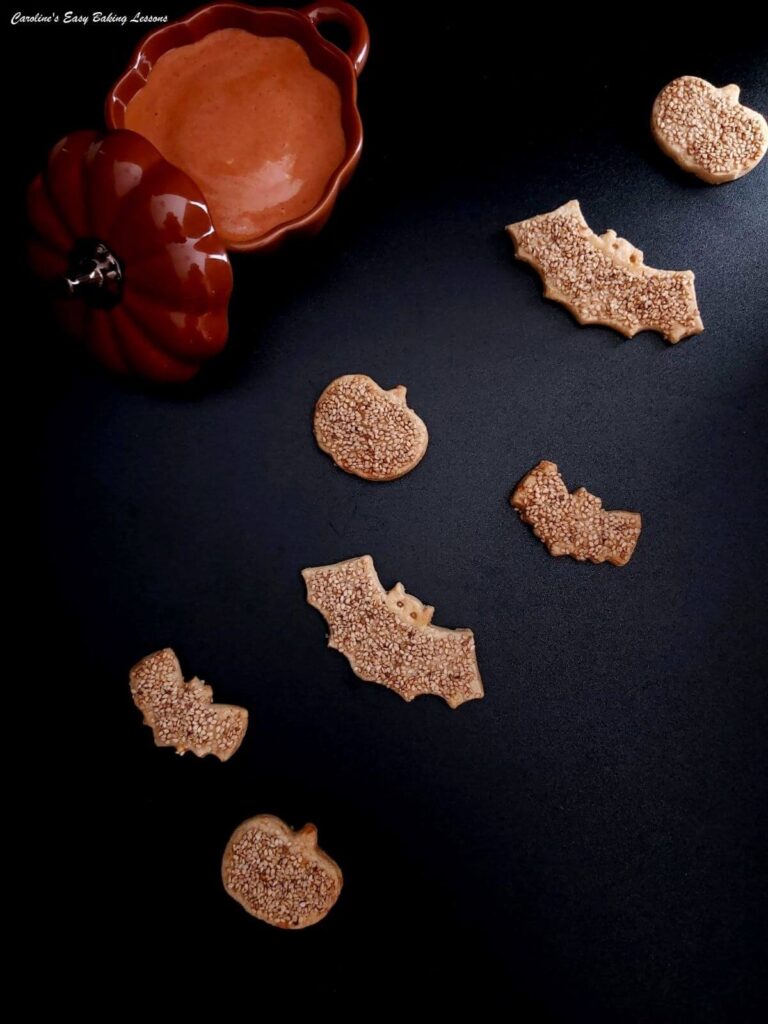 Try another bat-themed cookie but this time, a savoury one. Go to my Turkish Savoury Biscuits (Tuzlu Kurabiye)
Find more cookies on my Biscuits Page.
Try another bat-themed cookie but this time, a savoury one. Go to my Turkish Savoury Biscuits (Tuzlu Kurabiye)
Find more cookies on my Biscuits Page.
Nutrition: I am not a qualified nutritionist, so all values are estimates, based on ingredients listed & calculated via FitnessPal.com. Information based on serving of 1 large bat sandwich cookie, assuming 12 sandwich cookies (24 bats are baked). If more are made, or smaller cutter are used, these value will reduce. Paste recipe link into website/app MyFitnesPal.com to see these values, & log them for future use if tracking your food.


Subscribe For More Recipes
Want more great recipes, tips, baking information and newsletters? Then please consider subscribing by adding your email address below. Be sure to check for a confirmation email & respond back, so you can follow me & receive your free emails. Your personal information will not be shared with a third party.
Join My Facebook Group
Why not also join my – Facebook group Easy Online Baking Lessons, dedicated to this baking lessons website, as well as providing one-on-one support with myself & my team? Be sure to answer all security questions when requesting to join.
Follow me on social media:
Happy Learning & Baking!
Caro x
Try some other Halloween/Fall cookies, (see below) this time savoury ones – Turkish Tuzlu Kurabiye. Go to Savoury Bat Cookies


Oreo Style Bat Cookies
Search For Something You Fancy!
Caroline’s Easy Baking Lessons


Wow nice post thank you
Fantastic post! Love your new design for the site…..
Aww thanks so much Sally! I know you like these cokies as you made the Red Velvet version. And thank you for kind words about the new site design. I have still to check over about 200 recipes/posts (!) for any formatting issues that might have occured, but main pages and home page all done.