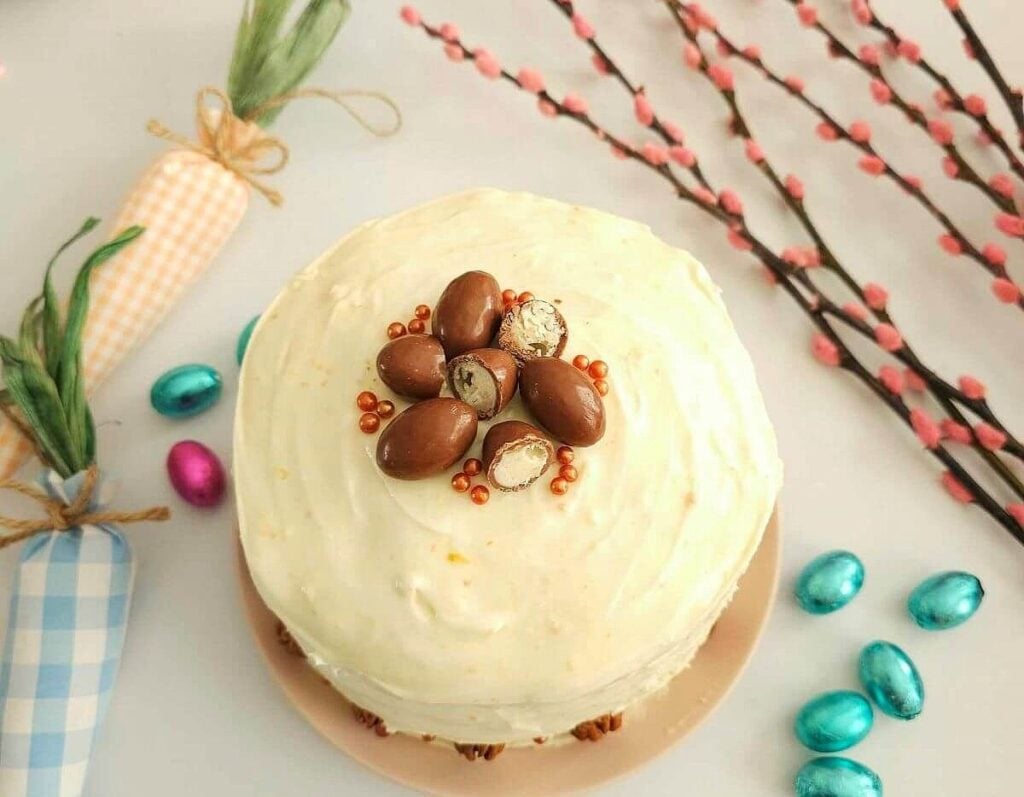
Carrot Cake With Orange Cream Cheese Frosting

This Carrot Cake With Orange Cream Cheese Frosting is not only super simple to make, but a much loved classic & for a very good reason. It can be made in different forms, but the light texture and cream cheese frosting, makes it just so easy to eat!
Carrot Cake With Orange Cream Cheese Frosting
The Only Recipe You Will Ever Need
**Original recipe 13 April 2019, updated layout & photos 26 March 2024


**Click link to jump to section**


Why Make This Carrot Cake?
- Easy to make & a beginner recipe
- Taste great
- Basic pantry ingredients
- Butter-free sponge
- Step-By-Step Instructions & photos
- Video Tutorial
- Can make different number of layers
- Can make a bundt cake
- Amount of frosting can be reduced
- Includes adjustments for smaller/bigger pans
- Can be made ahead
- Perfect for Easter/Spring baking


What The Recipe Makes
This recipe can be used for making a:
- 3-layer cake (7/8″, 18.5-21cm),
- 4 thinner layers,
- 2 deep layers,
- regular sized bundt cake or
- half the recipe for 12+ cupcakes/muffins.
See the various cake options in the photo collage here, where some photos are made by my recipe tester & editor Mrs D, and some readers.
For gluten free, if there is no Xanthan gum or other binder in your gluten-free flour, add 1¼ tsp of this and bake for a little longer.
Recipe Yield
The layers cakes will serve at least 16 slices.


Other Carrot Cake Recipes
More versions of my popular carrot cake can be found on my Carrot Cake Day page, as well as reader pics.
Try a slightly smaller bundt cake with my Gluten Free carrot Bundt Cake, Carrot Cake Slices/Traybake or mini carrot bundt cakes.
Fondant Carrots Without A Mold
Spring & Easter is the perfect time to practice your fondant skills with my super simple & details step-by-step photo tutorial on how to make fondant carrots without a mold. (See photo below). Or check out my Spring Cupcake Bouquet with a variety of seasonal fondant toppers.


Ingredients & Alternatives


Here are the ingredients for the carrot cake layers:
- Eggs
- Oil
- Light Brown Sugar
- Flour
- Baking Powder
- Spices
- Carrots
For the orange cream cheese frosting:
- Cream cheese (full fat)
- Butter, unsalted
- Icing/Powdered Sugar
- Orange Extract
- Orange Zest
- Nuts, mini eggs, fondant carrots for decoration (optional)


Flour
My carrot cake recipe was developed & tested using both UK self-raising flour & Plain (All Purpose) Flour. Myself, my recipe tester & also members of my Great British Bake Off (Great British Baking Show) Facebook group, from other countries, have made the cake using different flour. When using the Plain/All Purpose flour, please remember to add the 2 amounts of baking powder listed in the Recipe Card below.
Oil
You can use vegetable oil, sunflower oil or any other neutral oil you have.
Spices
For carrot cake, I love the following combination of spices – ground ginger, cinnamon, anise, Mixed Spice & freshly ground nutmeg. You can of course substitute the fresh nutmeg for ground nutmeg and anise can be omitted. Mixed Spice is similar but not exactly the same, as Pumpkin Spice & a good substitute.


Orange Cream Cheese Frosting
The orange cream cheese frosting pairs beautifully with carrot cake and the orange extract & zest gives a great citrus punch.
**Please note that the there is plenty frosting for a 4-layer cake, with lots of filling & on the outside. You can half the amount of frosting if simply filling & topping with frosting.
READERS’ PICS
Here’s some recent photos of reader pics of their Carrot Cakes using my recipe (more at the end of the recipe) – feedback page to be added soon.


Step-By-Step Instructions


Prepare The Cake
1. Start by adding the eggs, sugar & oil to a large mixing bowl, or bowl of a stand-mixer & beating till combined. See Photo 1.
2. Sieve over the flour & baking powder (*remembering the 2 amounts of baking powder if using Plain/All Purpose flour*).
3. Sieve in the mixed spice (pumpkin spice), cinnamon & anise if using. Grate over fresh nutmeg or use 1 tsp of ground nutmeg1.
4. Heat oven to 180°c/160°c Fan/350°f/Gas Mark 4.


5. Carefully beat the mixture together. (I often briefly mix the flour in by hand before I move onto the mixer). Mix only until all combined & no flour is visible.
6. Add in the grated/shredded carrot, and mix through by hand until combined and you have a relatively liquid batter, thickened with the carrot pieces. See Photo 2.
7. I like to prepare the cake tins right before adding the batter, as I find I don’t need to over grease them. You must use paper lining for cakes like carrot cake, but only on the base is required. To learn how to easily cut parchment circles for your tins/pans, see my Lining round tins article, or watch the Lining Round Cake tins video.


8. You can grease the base and sides of the cake pans with either lining paste (cake goop), Frylight cooking spray, cake-release spray, or butter & flour. I prefer the first 2 methods & used the Frylight in these photos.
9. Divide the batter equally between the cake pans (about 210g/7.5 oz for 4 layers, 280g/9.75 oz for 3 layers, or 420g/14.75 oz for 2 extra deep layers), tap on the worktop/counter a few times, before popping in the centre of the oven to bake for 16-18 minutes for 4 thinner layers. 3 layers will take about 5 minutes more, and 2 deep layers nearer to 25 minutes. (See Photo 3).
10.Meanwhile, place a tea-towel on the cooling racks, with parchment on top (prevents ‘grid-lines’ on the cake.)


11. Leave the baked cakes in the tins, on top of the cooling rack for 10 minutes before running a wooden cocktail stick around the edges of the cake. Turn the tins over & release the cakes onto the paper. Leave upside-down to cool.
12. After 5-10 minutes, very carefully see if you can pull back the edges of the paper. If you can, very slowly pull back the paper, otherwise, leave to cool a little more.
13. Leave to cool for about 30 minutes before assembling, or if using later, individually wrap each cake layer in cling film/plastic wrap. Then stack the cakes on top of each other, to help reduce doming or the need for trimming the cake. I like to arrange the layers, that may not be exactly identical, in such a way that they are most level and with straight edges. Leave out at room temperature for up to 3 days later, and do not refrigerate as it can cause condensation. (See Photo 4).


Prepare The Frosting
1. Make sure the cream cheese is soft and at room temperature. Cube the butter in very small pieces & the smaller surface area will soften quicker.
2. Beat the butter till smooth, before adding in the cream cheese & mixing till combined.
3. Sieve over about 1/4 of the icing/powdered sugar & mix on low speed (covering with a tea-towel if needed). gradually add in the rest of the sugar till all combined and a very thick smooth shinny frosting is formed. (See Photo 5).


4. Zest an orange over the frosting, and add in orange extract. Both give a great zesty taste and the zest provides some nice little specs of colour to the glaze. Taste test and add more extract to taste.
***This can be made ahead of time, such as the day before constructing the cake. Just make sure to store in the fridge in a good air-tight container. If too hard to spread when using, leave out for about 15 minutes before using. Although as slightly stiffer glaze is better for construction.


Assemble The Cake
1. Place 4 squares of baking/parchment paper under the serving plate or cake stand (or work on a cake board as in Photo 7), and place a spoon of frosting in the centre, to hold the cake in place.
2. Place your first layer of sponge down before spreading a layer of the frosting on top, all the way to the edges (no need to be neat).
3. Place the second layer on top, upside-down & push down gently before adding more frosting.


4. Repeat with the rest of the layers, making as straight and level as possible and if using 4 layers, or it feels unsteady, use some dowels (or wooden sticks) to support the cake (see Photo 8). Smaller cake boards can also be placed in-between the layers for further support. An oil-based cake like carrot cake, is very delicate structure-wise. You can also chill the cake in-between adding layers,
5. Gently apply a thin ‘crumb-coat’ to cover the entire cake. Don’t worry about any ‘crumbs’, the aim is to create a thin layer, or ‘primer’ if you like, before adding a proper layer, paying attention to filling any gaps between the layers. Chill or freeze for at least 30 minutes.


6. Apply a thicker coat of the orange cream cheese buttercream, ensuring you cover the dowels, (as seeing in Photo 8 above). There is plenty frosting, so you can go for a smooth look, peaks & swirls, or even do some piping if you like.
7. Chill the cake again for at least 1 hour till set, before adding any other decoration, such as whole nuts, crushed nuts, chocolate mini eggs etc.
**Remove the paper from under the cake after it has set up.


Serving & Storing
1. Slice the cake when set, with your favourite tea or coffee, served with some more frosting if you like.
2. Store un-eaten cake in the fridge, loosely wrapped or better still under a cake dome, or use an extra large food tub, turned upside-down, where the cake plate sits on the lid, and is covered by the container. Best if not left air-tight, to avoid condensation. Will be fine stored in the fridge for up to 3 days.2
3. Carrot cake can also be frozen but is best frozen without the cream cheese frosting and it will last up to 4 months3. Just wrap well in cling film/plastic wrap and then a container or food bag. The frosting can be frozen too, in a food bag with the air removed.
DIFFICULTY LEVEL: easy, beginner
**Ingredient amounts found in Recipe Card Below**


Here’s another large bundt made using this recipe, by my friend Diana, who added raisins to the batter.
Please see the sharing options or even printing, at the right/bottom of your screen (bottom of your screen for mobiles, and down the right-hand side on computers). You can even pin this to your own Pinterest page. You could also leave some feedback if you like.


Here’s also some pics above, by the runners up in a competition in Facebook Group, Great British Bake Off Fans. Where we used my recipe for the competition. Note this was made by members in the UK, America & Canada, and using All Purpose flour.


Recipe Card
Carrot Cake With Orange Cream Cheese Frosting

Equipment
- Weighing scales or measuring cups
- Small measuring jug
- Mixing spoon
- Stand or Hand mixer and mixing bowl
- Sieve
- Measuring Spoons
- Grater/shredder and bowl for carrots
- Cake tins – 3 x 7/8" (18.5/21cm) pans (2, 3 or 4 x 7/8" (18.5/21cm) pans, or bundt pan*)
- Lining paste for greasing tins (Cake Goop, Frylight spray, cake release spray or butter & flour)
- Baking/parchment paper & scissors
- 2 Cooling rack
- Wooden Cocktail stick
- 2 tea-towels
- Baking Palette knife or butter knife
- Bowl for making frosting
- *** For fondant carrots see below
- * Denotes see notes
Ingredients
For The Cake Batter
- 250 ml Sunflower/Vegetable oil (approx. 9 fl oz, 1 cup, or other neutral oil)
- 4 Eggs (medium to large, large to extra large US)
- 225 grams Light Brown sugar (8 oz, 1 packed cup + 2 tbsp)
- 300 grams Self-raising flour (10½ oz, 2½ cups OR Plain/All Purpose flour + 3 tsp baking powder)*
- 2 tsp Baking powder (In addition to above is using Plain/A.P.)
- 1 tsp Mixed Spice (Pumpkin Spice)
- 1 tsp Ground Ginger
- ½ tsp Ground Cinnamon
- ½ Nutmeg, freshly grated (or 1 tsp ground nutmeg)
- ¼ tsp Ground Anise (optional)
- 200 grams Carrots, grated weight (7 oz, 2 rounded cups, shredded)
For The Cream Cheese Frosting*
- 374 grams Cream Cheese, softened room temp. (12½ oz, full fat)
- 86 grams Unsalted Butter, cubed & soft (3 oz, ⅔ stick)
- 2 – 4 tsp Orange Extract
- Zest Of 1 Orange
- 750 grams Icing Sugar, sieved (Powdered Sugar, (26½ oz, 6 cups)
For Decoration
- Whole nuts (pecans, walnuts), crushed nuts, mini eggs (optional – try my homemade fondant carrots without a mold)
* Denotes see notes
Instructions
Prepare The Cake
- Add eggs, sugar & oil to a large mixing bowl & beat till combined.
- Sieve in the flour & baking powder (2 amounts if using Plain/A.P. flour). Sieve in the mixed spice (pumpkin spice), cinnamon & anise, before adding freshly grated nutmeg (or 1 tsp ground nutmeg1).
- Heat oven to 180°c/160°c Fan/350°f/Gas Mark 4.
- Beat the mixture together until all combined & no flour is visible.
- Add the grated (shredded) carrot & mix in by hand.
Prepare The Cake Pan & Bake
- Grease & line the base of the cake tins/pans. Grease with lining paste (cake goop), Frylight cooking spray, cake-release spray, or butter & flour.
- Divide batter between the cake tins (210g/7½ oz for 4 layers, 280g/9¾ oz for 3 layers, or 420g/14¾ oz for 2 extra deep layers). Tap the tins on counter/worktop & bake in the centre of the oven for about 16-18 minutes (for 4 layers). 3 layers will about 5 minutes more & 2 deep layers about 25 minutes.
- Place a tea-towel & baking/parchment paper on the cooling racks & leave the cake tins on top for 10 minutes cooling.
- Run a cocktail stick round the edges of the cake before turning the cakes out onto the prepared cooling rack. Leave upside-down for 10 minutes before attempting to peel back the paper very carefully from the edges.
- Leave to cool for at least 30 minutes or until completely cool before assembling. If using later (up to 3 days), wrap well individually in cling film/plastic wrap, then stack & leave out at room temperature. Do not place in the fridge.
Prepare The Frosting
- Cube the butter quite small to soften quicker & make sure the cream cheese is at room temperature too.
- Beat the butter till smooth & then add in the cream cheese, mixing till combined.
- Sieve in ¼ of the icing/powdered sugar, mixing on low before gradually adding in the rest of the sugar.
- Add in the orange zest & extract, mix & do a taste test.
Assemble The Cake
- Place a spoon of frosting on a cake board, or place 4 squares of paper on a serving plate/cake stand with frosting underneath to hold in place, then a little on top, before adding the first cake layer.
- Spread a thick layer of frosting on the cake, right to the edges, before adding on the 2nd cake layer.
- Repeat the filling and topping process, adding dowels or wooden sticks if using 4 layers and if it feels unsteady. Chill the cake in-between adding layers for added support.
- Once stacked, add a thin ‘crumb coat’ of frosting to the entire cake and then chill or freeze for at least 30 minutes.
- Apply a thicker coat of frosting, being sure to cover the dowels. Go for a smooth look, textured, with peaks and swirls, or do some piping.
- Chill or freeze for at least 1 hour till set & then add decorations such as nuts or mini eggs.


Serving & Storing
- Slice when set, with tea or coffee.
- Frosted carrot cake can be stored loosely wrapped or under a cake dome, in the fridge for up to 3 days2.

- Carrot cake is best frozen unfrosted, wrapped in cling film/plastic wrap & in a food bag or container, for up to 4 months3. Cream cheese frosting can be frozen in a food bag, with the air removed.

Video
Notes

 Size Of Cake – recipe amounts for making either – 4 thinner layers, 3 layers or 2 deep layers. Is also enough for a regular sized bundt cake, or half the recipe for 12 cupcakes/muffins.
Recipe Yield – the layer cake will yield about 16 slices.
Lining Paste (Cake Goop) – homemade lining paste is less expensive, great for baking & cooking & brilliant for metal bundt pans. Make your own Lining Paste (Cake Goop) At Home.
Size Of Cake – recipe amounts for making either – 4 thinner layers, 3 layers or 2 deep layers. Is also enough for a regular sized bundt cake, or half the recipe for 12 cupcakes/muffins.
Recipe Yield – the layer cake will yield about 16 slices.
Lining Paste (Cake Goop) – homemade lining paste is less expensive, great for baking & cooking & brilliant for metal bundt pans. Make your own Lining Paste (Cake Goop) At Home.
 Orange Cream Cheese Frosting – is enough for a 4-layer cake, with filling & plenty for frosting the outside of the cake. For simply filling the cakes & a little on top – half the frosting ingredient amounts.
Gluten-free – if no Xanthan gum or other binder in your gluten-free flour, add 1¼ tsp and bake for a little longer.
Orange Cream Cheese Frosting – is enough for a 4-layer cake, with filling & plenty for frosting the outside of the cake. For simply filling the cakes & a little on top – half the frosting ingredient amounts.
Gluten-free – if no Xanthan gum or other binder in your gluten-free flour, add 1¼ tsp and bake for a little longer.

 Make Ahead – the cake layers can be made up to 3 days ahead of time (see more details in recipe). The cream cheese frosting can be made the day before assembling the cake, stored in the fridge in an air-tight container.
Fondant Carrots – check out my tutorial for making fondant carrots without a mold that includes a step-by-step photo tutorial.
Make Ahead – the cake layers can be made up to 3 days ahead of time (see more details in recipe). The cream cheese frosting can be made the day before assembling the cake, stored in the fridge in an air-tight container.
Fondant Carrots – check out my tutorial for making fondant carrots without a mold that includes a step-by-step photo tutorial.

 Other Carrot Cake Recipes – including gluten free, mini bundts & slices (traybake), can be found on my Carrot Cake Page.
***See readers’ photos of this recipe, before this Recipe card, as well as step-by-step instructions & more tips.
Other Carrot Cake Recipes – including gluten free, mini bundts & slices (traybake), can be found on my Carrot Cake Page.
***See readers’ photos of this recipe, before this Recipe card, as well as step-by-step instructions & more tips.
 Try my Air Fryer Red Plum Orange Bundt Cake (above).
Time To Make – based on a 4-layer cake, completely covered in frosting. Nutritional Information – I am not a qualified nutritionist & all values are approximate and from website MyFitnessPal.com. One serving is based on a 4-layer cake, with all frosting used, no nuts and a recipe yield of 16 slices. Big or smaller slices and values will change. Using less frosting and the values will decrease significantly.


Join My Facebook Group
Why not also join my – Facebook Group Easy Online Baking Lessons, dedicated to this baking lessons website, as well as providing one-on-one support with myself & my team? Be sure to answer all security questions when requesting to join.
Click to join Facebook Group Easy Online Baking Lessons,
Subscribe For More Recipes
Follow me on social media:
Happy Learning & Baking!
Caro x

Carrot Cake With Orange Cream Cheese Frosting
Search For Something You Fancy!
Caroline’s Easy Baking Lessons
References:
- Fresh nutmeg equivalent for ground from McCormick.com @ https://www.mccormick.com/articles/lifehacker/the-measurements-to-convert-common-whole-spices-in ↩︎
- Storing Carrot Cake information from Freezeit.co.uk @ https://freezeit.co.uk/can-you-freeze-carrot-cake/ ↩︎
- Freezing carrot cake information from Freezeit.co.uk @ https://freezeit.co.uk/can-you-freeze-carrot-cake/ ↩︎
References:


What a great recipe with easy to follow instructions. The cake is so light with a lovely flavour.
Thanks you, I am so pleased you love the cake and the orange cream cheese frosting – one of my favourites!