How To Make Fondant Carrots Without Moulds

Here's my photo tutorial on how to make fondant carrots without moulds or any special equipment. Ideal for decorating carrot cake or any Easter & Spring themed bakes.
How To Make Fondant Carrots Without Moulds
A Photo Tutorial


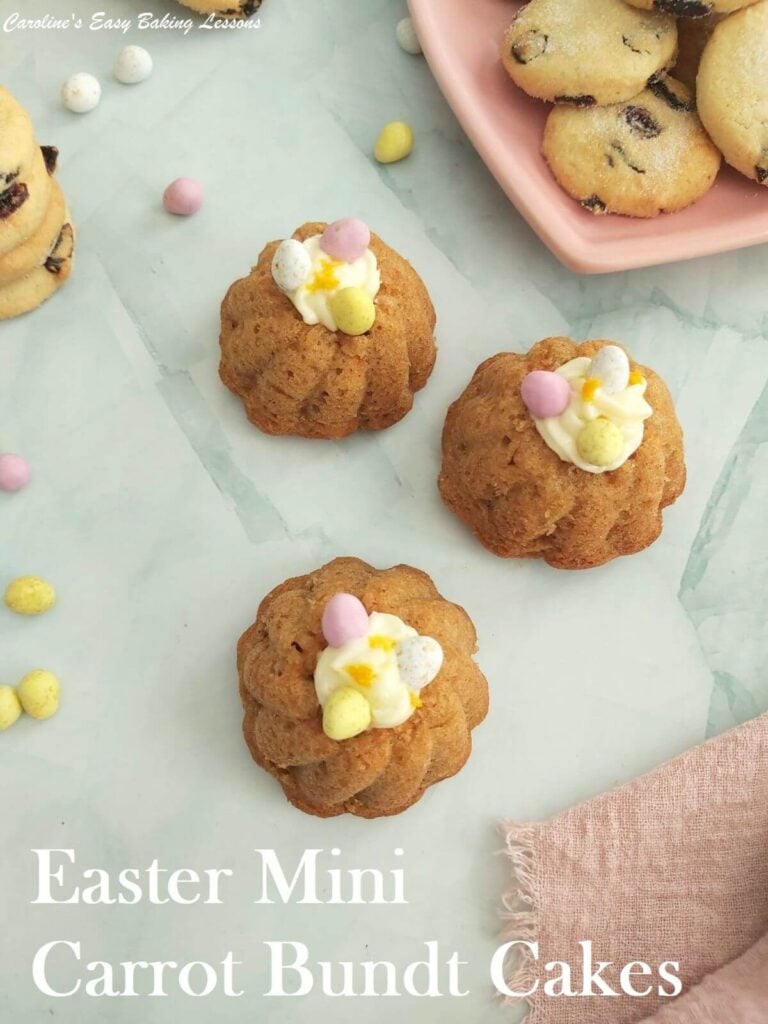


These fondant carrots go perfectly with my carrot cake recipes, and in this photo, I used on a carrot cake, for a girl who was a make-up artist. Photo tutorial for fondant make-up, coming soon. Here is an old photo of when I used these fondant carrots on a 4 layer carrot cake with orange cream cheese frosting. Also see my Easter & Spring recipes.
To DOWNLOAD the tutorial to save to your phone or computer, simply click the ‘download’ button below.
So on to the photo tutorial (For more fondant tutorials – go to Fondant Lessons).


EQUIPMENT
- Green & orange fondant (or white and food dye)
- (For dying I recommend using gloves so as not to stain your hands)
- Silicone mat or baking/parchment paper
- Sugar craft tools – cutter, roller cutter (straight edged), ball ended dresden tool (or small knife, small paint brush or wooden bbq skewer)
- Very Small paint brush
- Food glue, Clear alcohol or water to join the fondant
- Clear alcohol for shine (other methods on YouTube)
- Cling film/plastic wrap
Step-By-Step Instructions
1. Use coloured fondant or custom colour your own by adding food dye to white fondant. See Photo 1 below for how this is done. Use gloves as the food colouring stains! Add single drops at a time and knead the fondant until all colour is evenly distributed. In you want more colour, simply add another drop and repeat this process until you get the desired colour and shade.


Do not cover the fondant at this stage, as the extra liquid added to it makes it more moist. I recommend using gel dye or even better still paste (like Sugarflair), as they add less moisture to the fondant and make it easier to work with.
2. Make the carrot by starting with a ball of orange fondant about 3cm (1 + ⅕”) wide and then roll between the palm of your hands into an oblong about 4cm (1 + ⅔ “) long. See Photo 2.


3. Now roll again at one end and make it a little thinner to make the pointy end of the carrot. Pat to flatten the top of the opposite end that will be the top of the carrot (making it less rounded). See Photo 2.
4. Using something small and rounded (I used a sugar craft tool but even the end of a very small paint brush will do), make a hole in the ‘top’ of the carrot, and go down about a ⅓ of the length of the carrot. See Photo 3.


5. Using a small knife. Make alternating lines on the top of the carrots, remembering to continue to the sides. See Photo 3. Continue to make more carrots like this and vary their size by starting off with smaller balls of fondant. Leave to dry a little on a silicone mat or baking/parchment paper.
6. To make the carrot tops, form a ball of green fondant & roll out into a very flat oblong. Use a straight pastry cutter or similar sugar crafting tool (or knife), to make strips.


These will look best if not all straight or precisely cut and rough edges are fine. See Photo 4. Cut as many as you can get from this piece of fondant. We will even use small ones and make smaller carrots too.
7. Roll out more green fondant and make lots of strips of ‘carrot greens’. Once you have a lot try to make bundles of 3 or 4 pieces, as in Photo 5 with shorter ones on the outer sides. Make more than enough to go with however many carrots you have made.


Save any small or broken pieces as we can use them too. Squeeze the ends of the ‘greens’ together and allow to dry a little.
8. Once ready to attach the ‘greens’ to the carrots, make sure the hole you made is big enough to take in the ‘greens’, so you may have to widen it a little. See Photo 6.


9. With a small paint brush apply some food glue, clear alcohol or water, to inside this hole you made.
10. Very carefully place the ‘greens’ into the carrot top, using the paint brush to push down and in if needed. If any pieces fall off, simply apply a bit more glue and push into the carrot tops. See Photo 7 , varying lengths give a more natural look.


11. Continue to fill the carrot tips, and use up any small or broken pieces, by pushing into the carrot tops with the help of the brush. This will make them all look different and more realistic.
12. Carefully go over any of the carrot lines you made earlier that may have been smudged when handling them and then leave them to dry. You can let the greens sit in a curved way, and not all straight, again to help look more realistic.


13. Once they set up, the colour fades and they lose the initial shine, but do not worry, we can make them look fresh again. There are several methods on You Tube, but I used some Vodka (any clear alcohol will do) and brushed a little onto the top and sides of the carrots only (leave the greens). One coat was enough to give a great shine. The alcohol will evaporate and after time the shine will go but this will take days to happen. See Photo 8 for the difference: the top carrot is the faded one and the bottom one had vodka painted on to it.
14. Leave out to dry a little. Don’t cover as there may end up too much moisture and ruin your hard work. You can place on top of fondant when dry. It is not advisable to place on top of buttercream until the last minute as it will soften the fondant. Also the fondant should not be placed in the fridge, as condensation will cause it to weep.


15. If not using right away, you can cover well with cling film/plastic wrap. Leave out at room temperature but away from direct sunlight as it will fade any colouring. Note that these can be made weeks in advance and last years if properly stored.
DIFFICULTY LEVEL: easy-intermediate
Join My Facebook Group
Why not also join my Facebook group Easy Online Baking Lessons , dedicated to this baking lessons website, as well as providing one-on-one support with myself & my team? Be sure to answer all security questions when requesting to join.


Please see the sharing options or even printing, at the right/bottom of your screen (bottom of your screen for mobiles, and down the right-hand side on computers). You can even pin this to your own Pinterest page. Alternatively, you can download this article, see below. You could also leave some feedback if you like.
Click the ‘Download’ button below, to save to your phone or computer.
Subscribe For More Recipes
Want more great recipes, tips, baking information and newsletters? Then please consider subscribing by adding your email address below. Be sure to check for a confirmation email & respond back, so you can follow me & receive your free emails. Your personal information will not be shared with a third party.

See my other Easter & Spring recipes.
Follow me on social media:
Happy Learning & Baking!
Caro x


How To Make Fondant Carrots Without Moulds
Search For Something You Fancy!
Caroline’s Easy Baking Lessons


