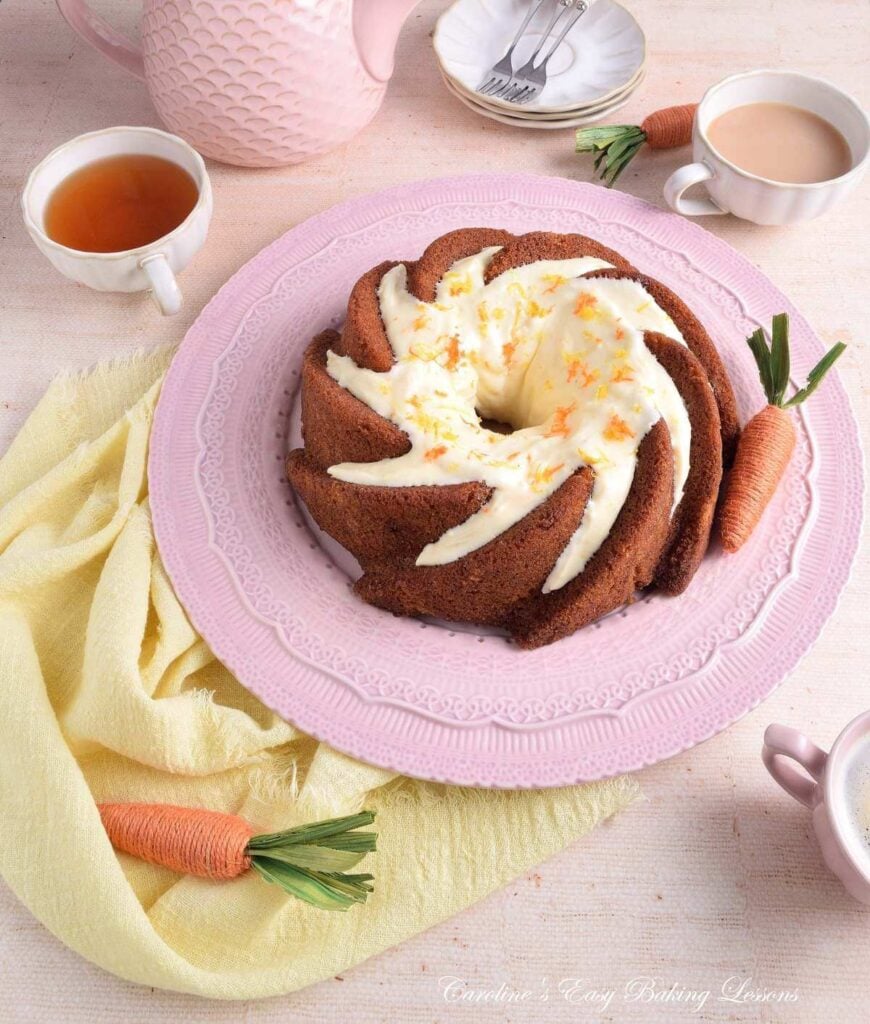
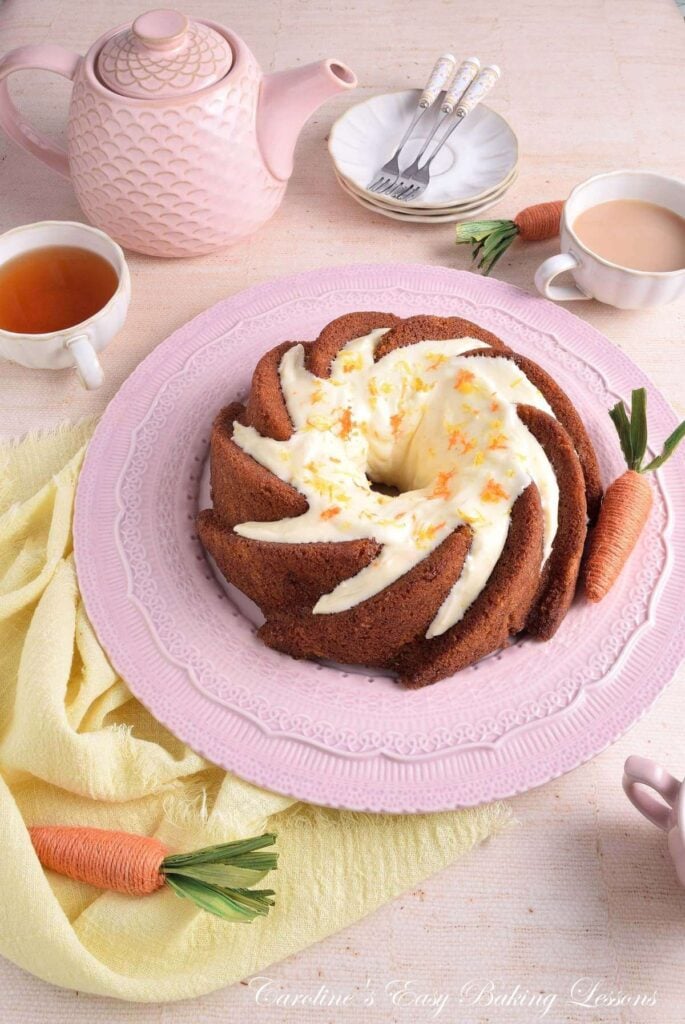
Gluten Free Carrot Bundt Cake

Here's my regular carrot cake, reduced a little in volume and using Gluten Free flour. All baked in a pretty bundt pan, with orange & lemon cream cheese frosting. Finish off with some nuts or mini eggs. Perfect for Easter or Spring-time baking!
Gluten-free Carrot Cake
In A Bundt Pan
With Orange Cream Cheese Frosting
***Full disclaimer, I am an affiliate for M&S and as such, if you purchase any products from them using my unique link, I will receive a small commission (at no cost to you).


***select to jump to section***
*Original recipe 15/03/2020, new images & structure 13/03/2026


What Is This Carrot Cake?
This is a very tasty classic carrot cake recipe, (with all the usual spices), but this time it is made using gluten-free flour. You can use the same recipe using regular flour too. It is also baked in a regular sized bund tin (more on that below), and topped with a zesty cream cheese buttercream.
Bundt Cakes That Don’t Stick
For all my bundt cakes, I use homemade lining paste (also known as Cake Goop). I started using this years ago when I reviewed the lining paste recipe by Nancy Birtwhistle.
For chocolate cakes, I add a little cocoa powder and did the same for this carrot cake. The old video below is of me lining the bundt tin, removing when baked & decorating the cake.
You can also see the lining paste being used in the photo collage 4 below in the step-by-step instructions.


Ingredient Notes
My carrot cake is made of the following basic pantry staple ingredients:
***Note, all ingredient amounts are in the Recipe Card below.
- Sunflower or Vegetable oil *
- Eggs*
- Light brown sugar
- Gluten Free Plain Flour*
- Baking powder *
- Mixed spice*
- Ground Ginger
- Ground Cinnamon
- Ground Anise (optional)
- Fresh Nutmeg (optional)
- Carrots
- Xanthan Gum*


For the cream cheese frosting:
- Cream Cheese
- Unsalted Butter*
- Icing (Powdered) Sugar*
- Orange & or lemon
- Orange extract
To Decorate (optional):
- Orange & lemon zest
- Pecans, hazelnuts, walnuts etc. (optional)
- Mini chocolate eggs (optional)
- fondant carrots (optional, see below)
*see notes below on ingredients & substitutions
Oil
This carrot cake doesn’t have any butter in the cake itself. I use oil instead and either sunflower or vegetable oil. But any neutral tasting oil will go.


Eggs
I use either medium or large eggs here in the UK, which are about the same size as US large to extra large size. Just make sure they are at room temperature when you come to use them.
Gluten-free Flour & baking Powder
I have used both Freee by Doves Farm, and M&S Made Without Wheat brands of gluten-free flour. Both have Xantham gum in them, which is your substitute for the lack of gluten in this flour. Other brands might have Guar Gum that works in a similar way. While some gluten-free flour doesn’t have any ‘binding agent’.


In which case you want to add some. Not having any, the bake has a hard time holding together.
Since M&S and Doves farm both contain Xanthan Gum, I don’t tend to add any for this cake. It is naturally a crumbly cake, but if you want perfectly cut slices, add just a 1/2 tsp of Xanthan gum in with the flour.
Doves farm also make Xanthan Gum, that is easily found in the free-from section in larger supermarkets like Tesco & Sainsburys.
***Full disclaimer, I am an affiliate for M&S and as such, if you purchase using my unique link here to their M&S Gluten-free Flour, I will receive a small commission (at no cost to you).
I have tested all my carrot cake recipes using Plain Flour (All Purpose) and UK Self-raising Flour. Both work just the same, with Plain (A.P.), needing a bit more baking powder. (**All details given in the recipe card below).
Point to note, UK brand Dr Oetker’s baking powder is actually gluten-free so no need to pay any extra.


Spices
I use a blend of ground ginger, cinnamon, UK Mixed Spice, and often a little ground anise & half a freshly grated nutmeg. (The last two being optional).
UK Mixed Spice is closest to US Pumpkin Spice, followed by All Spice.
If you only have ground nutmeg, just use 1.5 tsp.


Butter
Always, always use unsalted butter in your baking, even if its savoury baking. Salted butter has a higher percentage of water and this amount can vary from brand-to-brand. I believe that since Covid, US brands are increasing the water content (and hence the fat content reduces), to cut costs. This appears to be the reason for many people’s cookies suddenly baking out flat.
I always cube my butter very small for baking, about 1cm (1/3″) in size as the smaller surface area means the butter softens and comes to room temperature faster.
*See image here of the small cubes of butter.


Homemade Butter & Buttermilk
If you see double cream (heavy/whipping cream) on sale, have some about to expire, make your own butter.
It is really easy with a mixer or even a Mason jar. You have the added bonus of buttermilk and you can easily freeze the butter like I do all the time.


Orange & Lemon
The orange cream cheese buttercream is really good with carrot cake, but adding some lemon works too. So swap lemon for orange or use both, for the zest & extract.
Extra Decorations
Old images of this gluten-free carrot cake recipe, I added some nice pecan halves to the top of the cake. Not adding to the cake batter helps if there are any fussy eaters. Any nut will work.
You can also add some mini chocolate eggs to the top of the cake. But even just the orange &/or lemon zest, enough to finish off this carrot cake.


Handmade Fondant Carrots
If you want to make some fondant carrots or other Spring time decorations for the cake,go to my Fondant Spring Bouquet tutorial.
Or directly to the one on Fondant Carrots Without Moulds. These are so simple but very effective and perfect for Spring baking.


Equipment
You don’t even need an electric mixer for making the cake batter. But it’s probably best for making the cream cheese buttercream.
I used a standard sized bundt tin. The‘Heritage Bundt’ is what Nordic Ware call their version. Other names I found were‘spiral-fluted’ design,‘swirl’ and often ‘fluted’. In each case they are usually classed as a 10-cup capacity tin/pan for US/Canadian bakers. And that equates to about 2.5 litres.
When it comes to the dimensions of this bundt tin, there is a little variation in the sizings. They seem to range from a width of 24 – 27cm (9.5 – 10.5 inches). And depth of about 9cm (3.5 inches).

Air Fryer Or Oven?
If you have a bigger, open-front air fryer, you can bake in that as well as a regular oven. My updated images were from baking in the Tefal 20L capacity 10-in-1, model FW605840.
With this air fryer, I was & am able to bake a full-sized bundt cake and a lot of other full-sized bakes.
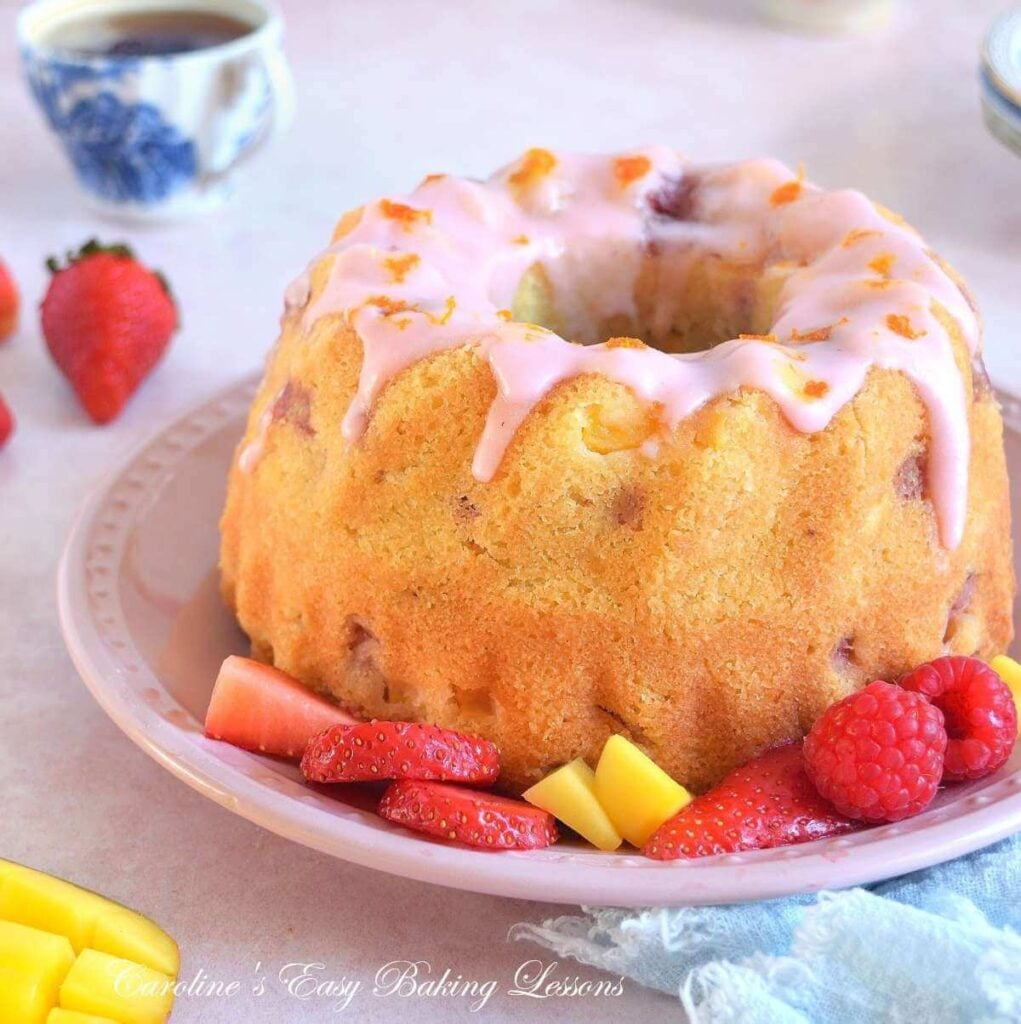
If you want to make in a smaller air fryer, but still using a bundt tin (a smaller one), then check out my other air fryer recipes. Like the strawberry mango bundt cake, baked in a 6.5″ (17cm) bundt tin. Sometimes is referred to as a ‘Kugelhopf Pan’. Just reduce all ingredients by multiplying by 0.63. See my reducing cakes article.


Recipe Yield
Using a bundt tin of the 10 cup (2.5 litre) capacity, will yield one large bundt cake that could easily serve 10-14 slices. (There are 10 thick ridges on the tin, but I think those would be too thick.
**A note too on the frosting. In the older images I used more of the cream cheese topping to make a nice covering to the top to the cake, controlled drips half-way down the ridges, as well as down inside the hole in the middle. My updated images, I used a lot less and it’s all down to taste. So please read the notes in the recipe card about how much to make for your own needs. It is super tasty but!
Here’s a video of me making the carrot cake batter for mini bundt cakes:
Step-By-Step Instructions

1.Start off by weighing out all your ingredients & peeling and grating/shredding your carrots.
***Note, all ingredient amounts are in the Recipe Card below.
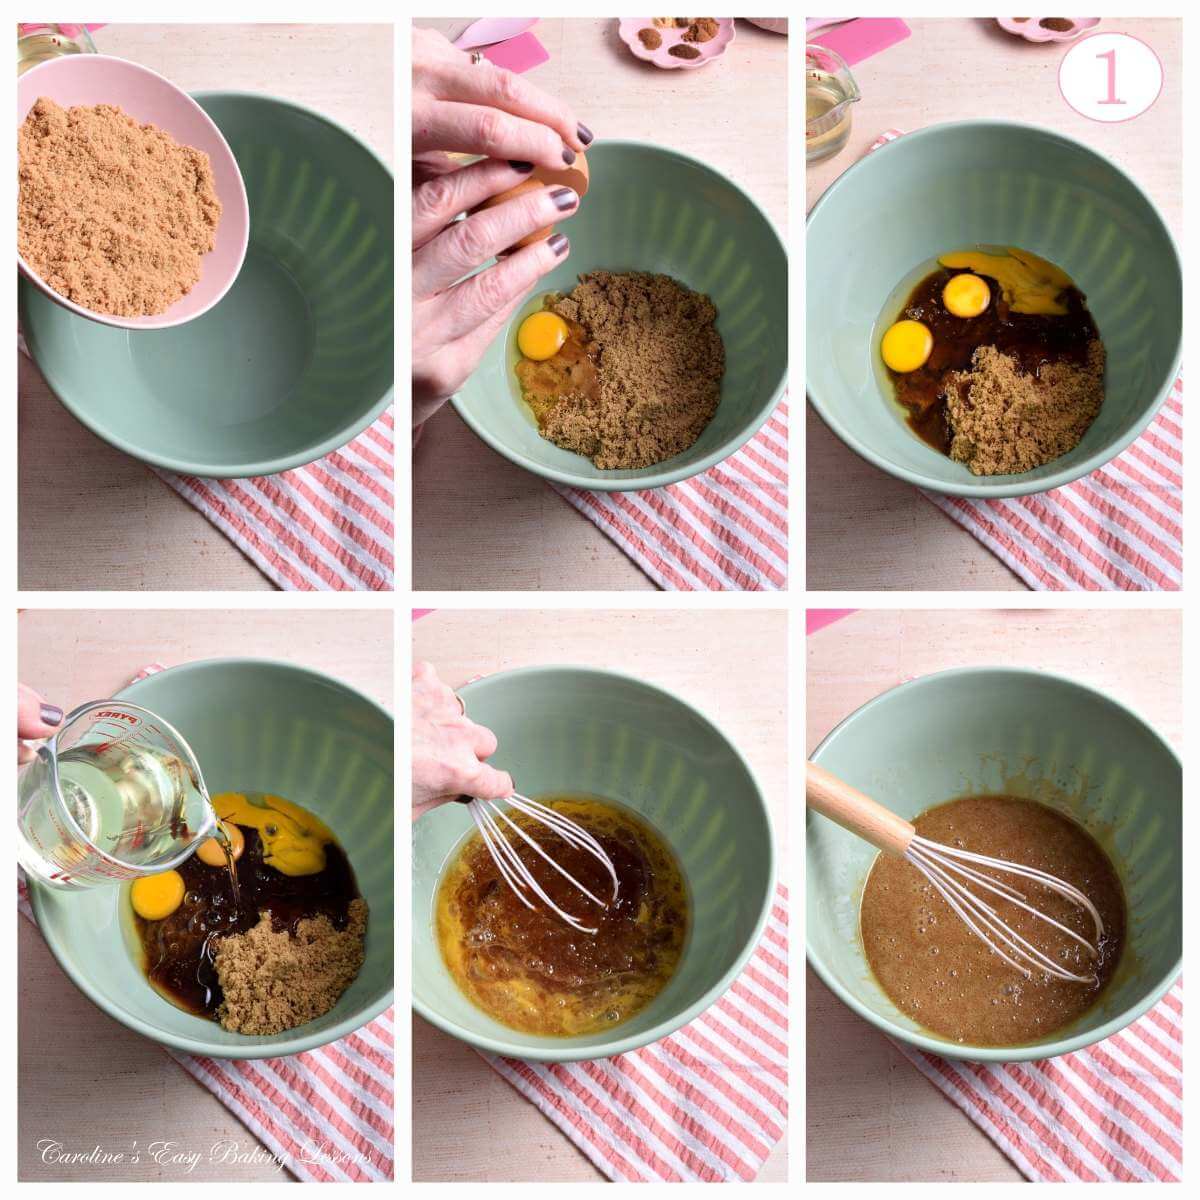
2. In a large mixing bowl, add the light brown sugar, the eggs and the oil.
3. Mix thoroughly together until incorporated. **No need to get a mixer out, as this can easily be done by hand if you can, with a whisk. (See Photo collage 1).


4. Now place your sieve over the mixing bowl, add in the flour and baking powder. (Add the Xanthan Gum now too if using). Use the back of a spoon to rub the dry ingredients through the sieve.
5. Next, sprinkle over all the spices, and grate in half a nutmeg (or 1/2 tsp ground nutmeg). See Photo collage 2.
6. Now mix all the ingredients with a spoon or spatula, just until they come together, with no flour visible. Over-mixing will produce a tough bake.
7. Finally add in your carrots and mix by hand just until distributed evenly and no more.


Grease The Bundt Tin
1.Normally you prepare your bundt tin first, but as we want this gluten-free cake batter to sit a little, I usually do now, and also while the oven is pre-heating.
2. Set the oven to pre-heat to: 180°c/160°c Fan/350°f/Gas Mark 4. **If using a new or powerful air fryer, use 160°c.
3.Meanwhile, make sure the bundt is all nice and clean and dry. I always recommend using homemade lining paste (aka Cake Goop).
If you don’t have any or want to make some, you can use cake release spray, or rub on butter and flour. Just coat really really well.


4.To use the Lining Paste, take 3 tablespoons of the lining paste out of the jar (directly from the fridge), and add to a small dish. Then add in about 1/2 a tsp of cocoa powder. Mix well until all combined and a beige paste is formed.
5. Use a brush (I tend to use artist brushes as they are less expensive than pastry brushes and come in many sizes), but DO NOT USE A SILICONE BRUSH. These are useless and leave bare areas. If not brush, you would be better rubbing the paste on, but this is tricky with bundts unless smooth.
6.Load the brush with lining paste and start at the bottom. iWith these ridges in the bundt, I tend to dab it on to get into the grooves, then brush a little. Make sure it is all covered. Then work your way up the sides. here you want to brush in upward strokes. This helps the cake rise better. Once all coated, repeat with a second layer making sure all areas covered. Not a problem to use too much. See Photo 4.

Bake The Cake
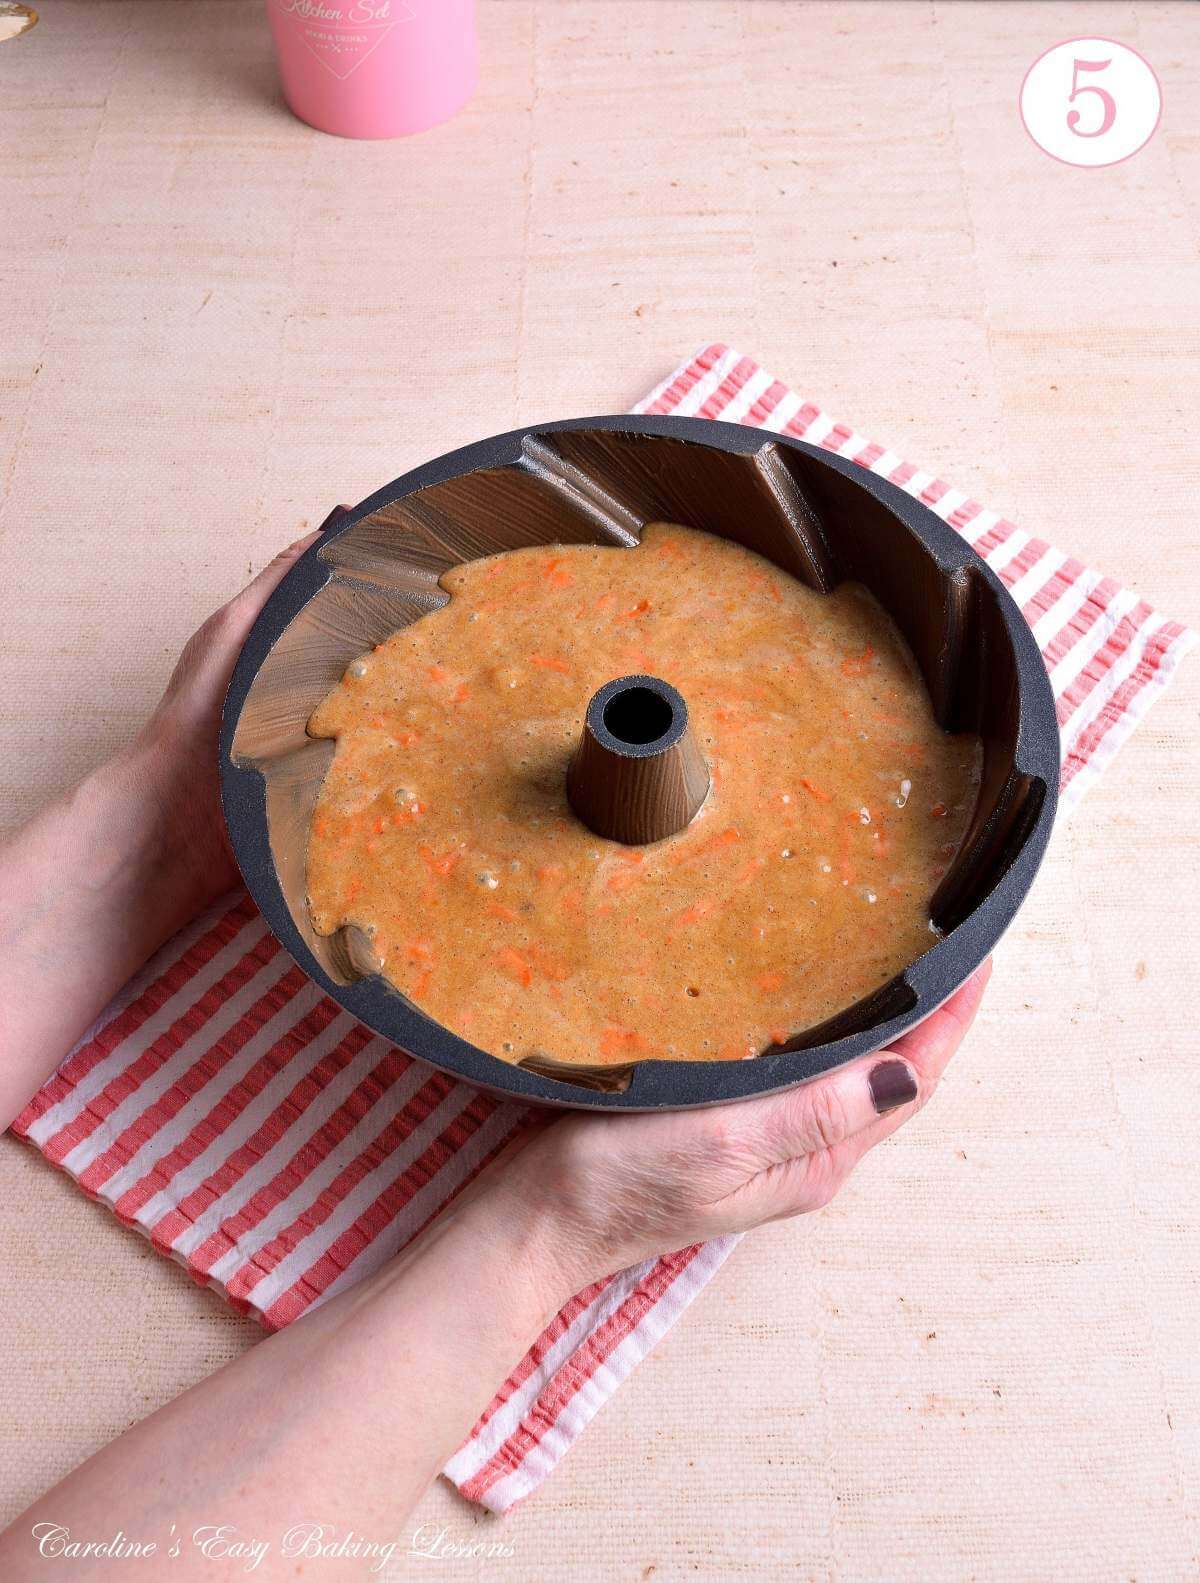
1. Spoon the batter evenly into the prepared cake pan, spreading it out to level it. Also give the pan a few taps on the counter/worktop to expel any trapped air, before popping in the oven to bake.
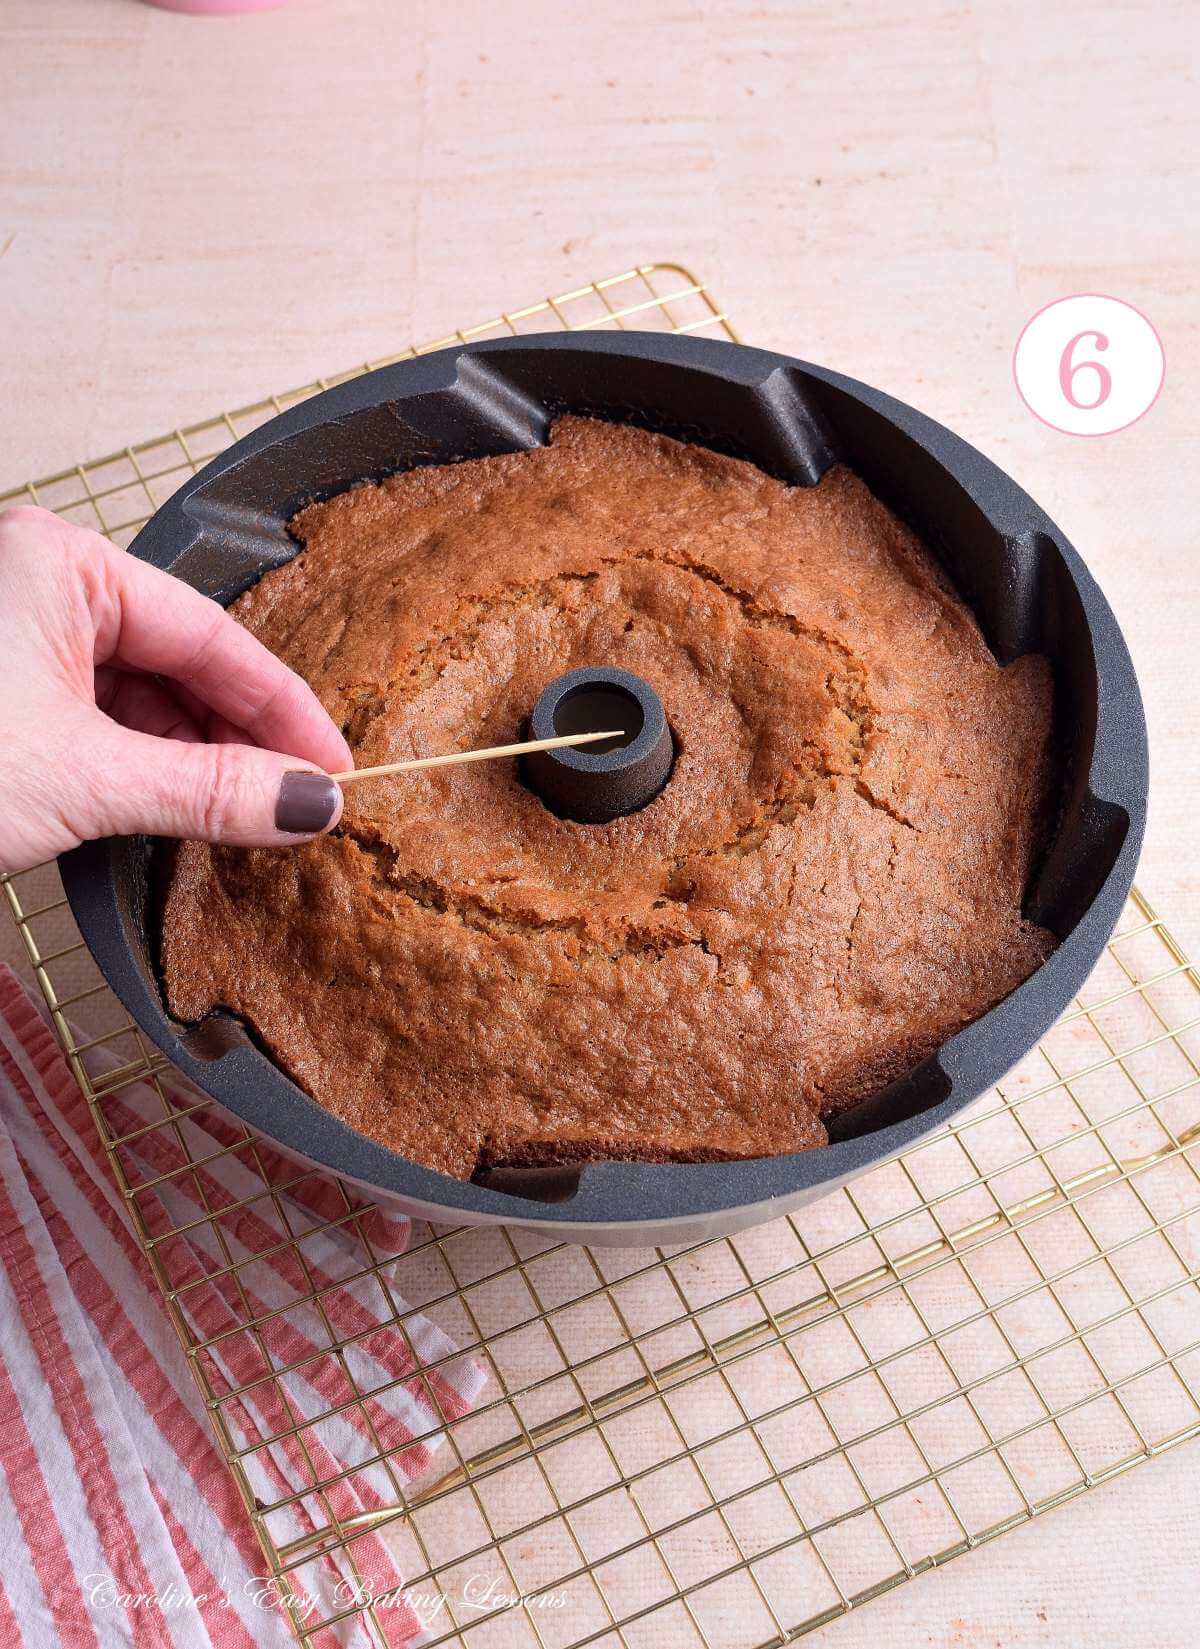
2. Bake in the preheated oven for 30 – 40 minutes until risen & golden brown. Check it is done, by inserting a wooden cocktail stick/toothpick into near the centre of the cake and if it comes out clean it is ready. Another way to check is if the cake springs back when pressed with a finger gently. It will also be starting to come away from the sides of the pan when baked fully. (See Photo 6 & 7 below). If it isn’t done yet, continue to bake for a further 2 minutes and check again.
3. Continue until fully baked. If it colours too much on top, cover with some foil/aluminium. My oven doesn’t cook evenly, so I turn the pan and use my timer to do so in intervals. Be sure to use a timer. See Phot


4. Leave to cool in the pan on top of a cooling rack for at least 30 minutes. Meanwhile prepare the cream cheese frosting. **Do not turn out the cake any sooner.


Preparing The FROSTING
1. Beat the cream cheese with an electric whisk, (or by hand) on low speed until smooth.
2. Add in the softened cubed butter and beat till smooth.
3. Next, add in the sieved icing/powdered sugar in about 1 cup (125g) amounts at a time. **Tip – hold a tea-towel over the bowl or use a splash-guard here, as the sugar likes to go everywhere.
4.Then gradually add in the rest of the sugar in increments. You want a thick, but controllable frosting.


Frosting with a dripping consistency rather than a pouring consistency. Test by observing it fall off the end of a spoon. It should go very very slowly. (See Photo collage 9, bottom left shot).
If you just want to completely cover the cake and it to be thinner, add a lot less sugar. Or if too thick, add in some orange juice to thin down, but very very gradually.
5. Finally add in the orange extract & zest of an orange and/or lemon, before finally mixing through. Do a taste test. See Photo collage 9.
6. The frosting can be made ahead if you like (up to one day before).
7. Cover well with cling film/plastic wrap and store in the fridge to keep cool and firm.


Turning Out The Cake
1. Now comes the time to remove the cake tin! Run a plastic or silicone spatula along the edges of the cake, if you see any cake sticking to the sides. (See Photo 10).
Have a cake stand or large serving plate ready. Place the plate on top of the cake, and with 2 hands, hold everything together & turn over.
3. Place on top of the cooling rack, and very gently give a few taps before lifting off the bundt tin. With lining paste, the cake will come out all in one piece. Note however, that gluten-free cake is more crumbly. See Photo 10.
4.Leave on the plate, over the cooling rack for another 30 minutes to cool down before decorating.
Alternatively, you can decorate the next day, or up to 3 days later. Just make sure completely cooled, then place a cake dome or container on top, and seal completely with some cling film/plastic wrap to make air-tight.
** Leave out at room temperature and not in the fridge.


Decorating The Cake
1.Start by cutting a piece of baking/parchment paper about the width of the cake stand/cake board or plate you want to serve the cake on. Cut into 4 squares and then place a few spots of the frosting on the plate to hold the 4 pieces of paper in position. You want the 4 pieces to just meet and these will be removed once decorated and give you a clean finished cake. (See Photo 11 for reference).
2. You can now apply the frosting whichever way you like. You can pipe on or as I did, just spoon it on. I started by adding small spoons to the top of the cake.
3.Then I moved onto letting some frosting go down one of the groves. You can use a cocktail stick to encourage it down, to about a half-way point. Then work your way around all the groves. I don’t think letting it puddle on the plate at the bottom looks great. So prefer controlled drips.
3. Now add some more frosting to the centre of the cake, letting it drip down the hole in the middle. This will use up less than half of the frosting. So plenty left for serving on the side or using for something else. See photo here.
In my older photos, (after the Recipe card), I completely covered the top of the cake (and not just the rim where the ridges start). This looks nicer and ratio of frosting to cake when sliced, is much better. And this would use up nearly all the topping.
5.Finally, add on the remaining orange and/or lemon zest to the top of the cake. You can add pecans on top of the cake and broken pieces into the centre to finish it off.


6. Place in the fridge or somewhere cool for at least 15 minutes before cutting, just to let the frosting settle a bit. **But do not store there.
Serving & Storing
1.After a little setting of the cream cheese frosting, the cake is ready to be sliced and served.
The cake will serve 10-14, depending on not so much the thickness of the slices you cut. But how you cut the cake. This shape of cake is a little tricky.

2. Serve on it its own or with some more cream cheese frosting on the side. And enjoy with your favourite hot drink.
3.Store the cake under a cake dome or in an airtilght container, at room temperature, for up to 5 days. **Do not put in the fridge as this can cause condensation and also dries the cake out.
**Top tip – not got a cake dome or cake carrier case to sore the cake? Then find a large food container that is wide enough and tall enough to take the cake. And instead of placing in the container, slip the cake, (with the plate), onto the lid of your container. Then it’s simply a case of having the container turned upside-down and placed on top of the cake, allowing it close firm with the lid below.
DIFFICULTY LEVEL: super simple, beginner
My Old Video from 2020
See my old video of me lining the bundt tin, removing and then decorating the cake.
Other Carrot Cake Recipes


Recipe Card
Gluten-free Carrot Bundt Cake

Equipment
- Digital scales or measuring cups
- Small measuring jug
- Mixing spoon
- Stand or Hand mixer and mixing bowl
- Sieve
- Measuring Spoons
- Grater/shredder and bowl for carrots
- Zester
- Bundt Tin (Heritage/Swirl pan,10-cup capacity*)
- Lining paste for greasing tins (Cake Goop, cake release spray or butter & flour*)
- Wooden Cocktail stick
- Cooling rack
- Bowl for making frosting
- Baking/parchment paper
- Small spoon
- * Denotes see notes
Ingredients
For The Cake Batter
- 180 ml Sunflower/Vegetable oil (approx. 6 fl oz, ¾ cup, or other neutral oil)
- 3 Eggs (medium to large, large to extra large US)
- 169 grams Light Brown sugar (6 oz, 1 rounded, packed ¾ cup)
- 225 grams Gluten-free Self-raising flour (8 oz, 1¾ cups OR Plain/All Purpose flour + 2¾ tsp baking powder)*
- 1½ tsp Baking powder (In addition to above is using Plain/A.P.)
- ¾ tsp Mixed Spice (Pumpkin Spice)
- ¾ tsp Ground Ginger
- ¼ tsp Ground Cinnamon
- ½ Nutmeg, freshly grated (or 1 tsp ground nutmeg)
- ¼ tsp Ground Anise (optional)
- 150 grams Carrots (5¼ oz, 1½ cups, grated/shredded weight)
For Lining The Bundt:
- 3 tbsp Lining Paste (Cake Goop)
- ½ tsp Cocoa Powder
For The Cream Cheese Frosting*
- 132 grams Cream Cheese (4⅔ oz, roundered ½ cup full fat, softened at room temp.)
- 76 grams Unsalted Butter (2⅔ oz, ⅓ cup, cubed & soft)
- 2 tsp Orange Extract
- Zest Of 1 Orange (& lemon)
- 250 grams Icing Sugar (Powdered Sugar, (8¾ oz, 2 cups*), sieved)
For Decoration
- Whole nuts (pecans, walnuts), crushed nuts, mini eggs (optional – try my homemade fondant carrots without a mold)
* Denotes see notes
Instructions
Prepare The Cake
- Switch the oven on to 180°c/160°c Fan/350°f/Gas Mark 4. *For new or powerful air fryers, use 160°c temperature.
- Add 169 grams Light Brown sugar, 180 ml Sunflower/Vegetable oil , & 3 Eggs to a large mixing bowl & beat by hand until combined.
- Then sieve over the 225 grams Gluten-free Self-raising flour, 1½ tsp Baking powder (2 amounts of baking powder if using Plain/A.P. flour). Add ½ tsp Xanthan Gum (if using – see notes). Then add ¾ tsp Mixed Spice, (Pumpkin Spice), ¾ tsp Ground Ginger, ¼ tsp Ground Cinnamon, ½ Nutmeg, freshly grated & ¼ tsp Ground Anise (optional).
- Gently mix the ingredients until no flour is visible, being careful not to over-mix. Then add the 150 grams Carrots (grated/shredded) & mix in by hand. Leave to the side & let the gluten-free flour have time to absorb the wet ingredients.
Prepare The Cake Pan:
- I always use homemade lining paste/cake goop for bundt tins. Learn how to make your own lining paste. Alternatively you can use cake release spray, or butter & flour.
- For the carrot cake or chocolate cake, I make the lining paste beige by using some cocoa powder. Decant 3 tbsp Lining Paste (Cake Goop) and add ½ tsp Cocoa Powder, before mixing well to combine.
- Use a pastry brush or artist brush to apply the paste (DO NOT USE A SILICONE BRUSH). Apply generously and for the side, in upward strokes. Then apply a second layer. **See process photos for more on this.
Baking The Cake:
- Carefully spoon the batter into the prepared bundt pan, & spread out to level it off. Give a few taps on the counter/worktop & popping into the centre of the pre-heated oven or air fryer to bake.
- Bake for 30 – 40 minutes until risen & golden brown. Check the cake is done by inserting a wooden cocktail stick near the centre of the cake and if it comes out clean it is ready It will be springy to touch & be starting to come away from the sides of the pan. If it isn’t done yet, continue baking for another 2 minutes and check again.
- Leave to cool same way up, on top of a cooling rack. Leave for 30 minutes. Do not try to turn out before that time. Meanwhile you can prepare the cream cheese frosting (or ahead of time).
Prepare The Frosting
- Make sure the 76 grams Unsalted Butter is softened and cubed small, before adding to a stand-mixer or mixing bowl & beating till spreadable. Then add in the room temperature 132 grams Cream Cheese & beat till combined & smooth.
- Add in about ⅓- ½ of the 250 grams Icing Sugar (powdered sugar), to the mixture & cover with a tea-towel before beating on low to combine. Then gradually add in the rest of the sugar, until you have a very thick frosting. Very thick with a very slow drip. (See more on this in process collage 9 of the step-by-step instruction above).
- Add 2 tsp Orange Extract (to taste), before adding most of the Zest Of 1 Orange (and lemon if you want – but hold some back for the decoration). Then mix gently. Cover with some cling film/plastic wrap and place in the fridge till ready to use.
Turn Out The Cake
- After 30 minutes of cooling you can turn out the cake. Simply run a plastic or silicone spatula around the edges if any bits of cake seem to be sticking to the tin.
- Place a large plate or cake stand on top of the cake & hold everything together. Then flip everything over & place back down on the cooling rack. Give a little tap and lift off the bundt tin. It should come off easy with lining paste. Leave to cool for at least 30 more minutes before decorating.
Decorating The Cake:
- If you are going to use a different plate to serve or want to cover with a lot of frosting), cut a piece of baking/parchment paper about width of your serving plate or cake stand. Then cut into 4 squares. Hold them in place on top of the plate with a little frosting. Then place the cooled bundt cake on top. These can easily be removed from under the cake after decorating and save mess.
- Pipe or spoon the cream cheese frosting onto the cake. I used a small spoon and covered the top of the cake first. Then moved onto letting the frosting slowly drip down the ridges of the side of the cake. I really don't think drips pooling at the bottom looks nice. Build up the frosting gradually and encourage it into the areas you want. See the images and also the old images with different styles of frosting.
- Once happy, add on the remaining orange and lemon zest. Add some nuts, mini eggs, whatever you like. Then place in the fridge or somewhere cool for at least 15 minutes to let the frosting set up a bit.
Serving & Storing:
- The cake can be cut into 10-14 slices. Serve with a hot beverage and with some more frosting on the side for those with a sweet tooth.
- Store the cake under a cake dome or in an air-tight container, at room temperature or somewhere cool (but not the fridge as it can cause condensation). It will be fine for about 5 days.
- Unfrosted carrot cake will be fine wrapped in cling film/plastic wrap for up to 3 days before decorating.
Video
Notes
 Oil – Use Sunflower, Vegetable or any other neutral oil.
Size Of Bundt Tin – I used a full-sized, 10 cup equivalent to Nordic Ware’s ‘Heritage Bundt’. See more in the equipment section above including measurements & how to use a smaller bundt tin for a small air fryer.
Oil – Use Sunflower, Vegetable or any other neutral oil.
Size Of Bundt Tin – I used a full-sized, 10 cup equivalent to Nordic Ware’s ‘Heritage Bundt’. See more in the equipment section above including measurements & how to use a smaller bundt tin for a small air fryer.

 Size Of Bundt Tin – I used a full-sized, 10 cup equivalent to Nordic Ware’s ‘Heritage Bundt’. See more in the equipment section above including measurements & how to use a smaller bundt tin for a small air fryer.
Recipe Yield – 10-14 slices depending on how you cut the cake.
Size Of Bundt Tin – I used a full-sized, 10 cup equivalent to Nordic Ware’s ‘Heritage Bundt’. See more in the equipment section above including measurements & how to use a smaller bundt tin for a small air fryer.
Recipe Yield – 10-14 slices depending on how you cut the cake.

 Lining Paste (Cake Goop) – homemade lining paste is less expensive than cake release, & THE BEST for bundt. Make your own Lining Paste (Cake Goop) At Home.
Orange Cream Cheese Frosting – there is enough frosting for decorating the cake as in the newer images, with the excess being used to serve alongside the cake slices. Or, you can cover the top of the cake more, like in the older images (at the foot of the page).
Make Ahead – the cake can be made up to 3 days before decorating. After cooling cover well in cling film/plastic wrap and leave at room temperature.
Lining Paste (Cake Goop) – homemade lining paste is less expensive than cake release, & THE BEST for bundt. Make your own Lining Paste (Cake Goop) At Home.
Orange Cream Cheese Frosting – there is enough frosting for decorating the cake as in the newer images, with the excess being used to serve alongside the cake slices. Or, you can cover the top of the cake more, like in the older images (at the foot of the page).
Make Ahead – the cake can be made up to 3 days before decorating. After cooling cover well in cling film/plastic wrap and leave at room temperature.

 Fondant Carrots – see my tutorial for making fondant carrots without a mold that includes a step-by-step photo tutorial.
Other Carrot Cake Recipes – including layer cake, mini bundts & slices (traybake), can be found on my Carrot Cake Page. You can see readers’ photos of the other carrot cake recipes there too.
Fondant Carrots – see my tutorial for making fondant carrots without a mold that includes a step-by-step photo tutorial.
Other Carrot Cake Recipes – including layer cake, mini bundts & slices (traybake), can be found on my Carrot Cake Page. You can see readers’ photos of the other carrot cake recipes there too.


Nutritional Information – I am not a qualified nutritionist & all values are approximate and from website MyFitnessPal.com. One serving is based on a full bundt cake with all of the frosting used and with a yield of 14 slices. Big or smaller slices and values will change. Find the stats at MyFitnessPal.com


Join My Facebook Group
Why not also join my – Facebook Group Easy Online Baking Lessons, dedicated to this baking lessons website, as well as providing one-on-one support with myself & my team? Be sure to answer all security questions when requesting to join.
Click to join Facebook Group Easy Online Baking Lessons,
Subscribe For More Recipes
Old 2018 images below, of this gluten-free carrot bundt cake. With more of the orange cream cheese frosting, and pecans.


Follow me on social media:
Happy Learning & Baking!
Caro x


Gluten Free Carrot Bundt Cake
Search For Something You Fancy!
Caroline’s Easy Baking Lessons


