Perfect Glaze 101 – Icing Tutorial

Learn how to make perfect icing for whatever your bake, using my perfect glaze 101 - icing tutorial.
Perfect Glaze 101 – Icing Tutorial


**Click to jump to section**


What You Will Learn
- What is a glaze & the other names?
- Testing glaze consistency
- How to prepare a glaze for dipping
- How to make for a drip
- How to make for a drizzle
- How to make to spread on
- How to make a ‘controlled glaze’
- How to flavour the glaze
- How to colour the glaze naturally
- Q&A for FAQs about glazes & problems
- Ideal bakes to use the versatile glaze on
All with step-by-step photo instructions below, as well as a long-form video tutorial (**this is for all who watched my 10 second YouTube video & wanted more).

What Is Glaze?
This baking glaze is made from icing sugar (US Powdered Sugar or Confectioners’ Sugar), and often water. It is a thinner mixture than buttercream, that hardens a little on setting, sometimes very translucent & gives a glossy finish to your baked goods.
What Other Names Is It Known By?
A glaze can also be referred to as an ‘icing’ here in the UK. But to confuse matters more, we can sometimes refer to a layer of fondant as icing too!
Another UK term used is a ‘water icing’, or glacé icing.

To confuse things even further, in the US, some bakers (& indeed some baking websites), will refer to a very thin running icing as a glaze. (As in just ‘glazes’ the top). And a thicker, more spreadable and pliable icing, as an icing!
Some in the UK might also refer to the covering of a little Fondant Fancy or French Fancy (those little cute Petit Four cakes), as an icing or glaze. It does look like they were dipped in an icing/glaze, but in actual fact it is made from fondant (sugar paste) & water, and beaten into a liquid consistency. (Or you can save yourself the bother and buy a box of Tate & Lyle’s Fondant Icing Sugar).
Some in the US might call it a ‘powdered sugar icing’, or even refer to ‘icing’ a layer cake, by decorating with a buttercream ‘frosting’! You can see why people can get confused.
We are detailing here, how to make a glaze/icing & not a buttercream. You can learn more in my buttercream for beginners tutorial.
What Do You Use It For?


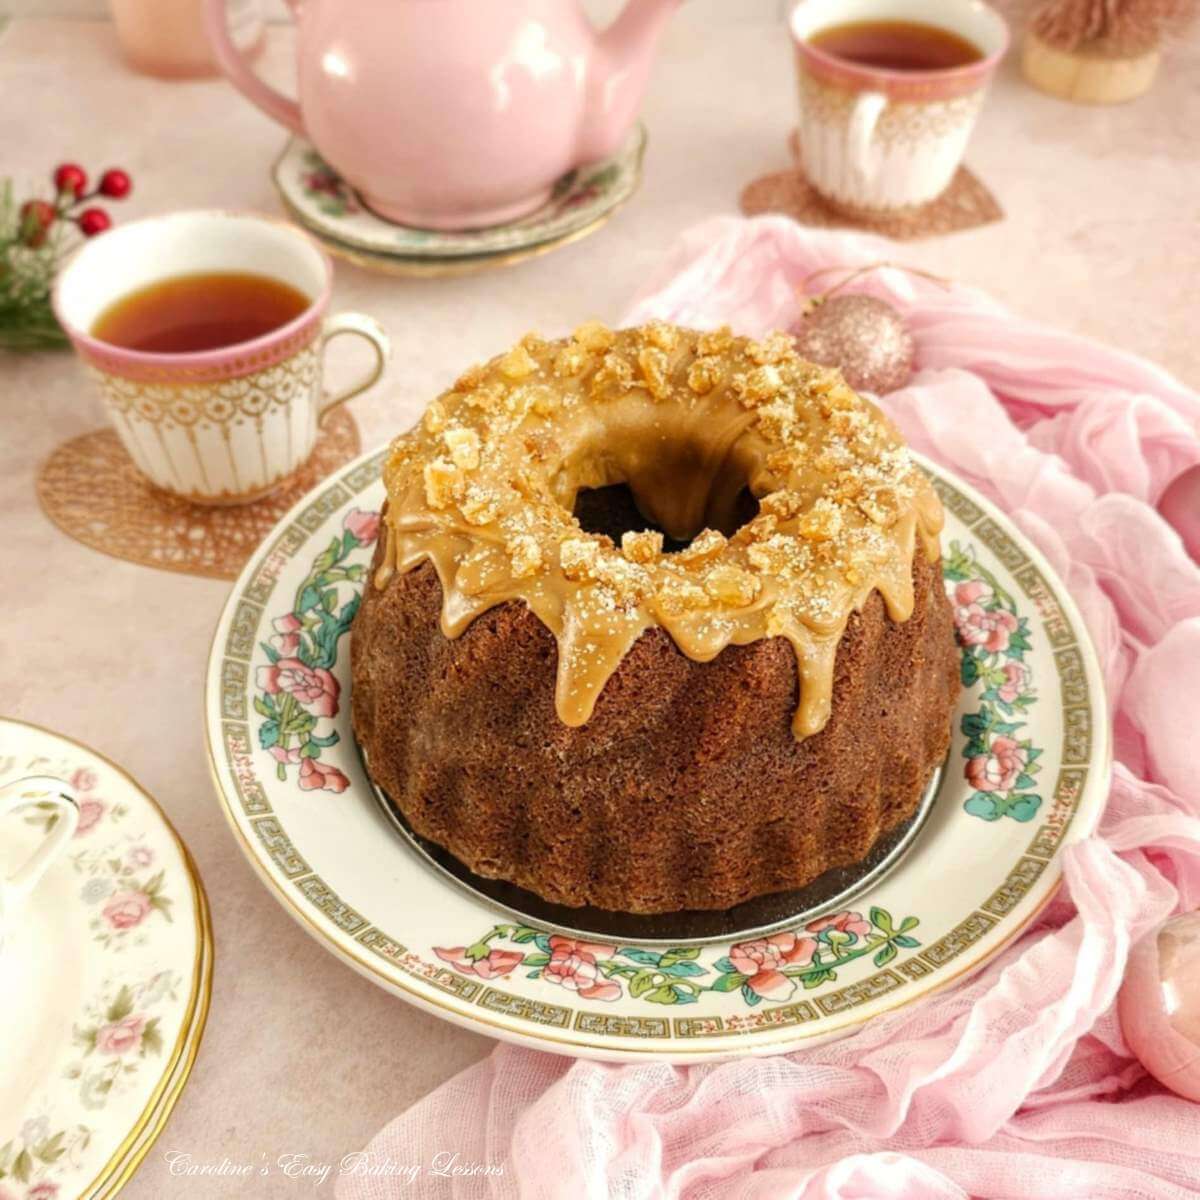
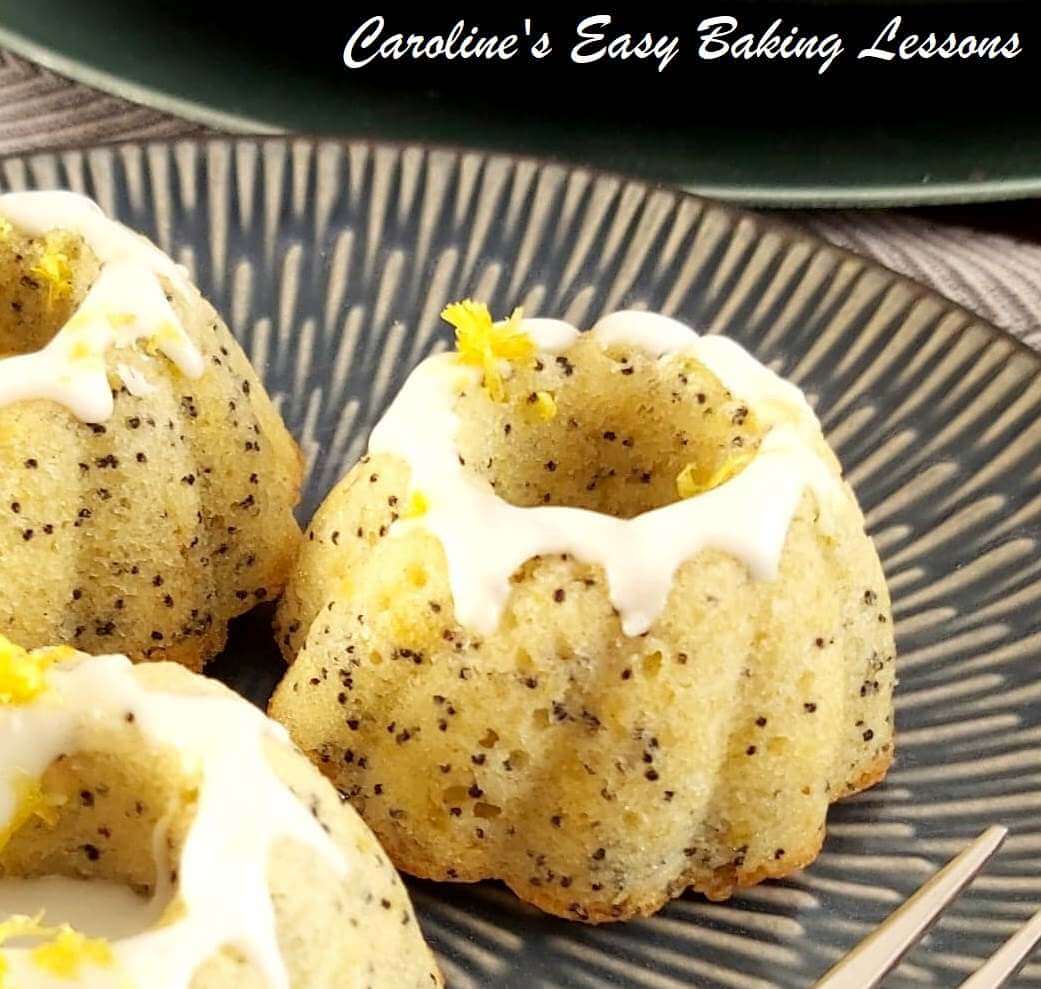
A glaze/icing is very versatile & used on top of cakes like lemon drizzle cake, in a ‘drizzle’ as the name suggests. It can be used to coat just the top of a cake (like in this chocolate glaze on top of mini chocolate bundt cakes). Or used to top and gently drizzle down the sides of a cake.
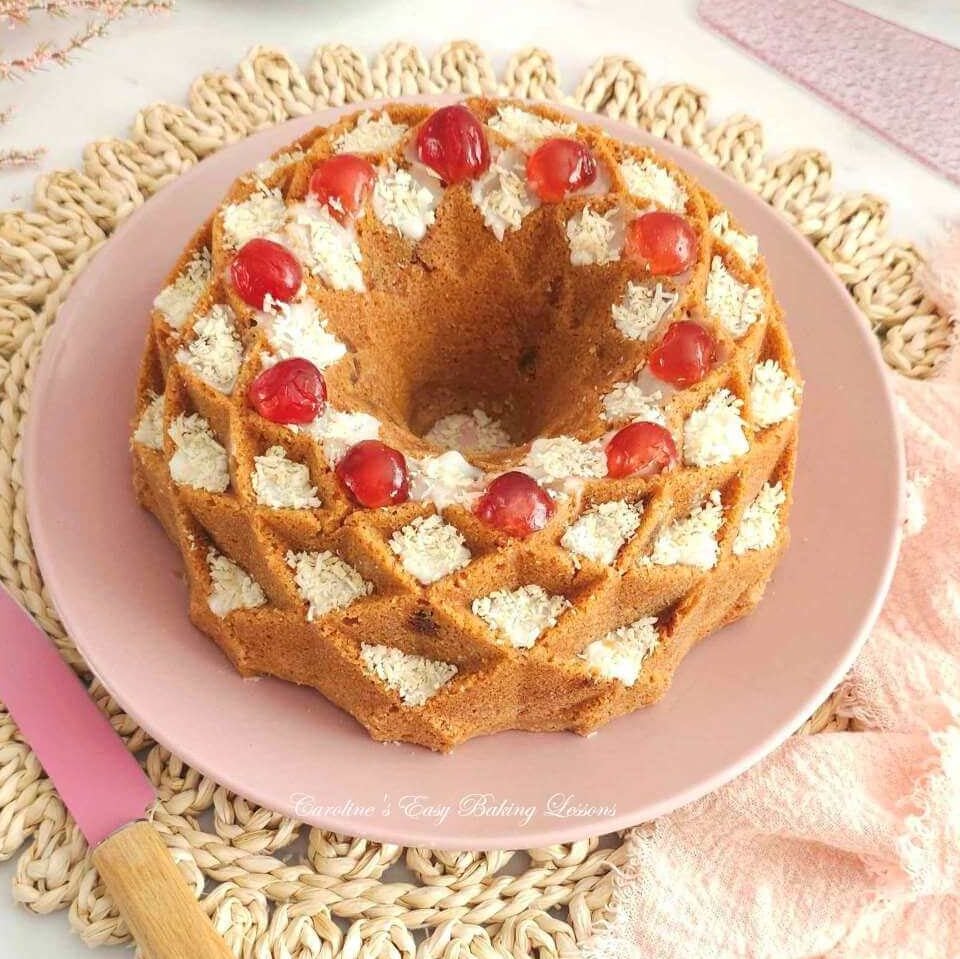
You can also use to coat just the top of a cupcake, and then use as an adhesive for toppings such as coconut. See my Tropical Banana bread recipe.
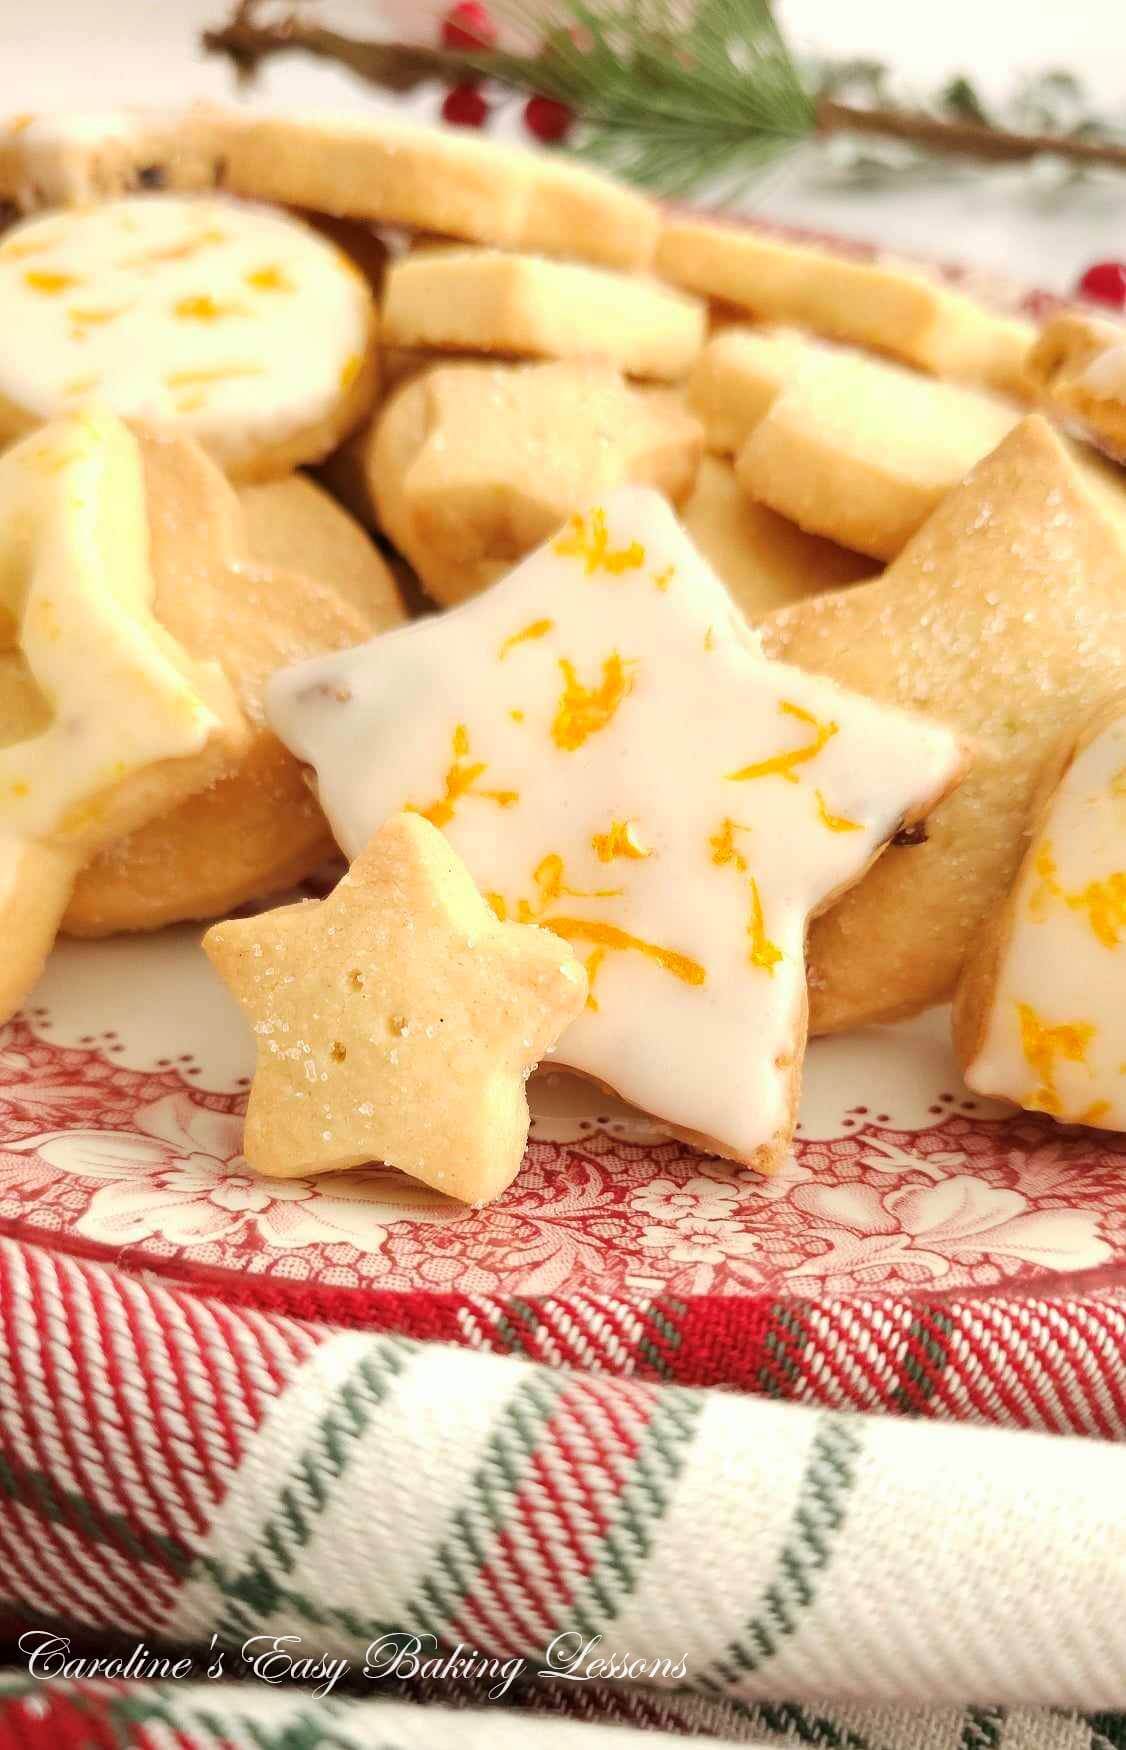
An icing/glaze can also be used to top/half-dip your biscuits/cookies, like in the Orange Glazed Scottish Shortbread. A glaze will firm a little but not solidify as much as Royal Icing, so if you want to do fine decorating on sugar cookies, check out my friend Tanya’s Sugar Cookie Icing tutorial on Global Bakes.


Ingredients Needed
- Icing (Powdered/Confectioners’) Sugar
- Liquid
- Flavouring (optional)
- Colouring (optional)
Icing Sugar
Icing sugar is the term we use in the UK for powdered granulated sugar. Also known as Powdered Sugar or Confectioners’ sugar in the US. (Confectioners’ sugar does usually have a little corn starch in it & corn flour is the term in the UK).
You can of course make your own icing sugar by blitzing some granulated sugar. Note however, it will not be as consistently fine as shop bought.

Liquid
The most basic & commonly used liquid to make an icing is a little water or even milk. You can never be exact with the amount needed as it can very and also depends how thick you want it. With water, it is a nice sweet sugary tasting glaze. Alternatives are orange juice & more.
Flavouring
Flavouring your glaze is optional. Notice I say flavouring and not just food flavourings or baking extracts.
You can use Vanilla extract, and orange extract is nice too or even almond for my Bakewell Bundt Cake. Just note that you want to use the liquid flavouring before you add any water or other liquid to the sugar.


But it does not need to just be baking extracts. Something as simple as adding orange zest, can also change the colour of the glaze slightly, or give some orange speckles to it. Try some Baileys Irish lliqueur.
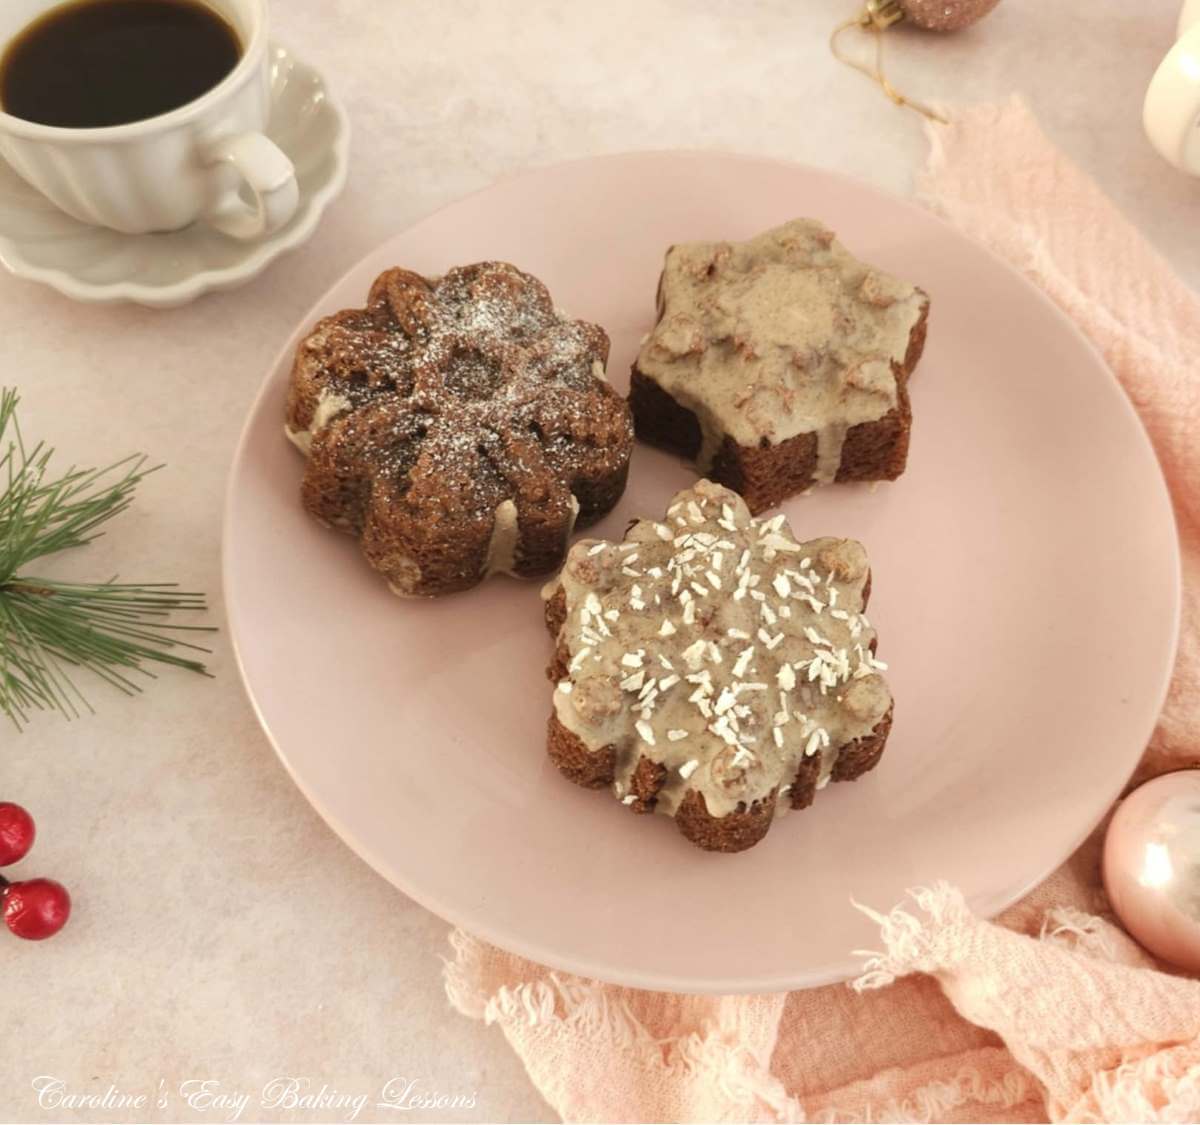
You can even add spices to your icing. Like in these chai spice mini gingerbread cakes, I added some chai spice and mixed spice, or even US pumpkin spice works too. (This does change the icing colour a little too).
Colouring
Which leads me on nicely to colouring your glaze. A glaze will typically be a nice white colour.


A thin glaze on the likes of gingerbread, will have a translucency to it, even if you add more layers. So best to add not too long before serving.
Things that will naturally colour the icing are orange or lemon zest, spices, or some orange juice used as part of the liquid.
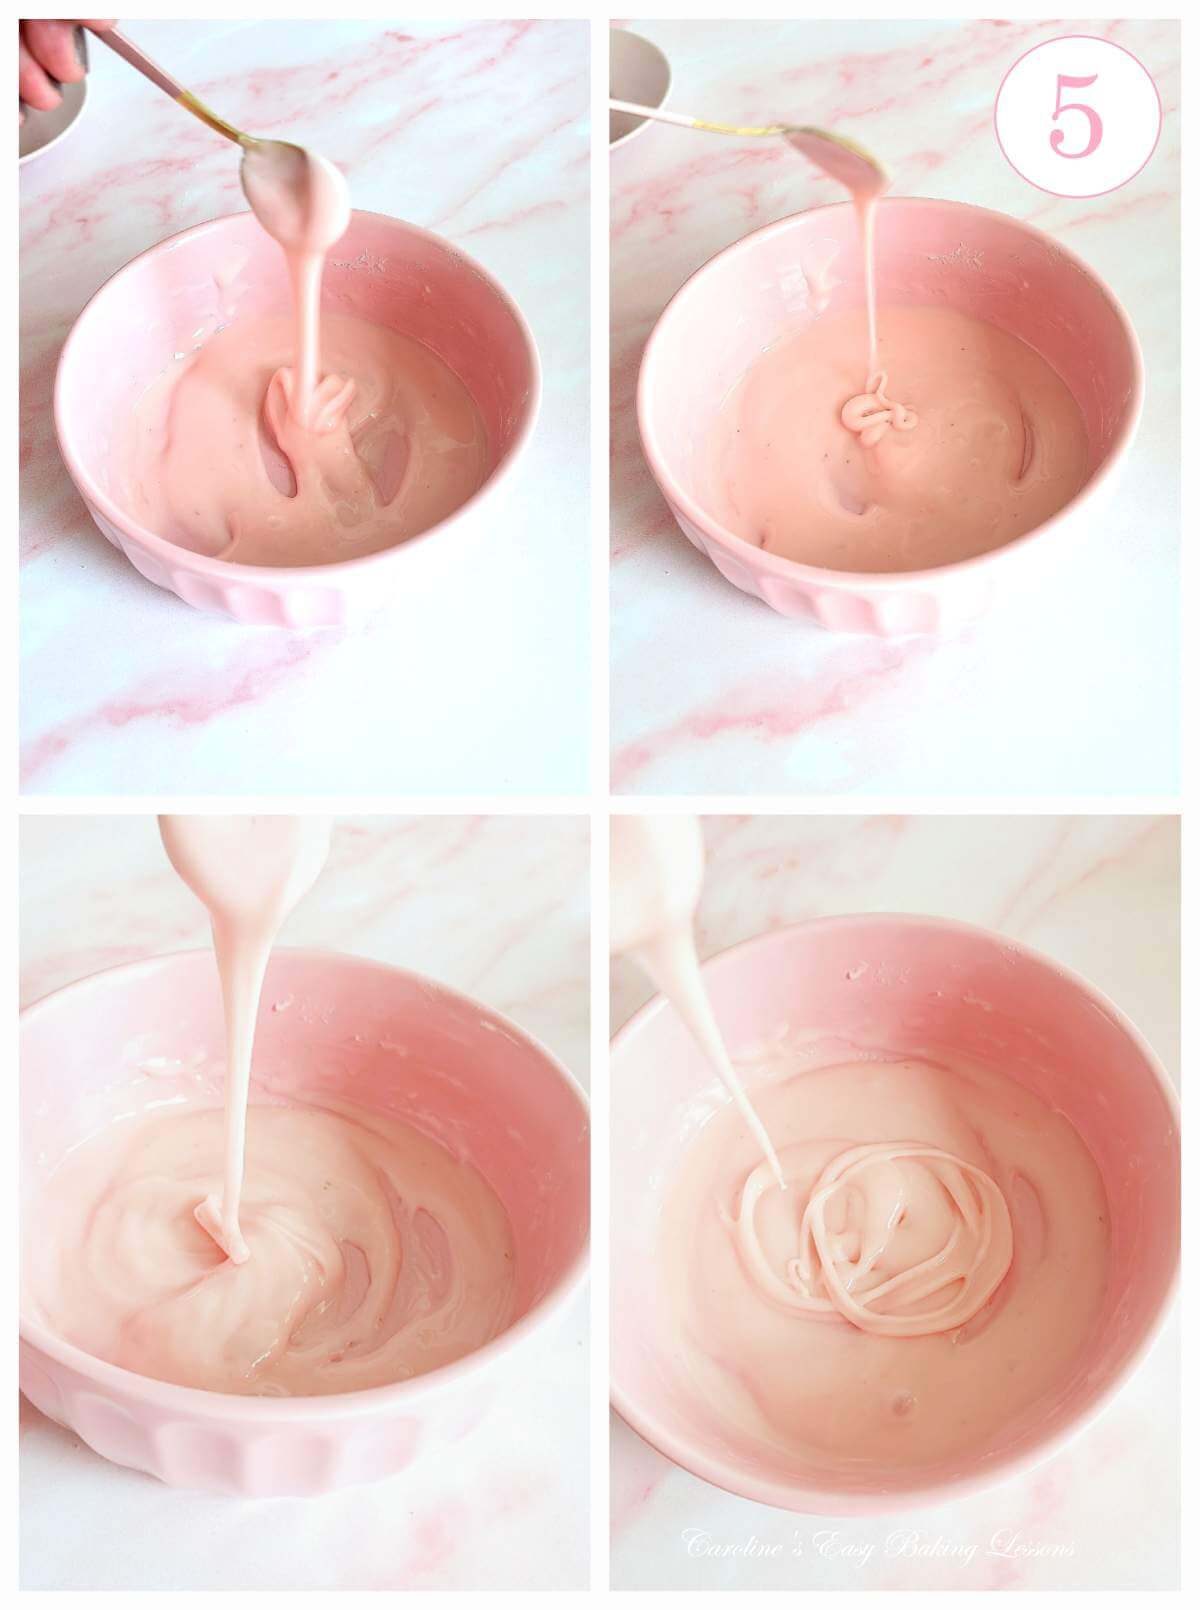
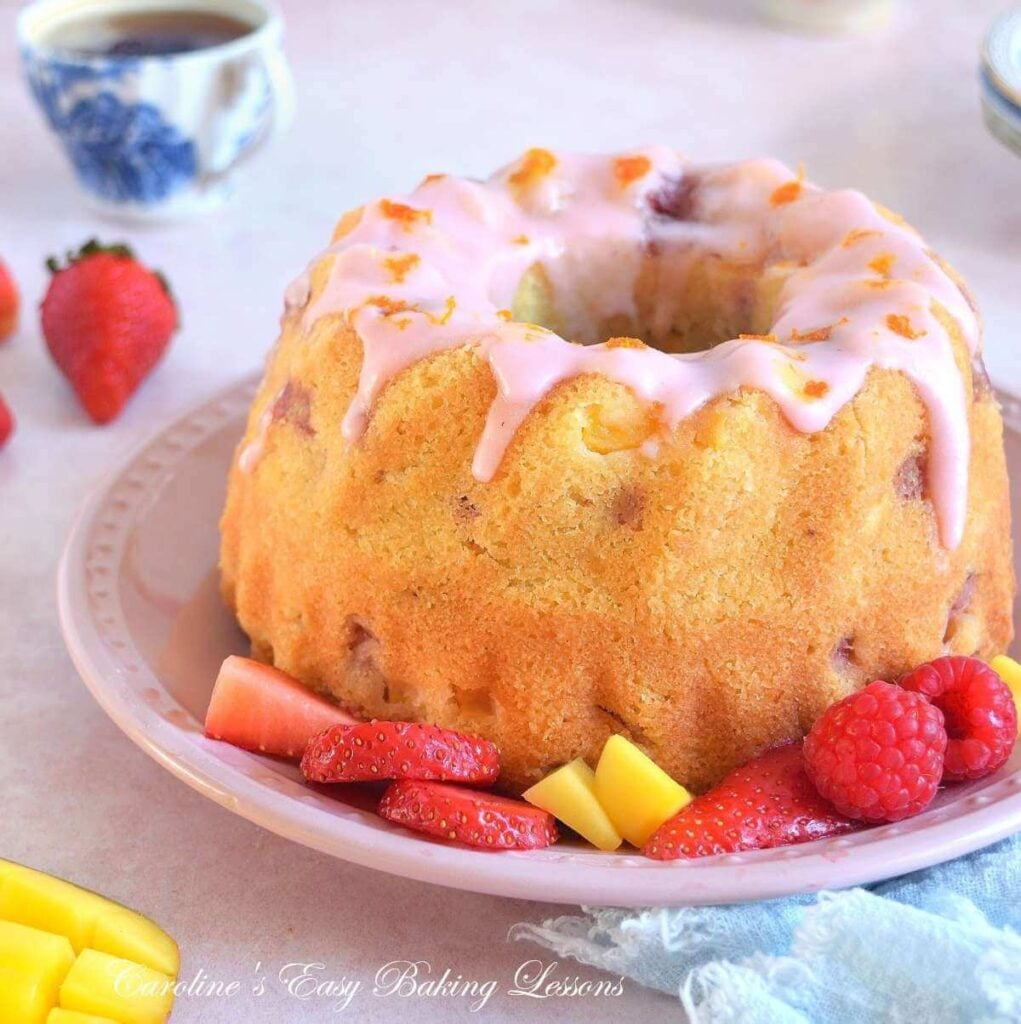
But another great way is to use coloured water from fruits. Like in my air fryer strawberry mango bundt cake, I macerated the strawberries before adding to the cake batter. This just means adding some sugar to the strawberries for them to give off their juices and not make a soggy cake. (See photo collage below).


That liquid collected is transparent but red. So when added to icing sugar, it makes a beautiful pink shade. And this is what I used in the step-by-step photos below.
Other fruits will do the same. Rhubarb, blueberries , beetroot even. You could even microwave a small amount of the fruit and puree it. A little concentrated strawberry puree would work too. Even adding a little jam/preserve can add a little colour. (Try my plum orange jam, or even homemade blueberry orange curd). So you see, you don’t always have to add food colouring. But if you do, try the pastes over the liquid kind, & add gradually, before adding any more liquid. (Try Sugarflair colouring).
You can also make a rich chocolatey glaze (see below).


Recipe Yield
The recipe given is for a small amount of glaze/icing for say a coating over a traybake such as these low fat/cal chocolate courgette cake squares. It is based on 1 American cup of icing/powdered sugar (but only as it is a good base amount). All ingredients for my recipes, have grams, ounces and cup measurements, all hand tested by myself in recipe development. Check out my baking ingredient measurement conversions table.
You can of course half the amount (for 6 small cupcakes), or double or triple.


It is also hard to say what weight or even cup size the glaze will make, as it depends on the thickness you want and how much liquid you add. But, the minimum weight is 130g (4.5 oz) per batch, as made in the recipe card at the bottom of the page.
Often you hear or read in recipes to ‘add the liquid to your icing sugar until you have a thick but pourable consistency’. But what are the thicknesses and consistencies actually looking like? You want different consistency or thickness depending on what you are adding the icing to or how you want it to set or if you want it to fall. In the step-by-step instructions below, I take you through how to test for the consistency you require.


FAQs
“What’s the difference between a glaze and icing?” None really, apart from different names in different countries. *
**Read more in the What Is A Glaze section above.***
“What is a perfect glaze consistency?” Again, depends on what bake you will be using it on. Do you want to dip in the glaze? Do you want to drizzle or spread it?
Or do want some drips down the sides of the cake? All require different consistency & thickness. Learn more in the glaze directions below.


“How do I fix icing that is too runny?” If the icing/glaze is too thin and running too much for you, simply add some more sieved icing/powdered sugar.
In the future, very very gradually (& I mean by the 1/2 or 1/4 teaspoon), add the liquid to reach the desired thickness.
“How do I fix glaze that is too thick?” If the glaze is too thick, doesn’t pour or drip (& possibly cracks), you need to very gradually add more liquid.


“How do I test the thickness or consistency of my glaze?” There are a few ways to test the consistency of your glaze. Firstly you can use a spatula or butter knife to see if it is spreadable.
You can also lift the icing up high on a spoon and see how it falls back into the bowl.
You can even draw a spatula or spoon through the icing & make a line, observing how many seconds it takes for it to disappear.
Alternatively, test the icing on a plate or down the sides of an upturned small bowl or ramekin. More detailed explanation of the tests in the step-by-step recipe below.
Step-By-Step Instructions


1.Start by sieving your measured out icing/powdered sugar, into a small-medium-sized bowl (or a small mixing bowl).
2.Add 1-2 tsp of orange extract, (optional, other kind).
3. Start to add the water (or other liquid, such as macerated strawberry liquid. This is what I have used in the photos and the video. Before adding fresh strawberries to a cake batter, I had chopped them and added 2 tsp sugar, coated and left at least 30 minutes. This draws out excess liquid that you don’t want in a cake batter. I collected this liquid, that is translucent but with a red colour & used for this glaze).


4.For this amount of icing sugar, I recommend starting off by adding 1 teaspoon (tsp) of the liquid.
5. Mix with a metal spoon and then add in 1/2 teaspoon (tsp) more of the liquid. Mix again & repeat one more time.
6. Push down on the sugar with the back of a spoon, working your way across the bowl, making it take on more of the liquid.
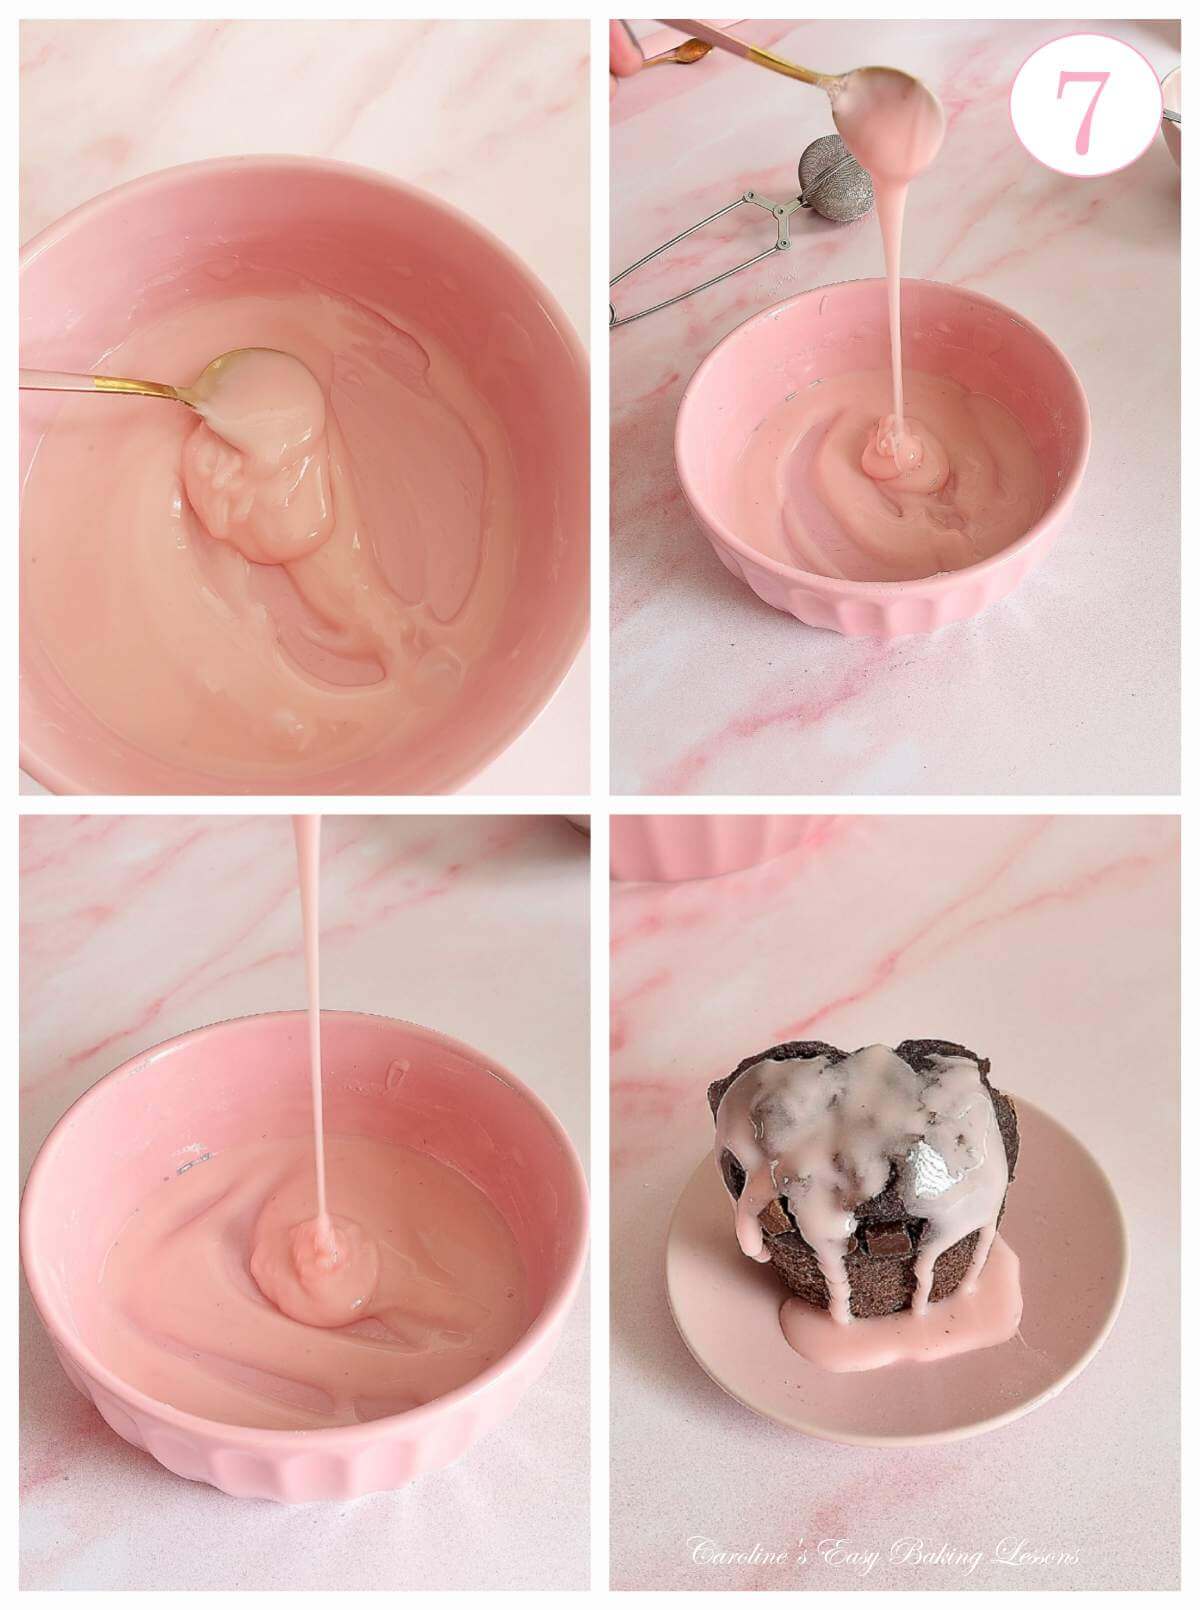
7.Now start adding the liquid until you have a very thick dry paste-like mixture . (See Photo collage 2). With the strawberry liquid, this will have a pink colour to it.


6. Next start adding the liquid in 1/4 teaspoon (tsp) amounts at a time, mixing well in-between each addition.
7. Repeat until you have a thick but spreadable icing.
Thick But Spreadable Icing/Glaze
1.Test the spreadable icing by using a spatula, butter knife or even back of the spoon, to press down on the icing and draw through it. If spreadable this will be easy to do and not be clumpy. See Photo collage 3.
2. You can also test by removing some icing and attempting to spread on a plate or on some baking/parchment paper. It should also coat the back of a spoon & not drip.
In the video I spread on top of a biscuit.
Thick Controlled Glaze


1.Now for a thick glaze that also has some drips, and what I refer to as a controlled glaze or controlled drips, is for example on a loaf cake or bundt, where you want a nice thick glaze with some drips down the side. Not big puddles of icing on the plate from the drips. Not a good look in my opinion.
2.Add more liquid in ¼ teaspoon (tsp) drops at a time, remembering to mix really well & push down on the sugar with the back of the spoon, before adding anymore liquid.
3.Test for the ‘thick but pourable consistency’, by lifting up some of the icing with a spoon, holding up high above the bowl & letting it drop down back into the bowl. Observe how it flows and falls. We want a thick glaze that drips down in a thick steady stream. Does not run but at the same time does not clump together. (See the video below).


4. It should also leave a trail on the surface of the glaze, (like when you test for the ribbon stage/ribbon trail when whisking egg yolks and sugar). It should leave an impression that does not immediately sink. See Photo collage 4 above & the cake here with controlled drips, that can be encouraged to fall where you want, by using a cocktail stick.
5. Try testing the consistency on a plate held vertically, or on a small ramekin turned upside-down.

Thick But Pourable Glaze
1. Next is the slightly thinner consistency, sometimes referred to as ‘thick but pourable’. Add more liquid very gradually in ¼ teaspoons (tsp) at a time, remembering to mix really well.
2. The icing should still have a nice thick shiny appearance but when lifted up, will drip a little quicker, but not run and be one continuous flow. If it stops and starts or clumps, mix again well before repeating.
3.You can also test on a plate or side of a ramekin, where it should leave a thick drip, moving a little faster but not reaching the bottom (at least not in 1 – 2 seconds). Any trail on the surface of the bowl will fade after 1 or 2 seconds.


Pourable Glaze Or Drizzle
1.The next thickness is ‘pourable’ or a ‘drizzle’. You can also use to half dip cookies in.
2.Add more liquid, 1/8 teaspoon (tsp) at a time till a consistency where the icing runs off the spoon in a quick and steady flow. (No 1/8 tsp? Just half fill a ¼ tsp).
3. Any pattern that forms from landing on the surface of the bowl, will immediately disappear.
4.Test on the plate or ramekin and it should run down the sides immediately. Too thick & it will not be easy to drizzle.

Very Thin Pourable Glaze
1.This is the thinnest of glazes and very thin. The icing will pour rather than drip, and move really quickly. Not thick enough for drips, it will eventually all settle together creating puddles.
2.Add 1/8 teaspoon (tsp) more liquid till liquid and mix well.
3.It can be used to completely cover whole cakes for example, that will be turned over and glazed on the bottom too. It will have a more opaque coverage. So can be used to also adhere decorations to the cake or cookies.
4.Other examples are white opaque glossy glaze on one side of a doughnut. Or even completely dipping doughnut holes in the glaze.


Colouring & Flavouring The Glaze
1.Colour the glaze with food colouring, zest (such as lemon, orange or lime), spices (such as cinnamon), or use coloured liquid such as orange juice, or red liquid from macerating fruits such as strawberries (as shown in the photos above). Colour & even flavour with a little jam or preserve.
2.For the coloured liquid, just add as instructed above. For food colouring add once you have the thick paste-like consistency & add a little more once at the right thickness, if not the correct shade you are looking for. Best to use a paste colouring as it doesn’t add liquid or gel colouring at a pinch. *Remember to also give it at least 10 seconds for the colour to develop.
3.For adding a slight colour or speckle of colour from fruit zest, use some orange juice, or add zest once the glaze is ready. (See Photo collage 8).

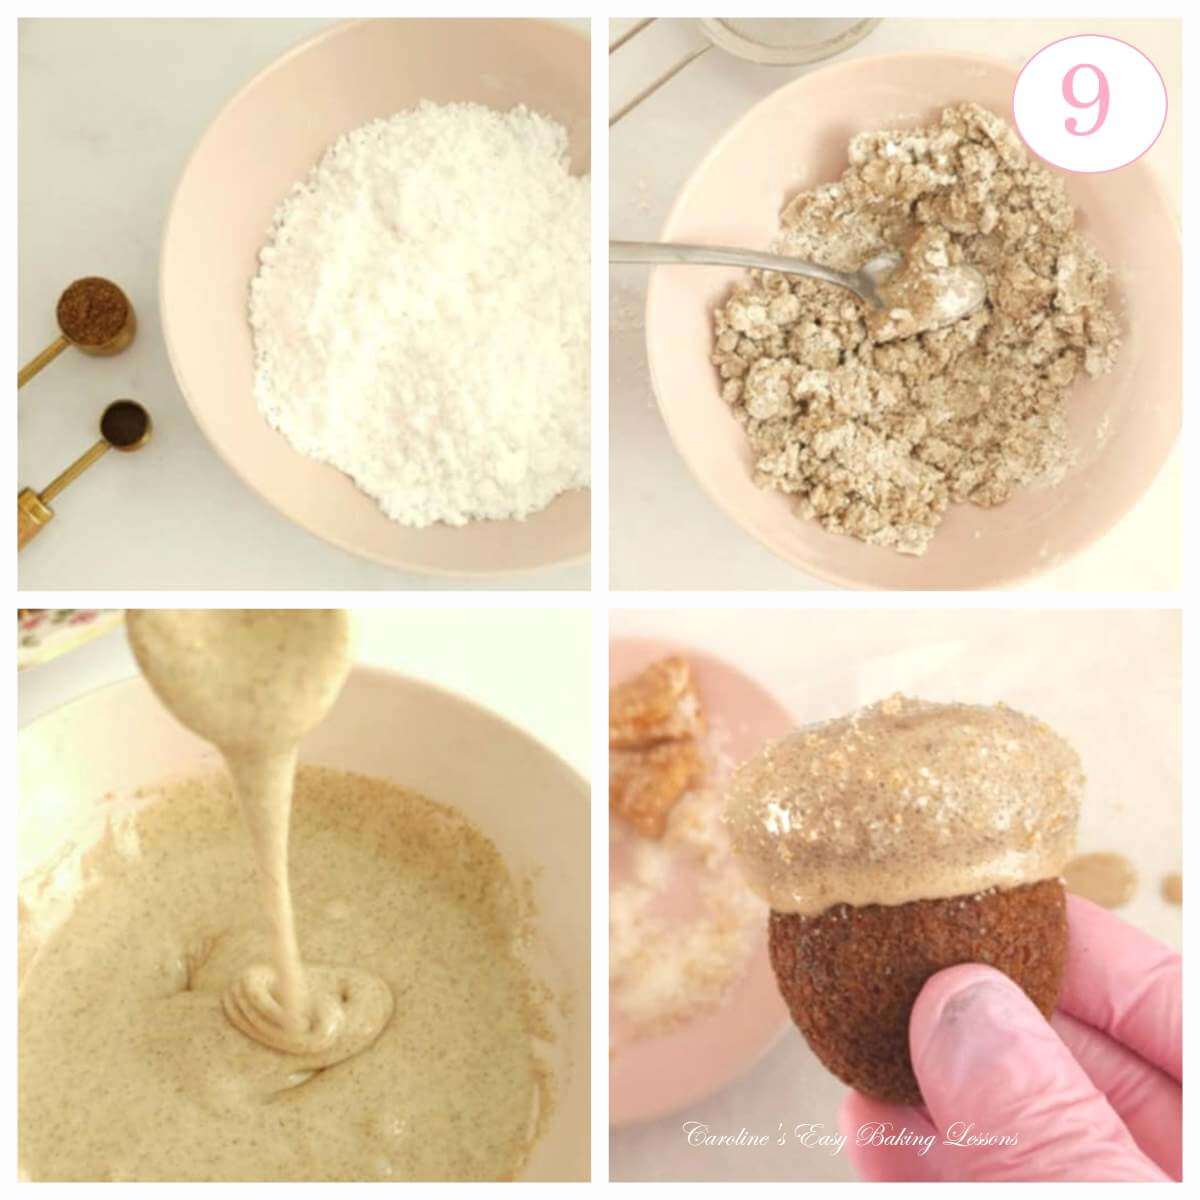
4.For spices such as cinnamon, mixed spice (pumpkin spice) or chai, (as shown in collage photo 9), add about 1/2 teaspoon (tsp) before adding any liquid and adjust to taste once the glaze is ready. This will change the colour of the glaze a little & flavour at the same time. See the spices in the photo collage here of mini chai gingerbread cakes
5.If using jam, or even a puree, add after the icing is at the paste-like consistency, as it will thin it out a bit. Once at the correct thickness, add a ½ teaspoon (tsp) more at a time till the right shade. If you add too much, you will need to add more sieved icing/powdered sugar.
6. Add extracts like vanilla, before adding any liquid.

Chocolate Glaze/Icing
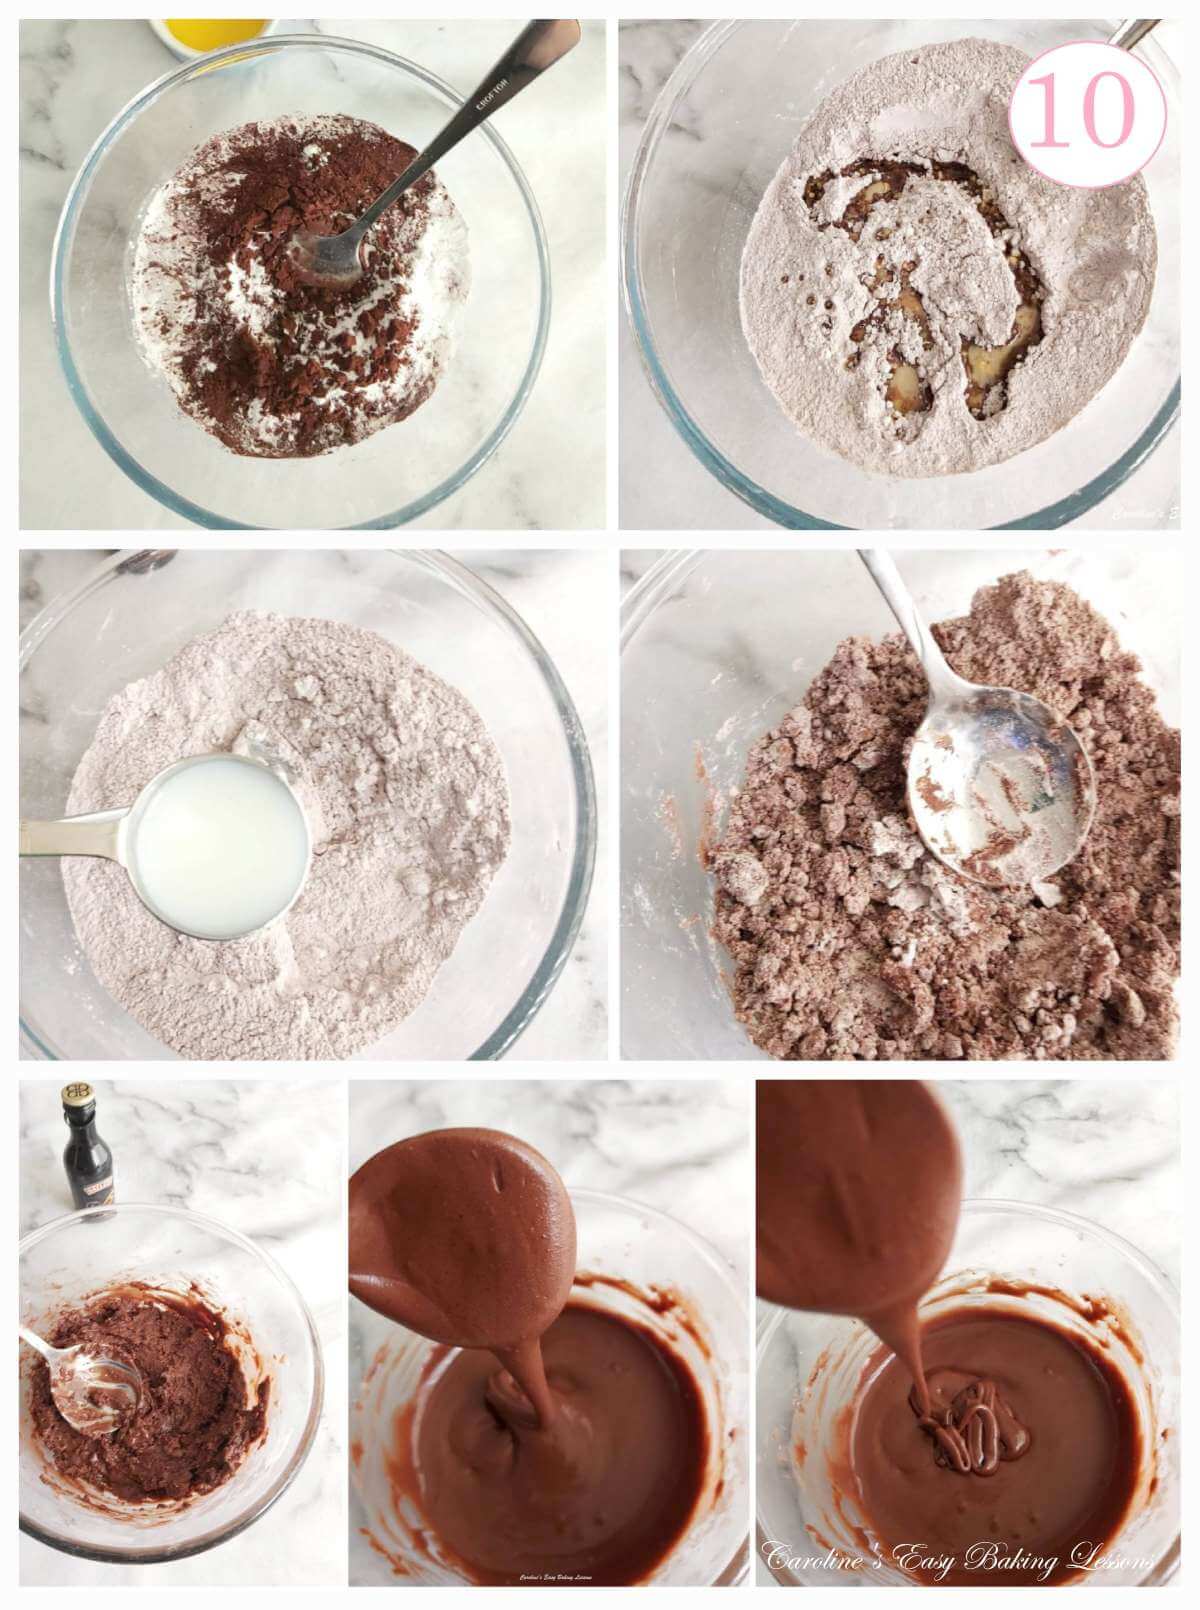
To make a chocolate glaze, that is best if thick and fudgy tasting, use:
125g (1 cup, 4.5 oz) icing/powdered sugar, 3 tsp cocoa powder, ¾ -1 tsp orange extract (optional), 1 tsp Bailey’s Orange truffle liqueur (optional), to approximately 3 ½ tsp milk.
Prepare as per the instructions above (sieving the sugar & cocoa, adding the extract & Bailey’s (if using) & gradually adding in the milk till at the Thick Controlled Glaze Stage (see above).
**Don’t make a chocolate glaze too far ahead of time as it hardens a little and can be harder to use. Mix well and add a touch more milk if needed.


**See me filling the chocolate glaze into the centre of a chocolate orange bundt cake, covering a surprise chocolate egg underneath.
Using & Storing Glaze
Use the glaze one prepared or make ahead of time. Cover with cling film/plastic wrap or place in an airtight container. Leave out at room temperature for up to 5 days. For information on freezing, read Freezeit.Co.uk’s freezing icing article1.
DIFFICULTY LEVEL: easy, beginner
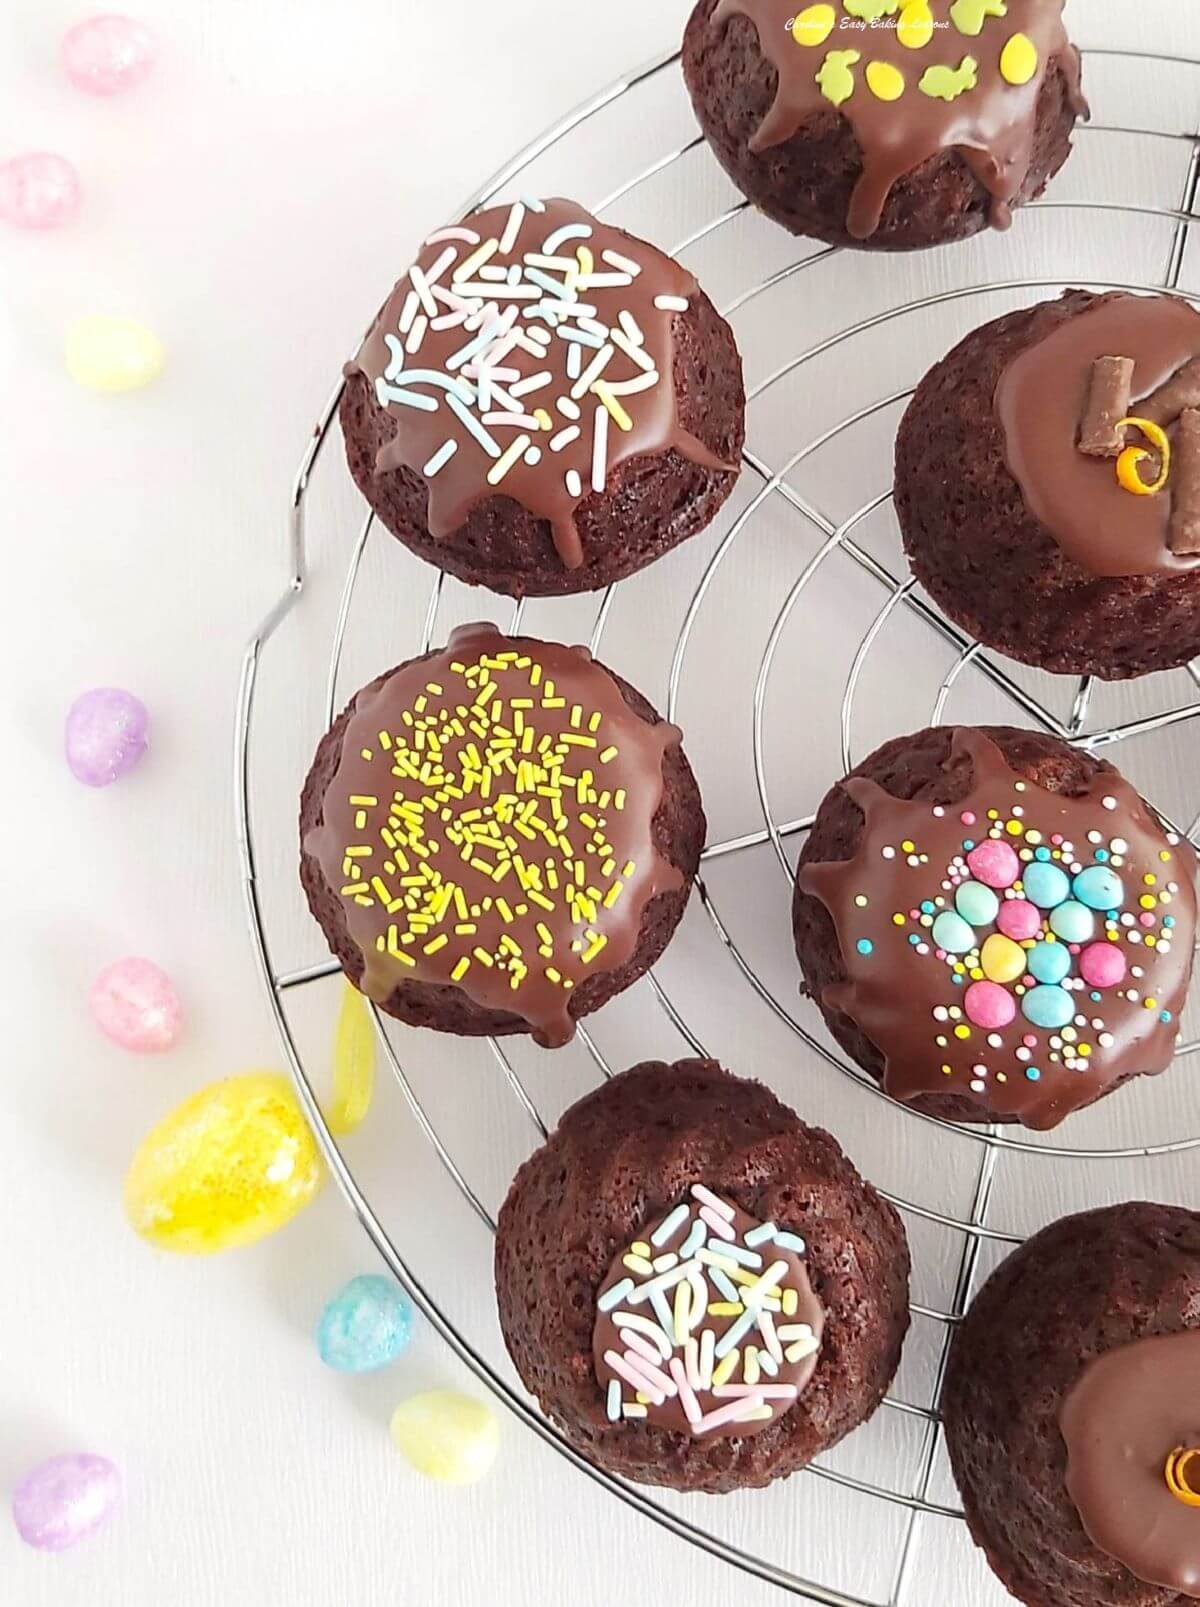
Use The Glaze On These Recipes
Try the basic sugar icing glaze, colour and or flavour and use on bakes such as those below – chocolate glaze on chocolate mini bundts. Some mini lemon drizzle poppy seed bunds. Chai gingerbread mini cakes with a chai spiced glaze or go for a mango strawberry glaze on the strawberry air fryer bundt cake.


Recipe Card
Glaze Tutorial – Icing 101

Equipment
- Digital scales or measuring cups
- Measuring Spoons (⅛-1 teaspoon)
- Small-medium bowl
- Sieve
- Metal Spoon
- Palette knife (or butter knife, optional)
- Cocktail Stick (optional)
Ingredients
For Basic Glaze:
- 125 grams Icing Sugar (1 cup, 4½ oz Powdered or Confectioners' Sugar)
- 4 tsp Water (at least 20ml, ⅔ fl oz, see notes below)*
For Pink Mango Glaze:
- 125 grams Icing Sugar (1 cup, 4½ oz Powdered or Confectioners' Sugar)
- 10 drops Mango extract (Foodie Flavours brand, optional, see below)*
- 4 tsp Strawberry Macerated liquid (or other red fruit, see notes*)
For Orange Glaze:
- 125 grams Icing Sugar (1 cup, 4½ oz Powdered or Confectioners' Sugar)
- 1½-2 tsp Orange Extract (optional but gives flavour)
- 4 tsp Orange Juice (at least 20ml, ⅔ fl oz, see notes*)
- zest of 1 Orange (optional)
Chai Spiced Glaze:
- 125 grams Icing Sugar (1 cup, 4½ oz Powdered or Confectioners' Sugar)
- 4 tsp Milk (at least 20ml, ⅔ fl oz, see below)
- 5 drops Chai Spice Extract (Foodie Flavours brand, or ½ – 1 tsp Mixed Spice (Pumpkin Spice) or Cinnamon)
Almond Glaze:
- 125 grams Icing Sugar (1 cup, 4½ oz Powdered or Confectioners' Sugar)
- ½ tsp Almond Extract
- 4 tsp Water or Milk (at least 20ml, ⅔ fl oz, see notes)
Chocolate Glaze:
- 125 grams Icing Sugar (1 cup, 4½ oz Powdered or Confectioners' Sugar)
- 3 tsp Cocoa Powder (1 tbsp)
- 4½ tsp Water or Milk (at least 22½ ml, ¾ fl oz, see notes)
Chocolate Orange Baileys Glaze:
- 1 tsp Baileys Orange truffle Liqueur (or other liqueur. Plus ingredients for chocolate glaze as above & 3/4 tsp orange extract (optional). Add the Baileys before the water/milk).
Instructions
For A Basic Thick Spreadable Glaze:
- Start by sieving the 125 grams Icing Sugar into a small-medium bowl.
- Start by adding 1 teaspoon (tsp) of the 4 tsp Water (not all at once), and mix through the sugar. It will still be dry, but only add another 1 tsp of the water. Mix in and push down on the sugar with the back of a metal spoon. Repeat this across the bowl, making the sugar take on more liquid.
- Now add ½ teaspoon (tsp) of the water and mix in well, with the back of the spoon like before. Add another ½ teaspoon (tsp), mix and add ¼ teaspoon (tsp) of the water. Repeat with the ¼ teaspoon (tsp) until you have a very thick paste-like mixture (will all be clumping together, see video or step-by-step instructions above for more visuals).
- Once at the paste-like stage, add more water in ⅛ teaspoon amounts until you have a thick but spreadable glaze. Test with a palette knife or butter knife, spreading onto some baking paper. It should spread easily with no drips.
For A Thick But Controlled Glaze:
- For a glaze that is thick, can create drips, but in a very controlled manner, make the icing as above. Then add more water (or other liquid), using a ¼ teaspoon at a time. Test the glaze by lifting some up on a spoon, high above the bowl & watching how it flows & falls. It should be thick but be able to run down slowly. if it does, but also clumps together, beat really well by hand until a steady stream.
- It will also leave a thick trail on the surface of the glaze. You can test the consistency by spreading on an upturned small ramekin & observing the slow flow (it should also not have any drips pooling at the bottom). You can also control the glaze & drips further, by using a cocktail stick to encourage it to fall where you want – for example down bundt cake groves.
For A Thick But Pourable Glaze:
- Continue adding ¼ teaspoons (tsp) at a time, mixing well in-between each addition.
- When lifted, the icing will still have a thick stream, but flow a little faster and the trail on the surface will be a little less defined & will fade after 1-2 seconds.
For A Pourable Glaze/Drizzle:
- For a thinner glaze, good for a drizzle across a traybake cake for example, add in more liquid ⅛ teaspoon at a time until you have a thinner glaze.
- It will fall quicker and in a thinner stream & the trail on the surface will vanish very quickly.
For A Very Thin Pourable Glaze:
- For an even thinner icing, that you can use to completely coat a cake before covering in something else (like coconut), thin the glaze with more liquid in ⅛ teaspoon amounts.
- The glaze will run very quickly in a very thin stream and any trail on the surface, will vanish immediately.
For A Coloured Glaze:
- If using a food colouring, add to the icing sugar before adding any liquid. Use coloured liquid such as macerate strawberry liquid, or orange juice, by adding in place of the water.
- If using zest for colour speckles, add once the glaze is prepared.
For A Flavoured Glaze:
- Add extracts to the sugar before adding any other liquid.
- For spices such as chai, add half to the sugar when sieving, & add more to taste once the glaze is ready.
For A Chocolate Glaze:
- Add the 3 tsp Cocoa Powder, sieve together with the 125 grams Icing Sugar & prepare for any thickness of glaze you require.
- Note, it will need a little more liquid because of the cocoa powder.
Using The Glaze:
- See the video for how to use the different glazes, as well as photo examples before this Recipe Card.
Storing The Glaze:
- Note that it will thicken and harden over time and need gradually thinning when you come to use it. For information on freezing icing/glaze, for up to 3 months, read FreezeIt.Co.uk's freezing icing article.
Video
Notes

 Flavouring – flavour with vanilla extract, almond, orange, lemon, mango extract. Or use some powdered spices, zest or even orange juice for the liquid.
Foodie Flavours Extracts – highly concentrated, used in drops. Recommend pineapple, mango, chai, pumpkin spice & coconut. If using other brands, use in measuring spoons. Check out Foodie Flavours website.
Flavouring – flavour with vanilla extract, almond, orange, lemon, mango extract. Or use some powdered spices, zest or even orange juice for the liquid.
Foodie Flavours Extracts – highly concentrated, used in drops. Recommend pineapple, mango, chai, pumpkin spice & coconut. If using other brands, use in measuring spoons. Check out Foodie Flavours website.

 Colouring – use food colouring (paste or gel), use macerated fruit water, jam, curd, orange juice or spices to naturally colour the glaze. SugarFlair brand are good.
Recipe Yield – hard to say in volume due to different thicknesses, but at least 130g (4.5 oz). Enough to cover the top of a 8-9″ traybake, top 12 cupcakes, (with some small drips). And the chocolate glaze is enough to fill & top 12 mini bundt cakes. Can easily be halved, double, tripled etc.
Check out the video above and the step-by-step instructions & photos, before this Recipe Card, as well as for FAQs.
Colouring – use food colouring (paste or gel), use macerated fruit water, jam, curd, orange juice or spices to naturally colour the glaze. SugarFlair brand are good.
Recipe Yield – hard to say in volume due to different thicknesses, but at least 130g (4.5 oz). Enough to cover the top of a 8-9″ traybake, top 12 cupcakes, (with some small drips). And the chocolate glaze is enough to fill & top 12 mini bundt cakes. Can easily be halved, double, tripled etc.
Check out the video above and the step-by-step instructions & photos, before this Recipe Card, as well as for FAQs.

 🎂☕Buy Me A Coffee (if you would like):
 https://buymeacoffee.com/caro.easybakinglessons
Nutritional Information – I am not a qualified nutritionist and all values are approximate. Based on making a basic glaze from icing sugar & water, no flavouring, as above & one batch. Add these amounts to your cake or cookie nutritional information, remembering to divide by the number of cakes/cookies/servings it is used on. Values calculated via MyFitnessPal.com.
Subscribe For More Recipes
Want more great recipes, tips, baking information and newsletters? Then please consider subscribing by adding your email address below. Be sure to check for a confirmation email & respond back, so you can follow me & receive your free emails. Your personal information will not be shared with a third party.
Join My Facebook Group
Why not also join my – Facebook group Easy Online Baking Lessons, dedicated to this baking lessons website, as well as providing one-on-one support with myself & my team? Be sure to answer all security questions when requesting to join.
Follow me on social media:
Happy Learning & Baking!
Caro x


Perfect Glaze 101 – Icing Tutorial
Search For Something You Fancy!
Caroline’s Easy Baking Lessons
Reference:
- Freezing glaze information from FreezeIt.Co.UK – freezing icing article. ↩︎


