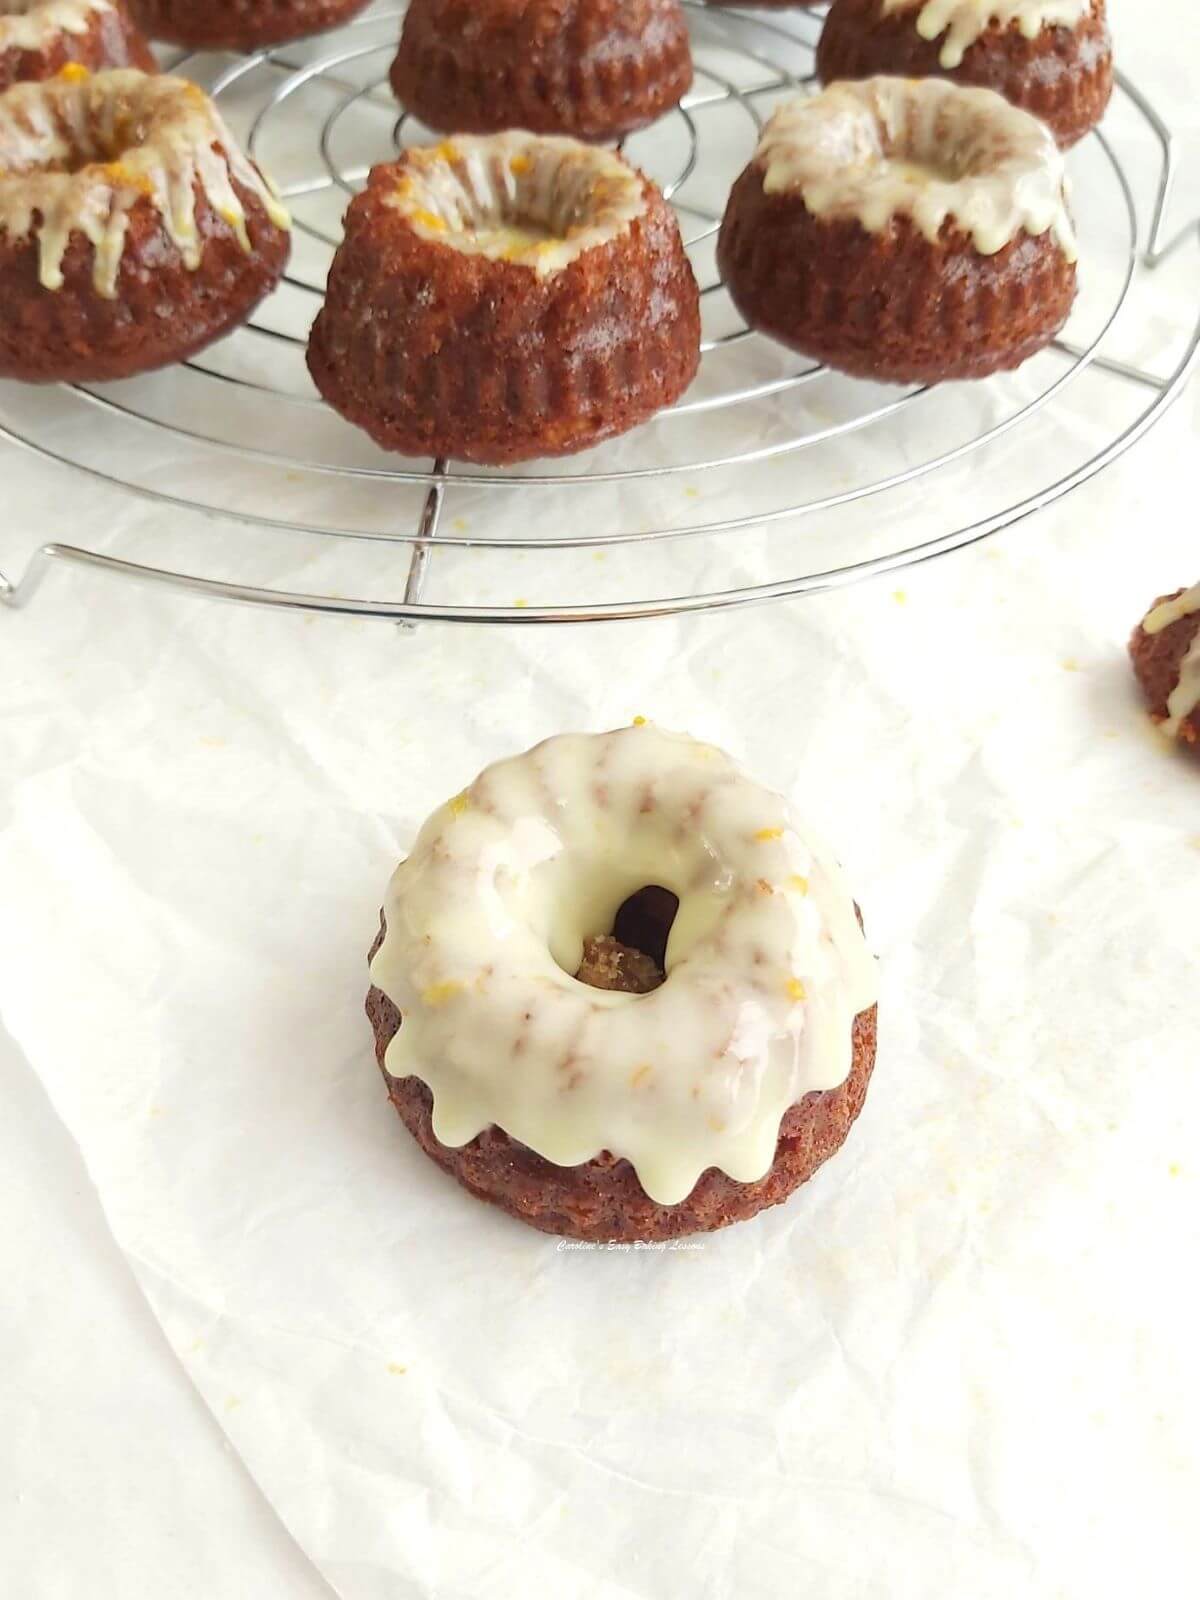
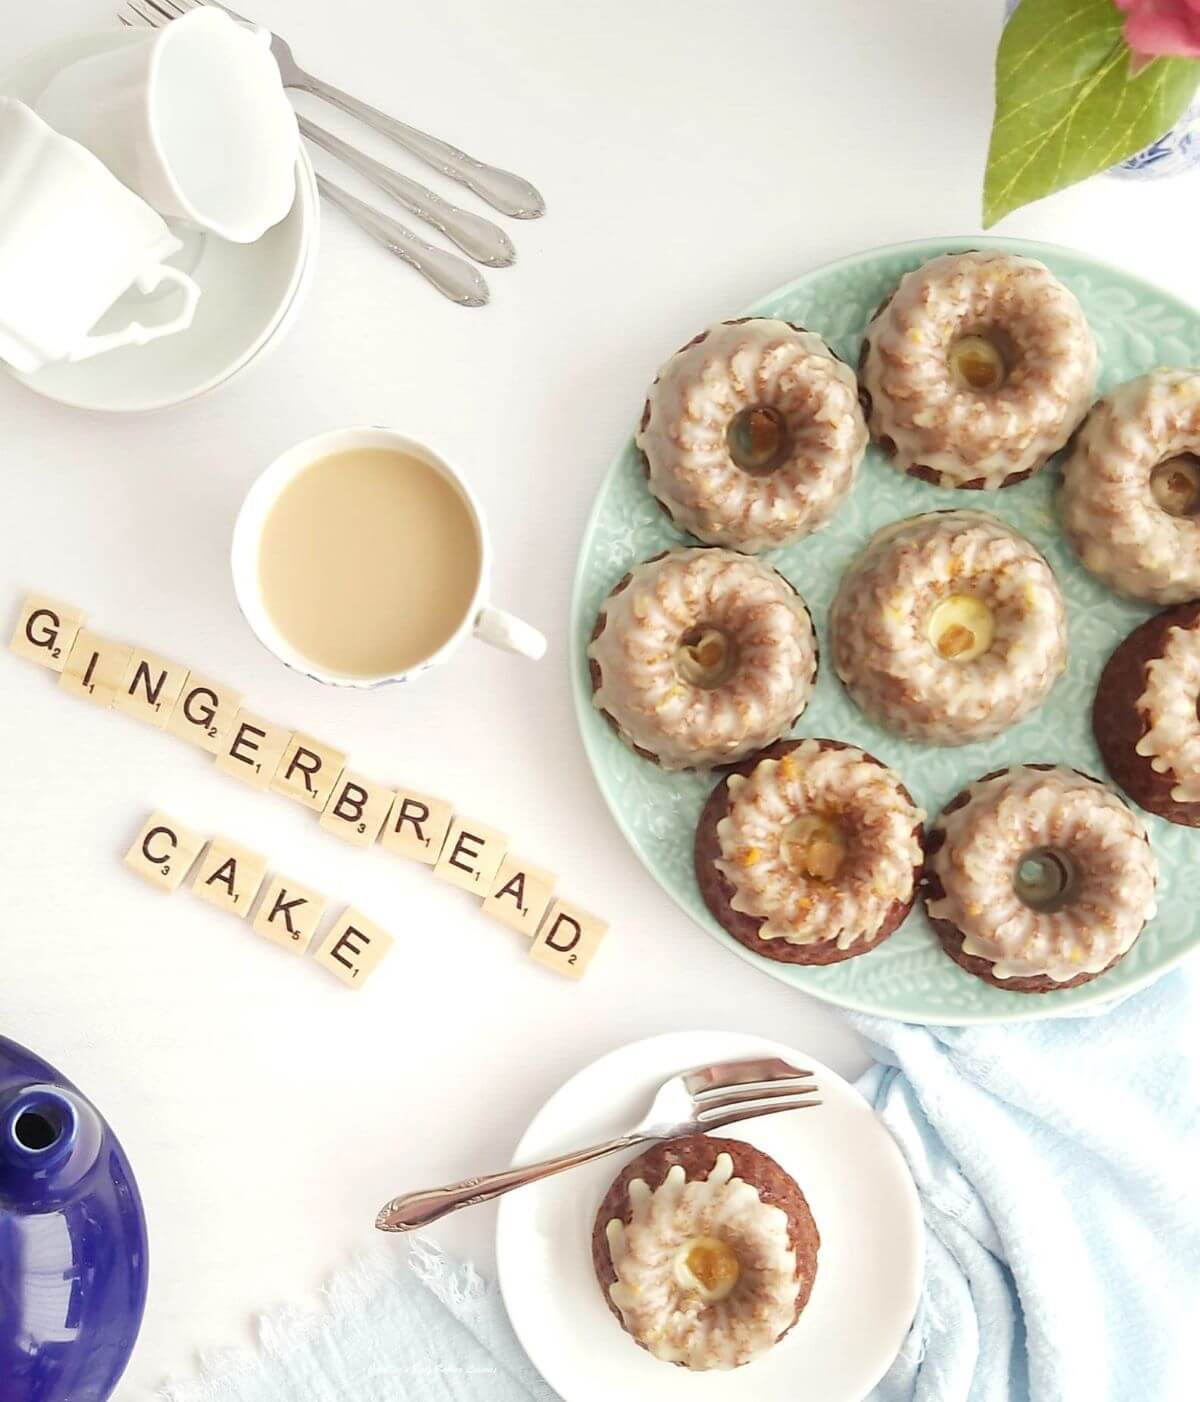
Easy Mini Gingerbread Bundt Cakes

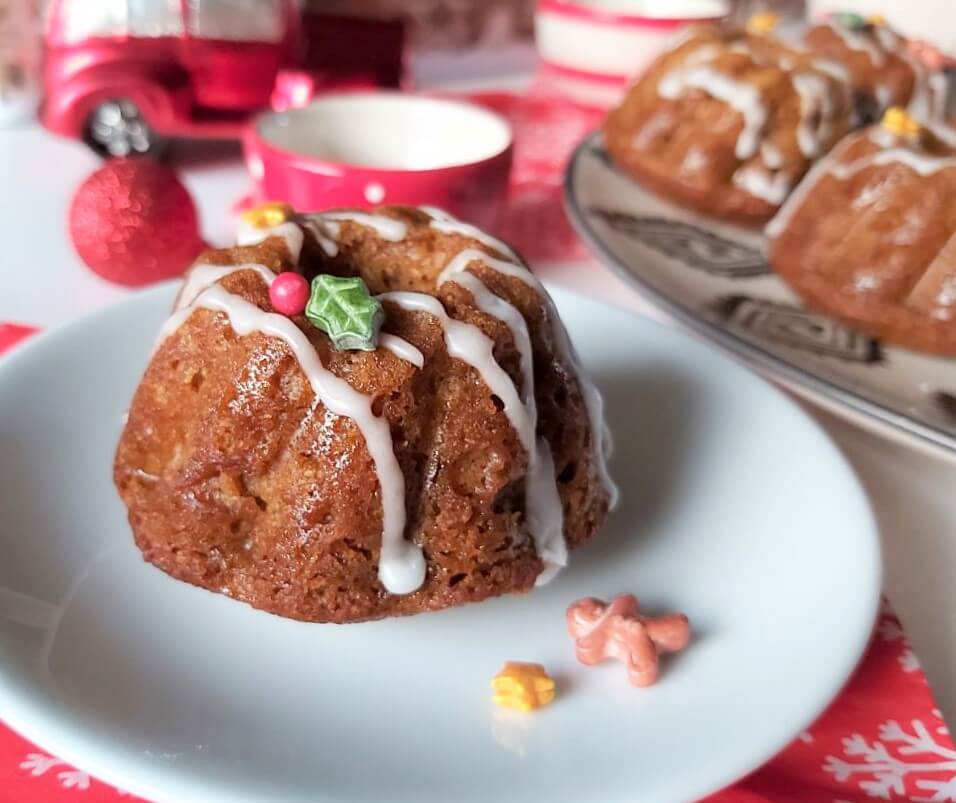
Here's my super simple version of my gingerbread cake, but made in mini bundt cases. Leave as is, or top with some orange glaze & crystalized ginger pieces for an easy but tasty sweet treat.
Easy Mini Gingerbread Bundt Cakes
**Originally posted 01/12/2019, new photos being added April 2023**


Making Gingerbread In Bundt Cases
To make sure they would work for mini silicone bundts, I altered my gingerbread loaf cake recipe slightly, so rest assured, these will work out great.

Make Anytime Of The Year
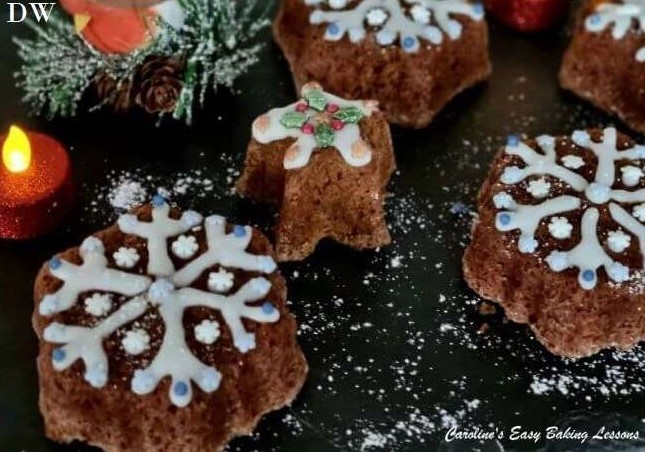
First year I made them, I decorated and set up photos at Christmas time and added some themed sprinkles. (See photo below).
You will also see they can be made any time of the year and even made in different mini tins. I tried them in silicone mini bunds (that fit nicely into cupcake trays and so hold their shape great), mini metal bundts (gifted to me by my lovely friend Christine, and are made by Tala and a good solid quality), and also mini loaf tins) also by Tala). I am in no way sponsored by Tala but recommend these, and also the silicone cases which are from Aldi.


Notes On The Ingredients
‘Is Black Treacle the same as Dark Corn Syrup (Dark Karo)?’
My recipe includes Golden Syrup and Black Treacle that are both products made here in the UK. Now I see debates about what Black Treacle is like on Facebook groups, people saying it is the same as molasses & dark corn syrup. Trust me, Black Treacle is definitely not the same as dark corn syrup. It’s closest is black strap molasses. However, there is no guarantee they will taste the same or have the same over-all effect on the baked cake. If I ever get some of that molasses sent over from the states, I will taste and do a test. In the meantime, some internet sites selling British products have this in stock and those that do, often have the Golden Syrup too. Yes, another British product. (Below is a list I compiled from readers in the states & Canada, of where to buy these).
‘Is Golden Syrup the same a Corn Syrup (Karo)?’
No, Golden Syrup is not the same as Corn Syrup or Karo Light Corn Syrup. Not same colour, consistency, taste, or how it is made.


Where To Buy Golden Syrup & Black Treacle
Black Treacle & Golden Syrup are both widely available in the UK and even shops like Aldi sell their own version of the syrup. But for bakers in the US & Canada, here is a list of where you can source these:
World Market, some Walmarts in Canada, Sobys, ‘Stop & Shop’, Wegmans, Frys (Smiths), Woodmans, Nugget Store, The Scottish Bakery, The British Store, Talin Market, Albertsons & in Dorgnacs. It is also available online at Amazon (free delivery for Prime accounts), 647-Florist.com, British Food Depot.com, UK Gourmet.us, World Market.com, Cost Plus World Market & Marina Market. (Information current at October 2019).


Now I am also told, that you can get both the Golden Syrup & Black Treacle from: Nugget Store & online from: Marina Market, UK Gourmet, British Food Depot & Amazon. So if possible, try to get both. The Golden Syrup can even be used as is on top of desserts and cakes so won’t go to waste.
**Note – you do not have to buy the brand Lyle’s for Golden Syrup. You can also get less expensive brands of that, but I don’t know of anyone else making Black Treacle.


WHY THESE INGREDIENTS ARE BEST
‘Why can’t I just use dark corn syrup & molasses?’
You can buy any substitutes you like, but just please bear in mind, that the original recipe (and this applies to recipes in general), has not been tested with those and more importantly not based and developed on those substitutes (unless otherwise stated). So there is a very good chance of differences and if for example if you are not happy with the taste or texture of a recipe, this can be because of substituted ingredients. The substitutions may also be nice, but again, unless you have actually seen and tasted how the original recipe is intended, you will never be able to say it is the exact same with these substitutions.


The Evidence Of How It Is Different
After this recipe was published, a friend from the Facebook GBBO Fans conducted a little experiment and halved the recipe. She baked half with the Golden Syrup & Black Treacle (original ingredients), and the other cake with US Grandma’s Molasses & Karo Dark Corn Syrup (substitutions). Not only was the taste different, but the colour and more surprisingly the texture was different too. Here are Jennifer’s results in her own words:
The Evidence
Comparison Of US Vs UK Ingredients For Caro’s Gingerbread Cake


“I used Karo Dark Corn Syrup in place of Golden Syrup and Molasses in place of Black Treacle in the US version.
Golden Syrup taste is just incomparable to anything I’ve ever had in the US products. It’s very similar to butterscotch, but not as heavy. Corn Syrup just does not compare at all.
Black treacle tastes very like the Sorghum or Blackstrap Molasses that my Grandfather used to love. I couldn’t get any of that, but I believe it would be a good substitute.
On oven exit, the UK cake seemed fluffier than the US one. US is much lighter in colour, and lacks the strong flavor of the UK ingredients. It’s still very good, but I would recommend purchasing UK ingredients if at all possible. The taste is just that much better.
As always with Caro’s recipes, I highly recommend“
Jennifer Jones, Facebook October 2020.
Gingerbread Cake & Traybake


Self-raisinging Flour & Plain/A.P. Flour
Other than that, this recipe is really simple with nothing technical to it. The recipe was originally written using Self-raising flour, (not US Self-rising), but I have subsequently tested it using Plain (All Purpose) flour and have listed below how much baking powder you will need if using this type of flour.
DOWNLOAD the recipe lesson – save onto your phone or computer for using or printing off later, by clicking the ‘download’ button below.
**Photo of gingerbread made in Tala, larger mini bundt tin.
INGREDIENTS
- 75g Butter, unsalted
- (2.5 oz, 1/3 cup)
- 100g Golden Syrup
- ( 3.5 oz or 1/4 cup + 1 tsp or 4 1/2 tbsp)
- 50g Black Treacle (see note above)
- (1.75 oz, 1/6 cup or 2 1/2 tbsp)
- 75g Light Brown Sugar
- (2.5 oz or 1/3 cup)
- 1 tsp Ground Ginger
- 1/4 tsp Ground Cinnamon
- 125ml Milk
- (4.25 fl oz or 1/2 cup + 1 tsp)
- 1 Medium – Large Egg
- (Large – XLarge USA)
- 1/4 tsp Bicarbonate of Soda (Baking Soda)
- 150g Self-raising Flour
- (5.25 oz) (see note above)
- ***OR 1 1/4 level Cups Plain/All Purpose plus 2 scant tsp Baking Powder
*** Makes 12 mini silicone bundts similar size to cupcakes.
For Icing/Glaze (optional
- 125g Icing/Powdered Sugar, sieved
- (4 oz or 1 cup)
- 2 tbsp Orange Juice (or water)* see notes as more may be needed
- 2 tbsp Orange Extract (or more to taste)
- 2 tsp Lemon Extract (optional)
- Crystallised Stem Ginger Pieces, chopped (optional)
- Orange Zest (from 1 whole large orange, optional for glaze &/or decoration)
- *If you want to use on mini loaves, double the icing/glaze for a full coverage.


EQUIPMENT
- Scales or measuring cups
- Measuring spoons
- Small measuring jug
- Small cooking pot
- Medium – Large mixing bowl (no need for a hand/stand mixer)
- Whisk
- Spray oil, (Frylight), Cake release spray or butter for greasing (For metal tins you can also use homemade lining paste – see instructions).
- 12 Mini cake cases – bunts, or 12 cup bundt tray/pan
- Sieve
- Medium bowl x 2
- Metal spoon
- Timer or phone timer
- Cooling rack
- Piping/pastry bag & fine nozzle or food baggie
- Baking/parchment paper
OVEN: 180c/ 160c Fan Oven/ 350f/ Gas Mark 4
Mini Gingerbread Bundt Cakes


Mini Gingerbread Bundt Cakes Video
INSTRUCTIONS


1. Place the butter, golden syrup, black treacle, sugar, cinnamon & ginger in a small saucepan and warm on medium heat until everything is dissolved and melted.
** Tip for using the syrup & treacle – spray oil on the measuring spoon and it will slip off easier. See spooning syrup video
2. Mix everything thoroughly and remove from the heat. See Photo 1. Transfer to another bowl & allow to cool while you prepare all the other ingredients. We don’t want it too hot when added to the eggs.


3. Heat the oven to 180c/160c Fan Oven/350f/Gas Mark 4.
4. Now prepare your mini bundts or mini loaf tins. I use Frylight Onecal spray (butter, olive oil or rapeseed oil all work for me), on the silicone bundts. (Tip – buy from Aldi, Lidl, Home Bargains or B&M at a better price from the bigger supermarkets).
For metal tins, I recommend making your own lining paste. It is less expensive that cake release spray, or using butter and flour. Can be used for any greasing in your baking or cooking. Read my review of lining paste and how to make it at home.
**Top Tip 2 – for mini silicone bundt cases, I pop them in a cupcake tray/sheet as they hold their shape better, and easier to manage too. See Photo 2.


5. Place the egg in a medium sized mixing bowl and whisk lightly. This ‘wakes up’ the protein in the egg and helps provide the structure of the cake. Add in the milk and bicarbonate of soda (baking soda) and whisk till all combined.
6. Add the cooled mixture you prepared first, to this milky egg mixture and stir continually until all incorporated. I just used the whisk to do this. See Photo 3.


7. Finally sieve over the flour into the mixture and beat until combined and the batter is smooth. (A few small bumps is fine). No need to get the stand /hand mixer out for this. A baking spatula and a whisk towards the end will work fine. Note that this batter will be thin and runny in comparison to some other cake batters. See Photo 4 & 5 below, or the video for consistency.


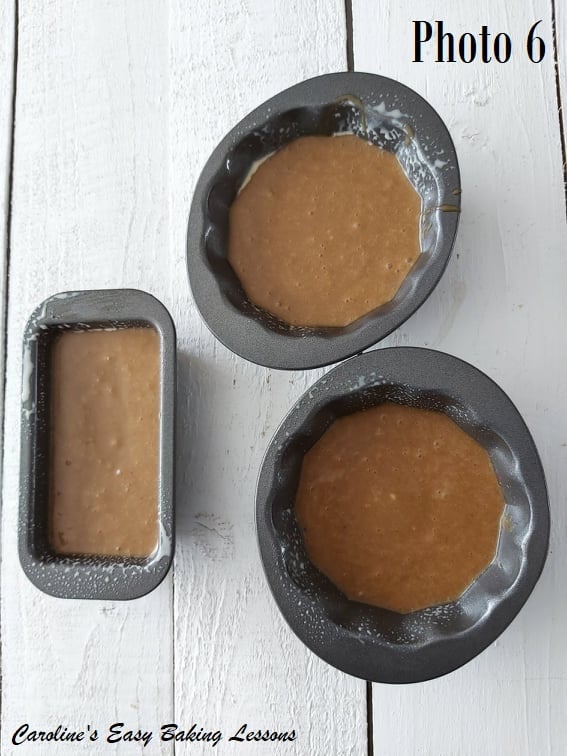
8. Now, using a small scoop or table spoon, fill the prepared bundts to about 3/4 full. In the video & Photo 5, I filled a little too much as I was making a bigger batch, and doing the large bundts and mini loves at the same time. See Photo 6 below, filled to the right capacity 🙂 But if you do fill too much, I have a trick for reducing the doming (See further down the recipe) 😉


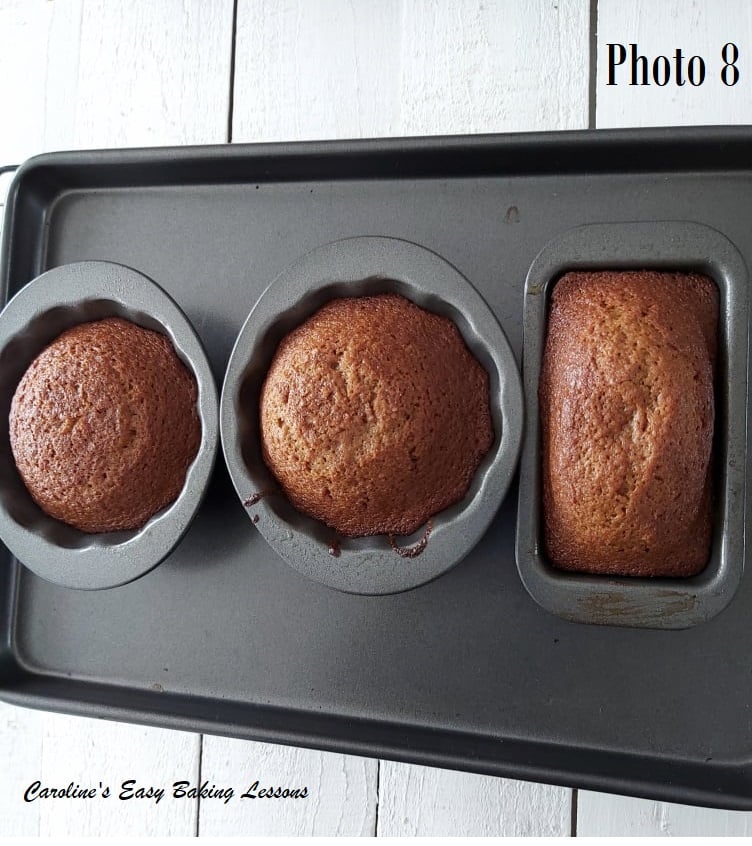
9. Bake in the centre of the oven, for about 15 – 20 minutes, until set and when you insert a wooden cocktail stick near the centre of the cake, it comes out clean of crumbs. Note if colouring too soon, cover in foil till cooked through. It will be very soft & delicate on top. See Photo 7 & 8.


10. Leave to cool still in their cases/tins, and in the cupcake tray, on top of a cooling rack for about 10 minutes. Then remove the cupcake tray and leave to cool down completely before trying to remove. See my video on me doing this. 2 top tips below for this:
Top Tip 3: For any cakes that you are cooling, place on top of a folder clean tea-towel and this will prevent ‘tell-tail’ lines on your cakes – especially noticeable in layer cakes if the top isn’t decorated.
Top Tip 4: If you over-filled or have too much doming on the top of your bundts (mini or regular size), that may making laying flat difficult, place the cakes right way up when cooling. Doing this whilst still hot, and with gravity and the weight of the cake, it will settle a bit and become flatter. Saves you trying to trim them nicely. See Photo 9.
Making The Icing/Glaze
11. While the cakes are cooling, make up your icing/glaze if you want some (believe me it’s nice without it too). Sieve the icing/powdered sugar into a medium sized bowl (otherwise you will get the sugar everywhere).


12. Add 1 tbsp of the orange juice, the orange extract (and lemon extract if using), to begin with, and mix with a spoon. Once the liquid is in, use the back of a large spoon to push down on the sugar that will keep absorbing the liquid. Keep doing so – you will be amazed at how much liquid this sugar can absorb if you keep at it. Then gradually add in more of the orange juice, 1tsp at a time and the sugar will become paste like. Keep rubbing in, & adding 1/4 tsp drops until you get a thick but pourable icing/glaze. Thick is best as it will form a nice layer and less likely to ‘melt’ into the cake completely.
To test if it’s right, hold your spoon up high above the bowl with some icing/glaze on it and point it downwards to let it drip off. You want it to run down gently. If it stays where it is, add more water a little at a time. If you have added too much water at once, sieve in more sugar and repeat until you get it right. Very gradually is the key here.
Again you can refer to my video above, but I also have a quick one showing how I make icing/glaze by hand – go to icing/glaze video.


13. Once the cakes are cooled down, it’s time to remove from the cases/tins. For the metal tins, it will just be a case of turning out and maybe giving a few taps. For the silicone cases, I like to squeeze very gently along the top edge (well bottom really & what is going to be the top of the cake). Alternatively, you can roll or turn the top edge of the cases down onto itself, exposing the cake. I prefer the first way. Here’s another quick little video below of me trying both ways.


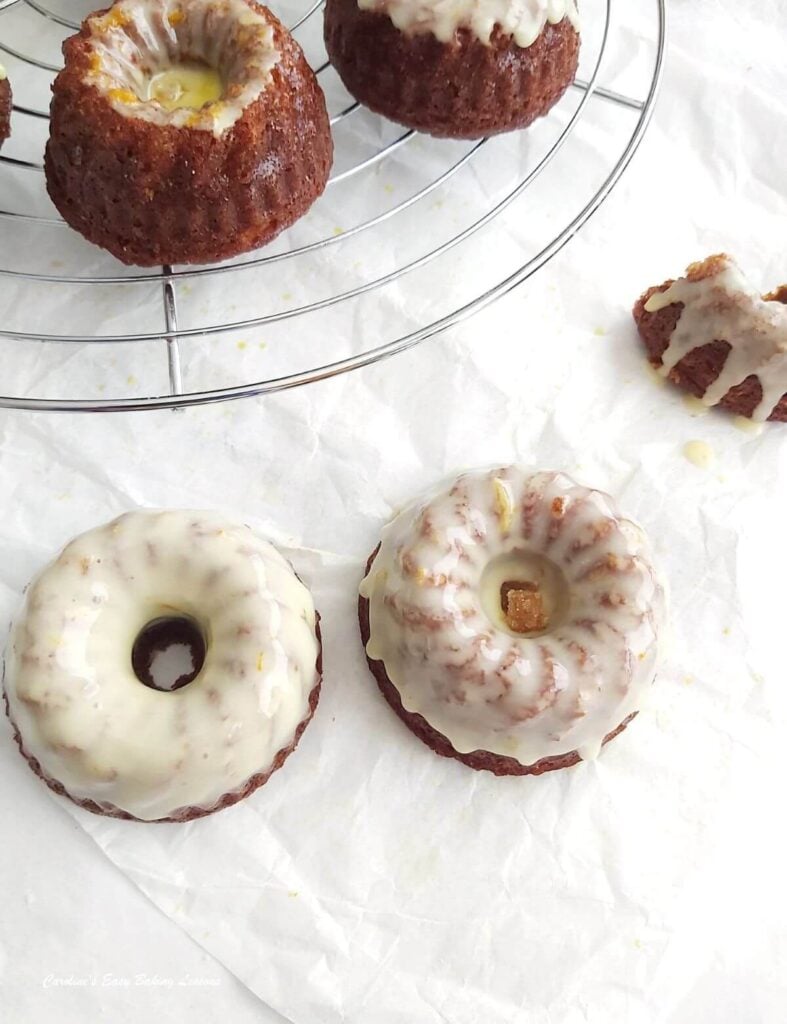
14. Once the cakes are out of their cases/tins, place on top of the cooling rack with no tea-towel this time. And place some baking/parchment paper under the rack. Then take a small spoon’s worth of the icing/glaze and hold high above the cakes. I like to start at the end/edge of the cake and draw it across the cake as the sugar drips down. Holding up high gives you a thinner drizzle. Just move your hand left and right while drizzling above the cake and do any pattern or random drizzle that you like.
You can spoon the glaze into the centre of the cake and then just add small pieces of chopped crystalized ginger, or some orange zest on top. Or continue adding a little more glaze in a ring, around the centre of the bundt.
Alternatively, you can carry on with the glaze as drips down the cake. I am not a big fan of drip cakes, and also tried completely covering the cakes too. You can spoon on or use a small piping bag or piping syringe, or even dip the cakes in the glaze. Just be very careful when dipping. Just make sure your glaze is not too thin and it will be easier to work with.


If making mini loaf versions, keep the glaze thick and spread it on, covering the whole top of the cake (be sure to increase your amount of icing/glaze for that). Starting from the middle with a thick amount and then spreading out to the edges.
It should set up in minutes if the room isn’t too warm. You can also do a neater finish and drips to the bundts, by piping it on, using a tiny nozzle (#1). Here’s a piping glaze video on how to do this in a few different ways.


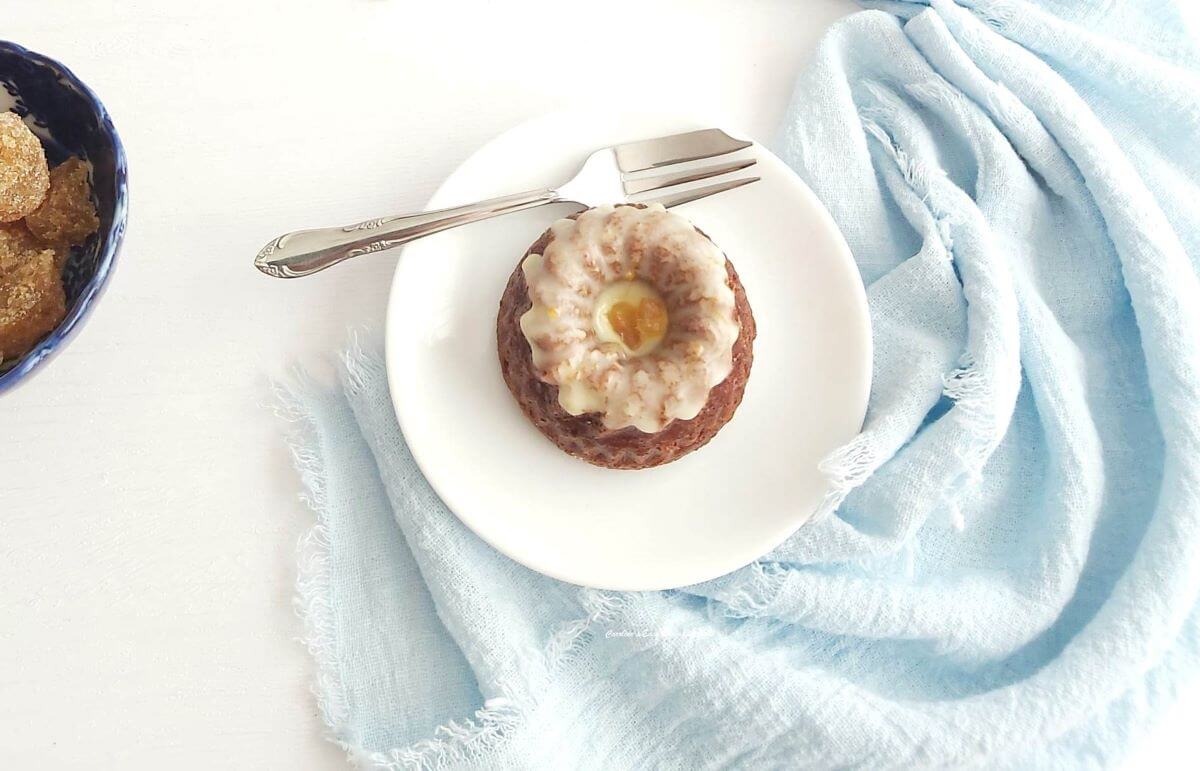
15. Add some chopped crystalized ginger if you like, to the centre of the bundts, as well as some orange zest if you like & let the glaze set (dry to touch). Enjoy!
16. Store in an airtight container for at least 7 days, or cake stand & dome, for at least a few days. (I use cake tins for most of my bakes). Note Gingerbread cake will improve with taste after the first day or 2 and become stickier.
Can be frozen (with/without the glaze). Store multiple cakes in a plastic airtight container, wrapped in cling film/plastic wrap, with paper in-between if stacked. Alternatively, for single bundt cakes, wrap in baking/parchment paper, then cling film/plastic wrap or foil & a food bag on top. This will prevent freezer burn & stop the cake taking on any odour from other foods in the freezer. Date and label the bag – and will be good for about 2 months. (Tip – scrunch the paper into a ball, then flatten out and use, and will be easier to wrap the mini bundt). Thaw at room temperature (or in the fridge overnight).
DIFFICULTY LEVEL: Super simple, beginner


Readers’ Pics
Here’s some of my mini gingerbread bundt cakes made by my readers. (Shona A, Sally N & Diana W included, as well as Shona McA’s Tala mini bundt tins, same as mine). I think their cakes look amazing!!


Join My Facebook Group
Why not also join my Easy Online Baking Lessons Facebook group – Easy Online Baking Lessons, dedicated to this baking lessons website, as well as providing one-on-one support with myself & my team? Be sure to answer all security questions when requesting to join. Click to join the Facebook group.
Share The Love
Please see the sharing options or even printing, at the right/bottom of your screen (bottom of your screen for mobiles, and down the right-hand side on computers). You can even pin this to your own Pinterest page. Alternatively, you can download this article, see below. You could also leave some feedback if you like.
Click the ‘Download’ button below, to save to your phone or computer.


Make A Large Bundt Cake
Diana wanted to make gingerbread in her fancy Nordic Ware bundt pan, so I did the maths and came up with 2 options. Triple this mini bundt recipe and that is enough for a 10 cup bundt tin/pan plus 12 mini bundts. Double the recipe for just the 10 cup bundt cake.
Use homemade lining paste (cake goop), and the cake comes out perfectly and all in one piece, from even the most detailed bundt tin. For silicone bundts I recommend cooking spray or cake release spray.
Don’t you just love Diana’s gingerbread bundt cake? Such an impressive bake, that really does not require any decorating and looks great as it is.
British Mini Gingerbread Bundt Cakes With Orange Glaze

Equipment
- Scales or measuring cups
- Measuring Spoons
- Small measuring jug
- Small Cooking Pot
- Medium mixing bowl
- Hand Whisk
- Spray oil, Cake release spray or butter for greasing (For this cake I used Frylight spray, & for metal bundt tins you can also use homemade lining paste/cake goop )
- 12 Mini Bundt Cases/Tins (Silicone or metal, or a 12 cup mini bundt tray/pan)
- Sieve
- Medium bowl x 2
- Metal Spoon
- Timer or Phone Timer
- Cooling rack
- OVEN: 180°c/160°c Fan Oven/350°f/Gas Mark 4
Ingredients
- 75 grams Butter, unsalted (2½ oz, ⅓ cup – no need to soften)
- 100 grams Golden Syrup (3½ oz or ¼ cup + 1 tsp or 4½ tbsp)* see notes & before recipe for tips
- 50 grams Black Treacle (1¾ oz, ⅙ cup or 2½ tbsp, see notes)
- 75 grams Light Brown Sugar (2½ oz or ⅓ cup)
- 1 tsp Ground Ginger
- ¼ tsp Ground Cinnamon
- 125 ml Milk (4¼ fl oz or ½ cup + 1 tsp)
- 1 Medium or Large Eggs (Large or Extra Large size US)
- ¼ tsp Bicarbonate of Soda (Baking Soda)
- 150 grams Self-raising Flour (5¼ oz) see note above
- OR 1¼ level Cups Plain/All Purpose plus 2 scant tsp Baking Powder (be sure to also add the Bicarb/Baking Soda above too)
For Orange Icing/Glaze (optional)
- 125 grams Icing/Powdered or Confectioners’ Sugar, sieved (4½ oz or 1 cup)
- 2 tbsp Orange Juice (or water)* see notes as more may be needed
- 2 tbsp Orange Extract (or more to taste)
- 2 tsp Lemon Extract (optional)
- Orange Zest (from 1 whole large orange, optional for glaze &/or decoration)
- Crystallised Stem Ginger Pieces, chopped (optional)
Instructions
- Warm the butter, golden syrup, black treacle, sugar, cinnamon & ginger in a small saucepan, on medium heat until dissolved & melted. (** Tip for using syrup, treacle or molasses – spray oil on a measuring spoon first & it will slip off easier. See Photo 1 from using Frylight cooking spray.) Mix thoroughly, remove from the heat & leave to the side to cool.


- Meanwhile prepare the mini bundt cases/tin. I recommend Frylight Onecal spray (butter, olive oil or rapeseed oil all work for me), on the silicone or metal bundts. You can also use homemade lining paste/cake goop on metal mini bundts, but spraying is much quicker for bundts. Alternatively grease with butter and flour. (**Top Tip – for mini silicone bundt cases, put in a cupcake tray/sheet as they hold their shape better, and it is easier to manage too.
- Heat the oven to 180°c/160°c Fan Oven/350°f/Gas Mark 4.
- Add the egg to a medium bowl & whisk lightly to activate the protein & help provide structure for the cake. Then whisk in the milk & bicarbonate of soda (baking soda), till all incorporated. Followed by the slightly cooled syrup mixture, stirring continually until combined.
- Sieve the flour (& baking powder if using Plain/All Purpose Flour), over the mixture & beat until combined. Use a hand/stand-mixer & there will be less lumps, but a few is fine, in this thin cake batter.
- Spoon the cake batter evenly into the prepared mini bundt cases/tin. You are looking for about ¾ full. Finally tap the tin on the counter/worktop a few times to expel any trapped air.
- Bake in the centre of the oven, for about 15 – 20 minutes, until set, a deep golden colour, & a wooden cocktail stick comes out clean of crumbs. Mine were fully baked after 18 minutes.

- Leave the mini bundts in the tin/cases, and place on a cooling rack for about 10 minutes. Remove the silicone bundt cases from the cupcake tray (if using), and leave to cool down completely before trying to remove. See my video on me doing this. Top Tip: If you over-filled your bundts (mini or regular size), that may be making sitting flat difficult, place the cakes right way up when cooling. Doing this whilst still hot, and with gravity and the weight of the cake, it will settle a bit and become flatter. Saves you trying to trim them.


Make The Icing/Glaze
- While the cake is cooling, make the icing/glaze if you are using. First sieve the icing/powdered sugar into a medium sized bowl. Before adding in a tbsp of orange juice, the orange extract (and lemon extract if using) and mixing well with a spoon. Push down on the sugar to take on the moisture, before adding anymore juice, and very gradually in 1tsp, then ½ tsp amounts till you have a thick but pourable glaze. Watch my quick 10 second video showing how the glaze will fall. Finally add some orange zest to the glaze, holding some back to decorate if you want.

- Once the cakes are cooled, you might need to push a wooden cocktail stick through the hole within the centre of the bundt tin (example being Tala bundt tray), before releasing the cakes. They should pop out, some might need tapping, & some silicone cases may require you to peel the cases down and over, to release the cakes.

Decorating The Bundt Cakes
- Decorate the cakes with the prepared orange glaze, on some paper, or on top of the cooling rack, with paper underneath. See the post before this recipe card for a video on different ways to glaze the bundts. You can spoon the glaze into the centre of the cake and then just add small pieces of chopped crystalized ginger, or some orange zest on top. Or continue adding a little more glaze in a ring, around the centre of the bundt.

- Alternatively, you can carry on with the glaze as drips down the cake. I am not a big fan of drip cakes, and also tried completely covering the cakes too. You can spoon on or use a small piping bag or piping syringe, or even dip the cakes in the glaze. Just be very careful when dipping. Just make sure your glaze is not too thin and it will be easier to work with. See my Glaze consistency video above. Leave the glaze to set before serving or storing.

Storing & Freezing
- Store in an airtight container for at least 7 days, or cake stand & dome, for at least a few days. (I use cake tins for most of my bakes). Note Gingerbread cake will improve with taste after the first day or 2 and become stickier.

- Can be frozen (with/without the glaze). Store multiple cakes in a plastic airtight container, wrapped in cling film/plastic wrap, with paper in-between if stacked. Alternatively, for single bundt cakes, wrap in baking/parchment paper, then cling film/plastic wrap or foil & a food bag on top. This will prevent freezer burn & stop the cake taking on any odour from other foods in the freezer. Date and label the bag – and will be good for about 2 months. (Tip – scrunch the paper into a ball, then flatten out and use, and will be easier to wrap the mini bundt). Thaw at room temperature (or in the fridge overnight).

Video
Notes

 Black Treacle, Golden Syrup & Corn Syrup Debate – Read more about Black Treacle & Golden Syrup, before this recipe card. As well as an experiment & why it does not taste as good with substitutes like light & dark corn syrup. Also included is where you can buy these British products if you are in the US/Canada. Lyles brand of Golden Syrup is not essential (other brands are available), & you can use black strap molasses instead of Black Treacle.
Any milk is fine & dark brown sugar or coconut sugar would also work. Artificial sweeteners are not recommended.
Black Treacle, Golden Syrup & Corn Syrup Debate – Read more about Black Treacle & Golden Syrup, before this recipe card. As well as an experiment & why it does not taste as good with substitutes like light & dark corn syrup. Also included is where you can buy these British products if you are in the US/Canada. Lyles brand of Golden Syrup is not essential (other brands are available), & you can use black strap molasses instead of Black Treacle.
Any milk is fine & dark brown sugar or coconut sugar would also work. Artificial sweeteners are not recommended.
 When using Plain (All Purpose) flour in replace of UK Self-raising, make sure to add the baking powder, as well as the bicarbonate of soda (baking soda).
Glazing Day After –You can wait to glaze the baked mini bundt cakes, a day or two later, if stored in the tin. Leave out at room temperature to cool completely, before closing in a tin. Don’t put in the fridge, as condensation will occur & wet the cake.
**Note gingerbread cake will improve in taste after a day or 2, and become stickier. So ideal to place on some paper.
When using Plain (All Purpose) flour in replace of UK Self-raising, make sure to add the baking powder, as well as the bicarbonate of soda (baking soda).
Glazing Day After –You can wait to glaze the baked mini bundt cakes, a day or two later, if stored in the tin. Leave out at room temperature to cool completely, before closing in a tin. Don’t put in the fridge, as condensation will occur & wet the cake.
**Note gingerbread cake will improve in taste after a day or 2, and become stickier. So ideal to place on some paper.

 Variations On The Recipe
This mini gingerbread bundt cakes recipe can also be used to make 6 cakelets (see below). Or, why not try one large 10 cup bundt cake by doubling the recipe. Triple and you can have the large bundt and 12 mini bundts. Photo below. See my slightly different recipe for making Gingerbread Cake in loaf form above.
Variations On The Recipe
This mini gingerbread bundt cakes recipe can also be used to make 6 cakelets (see below). Or, why not try one large 10 cup bundt cake by doubling the recipe. Triple and you can have the large bundt and 12 mini bundts. Photo below. See my slightly different recipe for making Gingerbread Cake in loaf form above.

 For more information of process photos, please see before this recipe card.
More cakes on my Cake Recipes Page, or try my Christmas Recipes Page
Get some ideas & recipes for Food Gifting your homemade treats.
For more information of process photos, please see before this recipe card.
More cakes on my Cake Recipes Page, or try my Christmas Recipes Page
Get some ideas & recipes for Food Gifting your homemade treats.

 Fan of GBBO (Great British Baking Show)? Learn more about differences in UK & US baking ingredients, or view, save & print my common baking ingredients conversion table. Includes gram, ounce & cup measurements. (Note all are hand measured by myself during recipe development & testing).
Occasionally I accept new members to Facebook group ‘Great British Bake Off Fans’. Or join my Facebook group ‘Easy Online Baking Lessons’ to accompany this lesson website.
Fan of GBBO (Great British Baking Show)? Learn more about differences in UK & US baking ingredients, or view, save & print my common baking ingredients conversion table. Includes gram, ounce & cup measurements. (Note all are hand measured by myself during recipe development & testing).
Occasionally I accept new members to Facebook group ‘Great British Bake Off Fans’. Or join my Facebook group ‘Easy Online Baking Lessons’ to accompany this lesson website.

_____________________________________________________________________________
***I am not a qualified nutritionist, and all nutritional values are based on a serving of 1 mini bundt cake, and an even share of glaze, (from a batch of 12 as per recipe above).. Bigger or smaller bundt & more or less glaze, & the nutritional values will change. All values from Whisk.com & freecaloriechart.uk


Gingerbread Cakelets
The beautiful photos here are by reader Diana Watkins. Diana used a Nordic Ware snowflake cakelets pan, & greased with Homemade Lining Paste (Cake Goop) & used my Mini Gingerbread Bundt Cakes recipe, for some festive holiday mini cakes! They look just perfect, with the glaze detailing on top. Great job Diana!
Try my original Gingerbread Cake recipe in loaf form or Chai Spice Gingerbread Mini Cakes (below)


Follow me on social media:
Thanks for reading
Happy Learning & Baking!
Caro xx


Leave some feedback below
Easy Mini Gingerbread Bundt Cakes
Caroline’s Easy Baking Lessons


My family love gingerbread so came across this recipe where you could make mini cakes. Everything was explained and they are delicious. Thank you again for a great recipe.