Raspberry Coconut Sponge Squares – Air Fryer or Oven

This is my take on old-school classic British bake Raspberry Coconut Sponge Squares. A super simple beginner recipe consisting of a light cake sponge topped with raspberry jam and cococonut, it can also be made in the air fryer to save you energy & money.
RASPBERRY COCONUT SPONGE SQUARES
-Air Fryer Or Oven
Sweet Lesson No.1
*Original posted 17/08/18, updated photos 12/06/24*
Old School Raspberry Traybake


**Click link to jump to section**


What Are Raspberry Coconut Sponge Squares?
Old school raspberry coconut sponge squares are a classic British bake, consisting of a light airy sponge cake layer, topped with raspberry jam & desiccated coconut, baked in a square or rectangular tin and cut into square cake slices.
Often served in school canteens/cafeterias, this memorable cake of British peoples’ childhood, is often served with custard. (*See my homemade pastry cream recipe and make a little thinner).


Why Make This Recipe?
- Memorable childhood cake
- Easy to make
- Step-By-Step Instructions & photos
- No special ingredients (pantry staples & dairy)
- No special equipment
- Bake in oven or air fryer
- Use air fryer & bake in hotter Summer months
- No special baking skills required
- Can be made ahead
- Lasts several days
- Introduction to cookie/biscuit making
- Easy & quick to make & a beginner’s recipe
- Taste great
- Adjust the flavour/inclusions
- Video Tutorial
Find more energy & money-saving recipes & tips in my Baking On A Budget Series.
Ingredients & Substitutions


Raspberry coconut sponge squares are made from basic pantry staples with some dairy:
- Butter
- Sugar
- Eggs
- Flour
- Baking Powder
- Vanilla Extract
- Raspberry Jam
- Desiccated Coconut
**Note ingredient amounts are listed in the Recipe card).
Eggs
Medium to large eggs are used, US/Canadian equivalent is large to extra large size. *If you have your eggs stored in the fridge, make sure they are at room temperature before using (so remove when softening the butter).


Butter
Unsalted butter should always be used in baking unless otherwise stated. The amount of salt in salted butter varies from brand to brand. Salted butter contains a higher percentage of water content which in some cases can change the end result of your bake.
Sugar
Like most of British baking, Caster Sugar is the sugar of choice. Caster sugar is finer than granulated sugar, but not as fine as icing sugar (powdered sugar) – see my comparison photo below of UK sugars. The best equivalent for Caster sugar is US Extra/Super Fine sugar.
You can make your own Caster sugar by lightly processing or blitzing regular granulated sugar. Just note that US granulated is slightly smaller granule size than UK granulated, so only process slightly.


“Why Use caster Sugar?”
I am often asked the question “why must we use Caster Sugar instead of granulated sugar?”


Unless the sugar is being melted, (say to make a drizzle), caster sugar is not just there to provide sweetness & moisture, but also to create friction when creaming with the butter. This process of rubbing with the smaller sugar crystals, creates friction which in turn produces air pockets. It is these air pockets that give a nice rise and light texture to your cakes. A prime example of this is another British classic bake – Victoria Sandwich Cake, as seen in the photo.
For meringues & macarons I would always advise on using fine sugar (Caster/Super Fine sugar), again because of the reactions that occur. For most cakes, they will still bake off nicely when using granulated sugar, but not be identical to the original cake or how it was intended by the recipe developer. And you should always bear this in mind if your bake does not turn out the same, even if you made the smallest or alterations.


Flour & Baking Powder
Many British recipes use UK Self-raising flour. Not to be confused with US Self-rising flour, that a slightly different proportion of baking powder. You can also make this recipe using Plain/All Purpose flour, but don’t forget to add the extra baking powder. Details are in the Recipe Card below.
**Note ALL of my recipes provide details on how to use with both flours. And I tend to use slightly less baking powder than generally recommended. And my reasoning behind this is because I believe UK Self-raising flour is loosing some of its rising-powder when stored in the shops in paper bags. This is also why you are best to store your flour in air-tight containers as soon as you get them home. You can read more about Differences Between UK & US Baking Ingredients in my article.


Coconut
Desiccated coconut is a pantry staple for UK bakers and can be easily found. The US equivalent is unsweetened shredded coconut. However, this coconut is in larger pieces, so to look more like the UK version, you can lightly chop or even process if you are processing the sugar. See my comparison photo. Love coconut and raspberry? Check out my Coconut & Raspberry Article with more recipes to try.


Raspberry Jam
The classic old school version of this recipe typically uses raspberry jam, or raspberry conserve. You might need to thin just a little if spreading is difficult, but you want to add plenty. Alternatively, your favourite jam can be used. Raspberry pairs great with the coconut, as does blueberry jam (or blueberry curd), strawberry jam, plum jam, or apricot jam.
Tin Size
This recipe has been developed for a square 23cm/9” tin (about 3.75cm/1.5” deep). However, a rectangular tin, with a width & length when combined does not exceed 46cm/18” will be fine. Any wider/longer and the cake will be way too shallow. Example is a 30½ x 15¼ cm, 12 x 6” pan. For how to use different sized round cake tins for other recipes, see my How To Reduce A recipe article, or the Increasing A Recipe article.
If your cake tin does not fit your air fryer, bake as normal in a conventional oven.


Air Fryer Or Oven
This recipe was originally developed using a conventional oven, regular or fan oven. But has further been tested in an air fryer. Due to the size of the recipe and 9″/23cm tin, it works in an open-front air fryer. Like a mini counter-top oven. If your air fryer has a rectangular drawer (with length + width not more than 18″/46cm, you could try this. But would recommend using a container/tin inside the air fryer drawer/basket and elevated to allow the flow of air underneath too.
You could also reduce the recipe if you wanted to use a smaller square tin for your air fryer. A 6″/15.25cm square cake pan would need just ⅔ of the cake batter. Simply multiply all the ingredients by 0.66. Learn more in my How To Reduce A Cake Recipe article. Check out my Cello double air fryer review.


Recipe Yield
This recipe makes a traybake (or squares), where you can cut square pieces, for a resulting yield of 16 pieces. One serving is calculated as 1 cake square/piece, of 16 pieces, using all the ingredients listed.
ALL RECIPES CONVERTED & TESTED
All my recipes include conversions from grams to ounces and cups. Note that they have all been calculated by hand, by myself and tested several times, since Google is often inconsistent and inaccurate. But I also have a conversion table, with common baking ingredients for you to refer to my Baking Conversions Table.
Lessons Bakers
Beginner Bakers, please ALWAYS read the recipe directions a few times before even attempting to make the recipe. Often things like butter or eggs need to be taken out to bring to room temperature.
Step-By-Step Instructions


1. Begin by cubing your butter into small pieces to make softening much quicker. (About 1cm or ⅓” size cubes/rectangles). See Photo 1. This smaller surface area results in the butter coming to room temperature faster. Make sure to remove eggs from the fridge too if you store them there in your country.
2. Once the butter is softened, add to a stand-mixer bowl, or medium mixing bowl & beat with mixing attachment (‘K-paddle‘ for stand-mixers, not the balloon whisk that is for whipping eggs or cream). Beat a little until butter cubes break up, before adding the Caster sugar.
‘Cream’ the butter & sugar together till light, smooth & paler in colour. ‘Creaming’ is a term used for beating softened butter & sugar and is a method for incorporating air into your batter that results in a lighter cake. See Photo collage 1.


3. Next add in the eggs, on at a time, and beat briefly until incorporated. Don’t worry if the batter looks a little ‘curdled’ or split. The cake will turn out ok. Beat in some Vanilla Extract* (or orange extract), just until combined.
4. Turn on the oven or air fryer to pre-heat to a temperature of: 190°c/170°c Fan Oven/375°f/Gas mark 5.
**If your oven takes longer to come to temperature, turn on earlier.
5. Place a sieve over the mixing bowl and add in the flour & baking powder (**remembering to add the 2 amounts of baking powder if using Plain/All Purpose Flour).


6. Mix the flour briefly by hand, before making a well in the centre of the batter, and gradually adding in the milk. See Photo 3.
7. Start to mix on slow speed to begin with, and mix only until the flour is incorporated, being sure not to over-mix as this can produce a dense cake.
** Make sure to stop and scrape the batter from the sides of the bowl as you mix.
See Photo collage 3.


8. Prepare the cake tin by greasing & paper lining the bottom and up the sides.
I like to use Frylight cooking spray, or my homemade lining paste (cake goop) to hold the paper in place.
I strongly advise on cutting baking/parchment paper to fit the cake tin (for any cakes), as you use less paper and the paper will not fall into the batter as it bakes.
To cut for square or rectangular tins, place on top of the paper, & cut enough paper for the width of the tin, & to go up the sides of the tin. Then draw lines where the corners are (or free-hand like I do), and cut out the squares at the 4 corners like in Photo 4 (2nd pic). The result will be a thick ‘cross-like’ shape. Simply place into the greased tin and smooth out. You can trim any overhanging excess or clip in place with some metal bull-dog clips if you have them. See Photo 4.


9. Spoon the cake batter into the tin, evenly spread out till flat and level as best you can with the back of your spoon. See Photo 5.
10. Give the cake tin a few taps on the worktop/counter to expel any trapped air and pop into the centre shelf of your oven (or open-front air-fryer), and bake for about 15 minutes – 18 minutes.
11. The cake should be a golden colour (and you can turn the cake tin around after 10 – 12 minutes if your oven does not bake evenly.) See Photo 6 below.


The cake is ready when springy to touch, the sides of the cake are starting to come away from the sides of the cake tin and a cocktail stick will come out clean of crumbs.
12. Leave in the tin, placed on top of a cooling rack for about 15 – 20 minutes. Meanwhile prepare your topping, by thinning the jam/preserve if too thick to spread.
13. Spread a generous layer of the jam on top of the cake before sprinkling on an equally generous layer of the coconut. Leave for about 20 minutes until the cake is cooled sufficiently to slice. See Photo 6 & Photo 7 below.


14. Cut the cake into 4 equal long strips, before rotating the tin 45 degrees and cutting 4 more long strips, to make 16 squares of cake.
15. Serve as is with your favourite tea or coffee, or old-school with some homemade custard. See my Pastry Cream recipe and just cook a little less to make a thinner custard-like consistency and eat warm or cold with the cake.
16. Store the cake slices on the paper you used, inside a cake tin or cookie tin (metal is best). Or other airtight container and store at room temperature (not the fridge), for about 3 days.


17. The baked and cooled sponge cake can be frozen but I have not tried freezing the topping. Wrap the cooled cake in cling film/plastic wrap and store at room temperature for up to 3 days if topping later, or add a food bag on top and freeze for 3 months1.
Lessons Bakers- Next Step
Beginner bakers completing the lessons, please read the step-by-step instructions again before attempting to bake. Save the Recipe Card below but refer back to the detailed instructions & notes, as the Recipe Card is an abbreviated version of the recipe.
After completing this lesson, proceed to Theory Lesson No.2 – Alternative Baking Equipment, before attempting Savoury Lesson No.1 – 30 Minute Yeast-free Cheesy Bread (that can also be made in the air fryer).
Recipe Card
RASPBERRY COCONUT SPONGE SQUARES -Air Fryer Or Oven

Equipment
- Scales or measuring cups
- Measuring Spoons
- Hand Mixer or Stand Mixer (or wooden spoon, bowl & hard work).
- Sieve
- Spray Oil (Frylight, cake release, lining paste/cake goop or butter for greasing)
- Baking/parchment paper
- Square baking tin: 23x23cm (9" x 9") (Or rectangular tin up to 30½ x 15¼ cm (12 x 6 inches), but no more than a total of 18"/46 cm when you add the length and width.*)
- Cooling rack
- Timer or Phone Timer
- OVEN: 190c/Fan oven 170c/375f/Gas Mark 5
Ingredients
- 113 grams Butter, unsalted (4 oz, 1 stick, ½ cu, softened & cubed)
- 113 grams Self-raising flour* (4 oz, OR 1 Level cup A.P./Plain Flour plus 1½ tsp Baking Powder)* See notes.
- 113 grams Caster sugar (4 oz, ½ cup Extra/Super Fine Sugar* see notes)
- 1 tsp Baking powder
- 2 Eggs (med-large, large-XLarge US/Canada)
- 75 ml Milk (5 tbsp, 2½ fl oz)
- 10 – 13 tbsp Raspberry jam/jelly/preserve (About 170g, 6 oz, ½ cup. May need thinning slightly to spread)
- 29 grams Desiccated Coconut (1 oz, ⅓ cup. – US larger, unsweetened, shredded coconut is fine too, just lightly chop it)*
- * Denotes see note section
Instructions
Prepare Cake Batter
- Cube & measure out the butter to pieces about 1cm or ⅓” size for quicker softening. Make sure to bring eggs to room temperature too.
- Cream the butter & caster sugar together till smooth and lighter in colour.
- Add eggs one at a time & beat well in-between each addition. Then add in the vanilla extract or orange extract & beat just till combined.
- Pre-heat oven (or air fryer if required) to: 190°c/170°c Fan Oven/375°f/Gas mark 5.
- Sieve over the flour, baking powder (2 amounts if using Plain/A. P. flour) & briefly mix by hand before gradually adding in the milk. Start to mix on low speed and mix only till incorporated & do not over-mix.
Prepare Cake Tin/Pan
- Grease & paper line the cake tin. Use Frylight cooking spray, cake release spray, homemade lining paste (cake goop) & then baking/parchment paper on top. Cut the paper into a thick cross-like shape (see the Step-By-Step instructions before this Recipe Card for this) & position in the greased cake pan.
Bake The Cake
- Spoon the batter into the prepared pan, level & smooth out. Tap on the worktop/counter, before popping in the centre of the oven to bake. Bake for 15 – 18 minutes until golden, coming away from sides and a cocktail stick comes out clean of crumbs.
- Place on a cooling rack for 15 – 20 minutes.
Topping The Cake
- Spread thick layer of jam/preserve on top of the cake (thinning jam if needed) & sprinkle generous layer of coconut on top.
- Leave for 20 minutes before cutting into 16 square pieces.
Serving & Storing
- Serve as is with tea or coffee or with custard. Try my homemade pastry cream recipe and simply cook a little less for a thinner custard-like consistency.
- Store in a metal cake or cookie tin with the paper the cakes were baked on & these will be fine for at least 3 days.
- Un-toped cake can be stored for up to 3 days before adding the jam & coconut. Just leave to cool completely & wrap well in cling film/plastic wrap and leave at room temperature, not the fridge. If wanting to freeze, freeze like this with no topping, add a food bag on top & freeze for up to 3 months.1
Video
Notes
 Jam – you can use Jam, Jelly or Preserve for this cake recipe, with raspberry being classic. If too thick for spreading evenly, you might require to thin just a little with a splash of water.
Coconut – the equivalent of UK Desiccated Coconut, is US Unsweetened Shredded Coconut. However, the US version is in larger pieces. You can choose to process just a little or lightly chop to achieve the same look and texture.
Jam – you can use Jam, Jelly or Preserve for this cake recipe, with raspberry being classic. If too thick for spreading evenly, you might require to thin just a little with a splash of water.
Coconut – the equivalent of UK Desiccated Coconut, is US Unsweetened Shredded Coconut. However, the US version is in larger pieces. You can choose to process just a little or lightly chop to achieve the same look and texture.
 Cake Tin/Pan – recipe for a 9″/23cm square tin, but a rectangular traybake tin (such as 12×6″/30.5×15.25cm) can be used. **Do not use any bigger size or will be too shallow. See more before the recipe card.
Air fryer or Oven – originally developed using a conventional oven, you can also make in an air fryer. Preferably an oven-front mini-oven style air fryer in a 9”/23cm square tin. But bigger rectangular air fryer drawers may also work. Read more about sizing before this Recipe Card. Check out my Cello double air fryer review.
Cake Tin/Pan – recipe for a 9″/23cm square tin, but a rectangular traybake tin (such as 12×6″/30.5×15.25cm) can be used. **Do not use any bigger size or will be too shallow. See more before the recipe card.
Air fryer or Oven – originally developed using a conventional oven, you can also make in an air fryer. Preferably an oven-front mini-oven style air fryer in a 9”/23cm square tin. But bigger rectangular air fryer drawers may also work. Read more about sizing before this Recipe Card. Check out my Cello double air fryer review.
 Lining The Cake Tin – paper lining helps get the cake out easily. Cut to fit is best, as you won’t get any paper stuck inside your baked cake. Only takes a minute to cut it & use the same paper when storing the cake to help keep moist.
Freezing – I have not tested freezing the decorated cake, but you can freeze the cake after cooling. Wrap it whole, or in squares, with baking/parchment paper. Then on top of that cling film/plastic wrap or a food baggie, and mark the date. Freeze for up to 3 months1 & defrost at room temperature before decorating.
ALL RECIPES CONVERTED & MEASURED – All my recipes include conversions from grams to ounces and cups. Note that they have all been calculated by hand, by myself and tested several times, since Google is often inconsistent and inaccurate. Check out my Baking Ingredient Conversion table.
Lining The Cake Tin – paper lining helps get the cake out easily. Cut to fit is best, as you won’t get any paper stuck inside your baked cake. Only takes a minute to cut it & use the same paper when storing the cake to help keep moist.
Freezing – I have not tested freezing the decorated cake, but you can freeze the cake after cooling. Wrap it whole, or in squares, with baking/parchment paper. Then on top of that cling film/plastic wrap or a food baggie, and mark the date. Freeze for up to 3 months1 & defrost at room temperature before decorating.
ALL RECIPES CONVERTED & MEASURED – All my recipes include conversions from grams to ounces and cups. Note that they have all been calculated by hand, by myself and tested several times, since Google is often inconsistent and inaccurate. Check out my Baking Ingredient Conversion table.

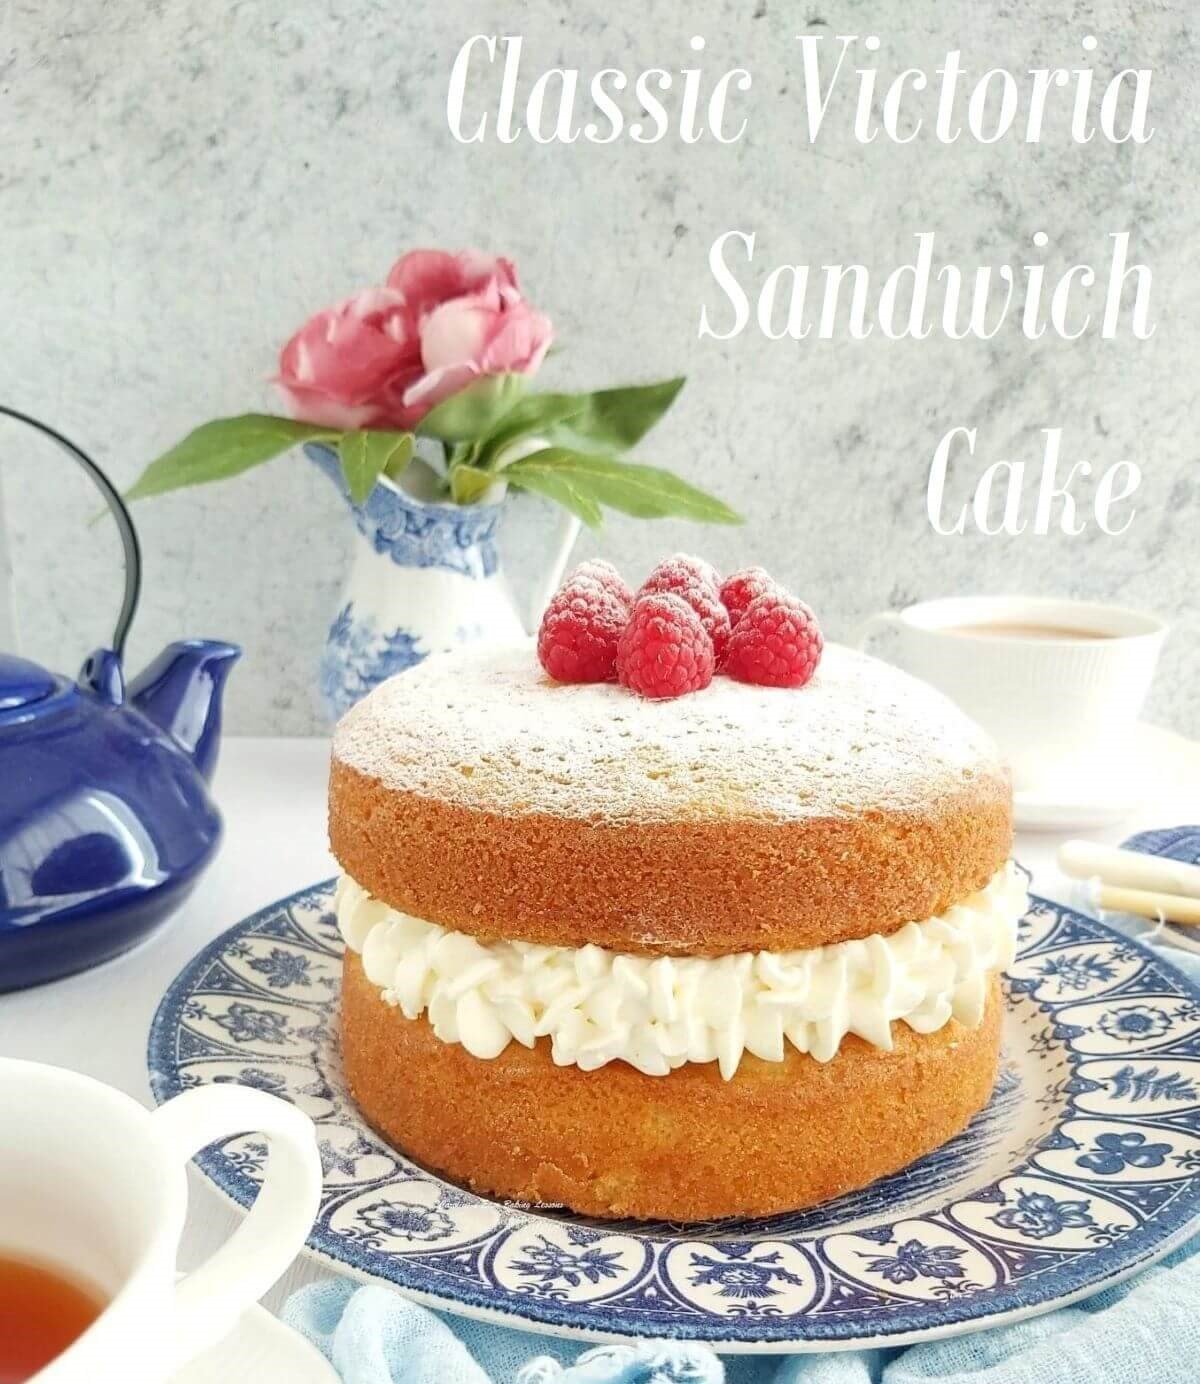 Try another classic British bake – my Beginners’ Classic Victoria Sandwich Cake tutorial (above).
Reference: 1 – freezing cakes from Freezeit.co.uk @ https://freezeit.co.uk/can-you-freeze-sponge-cake/
Try another classic British bake – my Beginners’ Classic Victoria Sandwich Cake tutorial (above).
Reference: 1 – freezing cakes from Freezeit.co.uk @ https://freezeit.co.uk/can-you-freeze-sponge-cake/
Nutritional Information – I am not a qualified nutritionist and all nutritional values are approximate and based on using the original ingredients & quantities listed above. Values based on one serving which is one square slice of cake, from a yield of 16 pieces. Cut smaller or bigger squares and these values will change. All values calculated from website MyFitnessPal.com.
Subscribe For More Recipes
Want more great recipes, tips, baking information and newsletters? Then please consider subscribing by adding your email address below. Be sure to check for a confirmation email & respond back, so you can follow me & receive your free emails. Your personal information will not be shared with a third party.

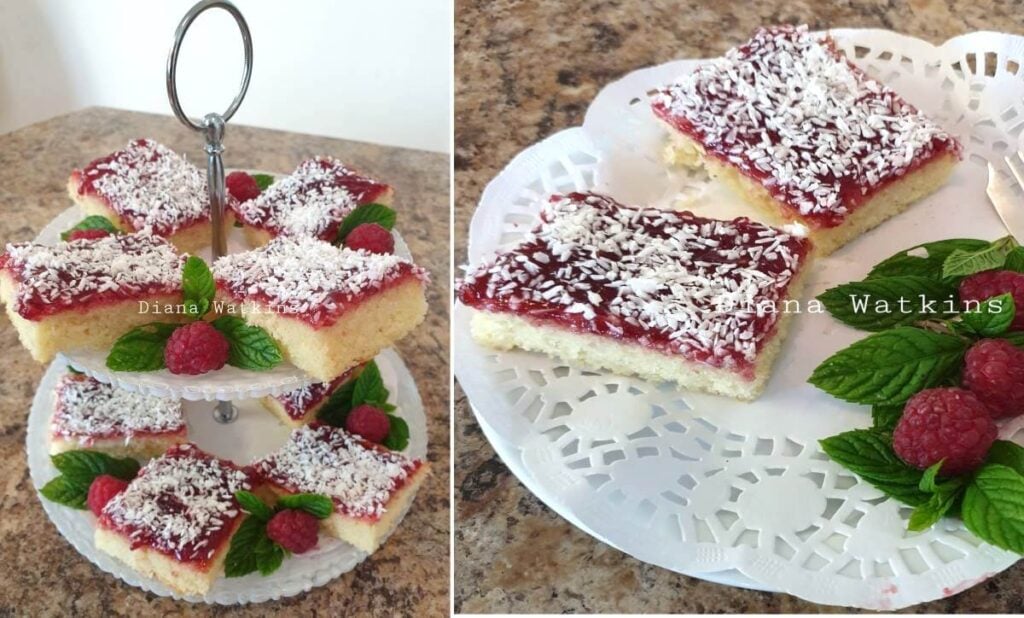
Reader’s Photos
I just love hearing how much my bakers enjoyed making my recipes, but seeing their work fills me with joy!
Here is one such photo by Diana Watkins, who beautifully made and presented), these raspberry coconut jam sponge squares, not once, but twice already! Great job Diana!
Join My Facebook Group
Why not also join my – Facebook group Easy Online Baking Lessons, dedicated to this baking lessons website, as well as providing one-on-one support with myself & my team? Be sure to answer all security questions when requesting to join.
Reference:
- Freezing cake sponges @ Freezeit.co.uk –https://freezeit.co.uk/can-you-freeze-sponge-cake/ ↩︎
Follow me on social media:
Happy Baking & Learning!
Caro x


Raspberry Coconut Sponge Squares – Air fryer Or Oven
Search For Something You Fancy!
Caroline’s Easy Baking Lessons


Such an easy recipe to make and so quick. Love coconut so this is a favourite of mine