Browned Butter, Nut & Chocolate Chip Cookies

Browned Butter, Nut & Chocolate Chip Cookies
By Caro
Now to our US and Canadian readers, browned butter cookies is a popular and well known flavour of cookie. Here in the UK however, not so much. But once you try them, you will wish you had been eating them for ever!
Why You Should Try This recipe
It is super simple to brown the butter. It takes you no more than 10 minutes, and you brown the butter after clarifying it. Now don’t let ‘clarified butter’ put you off. This is so simple to do, and I use it for buttercream fillings in sandwich cookies, as it’s a lot firmer setting than regular buttercream and so ideal, (such as my vanilla & chocolate sandwich cookies or my Chocolate Orange Oreo-style Sandwich Cookies).
What Is Clarified & Browned Butter?
Clarifying the butter, just means separating the fat from the liquid. This is done really simply on the stove top, by gently letting the butter melt, then come to a boil, and left until it changes from a solid yellow colour to more translucent, and a little foamy. As this happens, there will be residue forming at the bottom of the pan. Be sure to keep that, as it’s full of flavour.
Especially so, when you leave to cook just a little longer and let the liquid colour change to having a slight brown tinge to it. And at this stage, the clarified butter is now browned. Just don’t let it brown too much or it will be burnt. It smells lovely too.


Always Chill Cookie Dough
These are soft, drop cookies (not cut out), but I still chill them for at least 30 minutes so that they don’t spread too much and stay nice and soft.
A Note On Ingredients
I made a half batch in the video below, using milk (sweet) chocolate chips for my youngest son. The second half included chopped up dark (bitter) chocolate and chopped hazelnuts (almonds & pecans are also nice). I just used what I had, so use anything you like or leave them plain. The browned butter taste if enough that you don’t even need to use vanilla extract (and the good stuff is quite expensive so why waste it?)
Now for half a batch I probably used about 50g (1 + 3/4 oz) chocolate chips, the chopped chocolate was also 50g (1 + 3/4 oz) and maybe 24 hazelnuts. Some of the pics too are of the cookies just with chocolate chips.
Save This Recipe
Download the recipe to save to your phone or computer, by clicking the ‘download‘ button below.


Here’s a quick video of making the cookies made this year (note there’s also a real-time one further down).
1 Minute Quick Video
For a detailed video tutorial, click below to skip to the video


Browned Butter, Nut & Chocolate Chip Cookies
EQUIPMENT
- Scales or measuring cups
- Measuring spoons
- Small cooking pan
- Small bowl x 2 for the butters
- Medium Bowl for the dry ingredients
- Chopping board and knife for nuts & chocolate (if using)
- Mixing bowl/stand mixer bowl
- Stand or hand held electric mixer
- Spatula
- Baking/parchment Paper
- Large Baking trays/sheets x 2 (up to 4)
- Timer or Phone Timer
- Cooling Rack.
- OVEN: 180c/160c Fan Oven/350f/Gas Mark 4


INGREDIENTS
- 226g Butter, unsalted & cubed
- (1 cup/ 2 sticks/8 oz)
- (Divide the butter in half into 2 bowls. One bowl you will cube and leave to soften. The other will be cubed & made into browned butter).
- 200g Light or Dark Brown Sugar
- (packed 1 cup/ 7 oz)
- 2 Medium – Large Eggs
- 250g Plain Flour (A.P. 2 cups/ 8 3/4 oz)
- 1/2 tsp Baking Powder
- 1/2 tsp Bicarbonate of Soda (Baking Soda)
- 1 tsp Salt
- 2 tsp Coffee Granules
- Inclusions: Chocolate chips, chunks, nuts, etc of choice (See note above on quantities).
Check out my Ingredient Measurement Conversions Table, for accurate conversions, all hand measured by myself, during recipe testing.


Here’s my in-depth video, a more real-time version made in 2020.
INSTRUCTIONS


Browning The Butter
1.Begin by making the browned butter. Take the half quantity of butter (113g, 4 oz, 1/2 cup) and place in a small pan.
Top Tip – Have the butter cubed, and it will melt quicker.
2. Melt the butter on medium heat. Then let come to a boil. Note the colour of the butter once melted. It will be an opaque yellow colour. See Photo 1.
3.Let the butter boil & bubble away for at least 5 minutes and until the liquid and fats separate. It will begin to smell nice and a foam will form on the surface. The liquid will change to more a tranlucent consistency, and some residue will be visible on the bottom of the pan. Once the liquid starts to turn a slight brown colour, it’s time to remove form the heat. Don’t leave any longer or it will be burnt. So ideal to keep an eye on the colour. Watch my video below for this process, and also Photo 2 of the stages.
Stages Of Clarifying & Browning The Butter


How To Make Browned Butter Video
Here’s my video showing you what the process of browing the butter looks like


4. Pour the browned butter into a small heat safe bowl and be sure to scrape down the residue and add this to the bowl, as this is where the flavour is.
5. Leave to cool down while you prepare the cookie dough.


Preparing The Cookies
6. Using the other bowl of softened cubed butter, (always cube it so it softens quicker with it’s smaller surface area), beat this together with the brown sugar until light and fluffy and paler in colour. See Photo 4 for how it should look. This is known as ‘creaming’ the butter & sugar together, and I just used my handheld mixer rather than move my heavy stand mixer to the plugs!
This should only take a few minutes if your butter is soft enough. You don’t want to over-beat when making cookies. Cubing the butter rather than adding sticks of butter, also speeds up this process. Watch my quick video of knowing when your butter is ready. If you haven’t taken your butter out to soften in time, here’s a hack I reviewed from Sally’s Baking Addition, to soften the butter in about 12 mins.


7. Next add in the eggs, one at a time, and beat everything together. Only beat until each egg is incorporated. Scrape down the sides of the bowl when needed. See Photo 5.
8. In a separate bowl, mix together the flour, salt, coffee granules (you can use decaf if you like), baking powder & bicarbonate of soda (baking soda).

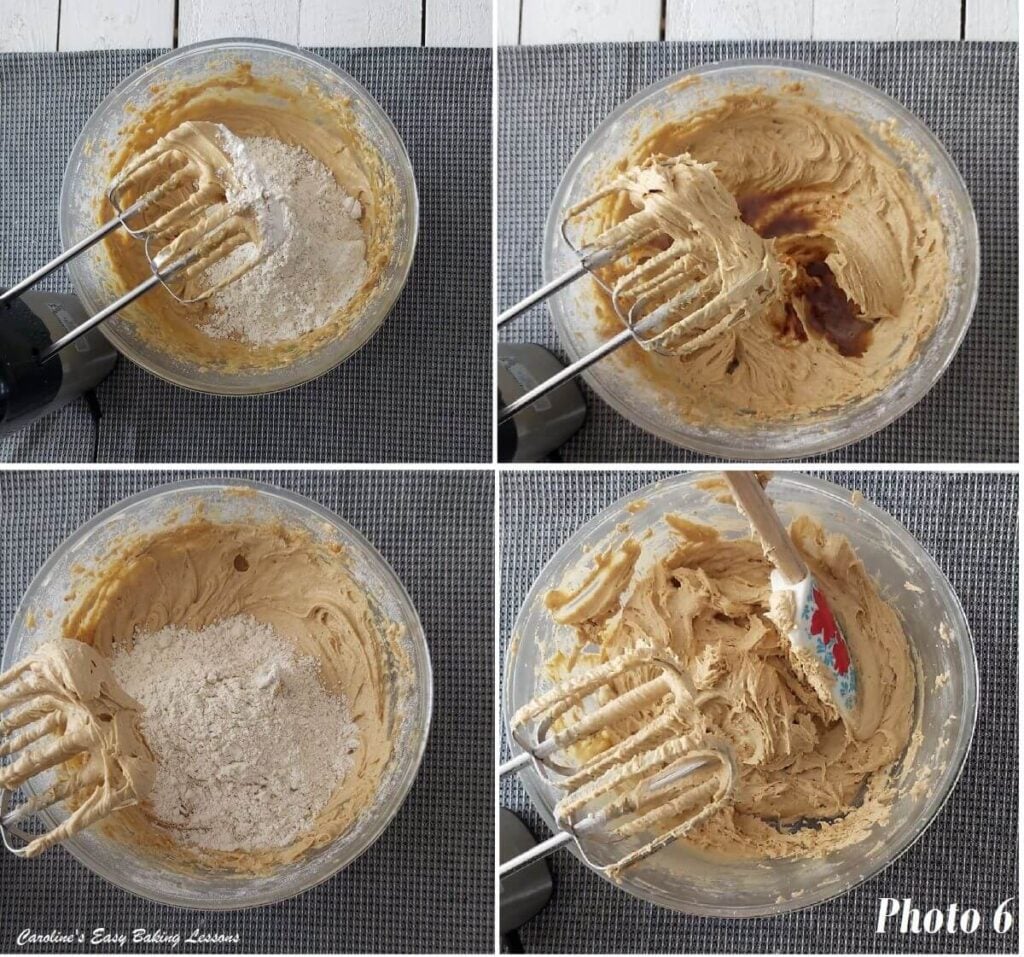
9. With the mixer on low, (very important) add in the dry mixture in thirds, and be sure to scrape down the sides to get all the flour incorporated. Stop when no more flour is visible. Don’t over-mix. You can use a spatula to roughly fold the dry ingredients in, before using the mixer.
10. Add in half of the browned butter (make sure it’s not still hot & add in the residue too), before adding another increment of dry ingredients. Mix just until incorporated, and then add the final amount of dry ingredients. See Photo 6..
11. Finally add in any inclusions you like. I like to add the chocolate &/or nuts in 3 increments and fold through, to get an even distribution. (Don’t use your mixer for this). See Photo 7 below.


12. Prepare at least 2 baking trays/sheets (I used 4 and baked in 2 batches), but will depend entirely on the size of your oven and trays/sheets. This recipe will make at least 28 good size cookies, using about a tbsp of dough per cookie. But in my video, I made them bigger, so be sure to leave extra space for baking, as they do spread a lot. Be sure too, to lightly grease the paper to your baking trays/sheets, if they don’t have a lip on them. I have lost cookies to the floor before, and don’t recommend that!
13. Using a tablespoon or small scoop, scoop rounded amounts of dough, and using a small spoon to slide or drop it onto the baking tray/sheet (hence why they are called ‘drop cookies’!) No need to flatten or shape them. Leave lots of space in between each one to allow them to spread easier whilst baking. I leave a good 1.5 inches (3.75cm) at least, between them.
14. Now place in the fridge for about 30 minutes. (Meanwhile have a sit down – you can wash the dishes when the cookies are baking!)


Bake The Cookies
15. Heat up the oven to 180c/160c Fan oven/350f/Gas Mark 4 before the 30 minutes are up.
16. Bake 2 of the trays of cookies in the centre of the oven, for about 7-10 minutes. I like to turn and rotate the trays during baking, just for an even bake. Bake just till the edges are set. The middle will still be soft. Better to take out before seeming ready, as they continue cooking once out of the oven. Only leave on the tray for a few minutes, before transferring, (paper and all) to a cooling rack (don’t leave on the tray any longer or they will cook more and harden). Now bake the remaining batch of cookies as before.


17. Enjoy fresh and still a little bit warm, or store in an airtight container – preferably a metal tin, once cooled. Storing cookies in food baggies I find makes them go hard (and I so like a soft cookie!) These will keep for at least a week if stored as suggested, if they are around that long! (But not in my house 🙂 )
Take a look at all my biscuits and cookies, on The Biscuit Bitedown page.


DIFFICULTY LEVEL: easy, beginner
SIGN UP FOR MY NEWSLETTER – I would love it so much if you could sign up for my newsletter. I will send out monthly emails, showing the latest recipes and articles, and latest info. Being a free site, building a following, is even more important and will keep it up and running and for free to everyone. Occasionally there will be the odd seasonal emails, but is really a means of reaching you, if you are not already in one of the Facebook groups I admin. Please note too, that these email addresses are not shared or sold onto another party. Thanks so much Caro xxx


Join My Facebook Group
Why not also join my Facebook group Easy Online Baking Lessons – Easy Online Baking Lessons, dedicated to this baking lessons website, as well as providing one-on-one support with myself & my team? Be sure to answer all security questions when requesting to join. Click to join the Facebook group.
Sharing & Saving The Recipe
Please see the sharing options or even printing, at the right/bottom of your screen (bottom of your screen for mobiles, and down the right-hand side on computers). You can even pin this to your own Pinterest page. Alternatively, you can download this article, see below. You could also leave some feedback if you like.
Click the ‘Download’ button below, to save to your phone or computer.


Follow me on social media:
Thanks for reading
Happy Baking & Making
Happy Tummies & Memories!
Caro xx


Leave some feedback if you like 🙂
Browned Butter, Nut & Chocolate Chip Cookies
Caroline’s Easy Baking Lessons


