PUMPKIN PATTERNED SWISS ROLL – A Recipe Review

PUMPKIN PATTERNED SWISS ROLL
Reviewing Sugarhero.com Recipe


It’s Autumn (or Fall as American’s and Canadian’s call it), and although the UK seems to have went straight from Summer to Winter, pumpkin recipes are everywhere. Two competitions in Facebook groups that I am a part of, were Autumn/Halloween and Pumpkin/Pumpkin Spice themed, so having never really baked anything other than Halloween themed cakes, I experimented with Pumpkin and pumpkin spice. I made my own roasted pumpkin puree & used that puree, to review a Chocolate & Pumpkin Bundt Cake recipe by Anna Olson. But for the competitions, I decided to push myself and try something else new. Step in, the Patterned Pumpkin Swiss Roll by Sugarhero.com! I read this recipe on their website, which included lots of photos of the different stages, but it also included a great demonstration video, so this was the recipe for me. And I would review it too ?


Why Sugar Hero.com’s Recipe?
As mentioned, the recipe included a video, but the design was also stunning. So I started planning it out, only for the night before making it, someone else in the same Facebook group to try out the same recipe. I had intended changing up the pattern design and it was just as well, as I didn’t want to look liked I copied someone (other than the recipe author of course).

The Cake Pattern
The recipe gave a link to a template for tracing out the pattern, but instead I looked for leaf designs and then drew out my own. I actually did it 3 times, as the first 2 the patterns were too small. But it made me comfortable with easily drawing these leaves I was going with. I also included acorns and got a bit better with them too. When it came to actually piping the design onto the baking/parchment paper with batter, I couldn’t ‘draw’ in the small designs, as they were too small for clear enough details. So be aware of that when planning your design. I used a piping syringe and it did the job well, and I found it lighter to hold and easier to control.


Some Advice On Timings
Be aware if making this cake, that from start to cutting (or eating) will take a minimum of 7 hours. This is because of 2 times freezing the pattern and chilling the cake for 5 hours. I ended up doing other things in-between so in the end it took me 11 hours, but really would have been nearer to 8 had I not been busy with other things. You could also place the finished cake in the fridge over-night and reduce the time by about 5 hours. And to get clear pattern, slices & a good ‘swirl’, you really don’t want to skimp on the freezing and chilling times.


Assessing The Recipe
So how was the recipe? Well to start off, the recipe has ingredients listed in ounces and cups (no grams for UK readers). That being said, ounces is much easier to convert to grams (by Google or using the gram setting on your digital scales). However, I did notice one or two ingredients they had omitted the cup equivalent.
The oven temperature was only listed in Fahrenheit and no Celsius, fan oven temperature or gas mark equivalent was given. There was also only inch measurement given for the size of the cake tin to use, so clearly not aimed at the UK readers. There is also no photos in the printable version of the recipe so I often had to refer back to the main recipe write-up and the video (which was quite a lot to scroll though, especially so with the adverts).

I think other recipes also use a slightly lower temperature too, as this cake didn’t just brown quicker than expected but was a little crisp at the edges. I took it out after 14 minutes, even though it was the right colour after 10 minutes. But the recipes stated between 16 – 18 minutes.
The cake did also stick to the tea-towel a little, but luckily it was at the beginning or inner most point of the ‘swirl’ & so wouldn’t be visible. I think in future, I will use the icing/powdered sugar and baking/parchment paper to prevent sticking.


I did end up with a few cracks though on the top of the roll. They were around the pattern shapes and I think it was because my patterned cake batter was too thick. But the recipe didn’t mention anything about that, or what not to do. Also, when lifting the roll to get the tea-towel off, the length of the cake made it buckle a little in the centre. So, when wrapping in the cling film/plastic wrap I had to be very careful.
Spreading of the filling was also a bit difficult as you were to chill it while the cake cooled for 1 hour in the fridge. But when I went to spread it out, it was quite firm and not such a good combination with the quite fragile textured cake. It may well have actually started some of the cracks in the cake.


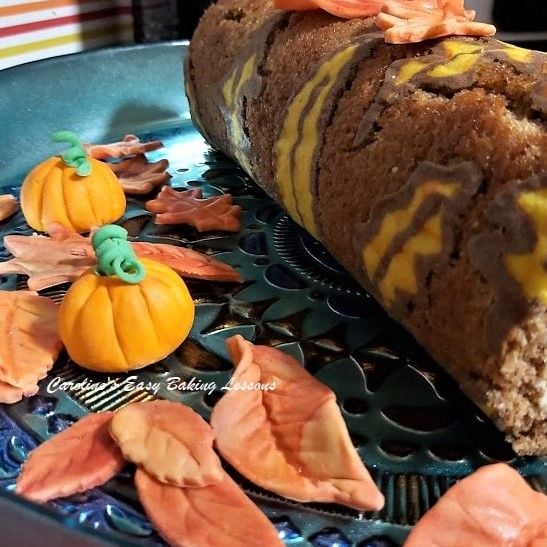
When I tried to trim off the ends with a large serrated bread knife, it didn’t give a clean cut at the bottom of the cake, so I trimmed the excess off with a large straight edged sharp knife. The opposite end cut with the sharp knife but it was tough to get through the pattern, (which was obviously now inside the roll too). I left it for 3 hours (not the 4) as it was getting late but the filling was fine. Then I took some pics and placed the cake back in the fridge, so will see how it cuts tomorrow. It looked good, good clean ‘swirl’ and to me tastes like a carrot cake. I guess it’s just the combination of the spices and the colour of the cake, your mind get’s fooled into it. Anyway, it tasted nice and the cream cheese filling was nice too. I would have liked a thicker lining of it, so making more filling would be a recommendation. Oh and for the pumpkin spice I just used the equivalent which is ‘mixed spice’ and I tasted the batter at the time and I gave it the thumbs up. I also didn’t add pumpkin creamer to the filling as we don’t have that in the UK.


My Recommendations
My recommendations are to use a wide cake lifter, or spatula or even two, when trying to move the rolled up cake. You don’t want it to crack and break at the final stage.
When coming to spreading the filling on, remove from the fridge 5-10 minutes before time to make spreading easier.
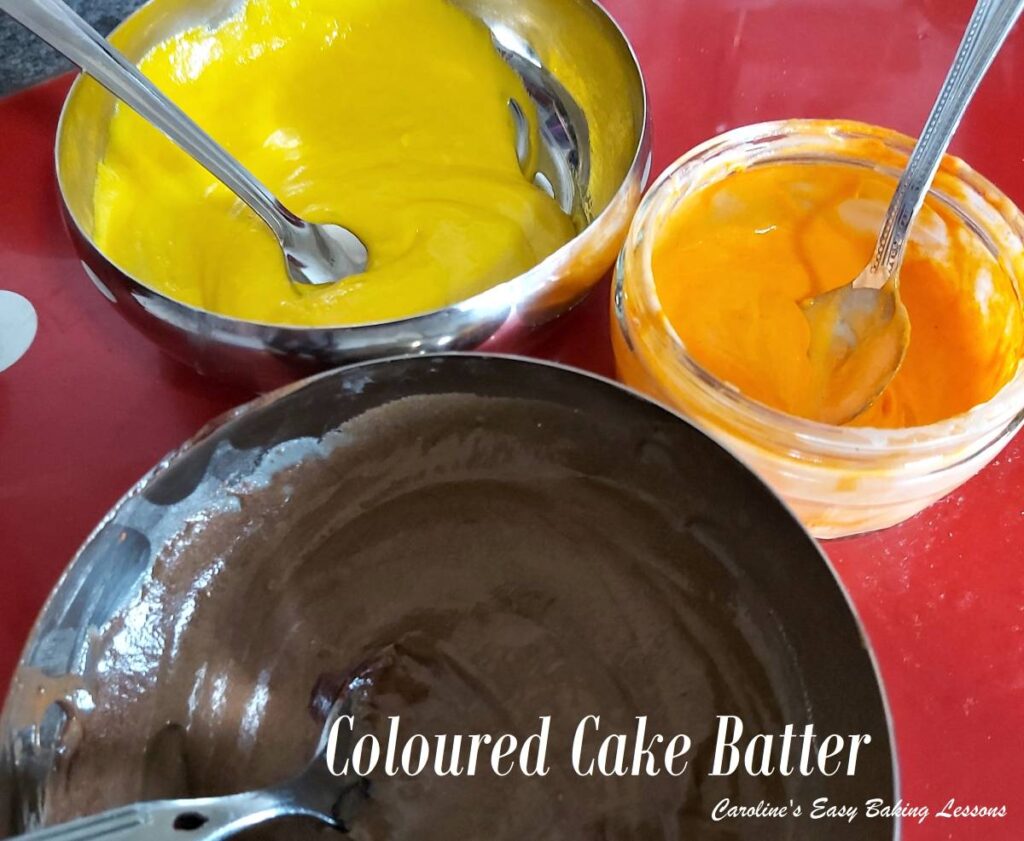
Be sure to use a strong dark colour for the outlining of your pattern. I choose to not do a ‘tie-die’ effect and drew my own pattern free-hand.
Before ‘drawing’ on the cake batter for your pattern, use a little of the coloured batter to stick the baking/parchment paper in position on the cake tray/tin so it doesn’t move about.
The piping nozzle recommended was a #2, which is a 1.5mm or 1/16 inch size but if there’s anything thinner that would have been nice for finer details.
Be sure to have a paper towel next to you when piping, so you can clear the tip of the nozzle as you go along, and before starting the next part you are ‘drawing’.

Lighten your squeeze on the piping bag, before you want it to end and it will thin out and tail off. Better to have a big pattern so that there isn’t too many details that are too small to pipe clearly. Also, if the pattern is repeated, you will get into the rhythm of how to pipe the design. You could always practice before hand on some paper.
Have a cocktail stick near by, in case there’s any mistakes. You can use it to push some batter away to an area you might be able to wipe clear.
Be careful not to let jewellery dangle into the pattern. Start at one side and continue on, remembering you can always turn the tray around to make it easier.
Freeze for 30 minutes after piping the outline and then fill in the gaps with the contrasting colour as quickly as you can and away from heat, as the frozen batter outline will begin to soften and you don’t want it to merge together.
Be careful not to make the piping too thick and so don’t go over it if possible. Only take the final frozen design from the freezer when the cake batter is ready to go on top.


How Do I Rate This Recipe?
So with everything taken into consideration, I would rate this recipe a 7/10, which is one of my higher markings. It had thorough instructions and photos in the main recipe & video, but was let down by no photos in the printable recipe, and because it didn’t have UK measurements. So if you have plenty of time and want a show stopper roll cake, this is the recipe for you. You can do any design you want and just follow around this recipe to guide you. I always wanted to make one, and I did it! Not sure I will be making one again though as it took so long! Another tick on the ‘baking bucket list’!
SIGN UP FOR MY NEWSLETTER – I would love it so much if you could sign up for my newsletter. I will send out monthly emails, showing the latest recipes and articles, and latest info. Being a free site, building a following, is even more important and will keep it up and running and for free to everyone. Occasionally there will be the odd seasonal emails, but is really a means of reaching you, if you are not already in one of the Facebook groups I admin. Please note too, that these email addresses are not shared or sold onto another party. Thanks so much Caro xxx


FONDANT PUMPKIN & AUTUMN LEAVES
For the Facebook competition, I needed some Autumn decorations. I made some fondant pumpkins and an assortment of Autumn leaves. This is because in the UK we don’t see many Autumnal decorations and the only leaves I could find in the garden were all a dull yellow colour! So fondant ones it was. Click to view my Fondant Autumn Pumpkin & Leaves Tutorial. Wish me luck in the competitions.
Here’s the link to go to the recipe and the video:
Go to Sugar Hero’s Pumpkin Roll Recipe
***UPDATE – I won one of those competitions with my Patterned Pumpkin Roll.
And finally, here’s some of the missing information/conversions not on the recipe for your convenience:
MY CONVERSIONS
| INGREDIENT | GRAMS |
| 1.5 oz Butter | 43g |
| 2 oz Powdered/Icing Sugar | 57g |
| 3 oz Plain/A.P. Flour | 85g |
| 3.3 oz Plain/A.P. Flour | 94g |
| 7 oz Granulated Sugar | 199g |
| 5.5 oz Pumpkin Puree | 156g |
| 4 oz Butter | 113g |
| 6 oz Powdered/Icing Sugar | 170g |
| 1/4 cup Half & Half/Cream or Milk | 60ml/2 fl oz |
| 4oz Cream Cheese | 113g |
| Powdered/Confectioners’ Sugar | Icing Sugar |
| Pumpkin Spice | Mixed Spice* |
| All Purpose Flour (A.P.) | Plain Flour |
| 10″ x 15″ sheet | 25.5 x 38cm tray |
| 350f | 180c/160c Fan/Gas Mark 4 |
| 1″ (inch) | 2.54cm |
- go to my Home-made Roasted Pumpkin Puree recipe
- go to my Autumn/Fall & Halloween Recipes
For more conversions, check out the articles below:
CONVERSION OF UK & US BAKING INGREDIENT MEASUREMENTS
DIFFERENCES BETWEEN UK & US BAKING INGREDIENTS
Please see the sharing options or even printing, at the right/bottom of your screen (bottom of your screen for mobiles, and down the right-hand side on computers). You can even pin this to your own Pinterest page. You could also leave some feedback if you like.
My Rating: 7/10


Follow me on social media:
Happy Baking & Learning!
Caro x


PUMPKIN PATTERNED SWISS ROLL – A Recipe Review
Search For Something You Fancy!
Caroline’s Easy Baking Lessons


