MINI MINCE PIES – Mincemeat, Jam Or PB&J Filled, With A Marzipan Topping

MINI MINCE PIES
Mincemeat, Jam Or PB&J Filled, With A Marzipan Topping
A good addition to your food gift basket this Christmas is mini mince pies. I will show you how to easily make them using my standard Sweet Shortcrust Pastry. This time I made them mini versions, using mini cupcake trays, but the same amount of pastry, makes 24 regular sized minced pies, (using either cupcake, fairy cake or mince pie trays) - Go to my Sweet Pastry Lesson).

The Mincemeat Filling
As a shortcut, you can use a jar of mincemeat for the filling of these mini mince pies. There are recipes on the internet for how to make your own mincemeat, but this would take longer. The jars are relatively inexpensive and you can get ones with or without alcohol and vegetarian varieties. This year, I also saw lots with different flavours being sold. And mincemeat isn’t just for mince pies, so buy a big jar and use any left-vers for my Christmas Mincemeat Slices , or Speedy Mince Pie Swirls (see photo below).


Alternative Fillings
For children (& some adults), who don’t like mincemeat, I have included a few alternative fillings for these mini mince pies. Various jam/jelly flavours, peanut butter and jam and even chocolate spread can be used. Please note that if you want to use chocolate spread, you will need to add a little jam, (the most ‘liquid’ part you can get), as the chocolate spread on it’s own is too dry making it dry up when baking. Play about with the flavours and see which is liked best. Always have a taste test first!
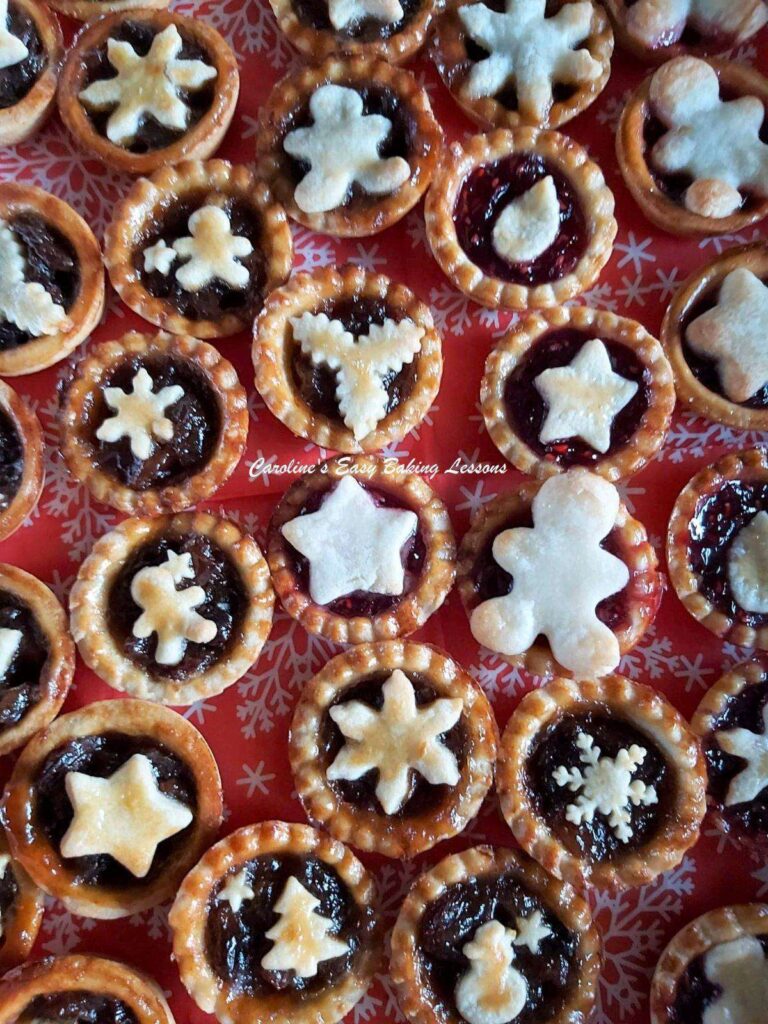
The Decorative Toppings
If giving these mini mince pies as gifts this year, why not invest in some cookie cutters to give the toppings a festive look. You can cut out a shape with the pastry, or even use marzipan as I did. It doesn’t hold it’s shape as well, so placing under the pastry shape is ideal. The marzipan is a great addition to the mini mince pies. This year I am going to attempt to pipe a Viennese cookie batter on top, for something a little different.
Perfect For Holiday Gifting
Once baked and cooked, these mini mince pies are perfect for holiday gifting. Place in cellophane bags, tie with seasonal ribbon & attach a gift tag with a personal note. Can also be placed in cupcake boxes, with a selection of special Christmas treats.
You can DOWNLOAD the recipe to save to your phone or computer, for using or printing off later. Click the ‘download’ button below.
EQUIPMENT
- Round Cookie Cutter (4.5 – 5cm, 1 ¾ – 2”) or Small Glass Rim
- Small Cookie/Fondant Cutters for the toppings
- Rolling Pin
- Baking/parchment Paper
- Flour or icing/confectioners’ sugar in a bowl for dipping the cutters
- Lining Paste, butter or cake release spray*
- Scissors
- Small Sieve
- Cling Film/Plastic wrap
- Regular tea spoons for each filling flavour
- Cooling Rack
- Mini Cupcake/Muffin Tray
- Pastry Brush or artist/paint brush
- *See also what is needed to make the Sweet Short Crust Pastry.
- Timer or phone timer


INGREDIENTS
- Sweet Short Crust Pastry (quantity as in recipe)
- Mince Meat (small jar for making 24)
- Jams of Choice (optional) – Jelly
- Chocolate Spread (optional)
- Icing Sugar/Powdered sugar
- Egg yolk (in a small bowl)
- Marzipan/Almond Paste (optional)
- Regular Tray (1 or 2)
MAKES: 24 mini mince pies, with small toppers
OVEN: 200/180c Fan Oven/400f/Gas Mark 6
Step-by-Step Instructions


1.Make the Sweet Short Crust Pastry as in my recipe – (go to pastry lesson recipe or click below to download the recipe to your phone or computer.
2. Next divide the dough as per Photo 1 (leaving a smaller amount for the toppings). Place the smaller amount in the paper, and place back in the fridge. *Make sure it’s had at least 20 minutes in the fridge to relax. If frozen, defrost until soft enough to roll out.
3. Cut 2 large pieces of baking/parchment paper and have ready for rolling out.


4.Now prepare your mini cupcake/muffin tray. This is a technique I learned from Great British Bake Off winner (Great British Baking Show), Nancy Birtwhistle. Start by greasing the holes of our tray. Use butter, cake release spray, or as I did, Nancy’s lining Paste – go to Lining Paste recipe.
5. Next cut long strips of baking/parchment paper. (See Photo 2 for the sizing).
6.Place one strip of the paper across the 4 hole row, and position the paper as shown in the right pic of Photo 2.


7. Form the larger portion of pastry into a disc and place in between the 2 sheets of baking/parchment paper and roll out until the thickness of a £1 coin, (3-4mm or 1/8 – 1/6in), see Photo 3.


8. Dip your cutter in flour (I used round edged for my mince meat filled pies and a scalloped edge side for the jam fillings. Alternatively use a glass rim, a bit wider than the top of the muffin hole.)
9. Then cut out 12 circles (you should be able to get 12 out of the pastry without having to re-roll, if you made the pastry thin enough. If you get less than 10, start over & re-roll thinner. See Photo 4.
10. If you have any pastry left, roll it up and add to the pastry in the fridge.


11. Take one of the pastry rounds and place on top of one of the paper lined holes. See Photo 5, left pic.
12. Then using the end of a rolling pin, or something smooth & the correct size, push down gently on top of the pastry, pushing it into the hole. See Photo 5, right pic.


13. Continue to fill the holes with the pastry in this same way. When finished, prick the base of each pastry case with a fork (known as ‘docking the pastry’, this helps baking steam escape and to prevent soggy bottoms, see Photo 6) and then chill for 30 minutes.


14. Meanwhile, make the pie tops with the remaining pastry that you chilled. Roll out as before and cut rounds, stars, what ever shaped cutter you have. As long as you chill before baking, they keep their shape pretty well when baking. Just make sure they are smaller than the width of the pie shells. See Photo 8 below


15. You can also add marzipan to your mini mince pies. You can cut out the same shape as your pastry topper and position under the pastry (that’s nice). Or just use a marzipan cut out on it’s one as a topper. They don’t colour much though so bear that in mind. (Alternatively place under a pastry topping). Place the cut outs on baking/parchment paper and pop in the fridge until ready to use. If not using soon, cover with some cling film/plastic wrap. See Photo 8 above.


16. Heat up the oven to: 200/180c Fan oven/400f/Gas Mark 6.
17. Once you have chilled the pastry shells, you can go ahead and lift them out of the tin with the paper. The paper should make this easy. See Photo 9.
18. Then simply grease the tin again and position the pastry shells back in again without the paper. You can also make up to this stage and instead of putting back in the tin, flash freeze them flat, and then pop into a container for freezing till you want to bake them.


19. Once the pastry cases are chilled, place about 1 tsp worth of mince meat into the pastry casing. See Photo 10.
20. For the non-mince meat fillings, use a little less than you would need to fill the casing as they ooze a little when baking. Remember to mix a little jam with your chocolate spread if using. You can even mix some chocolate spread with peanut butter.


21. Now place the pastry tops (on top of the marzipan rounds if you are using), on top of the fillings. For the marzipan on their own toppers, wait till have way through baking before placing on top. This will allow them to hold their shape better. (See Photo 11)
22. Brush the pastry tops and edges with the egg wash.


23. Bake for 10- 15 minutes until golden brown, ensuring you turn the tray during baking. Re-apply more egg wash when checking or turning them. **Remember, if just topping with marzipan, add them after about 7 minutes. See Photo 12.
24. Leave in the tray for 5-10mins.
25. Transfer to a cooling rack and let cool a little bit more.


26. Sprinkle some icing/powdered sugar through a small sieve on to the top of the pies to decorate or leave as they are. Alternatively, give them a little sparkle with some food glitter! See Photo 13.
27. Store in an airtight tin or container, for a few days. I prefer cake tins. Eat warm or cold.
SKILL LEVEL : Beginner, Easy
Thanks for reading.
Happy Learning & Baking!
Caro xxx
Sign up for my newsletter by completing the form below. Thanks!


Mini Mince Pies
Caroline’s Easy Baking Lessons


