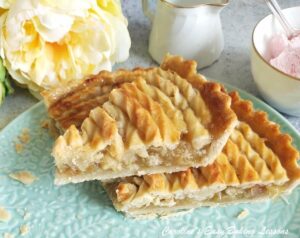
Rhubarb Pie With A Twist – Easy No-lattice Pie

Try my Rhubarb Pie With A Twist! Easier to make than a lattice pie top crust, this pie is impressive and perfect for serving on summer days with some ice-cream. If the weather is too hot, don't worry - this pie can be made in several stages, as well as some freezing.
Rhubarb Pie With A Twist
Easy No-lattice Pie
All From Scratch
*Original concept & post published 10 June 2019, updated photos to new site 20 July 2022


Jump To Recipe & Important Info
Experienced bakers can skip to the Recipe Card by clicking below on the ‘Jump To Recipe’. You will find this option on most recipe blogs, near the top of the page so be sure to look out for it, if in a hurry to get to the recipe.
Jump to Recipe Jump to VideoRhubarb Pie
Use my Rhubarb Pie With A Twist recipe & video tutorial, to make your own pie from scratch. No need for ready-make case or filling. Learn how to easily make, with any filling of your choice, and have a beautiful & different pie for Summer parties, Thanksgiving or any occasion.


WHY USE MY RECIPE?

1. Thorough Instructions & Video

2. Looks Good & Easier Than Lattice

3. Tastes Great

4. No Special Equipment

5. Easily Adjusted

6. Can Be Made In Stages

7. Can Be Frozen


Why Make Rhubarb Pie With A Twist?
1. Thorough Instructions & Video
As with all my recipes and lessons, I like to be thorough with my instructions, as well as in my video tutorials. No ambiguous baking terms without explanation. I even have several versions of the video – one showing the complete process, and shorter quick reels of the individual stages. All available to watch on YouTube and other popular social media apps.
Also note this is a longer recipe than most of my usual ones. Rather than give you links to individual stages, & have to leave the recipe, I have included all the step here.


2. Looks Good & Easier Than Lattice
Not only does this spiral or ‘twist’ pastry topping look good, it is actually easier than making a pastry lattice. Yes it takes you time to twist and add all the pastry strips to the top of the pie, but, if you have ever tried to do a lattice, that has many problems. First you need to get the weaving of the lattice correct and then you have the problem of transferring this, to the top of the pie without it falling apart. And forming a lattice on top of the pie filling also has its problems. And a weaved pie top crust can result in more filling leakage too.
Another reason for picking a spiral top was, after seeing some beautifully designed pies on Google, most didn’t look as impressive once baked and lost a lot of their detail.


3. Tastes Great
Rhubarb, sugar and pastry, what’s not to love? Adding a little anise to the rhubarb filling is great too, but entirely optional. You can add other favourite spices, such as cinnamon.
4. No Special Equipment
You don’t need any special baking equipment to make this impressive pie. And as always, I have listed everything I used, in the equipment section of the Recipe Card below.


5. Easily Adjusted
You can of course change the filling for the pie if you like, or even add strawberries. Strawberry and rhubarb is a popular combination. Just be sure to cook down the filling as much as possible, since strawberries also give off a lot of juices too, which could potentially result in a soggy bottom to your pie! *(See reader Melissa’s Rhubarb Strawberry pie below, after the Recipe Card).
You can also make in a different sized pie dish. This pastry will be enough for an 8″ (20cm) pie dish, with some left over. This is because some pie dishes are deeper than others, or shaped and need more pastry to fill them. So I would rather you had slightly too much pastry (that can be frozen), than not have enough. You could make using a 9″ (22.5cm) pie dish, but be aware you would need nearer to 500g/16oz/1lb of rhubarb.


Making In A Smaller Or Bigger Sized Dish
If you want to make in a smaller sized pie dish, check out my How To Reduce A Recipe article. In this I show you how to reduce a recipe with my formulas, so you know how to adjust your ingredient quantities. Examples give, in grams & in cup measurements. Can be used for cakes too. For making a bigger sized rhubarb pie, use my How To Increase A Recipe article.
Bake Time & Different Tin Sizes
Note – if reducing or increasing the recipe for a smaller or bigger diameter of dish, the cooking times will remain the same. Only if your depth of pie (or cake), is greater than the recipe states, will the cooking take longer. Similarly if the depth is more shallow, the bake time should be reduced.


6. Can Be Made In Stages
This pie is perfect for summer months (when the rhubarb is in season), but if you find it too hot to make all at once, it can be made in stages.
Stage 1 – Preparing The Pastry
The pastry is made, very quickly, but must rest at least 30 minutes in the fridge, for the pastry to firm but also for the gluten to relax and reduce the chances of a tough pastry. But you don’t need to use in 30 minutes. You can also freeze the pastry after that for using another day. Or store in the fridge to use up to 2 days later.


Stage 2 – Forming The Pie Case
Once the pastry is rolled out and the pie case formed, it again needs to be chilled for about 30 minutes before baking. So you can also freeze the uncooked pie case at this stage.
Stage 3 – Part-Baking The Pie Case
Once the pie case has had time to relax, it’s partly baked empty (blind baked) and then allowed to cool a little, before any filling is added. So you could also leave the part-baked pie case to be filled the next day. Just loosely cover with cling film/plastic wrap and place somewhere cool (but not the fridge as it can cause condensation). See photo collage below.


Stage 4 – Making The Filling
The filling can be made at any stage, but needs to be cooled down before adding to the slightly cooled down, part-baked pie case. So you could even make the day before, just cover and store in the fridge after it cools down). See Photo below.


Stage 5 – Constructing & Baking The Pie
The end stage is to fill the pie case and cut the strips of pastry for the top pastry spiral, before baking. You can leave the pastry for the top, in the fridge till ready to use when you are going to bake. Just don’t cut the pastry strips until ready to use. I found chilled pastry strips had more of a tendency to break when twisted.


Stage 6 – Cooling & Serving The Pie
Once baked the pie needs to cool down somewhat before trying to remove or slice. If you aren’t bothered about neat slices, you can eat slightly warm. An alternative is to heat slices slightly when serving.
Storing – You can store the pie on a cake stand, covered with a cake dome, or upturned container. Storing in the fridge, and in air-tight containers can lead to condensation, and making the pie soggy. So loosely cover and it will be fine for a few days (as long as it’s not too warm).


7. Can Be Frozen
You could also freeze the baked & cooled pie, as a whole or in slices. Well wrap in baking/parchment paper, then some cling film/plastic wrap and in a labelled food bag. Defrost at room temperature and once ready to eat, cover with foil and place in the oven at 180°c/160°c Fan Oven / 350°f /Gas Mark 4 and warm through (for about 15 minutes, depending on size of pie & your oven). If the pastry is still a little soft, you can remove the foil towards the end of the heating period.
As mentioned in the stages above, you can also freeze the pastry before this. It is recommended to use frozen uncooked pastry within 1 – 2 months*. Cooked pastry however, lasts longer and 3 – 6 months is recommended**. I have stored frozen uncooked pastry longer 2 months and I found it was fine. What you need to watch for is freezer burn, so well-wrapping is strongly advised.


Notes On The Pastry Ingredients
This rhubarb pie is made using my Sweet Shortcrust Pastry recipe. This pastry is very commonly used in sweet pastries. If you want to learn more about pastry, read my Pastry 101 article.
This sweet pastry is made up of unsalted butter, Plain (All Purpose) Flour, Icing (Powdered) Sugar, ice cold water & egg (I just now noticed the missing egg from the photo!).
Unsalted butter is always better in baking as the amount of salt in salted butter can vary and there is no control over the salt level. Also, salted butter has a higher water content than unsalted and in some cases this can affect a bake.
Note that the amount of water can never be exactly specified. The exact sizing of the eggs can vary, and where & how the flour is milled, results in different rates of fluid absorption. Just make sure the dough is not too dry.


Rhubarb Pie Ingredients
This pie is simply made from my Sweet Shortcrust (Pie) Pastry, Rhubarb, sugar, vanilla extract & an egg for egg-washing the pastry.
“Can I use Frozen Rhubarb?”
You can of course use frozen rhubarb for the pie filling. Just let it defrost & cook as per the recipe. It may need a little more cooking just to remove any further liquid.
PASTRY TIP
Anytime you have left-over uncooked pastry from a recipe, don’t throw it away. You can save small pieces in a food bag in the freezer and add to it from time-to-time with more scraps of pastry. Label and date the food bag (with the first date of adding pastry to it), and then place the pastry inside a second bag, that you will place inside the first labelled bag. Using 2 bags means you can easily add more pastry to the inner bag without the possibility of the pastry drying out or getting freezer burn. Just be sure to use the pastry based on the date from the first time pastry was added to the bag.


SIGN UP FOR MY NEWSLETTER – I would love it so much if you could sign up for my newsletter. I will send out monthly emails, showing the latest recipes and articles, and latest info. Occasionally there will be the odd seasonal emails, but is really a means of reaching you, if you are not already in one of the Facebook groups I admin. Please note too, that these email addresses are not shared or sold onto another party. Thanks so much Caro xxx


Join My Facebook Group
Why not also join my Facebook group – Easy Online Baking Lessons, dedicated to this baking lessons website, as well as providing one-on-one support with myself & my team? Be sure to answer all security questions when requesting to join. Click to join the group.


Share The Love
Please see the sharing options or even printing, at the right/bottom of your screen (bottom of your screen for mobiles, and down the right-hand side on computers). You can even pin this to your own Pinterest page.
The Recipe card below can also be printed (with or without the images), saved or shared.
You could also leave some feedback if you like, or rate the recipe &/or post, at the foot of the page.
Jump to VideoDIFFICULTY LEVEL: Intermediate
Rhubarb Pie With A Twist
Recipe Card
*Remember you can toggle the process photos on or off
Rhubarb Pie With A Twist! Lattice Alternative

Equipment
- Scales or measuring cups
- Measuring Spoon
- Pastry Cutter (optional, or a butter knife)
- Mixing Bowls for pastry & rhubarb
- Sieve
- Knife
- Cling film/plastic wrap
- Baking/parchment paper
- Rolling Pin
- Measuring Ruler (optional, or something similar)
- Long sharp knife (or pastry roller)
- Lining paste, Spray Oil or butter to grease pie dish (see below)
- Pie dish, or baking dish (21 cm/8" diameter and at least 2.5cm/1" depth. See note above)
- Pastry Baking beans (Silicone beans, or use uncooked dry beans/pulses. See notes)
- Tin foil (Aluminium foil)
- Small -medium sized cooking pot
- Wooden spoon
- Pastry Brush (or new paint brush – this is what I use)
- Small dish for egg wash
- Timer or Phone Timer
- Cooling rack (optional)
Ingredients
For The Pastry:
- 400 grams Plain Flour (3 cups + 2 level tbsp, 14 oz, All Purpose Flour)
- 45 grams Icing Sugar, sieved (3 tbsp, 1½ oz Powdered Sugar)
- 172 grams Butter, unsalted, cold and cubed small (6 oz, 1½ sticks or ¾ cup)
- 2 Eggs (medium – large) (Large – X Large USA)
- Ice Cold Water
For The Pie Filling:
- 400 grams Rhubarb, chopped (14 oz ** see notes)
- 100 grams Sugar, granulated or caster (½ cup, 3½ oz)
- 30 – 90 ml Water (⅛-⅓ cup, 1-3 fl oz approx.)
- 2 tsp Vanilla Extract (See how to Make Your Own Vanilla Extract)
- ⅛ tsp Ground Anise (Optional. Up to ¼ tsp. Or ¼ tsp of ground anise from 1 small Star Anise)
For Egg Wash:
- 1 Egg, beaten & a splash of milk mixed together.
Instructions
To Make The Pastry Dough:
- While weighing the butter, cube into rough squares (about 1cm/⅓"), & return to the fridge. Remove from the fridge 30 mins before starting the recipe.
- Add the flour & icing sugar/powdered sugar (3 tbsp) to a large mixing bowl, and mix together. See Photo 1 below.


- Follow by adding in the butter & ‘cutting the butter in’. Use a butter knife to cut the pieces of cold butter into smaller pieces. Continue until it looks fairly evenly blended. It doesn’t need to be exact. Alternatively, rub in using your fingertips. by picking up some of the flour & butter between your finger tips & squashing it together so that the butter takes on some of the flour. Continue to do this until you have a crumbly mixture with only a few odd lumps. (See Photo 2 below).

- If your hands/fingers get tired or sore easily, buy a Pastry Cutter/Pastry Blender. (See video for reference). You can get these online inexpensively. You use this by pushing down on the cutter into the mixture & perform a squashing motion: push down & squash while rotating the cutter left & right. You keep rotating like this & the butter will become fully incorporated with the flour. Just periodically, clear the blender of any blocked butter pieces.

- Next, make a little well in the middle, add the beaten egg & mix together. You can do this by hand or by machine. Mix until it starts to come together, before adding one or 2 tsp of the ice cold water. Continue to form the pastry by kneading by hand, or use a food processor. The dough is ready once it comes clean away from the sides of the bowl. If it’s still a little dry add a tiny drop of the cold water & mix again. You might still need a tiny bit more water or none at all. Just be sure to make sure the dough is nice & smooth & not dry. Test the dough by taking a piece & squeezing it together with your fingers. It should come together nicely. Note too the colour change – the dry mixture is a white colour, whereas when the pastry is coming together, it is more of a beige colour. (See Photos 3 & 4).

- Form the dough into a ball, then flatten into a disc, (to make rolling out a lot easier). Wrap in cling film/plastic wrap, place on a plate & put in the fridge for 30 mins to chill. See Photo 5 below.


To Make The Filling:
- While the pastry is relaxing, make the rhubarb filling. begin by washing the rhubarb and chopping into slices about 7mm (⅓") thick. (If your rhubarb stalks are quite thick, half the slices). My pieces were about 2cm (¾") on their widest edge. You can of course leave them bigger, and just cook down a little longer. Whilst large rhubarb pieces are lovely, allowing the rhubarb to cook down more before adding to the pie means less of the rhubarb's natural juices are given off when baking, and reducing the likelihood of a soggy bottom to your pie! (See Photo 6 below).

- Add the chopped rhubarb and sugar to a medium sized pot, and mix together, before heating on a low-medium heat. Add in a little of the water, & stir occasionally. Once the sugar has melted, allow the fruit to come to a boil. (*If the fruit seems too dry add the rest of the water). Leave to boil for a few minutes before reducing the heat to low and allowing to simmer till soft and translucent (this might take about 8 – 10 minutes). Once ready, transfer to a bowl and place in the fridge to cool down. Once cool you can add Vanilla Extract and some anise if you like. (See Photo 7 below).


To Shape The Pastry Case:
- Prepare the pie dish you are using by greasing it well on the bottom & up the sides. I use a great home-make cake release paste, for all my greasing in baking/ cooking. Here’s a link to make lining paste and a quick video of how to prepare it. When I don’t have that, I tend to use Fry Light One-cal Oil Spray, that works well too. See Photo 8 below.

- Divide the prepared pastry dough – cut just under the half-way mark and re-wrap this slight smaller piece of pastry for the top crust & place back in the fridge. (Tip – before placing back in the fridge, form into a rectangular shape by hand). On baking/parchment paper, (and a dusting of icing/powdered sugar if the dough is sticky), roll out the 2nd piece of pastry dough (use a second sheet of paper if you want), to a 3-4 mm (⅙ ") thickness. Make sure it is wide enough to fit the dish as well as up the sides. Try to give yourself at least 1″ (2½ cm) excess just to be safe. See Photo 9 below.

- Transfer the rolled-out pastry to the greased pie dish. (A few different ways to this and depends on what is easiest for you). Using the paper you rolled out on, you flip everything over, and onto the dish. Another way is to roll the dough over a dusted rolling pin & transfer carefully, un-rolling into the dish. You can also use the base of a loose-based pie dish, to transfer the dough. (See the video for reference or Photo 9 above. ) Once the pastry is in the dish, take a tiny ball of dough and use it to gently push the pastry into the dish to take on its shape, starting from the bottom, & pushing gently up the insides. **For more tips with pastry, see my Lemon Meringue Recipe, See Photo 10 below.

- Trim off the excess pastry, by either using a knife or a rolling pin to run over the top of the tin edges. Then thin the top of the edges of the pastry casing making it extend a little higher than the level of the tin, by 2 or 3 mm (⅛"). This helps with pastry that can shrink back a little on baking. Using a fork, pierce lots of holes over the base of the pastry casing. (This lets steam escape, and helps avoid a ‘soggy bottom’ and is known as ‘docking the pastry’). Now place some cling film/plastic wrap or baking/parchment paper on top of the prepared tin and chill for another 20 – 30 minutes. Roll up the scraps of left-over pastry and add to the pastry you have in the fridge. See Photo 11 below.


To Blind Bake The Pastry Case:
- Before the chilling time is up, heat up the oven to: 180°c/160°c Fan Oven / 350°f /Gas Mark 4.
- Cut some baking foil (aluminium foil) or baking/parchment paper, bigger than the size of the pie case. Place on top of the pie case and let it cover the edges of the crust too. 'Blind bake' this empty pie case with silicone pastry baking beans, or as I do, use uncooked dried beans/pulses or even rice. Be sure to use enough to fill the base & all the way up the height of the pastry case, to avoid shrinkage. See Photo 12 below.

- Place the pie tin on top of another bigger baking sheet/dish to make pulling out of the oven easier. Then bake the pastry case for 15 minutes & try to turn the pie half-way through cooking to ensure even baking. Remove the pie from the oven, & very carefully fold the paper/foil into the centre so you can lift off of the case. If any fall into the soft pastry, remove with a fork and smooth the pastry back down. Be careful as it will be hot. Mix the remaining egg with a splash of milk & apply this as an ‘egg wash’ to all exposed areas of the pastry, before popping back in the oven to bake for 5 minutes. Remove from the oven and place on a cooling rack while you prepare the pastry top. See Photo 13.


Prepare The 'Twist' Topping:
- Meanwhile, remove the 2nd piece of pastry from the fridge, & form into a rectangular shape, before rolling out. Cut long strips, about 1cm wide (⅓"). I used a ruler to guide me when I was cutting, but anything straight and long enough will work. See Photo 14.


Constructing & Baking The Pie:
- Once the part-baked pie case & your rhubarb filling has cooled down, you can now add the cooked rhubarb. To make the pastry twist top, take one long strip of the pastry just cut, use both hands & twist from one end to the other.

- Then on some paper, make a spiral for your starting point – like a rose. See video for reference. Alternatively, you can skip the initial twist, & twist the pastry while you are forming a spiral. (See Photo 16 & 17 below). Just be careful not to let the pastry break. Chilling the pastry before construction actually can make the pastry too hard and break more easily. So if too soft or your hands are too warm, just chill for 5 minutes at a time.

- Using the left-over egg-wash, brush all over this pastry spiral before carefully transferring to the centre of the pie, on top of the rhubarb filling. Then take a second pastry strip and twist from both ends, before joining onto where the first pastry spiral ends. See Photo 17 below. Having egg-wash on the sides of the pastry helps them join. Repeat with more long strips of pastry till you have filled the top of the pie. (See videos, and Photo 18 below for reference). If the pastry twist is not quite centre, gently and carefully shake the pie dish till it lines up better.

- Gently brush egg-wash on top of all the pastry, including the crust edge, before baking for about 14-18 minutes. Turn the dish during baking if needed & check after 12 minutes until you get an even golden colour, not pale (If the pie case edges are colouring too much, you can cover using foil – just cut out a circle in the centre, to allow the pastry in the centre to develop its colour). Place on a cooling rack to cool down before attempting to remove from the pie dish. (If you baked on top of a baking tray/sheet, remove this and just place the pie dish on the cooling rack). See Photo 18 below.

- Removing from a loose-bottomed pie dish – simply place the pie on top of a jar for example, & pull the ring of the tin down. It’s easy just to cut the pie on the tin’s loose base. Alternatively use a cake lifter or push the pie onto a flat plate (just make sure the pie is not still hot).


Serving & Storing
- Serve now with some ice-cream, cream, or even custard (try my pastry cream recipe). Store on a cake stand with dome for 1 or 2 days in not too warm an environment (make sure the pie is not warm when adding a cake dome). You can also store in the fridge, just be careful of condensation causing the pastry to go soggy. Can also be frozen once cooled (see all freezing options below in notes).


Video
Notes

 If not going to use formed pastry dough after 30 mins, then remember to take out of the fridge at least 15 mins before wanting to use it, so that it isn’t too hard to roll. Will be fine in the fridge for 2 days, well wrapped.
Frozen Rhubarb – you can of course use frozen rhubarb for the pie filling. Just let it defrost and cook as per the recipe. It may need a little more cooking just to remove any further liquid.
If not going to use formed pastry dough after 30 mins, then remember to take out of the fridge at least 15 mins before wanting to use it, so that it isn’t too hard to roll. Will be fine in the fridge for 2 days, well wrapped.
Frozen Rhubarb – you can of course use frozen rhubarb for the pie filling. Just let it defrost and cook as per the recipe. It may need a little more cooking just to remove any further liquid.


Freezing
Baked & cooled pie can be frozen, as a whole or in slices. Wrap in baking/parchment paper, cling film/plastic wrap & a labelled food bag. Defrost at room temperature, cover & warm in a 180°c/160°c Fan Oven / 350°f /Gas Mark 4 oven for about 15 minutes. As mentioned in the stages above the Recipe Card, you can also freeze the pastry before this, at several of the process stages.
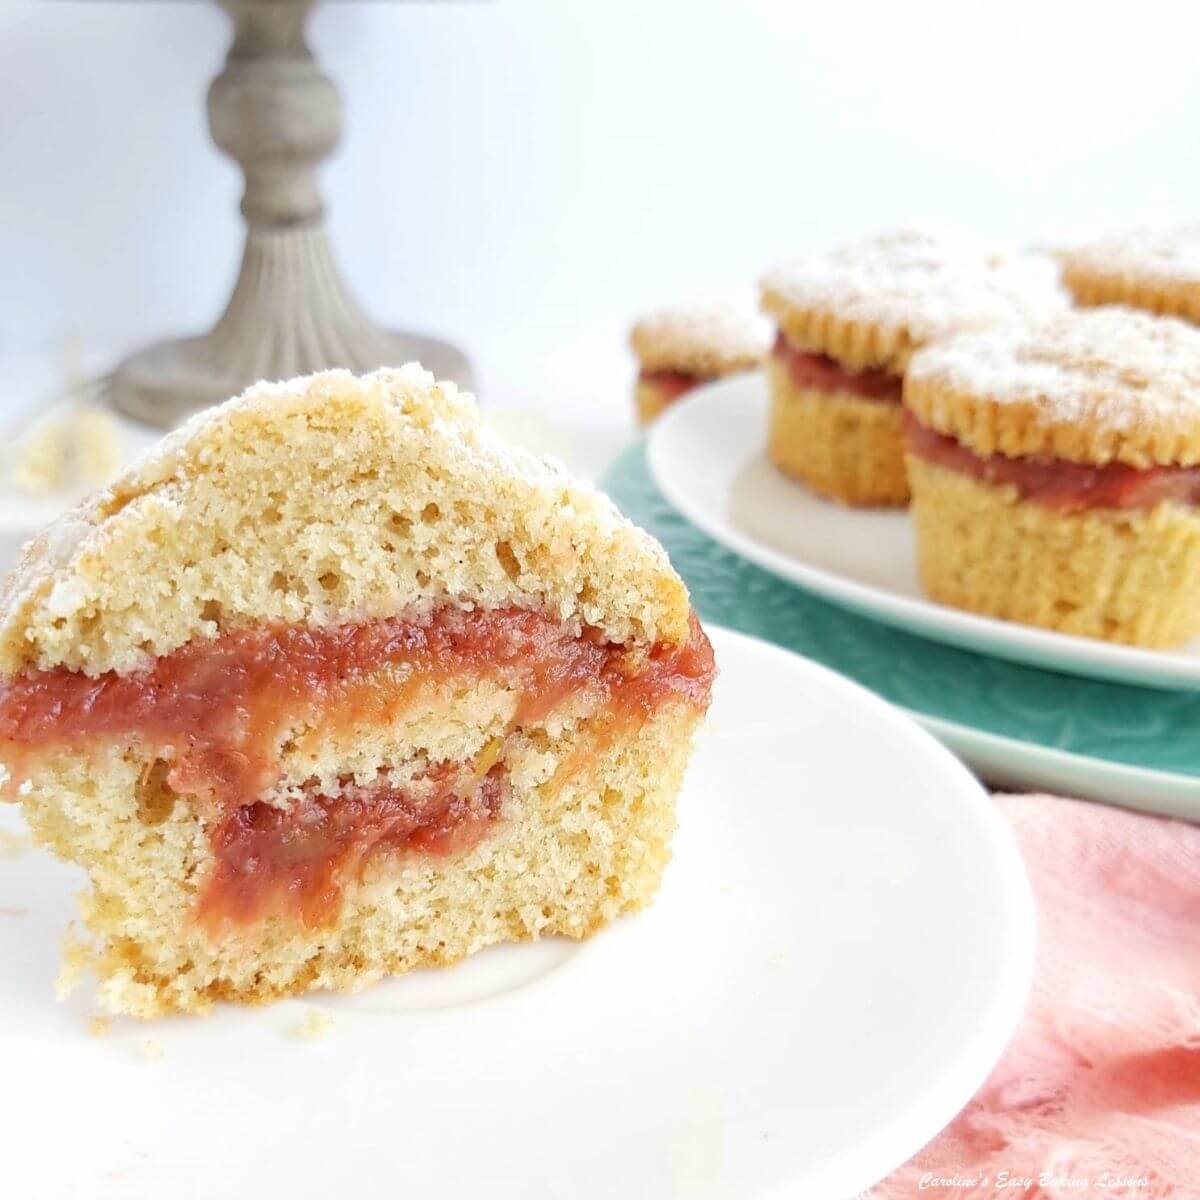 Here is a super simple recipe to use that rhubarb – Stewed Rhubarb Cupcakes, part of my Baking On A Budget series.
Read How To Make Home Made Vanilla Extract
Go to Individual Chocolate Tart recipe
Here is a super simple recipe to use that rhubarb – Stewed Rhubarb Cupcakes, part of my Baking On A Budget series.
Read How To Make Home Made Vanilla Extract
Go to Individual Chocolate Tart recipeReader Photos


I think Melissa’s pie looks amazing and so beautifully done! Here’s the link again to go straight to the pastry tutorial – Shortcrust Pastry 101
Click for more Rhubarb Recipes


Follow me on social media:
Thanks for reading
Happy Learning & Baking
Caro xx


References
*/**Freeze It website @ https://www.freezeit.co.uk/can-you-freeze-shortcrust-pastry/


Rhubarb Pie With A Twist
Caroline’s Easy Baking Lessons


Brilliant recipe for a tasty pie. It looks difficult but the instructions are so easy to follow and was so pleased with it. Family favourite