2 Hour Bagels – Quicker Yeast Recipe

This is my 2 hour recipe for 'real' bagels. 'Real' because they are yeast based, but can be made quicker with a revolutionary technique for handling yeasted dough.
2 Hour Bagels
Real Bagels With Quicker Yeast Recipe


***click to jump to section
*Original recipe 17 July 2019, photos updated 2022.
DIFFICULTY LEVEL: Intermediate

How Did My Recipe Come About
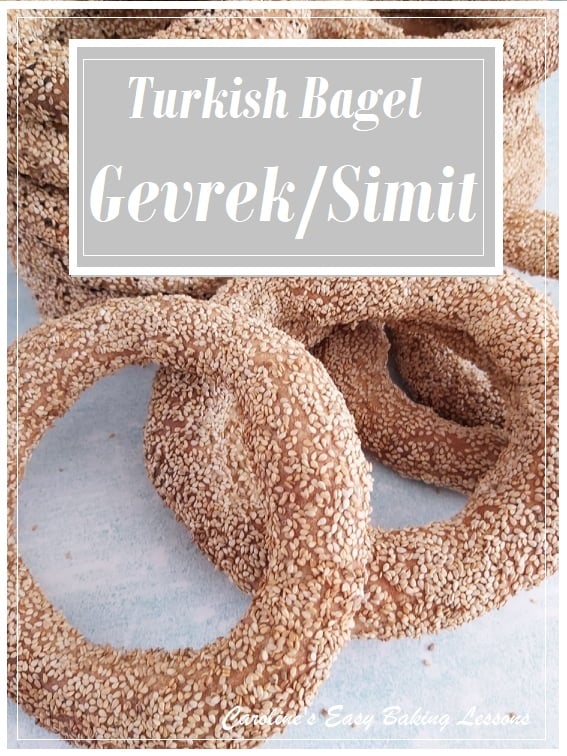
Being married to a Turk, I taught myself to make many Turkish meals and bakes. One of which was Gevrek/Simit (pronounced ‘Gev-rek’ and the other regional name for it is pronounced ‘see-meet’). It’s similar to a bagel but bigger and the hole is wider, making them thinner and hence the texture is slightly different, and more chewy.
So after learning how to make them, I moved onto making bagels. Initially with the Gevrek, I rolled long pieces of dough and joined them. This method came about as they were often made with 2 thinner strands twisted together. But when it came to the bagels, I found making a hole in the bagel, was a much better and quicker method.
I am also mentioning the Turkish version, as my video included of forming the bagel shape, was actually when I was making the bigger Turkish ones. But the idea is still the same.
Ingredient Notes
Let me break down the ingredients required for these 2 hour bagels.


Flour
Firstly, we have flour. I most often use Plain/A.P. flour for bread recipes. I only use strong/bread flour if I have it. The bread flour has a higher protein content, and this is beneficial for structure, so if I have any I tend to try and keep it for making sandwich loaves that have more height. That is not to say, you can’t achieve a good rise without bread flour.
Some of my quicker yeast recipes I make using 50% wholemeal/wholewheat flour. But I am still developing with 100% wholemeal flour. My only recommendation with using this flour, is that you increase your liquid content by about 11%, as it absorbs more liquid than white flour. And when adding the liquid, add gradually and give the flour 2 minutes to absorb the liquid, before adding more.
See my Quicker Yeast Bread & Roll Recipes (including Pizza) Or my 90 Minute Bigger Burger Buns recipe.


Yeast
I have developed this recipe using both Active, Fast Acting & Instant dried yeast.
Active or Fast Acting dried yeast can be used for this recipe & I have used both. But if you want to be exact with the amounts, or to use fresh yeast, see my Yeast Conversion tables.
Different Packet Names For Dry Yeast
You will notice that different companies, will name their dry yeast slightly differently. Such examples in the US are – Active Dry, Fast Rise and Rapid Rise. These are commonly available in supermarkets although not exactly the same, for most intents and purposes, you can use either. Especially so for smaller bakes.
Names found in the UK are Fast Acting, Rapid Rise, Active Dry & Instant Dried.


The fundamental differences are that Instant, Fast & Rapid are slighter more potent than Active Dry. It’s the difference between 1/4 tsp. My table in the Yeast conversions shows it in grams and if using a lot of yeast in bulk, this difference will obviously increase. The other difference is that the quicker activating yeast has ascorbic acid added to it.
But as I said this recipe I have made successfully with both types of dry yeast, with no ‘blooming’ (adding sugar & water to the yeast & leaving to froth) required to activate the yeast. I use the same amount. It is unlikely to result in the bread not rising. Over factors can cause this. See my Quick Guide For Beginners Working With Yeast Dough article.


Grape Molasses
With my husband being Turkish, I use a lot of Turkish products and for their version of a bagel, they use – Üzüm Pekmezi which is Grape Molasses in liquid form. You can also use Pomegranate Molasses, which is also found in a lot of Asian and Mediterranean stores as well as online. Other substitutes would be molasses, or barley malt. Both you can find in the UK, in jars. Holland & Barrett have them and Meridian is a brand that make them.


This however is a little thicker than grape molasses and should be watered down more. I would suggest trying only 1 tbsp of the ordinary molasses and mixing warm water in gradually till you have a consistency like in the video. I would also suggest adding a pinch of salt to this.
Can You Use Honey?
I have never tried using honey, but the molasses is more to give a deeper colour when baking and I am not sure honey would achieve this.
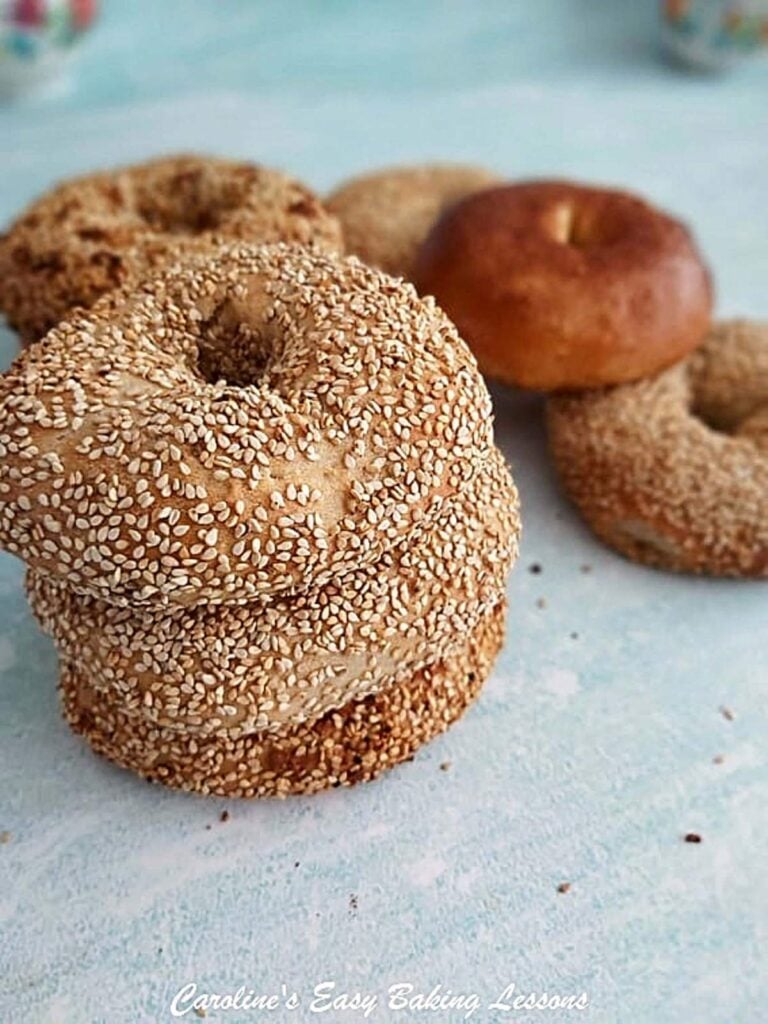
Sesame Seeds, Nigella Seeds & More
I love to completely cover the bagels in sesame seeds. I also mix a little Nigella Seeds in with the sesame seeds, as these are very popular in Turkey, and known as Çörek otu (pronounced ‘chew-rek ootoo’). I also in the photos tried adding some crushed, dried fried onion I had. It did catch a little when baking. So have also tried adding some onion salt to the sesame seeds. You could also use ‘Everything But The Bagel’ seasoning.


You can of course not add any seeds and leave plain. Just make sure to still dip the bagels in the molasses, and do so for a little longer – for 7 seconds, on both sides. This will give them a nice deep golden colour and flavour.
Seasoning In The Dough
For my quick yeast dough, I always add a touch of seasoning. I go between onion powder/granules/salt and garlic powder, depending on what I have. It doesn’t give a strong taste but rather just a hint, letting your choice of filling come through.
As an alternative, I would suggest an additional 3/4 tsp salt.


The Recipe Process At A Glance
The recipe process is as follows: Prepare your yeast dough for the bagels. This is best done with a powerful stand mixer for the kneading purposes, unless you have great upper arm strength. Also don’t slip the 2 minute mixing times for each batch of flour.
Leave the dough to rest in a warm draft free area for 15 minutes while you prepare for the next stage.
Prepare bowls with the molasses and seedings for dipping
Form the dough into 12 neat balls of dough and then shape into bagels by hand. This is so easy. I used to make the Turkish version (Gevrek, Simit), by joining long rolled strands, but this new method is much quicker.
Dip the bagel dough in the molasses bowl and then the seeds and place on a prepared baking tray/sheet.
Next leave the bagels to prove for 30 minutes, before popping in the oven to bake. That’s it!
Check out my video on rolling tight balls of dough. .
Mixing The Dough Video
You can also watch a real-time video of me making the dough, in my Quicker Dinner Rolls Video.
Jump to Video

Recipe Card
2 HOUR BAGELS – A Quicker Proper Yeast Recipe

Ingredients
For The Dough
- 283 grams Plain or Strong Bread Flour (2¼ cups All Purpose or Bread Flour) – [F1]*
- 2½ tsps Salt
- 415 ml Tepid Water (14 fl oz, 1¾ cups, see recipe instructions on temperature)
- 2 Egg Whites, medium – Large (Large – XLarge US eggs)
- 4 tsps Olive Oil or E.V.O. Oil
- 1½ tsps Onion powder or granules (optional)
- 2 tbsp Sugar
- 16 grams Yeast, Instant/Active (½ oz, 1⅓ packets of yeast)
- 142 grams Plain or Strong bread Flour (1 cup + 1 tbsp All Purpose or Bread Flour) – [F2]*
- 213 – 283 grams Plain or Strong bread Flour (1¾ cup – 2¼ cups All Purpose or Bread Flour) – [F3]*
For The Coating
- 240 ml Warm Water (1 cup, 8 oz)
- 2 tbsp Turkish Üzüm Pekmezi (Grape Molasses liquid – see notes for alternatives)**
- ½ tsp Salt
- Sesame Seeds, Çörek otu (Nigela Seeds), 'Everything But The Bagel' Seasoning, etc
Instructions
Prepare The Bagel Dough
- Begin by measuring out all the ingredients. See Photo 1 below. It is very important to have the 3 flour amounts in separate bowls. You can have [F1] flour in your stand mixer bowl.


- Separate your 2 eggs. You can save the yolks to use in a cake, make an omelette, make lemon curd, use in replace of 1 egg in a cake recipe, or freeze the yolks in an ice-cube tray. Alternatively, you can make into Pastry Creme – Creme Pat with some more yolks, or even keep for egg-washing another bread or pastry recipe.
- Have the water in a microwave safe jug and heat for about 30 – 45 seconds until just a little warm (120-130°f, 49-54°c). You can also test with a clean finger and it will be just above tepid. You can just use hot and cold water mixed together in the jug to get tepid temperature. But if unsure, best to use a thermometer first time making. Once at the right temperature, add in the egg whites & oil & mix together.
- While the water is heating, add the salt to the [F1] flour in the main mixing bowl, and mix well. Then add in the sugar & onion powder, and mix well before finally adding in the yeast. See Photo 2 below.
- Add the liquid mixture to the flour mixture and mix a little by hand before starting the stand mixer, with the 'k' paddle/mixer paddle attached (not the kneading hook yet). Mix for 2 minutes, on medium speed with a timer. The timings are important in this recipe. See Photo 2 above.
- Next add in the 2nd bowl of flour – [F2], (the smaller one) and let the mixer mix the flour in for another 2 minutes. See Photo 3 below.
- Now add in half of the third flour bowl – [F3] and let the mixer incorporate the flour on low – medium speed. Then slowly add in the rest of [F3] flour. You might not need it all, (or a little more – sometimes I have needed an extra 3/4c or 90g), but you want a dough that starts to come together as a very rough ball around the paddle. So mix for 10 seconds after each addition of flour and wait to see the ‘ball’ of dough. Note that the dough will be a bit sticky. See Photo 3 below.
- Next put the dough hook onto the stand mixer (use a scraper to get the dough off the paddle), and knead on medium speed for 4 minutes.
- Using a rubber or silicone slim spatula, scrape the dough off the hook & from down the sides of the bowl. Then turn the dough over, using the scraper and oiled hands if need be. Let the mixer continue kneading for another 4 minutes. The dough does tend to stick at the bottom when kneading, & this is another reason why we turned it during kneading. Once the total kneading time is up, the dough will be forming a ball & cleaning the sides of the bowl. Scrape any dough from the hook & into the bowl. Alternatively, need by hand on a very lightly floured surface for about 10 minutes till smooth less sticky.
- Have a feel of the dough to know how well kneaded dough feels. Note also how stretchy it is when you lifted the dough hook up. See Photo 4 above. Now place a clean tea-towel on top of the bowl and leave somewhere warm and draft free for 15 minutes.


Divide up The Dough
- Meanwhile, well flour some baking/parchment paper or worktop/counter and your rolling pin. The dough will have risen slightly, see Photo 6 below. Release the dough from the bowl, (use a scraper or lightly floured hand if need be) tipping out onto the worktop. Turn the dough over and let it get a bit more flour on it. Now divide the dough in half and divide each half into 6 pieces, to make 12 equal pieces of dough. For equal sizes you can weigh or, what I do is form into 2 large disc shapes. Then divide each disc into 6 triangle segments like a pizza.

- Now take each piece of dough & roll into a tight neat ball. (See Photo 7 below). To do this I pull the dough and tuck under itself. This repeated action, not only works the dough a little, but causes surface tension, which in line creates a tighter ball of dough. Then finally 'cup' the ball of dough with your opposite, in circular motions, smoothing the ball. For more on this, check out my video on rolling tight balls of dough. Place on a lightly floured sheet of baking/parchment paper while forming each ball of dough.


Prepare The Coating
- Prepare the coating by mixing the warm water and salt with the grape molasses (Uzum Pekmez), in a wide and deep enough bowl that you can dip the bagel in. (They will be about 10cm /4" wide, so a bowl wider than this is best, but not too big). Note too that I use a medium sized sieve in the dipping in molasses stage, and this needs to be able to hold the bagel, as well as be able to fit in the bowl. (See photos). Also have a bowl the same kind of size ready for your choice of seeds that you will dip the bagel in. (My bowls were 17cm/6¾" at the widest and about 5cm/2" deep, and the sieve was 15cm/6" at it's widest. But the wider you make the hole in the bagel, the wider they will get). See Photo 8 below.

- Line up the 2 bowls (with the liquid and seeds), and your sieve, placed on top of some kitchen paper/paper towel, and position them off to the side slightly, leaving room for you to shape the bagels on your work area.

Shape The Bagels
- Lightly flour some baking/parchment paper, and place one ball of dough on top. Then flour your thumb & index finger on your dominant hand.
- Lift the ball of dough & flatten slightly while still in your hand, and use your thumb to make a hole in the centre of the dough. See Photo 9 below, first pic. Also use your index finger that is on the under side of the dough, and use both fingers to widen the hole to about a thumb width. Then hold the dough vertically (hanging down), and use two hands to widen the hole more. I use a kind of squeezing and pulling along motion. (Kind of like when trying to thread elastic through a hem). See Photo 9 where I show the size of the whole made for the bagel and the Simit. Also check my video below, where I was making Gevrek/Simit – a Turkish type of bagel that is bigger and thinner and requires making bigger holes in the dough.

- You want to make the hole bigger than you want it to be once baked. This is because the dough will prove and bake, and the hole you made will become smaller. For sandwich bagels, I like to make the hole about 3¾cm/1½" wide. See Photo 9 above, top right pic. Repeat for the other 11 balls of dough and have ready for dipping. Flour your hands lightly if needed. See Photo 11 above.


Coat The Bagels
- Have your production line ready, with the coating and the balls of dough, as well as 2 or 3 paper lined baking trays/sheets.
- Begin by placing one of the bagels in the sieve, then dip the sieve in the bowl with the grape molasses mixture, for 5 seconds. (See Photo 12 below). Lift above the bowl and shake the excess liquid off a little, before flipping the sieve over on top of the palm of your opposite hand, allowing the bagel to fall onto your hand. Then let the bagel slide off your hand back into the sieve (but this time it will be on the opposite side). Dip the sieve into the liquid again, for just 5 seconds, allowing the opposite side of the bagel to be coated. Lift above the bowl and shake off the excess liquid. See Photo 12 below.

- Next flip the sieve over above the second bowl with the seed coating, and let the bagel fall out. (See Photo 12 above, last pic). Place the sieve down on the kitchen paper/paper towel, and even blot dry your wet hand. Then use your other hand to push sesame seeds up onto the sides of the bagel. For the centre, I run my index finger in a circle, in the middle of the bagel hole, letting the seeds coat the middle. See Photo 13 below, left pic.

- Turn the bagel over gently, with both hands, allowing the opposite side to be coated. See Photo 13 above. After ensuring fully coated, shake off excess, before placing on the prepared baking sheet/tray. Repeat for the other 11 bagels, leaving at least 1"/2½ cm gap in-between each bagel as they will expand.
- If you don't want to add any seeds, dip the bagels for 7 seconds, on each side and then place on the trays/sheets. (See Photo 14 of the onion bagels before & after 30 minutes proving).


Prove The Bagels
- Once all the bagels have been dipped and coated, leave 30 minutes in the same warm, draft free place for a proving (rising time).

- Before the 30 minutes is up, heat your oven to : 220°c/200°c Fan Oven/425°f/Gas Mark 7, to have it coincide with the end of the proving. The bagels will have puffed up and spread a little. See Photos 15 & 14 above.

Bake The Bagels
- Place the bagels in the oven to bake for 10-15 minutes until a deep golden colour and cooked through. See Photo 16 below. Since you will have 2 or 3 baking trays/sheets, it's advisable to turn and/or at least rotate them, between the shelves for an even heat. I would suggest putting the timer on for 5 minutes and then turning the trays/sheets as well as swapping shelves and baking a further 4 minutes. Then do another rotation if you are using 3 trays/sheets at once, and bake until a deep golden colour. Check the underside of one of the bagels, and if still soft, turn the bagels over and allow to bake on the opposite side for 2 minutes. Repeat this till all are baked through. You can of course bake just 2 trays/sheets at one time, or even just one, and be sure to place in the centre most shelf of the oven.

- Remove from the oven and place the tray/sheet on a cooling rack for 5 – 10 minutes, before removing, using the paper, to cool on just the rack. Leave at least 15 minutes before eating. Waiting even longer, they will be much easier to slice nicely. See Photo 17 below.

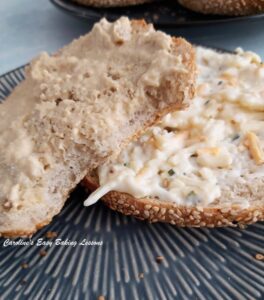
- Serve sliced with your favourite sandwich fillings. Cream cheese and smoked salmon is lovely. If you leave some till completely cooled, these will slice cleanly, and make toasting much easier too.


Video
Notes

 Üzüm Pekmezi – Grape Molasses in liquid form. You can use Pomegranate Molasses, which is also found in a lot of Asian and Mediterranean stores as well as online. Other substitutes would be molasses, or barley malt. A little thicker and should be watered down more. I would suggest 1 tbsp of the ordinary molasses & mixing warm water in gradually till you have a consistency like in the video. I would also suggest adding a pinch of salt to this. More on where to buy, before the recipe.

 Plain/A.P. flour or Strong/Bread flour can be used. I have also used 50% wholemeal/wheat flour with this quicker bread technique – see my Quicker Yeast Bread & Roll Recipes (including Pizza) Or check out my 90 Minute Bigger Burger Buns recipe.

 Active or Fast Acting dried yeast can be used for this recipe & I have used both. But if you want to be exact with the amounts, or to use fresh yeast, see my Yeast Conversion tables. Also read before the recipe for more on the types/different names of the yeast.
Go to my Bread & Roll recipes.
Active or Fast Acting dried yeast can be used for this recipe & I have used both. But if you want to be exact with the amounts, or to use fresh yeast, see my Yeast Conversion tables. Also read before the recipe for more on the types/different names of the yeast.
Go to my Bread & Roll recipes.

 Caroline’s Easy Baking Lessons 2022
https://easyonlinebakinglessons.com
Caroline’s Easy Baking Lessons 2022
https://easyonlinebakinglessons.com


Subscribe For More Recipes
Join My Facebook Group
Why not also join my – Facebook group Easy Online Baking Lessons, dedicated to this baking lessons website, as well as providing one-on-one support with myself & my team? Be sure to answer all security questions when requesting to join.
Follow me on social media:
Happy Learning & Baking !
Caro x


2 Hour Bagels – Quicker Yeast Recipe
Search For Something You Fancy!
Caroline’s Easy Baking Lessons


