Classic British Scones – Only Recipe You Need!

Try my authentic Classic British Scones recipe & video tutorial, with tips on how to achieve the perfect rise for this classic British bake.
Classic British Scones
That Rise To The Occasion
All You Need To Know
*Original recipe posted 17/08/2018, new recipe card added October 2022, new photos April 2023.


Difference Between British Scones & US Scones & Biscuits
I hear on a regular basis, people saying British scones look like US Biscuits. But this is not the case and only said by those who have never made or tasted an authentic British scone. True, US Biscuits look more like a British scone, than US scones (US scones don’t have the same rise & are often cut into triangles). British scones are traditionally made round and always with a cutter rather than a knife.
The similarity with US biscuits, is only the outer appearance. Yes they are made from the same general ingredients. However, the proportion of these ingredients is different. And this difference results in a different inner structure and texture when you eat them. But I digress….


Why Try This Recipe?
This is my adaptation of Mary Berry’s recipe for yummy traditional British Scones. Not to be confused with US Biscuits, the recipe for these scones will give a good rise, which is characteristic to scones from the UK.
I have altered the instructions and added lots of photos to help you learn this easy recipe, as well as crucial tips for a successful bake. You don’t have many dishes to use so it saves on the washing up too.
Click if you want to learn more about the history of scones & High Tea & Cream Tea.
Jump to VideoNo Fancy Equipment
No fancy equipment is needed to make these scones – you only need a hand whisk, round cookie cutter (not the scalloped edge), and a pastry blender (pastry cutter). And even the pastry cutter is not essential as you can use your hands or a butter knife too. So the most important equipment for these scones, is your own hands. No need for rolling pin or a mixer or food processor.


Tips For Great Scones
However, there are some important things to remember if you want that classic ‘scone rise’ with British scones. I describe it as a ‘rise & split structure’ and there are things, not to do, that can affect the rise.
Don’t roll out the dough and touch as little as possible. Never twist the cutter when cutting out the scones. Also, don’t let any of the egg/milk glaze dribble down the sides of the scone.
All these actions basically interfere with the structure you are hoping the scones will bake off as. (Please also see the video below for more tips and trouble shooting).
Jump to Video

To summarise Tips, see below:
Tips For A Great Rise To Your British Scones

1. Don't use a recipe with too much baking powder, as it can cause a premature rise & sink.
2. Don't use a food processor or mixer for making scones.
3. A slightly sticky dough is good.
4. Don't roll out the dough, pat out with your hands instead.
5.  Don't flatten too thin (1"/2.5cm minimum depth).
6. Don't twist the cookie cutter.
7.  Don't touch the sides of the cut-out scone.
8. Don't let the egg/milk mixture run down the sides of the scones.
9. Minimal and gentle handling as possible.
Caroline's Easy Baking Lessons
Notes On Ingredients


Sugar
If you are in the US/Canada and can’t get extra/super fine sugar as an equivalent for the UK caster sugar, you can make your own by grinding regular granulated sugar a little bit or processing lightly. Do not go as fine as a powder, keep it as small granules.
See photo below for a comparison of sugar grain sizes in the UK. Please also note that UK Granulated grain size is slightly larger than the US equivalent.
The use of fine sugar, is crucial in these scones, so should not be omitted. It’s only a small amount too, there in the recipe for structure rather than sweetness and also lengthens the life of the bake.
See photo of my scones with fig curd.
Comparing UK Sugars


Flour
If you can’t get self-raising or self-rising flour, make your own from Plain/All Purpose flour by adding baking powder. As a general rule, for every 125g (1 cup) of flour, add a scant 2 tsp of baking powder.
For the recipe below, I have reduced the baking powder quantities a little just to be on the safe side as there are some discrepancies on various websites over how much baking powder to add and what constitutes a cup size.
I have personally tested this recipe using plain/all purpose flour to make self-raising and it is sufficient to give a great rise. Too much baking powder causes it to prematurely rise, & then fall back down with not enough flour as support. It can also have a metallic taste if too much is used.
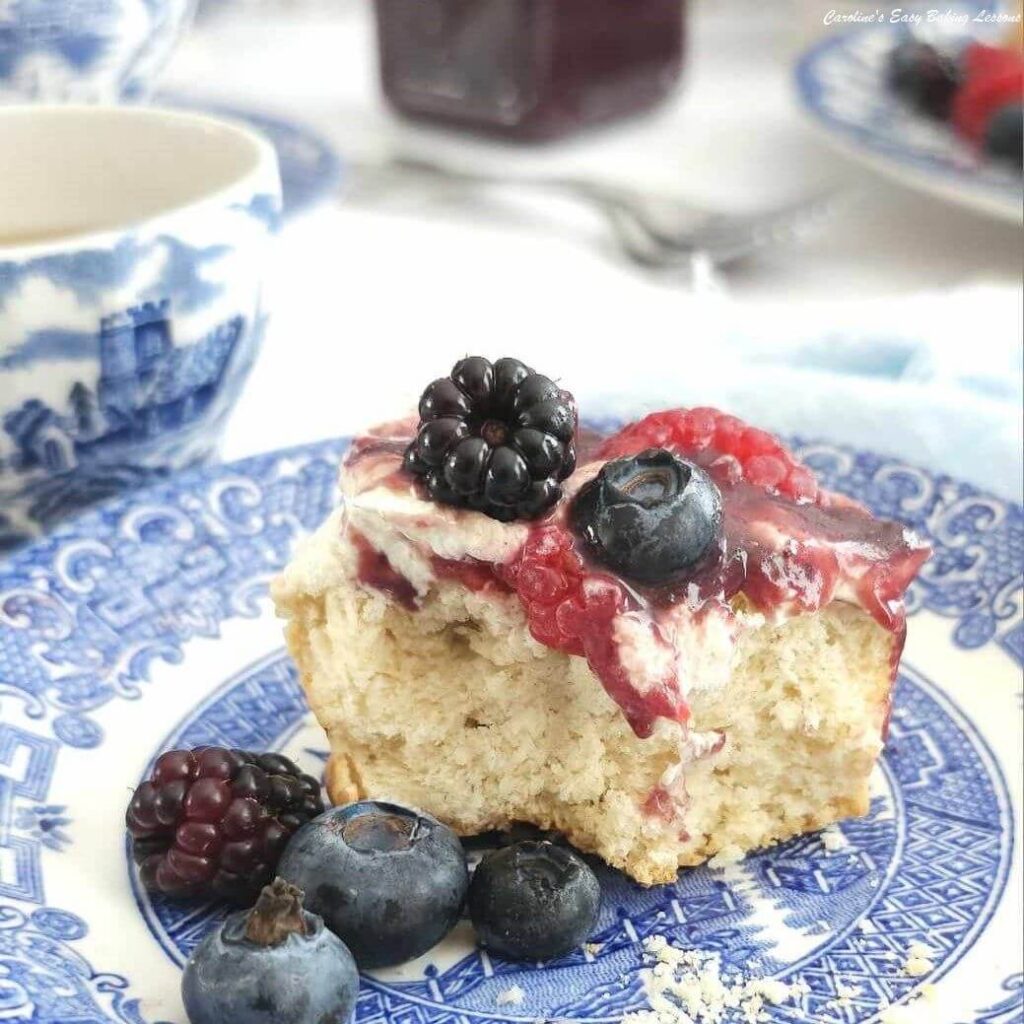
(**Photo of scones with homemade blueberry orange curd & whipped cream).


Gluten Free Flour & Alternative Milks
Many British scones in a group bake-along were made using this recipe & All Purpose flour, with great success. Some even used Gluten free flour, and coconut milk for health reasons.
This milk produces a scone, with the correct rise and texture, but the colour once baked, will be a little paler than when using cow’s milk. The same can be expected is the milk has a lower fat or sugar content. It will still all taste great through.


Adding Extra Ingredients
**Do not add too much chocolate or fruit to your scone dough as the added weight will reduce the rise of the scone significantly. And they will not rise as you want them too. I have calculated the maximum amount to add, and you can check that out in my Air Fryer Mango Cranberry Scones recipe, (see photo).
Mango CRANBERRY BRITISH SCONES
Check out my flavoured version of scones, with the addition of cranberries (or mixed dried fruit) and some spices. All tested, to give the same classic tall ‘rise & split’ structure typical to this type of bake. Go to mango cranberry scones

Other Scone Recipes
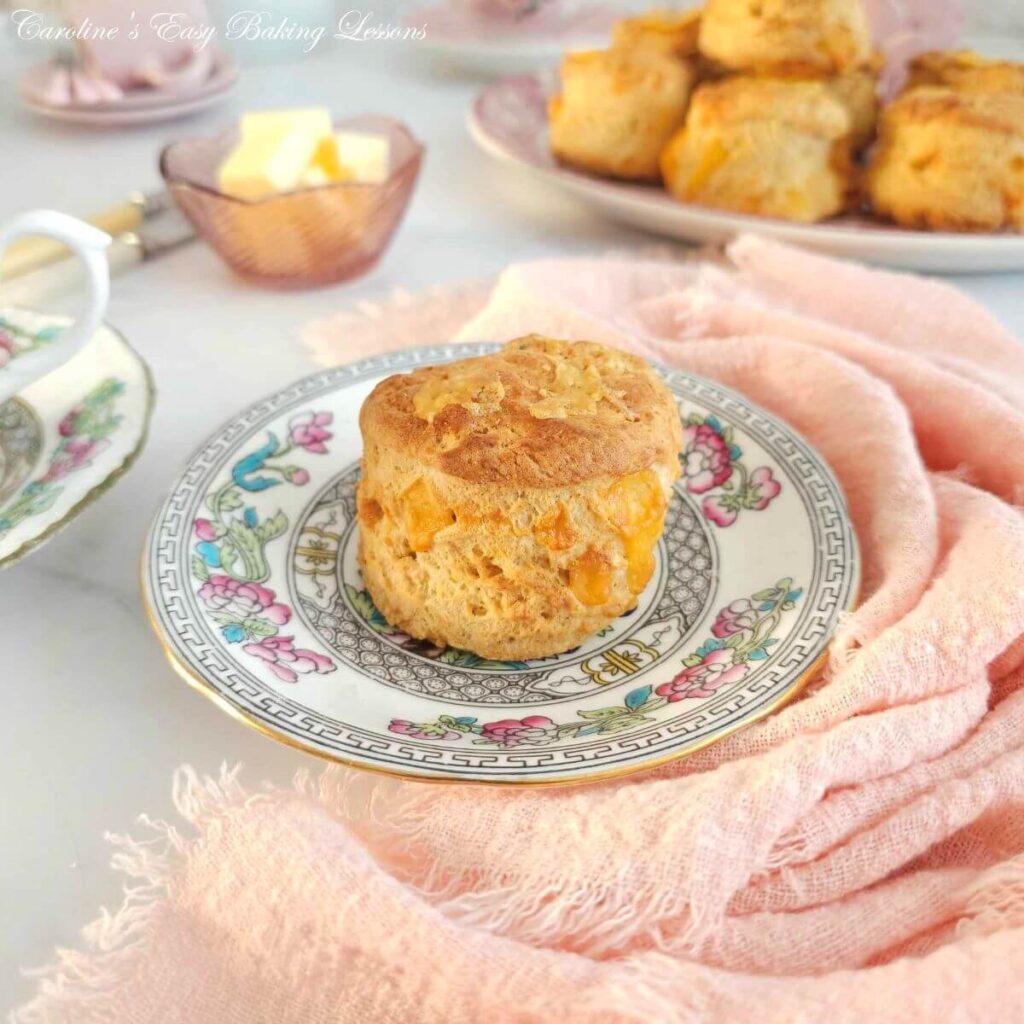
Cheese Scones
I also easily altered the recipe for a cheddar cheese version. Click for my Cheese Scones. Alternatively, you can try the Tear & Share Cheese Scones that are super simple and Savoury Lesson no. 3 for beginner bakers.
Air fryer Scones!
New for 2023 –Traditional British Scones In An Air Fryer or new for 2025, lemon blueberry air fryer scones.
Experienced bakers can skip to the Recipe Card – an abbreviated version of the British scone recipe. Click below:
Jump to Recipe


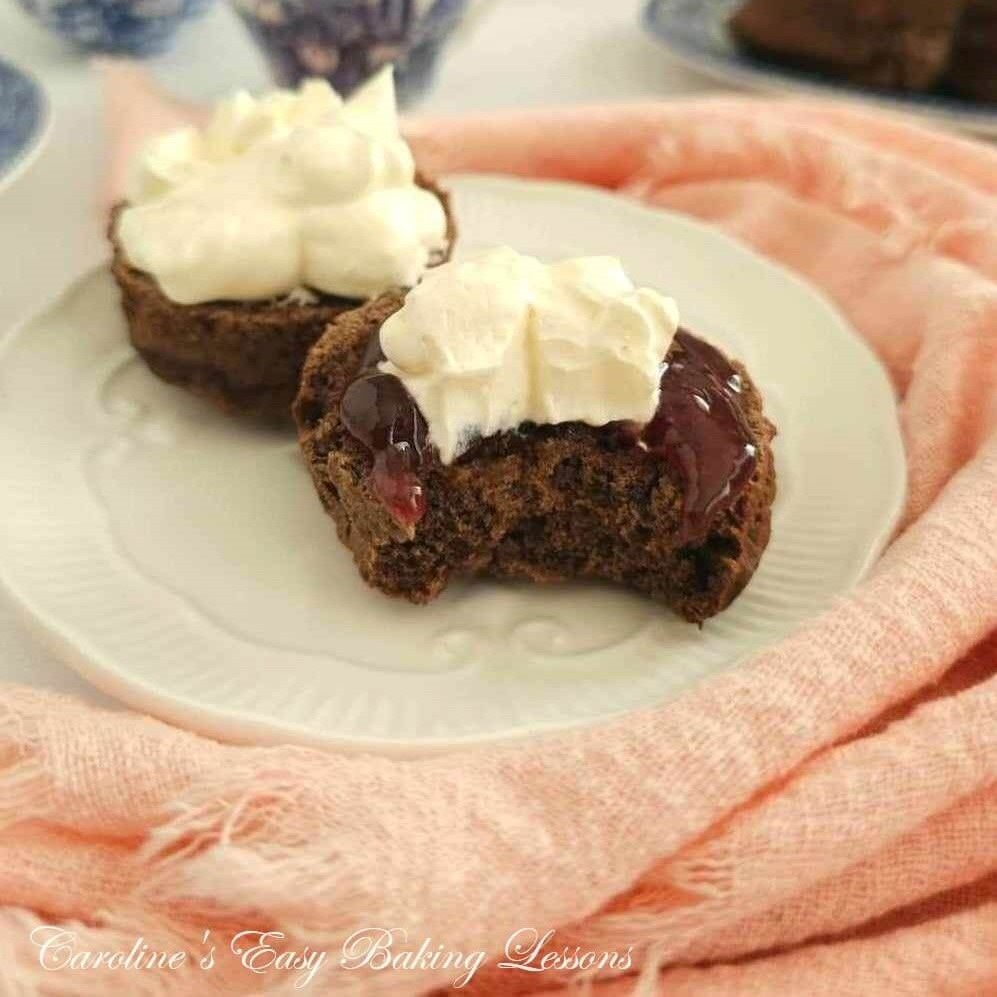
Latest recipe – Air Fryer Double Chocolate Orange British Scones
DOWNLOAD the recipe, to save to your phone or computer, for using or printing off later. Click the ‘download’ button below:


A Recipe Even Kids Can Make
This British scones recipe is so simple, my 13 year old son baked these ones for Mother’s day last year and they were perfect. If he can do it, so can you. As long as the instructions are followed, kids can make these unsupervised (depending on their age obviously).
KIDS – Just be careful when using the oven as it will be very hot. ‘Scant tsp’ just means a teaspoon that isn’t quite full, but nearly. A level one, you run a butter knife over the top, to make it flat.
My Son’s Scones


This first photo is how my son filled his scones: with raspberry jam/jelly and spray cream! They were delicious. You can spread on any filling you like. Jams/jelly, lemon curd, chocolate spread, peanut butter. He made a large heart shaped one just for me!
UPDATE – the rest of the scones in the collage above, were made by my boy for Mother’s Day (2021). He decided to use a square cutter this time (and British scones are always round). But boy, does this boy have a great touch for making scones! These ones turned out ‘enormous’! AND they were lovely. I am very proud of him 🙂
Reader Photo


Even Beginners Can Make These
Recently my Turkish husband’s niece Sude, (who lives in Germany), visited us for Christmas and I asked her what she wanted us to bake together. She had never tasted or made British scones before, so opted for that. I showed her what to do (and what not to do), and she ended up making the most amazing scones with a perfect & tall rise! Even her scones from the scrap dough were tall. See below a collage of the scones cooling and then photographed in a better light later.


Classic British Scones Video
Jump to my almost real-time British Scones video tutorial
Jump to Video
Step-by-Step Recipe
**Ingredients amounts & equipment listed in the Recipe Card below**
1. Weigh out the butter whilst cubing it and leave out to come to room temperature. I find smaller cubes (about 1/2″ or 1/ 1/4 cm is good since a smaller surface area means they will soften faster). See Photo 1.


If you forget to take out on time, try a hack I reviewed for softening butter in about 12 minutes. **Don’t use melted butter as it won’t create the correct structure. See my video for how to check if your butter is soft enough.
2. Next, lightly oil/grease the baking tray/sheet(s) & place baking/parchment paper on top. I only advise doing this if your baking tray/sheet doesn’t have a lip – I have had cookies slip off the tray onto the floor before! Not good.
3. Weigh or measure in the flour into the large bowl, spoon in the baking powder, give it a mix through & then add in the butter. I like to then just give a quick mix through, letting the flour coat the butter cubes.


‘Cutting-in The Butter’
4. Using your fingertips, rub the butter into the flour & continue to do this until the mixture resembles breadcrumbs, tiny pieces). See my new video for how to do this by hand, also know as ‘cutting in’ the butter, which is also used when making pastry.
You can also use two butter knives, but I use a pastry cutter/blender for this job as my fingers get sore. (See Photo 2 above). You push down into the bowl and do a squishing motion whilst turning the cutter left and right.
Repeat this until all the butter is now in tiny pieces with the flour. See Photo 2 or refer to the British scones video (click link below).
Jump to Video

5. Add in the sugar, or put the bowl back onto the scales, TARE to zero, and weigh in the sugar. Give it a good mix through for even distribution.
6. Put the bowl to the side, and beat the 2 eggs in a jug and then top up to the 300ml (10 fl oz or 1 1/4 cup) mark with the milk, (depending on the size of the eggs, you might not need as much milk). See Photo 3.
7. Give the liquid a good mix and then take 2 tbsp of it out and place in a small bowl to use later.


8. Gradually add the egg/milk mixture to the dry ingredients until a soft dough is formed. I tend to use a large spoon to start to mix it in, and then move on to using my hands, ensuring that there is no dry patches at the bottom. DO NOT USE A FOOD PROCESSOR OR MIXER. See Photo 4 (of the cheese scone dough coming together).
Be aware that the dough being a little sticky is good for the scones to rise. So only add enough of the liquid until just sticky. **So you may not need all the liquid. See Photo 4 & 5 or refer to the video for more guidance.
9. Lightly flour a pastry board, counter/worktop or use some baking/parchment paper with a little flour on top.


10. Heat up the oven to: 220c/200c Fan Oven/425f/Gas Mark 6. (***Kids – get an adults help with this).
11. Meanwhile form the dough into a disc & flatten gently by hand until you have a level piece of dough about 1 inch (2.5cm) high. (Kids, measure this with a ruler). Try not to go smaller than this. Don’t be tempted to roll out the dough as this won’t help the scones to rise. (See Photo 5 where end of my thumb to first knuckle is about 1″/2.5cm).
12. Flour the cookie cutter & cut out the scones. Push the cutter down. DON’T TWIST the cutter. Twisting can ruin the end structure of the scones – you want that characteristic ‘rise & split’ appearance of a good scone. Let it fall onto the prepared tray or leave to the end if it doesn’t come up with the cutter. At which point you can just pull back the excess dough. Try to touch the sides of the scones as little as possible.


13. Gently roll up the scraps of dough by hand and flatten out to cut out however more scones you can get, remembering to only lightly handle and bring together.
Refer to the video for this. Note that these last few scones, won’t be as perfect as the first ones, just because of more handling. See Photo 6.
14. Now using a pastry brush, very carefully brush the egg/milk liquid you reserved earlier, on to the tops of the scones only. If the liquid goes down the sides, it can ruin the rise of the scones.
So, the best way to avoid it is by shaking/taping the brush before moving to the scone and starting to brush from the centre and go outwards, so there is less liquid on the brush to spill down the sides. See Photo 6 below & the video.


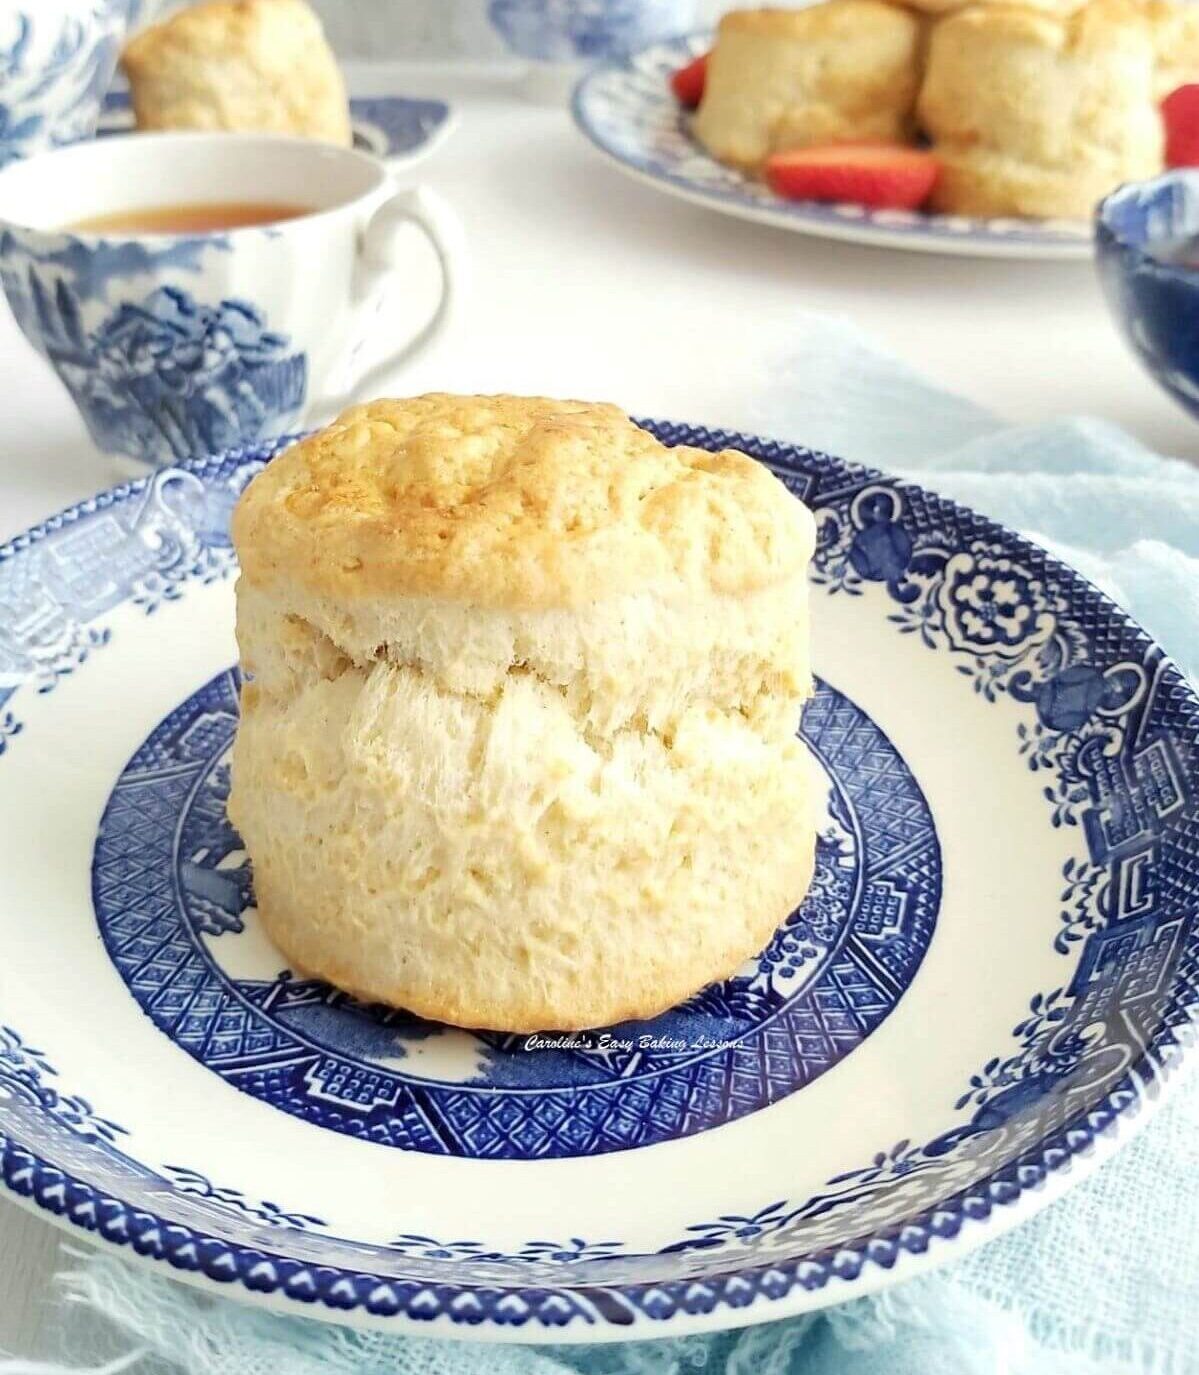
15. Bake for 8-12 minutes until well risen and golden in colour. Now I like to turn and rotate the baking trays between the shelves during baking, to ensure an even bake, (but I need a new oven!). See Photo.
(***Kids, get an adult to help with removing the scones from the oven.)
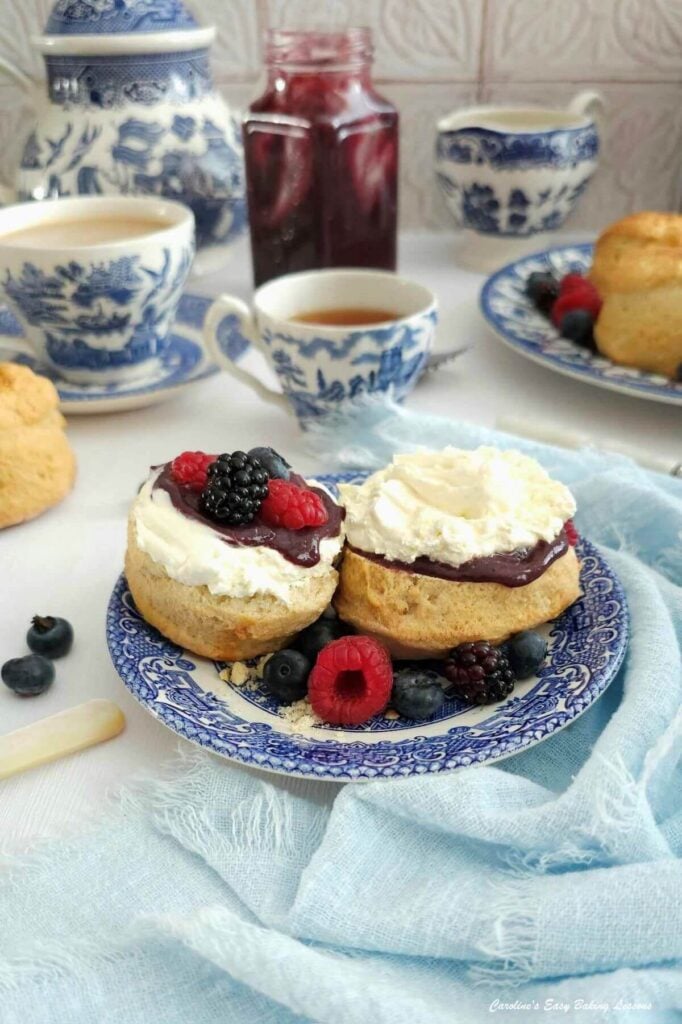
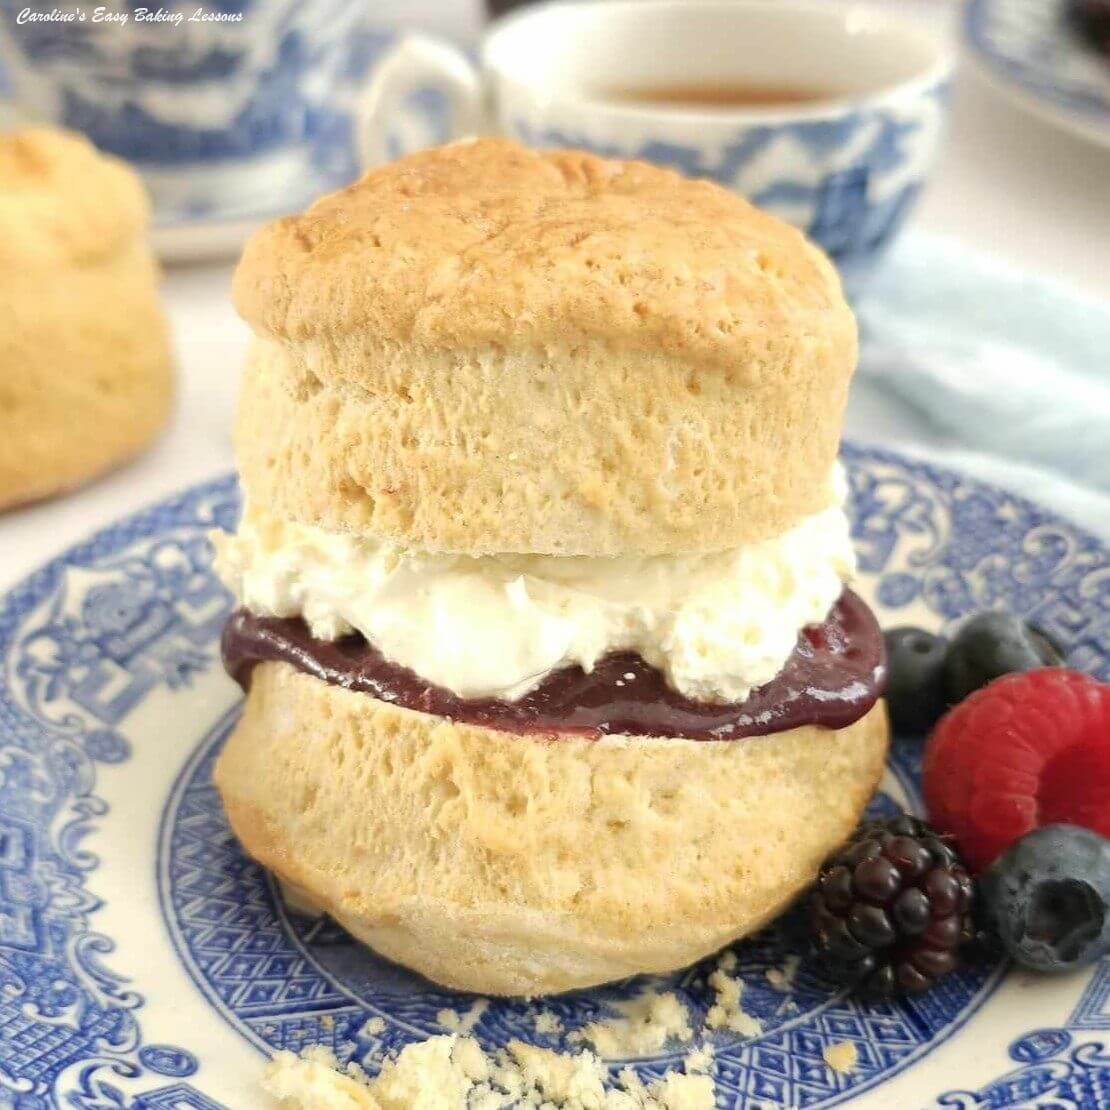
16. Cool a little on a cooling rack and enjoy warm with whatever fillings you enjoy. Jam & cream are typical toppings.
Storing Your British Scones
Store the scones in an airtight container, preferably a cake tin, and they will be good for 3 – 4 days, as long as kept away from too much heat.
You can absolutely freeze British scones and defrost at room temperature. After which, heat a little in a warm oven or slice in half and microwave for 20 seconds only.
Save My British Scones Recipe
Download the complete recipe to save to your phone or computer, for using or printing off later. (Alternatively print the Recipe Card further down). Click the ‘download’
Classic British Scones Download CEBLDownload
DIFFICULTY RATING – Beginner, Easy With Tips


FACEBOOK BAKE-ALONG
This authentic recipe was used for our GBBO Fans Facebook group bake-along earlier this year in 2020, with over 1100 British scones being made by our members all across the globe. It was a great introduction to our US & Canadian members, who had never made or had British scones before & so often likened them to American biscuits.
Because of the different proportion of ingredients, a different texture is produced making only similar in outer appearance.


The recipe was loved by all and a great success, with even Gluten Free ones being successfully baked. If you would like to read about the bake-along, check back here soon, as I need to get it uploaded onto this new site too.
Let’s Share The Scone Love!
Please see the sharing options or even printing, at the right/bottom of your screen (bottom of your screen for mobile devices, and down the right-hand side on computers). You can even pin the photos to your own Pinterest page/account. (Just hover over a photo and be sure to be logged into your own Pinterest account). Alternatively, you can download this article, see above. You could also leave some feedback if you like.
Air Fryer Scones
Air Fryer Scones, or the Air Fryer Double Chocolate Orange Scones.


RECIPE CARD (Abbreviated Recipe)
BRITISH SCONES – That Rise To The Occasion!

Equipment
- Scales or measuring cups
- Measuring Spoons
- Mixing spoon
- Jug
- Large mixing bowl
- Pastry cutter/blender or 2 butter knives
- Whisk or fork
- Spare flour
- Baking/parchment paper
- Cookie Cutter (5-6cm or 2 – 2⅓″ – mine is 5¾cm/2¼")
- Small bowl/dish
- Pastry brush or clean artist brush
- Timer
- Cooling rack
Ingredients
- 75 grams Butter, unsalted, cubed & at softened (2½ oz or level 2/3 stick or ⅓ cup)
- 450 grams Self-raising Flour (OR 15 ¾oz , 3⅔ cups All Purpose/Plain Flour PLUS 5½ (level) tsp Baking powder ) * See notes.
- 2 tsp Baking Powder (rounded tsp) (In addition to that above if using Plain/A.P. flour – see notes*)
- 50 grams Caster Sugar (1¾ oz or 1 level ¼ cup** – see note above)
- 2 Med-Large Eggs (US – Large or XLarge)
- 225 ml Milk approx. (up to 7½ fl oz or 1 cup) – will depend on size of eggs used.
Instructions
Prepare The Dough
- Weigh out butter whilst cubing it & leave to come to room temperature. Smaller cubes (about 1cm or ⅓" ) is good since a smaller surface area means they will soften faster). If you forget to take out on time, try a hack I reviewed for softening butter in about 12 minutes.
- Prepare a large baking tray/sheet with baking/parchment paper (grease in place if there is no lip to it).
- Weigh/measure in the flour into a large bowl, spoon in the baking powder, give it a mix through & then add in the softened butter & give a quick mix through.
- 'Cut the butter' into the flour in a choice of 3 ways. Use your hands and rub some of the flour and butter between your finger tips, lifting and repeating, until you have smaller flour coated butter pieces, about breadcrumb size. You can also use 2 butter knives to do this. I prefer to use a pastry cutter/blender for this job. Push down into the bowl & do a squashing motion whilst turning the cutter left and right. Repeat this until all the butter is now in tiny pieces, coated by the flour. See video for reference.
- Add in the sugar & give a good mix through for even distribution. Pre-heat the oven to 220°c/200°c Fan Oven/425°f/Gas Mark 6.
- Beat the 2 eggs in a jug & top up to the 300ml/10 fl oz or 1 ¼ cup mark with the milk, (depending on the size of the eggs, you might not need as much milk). Whisk together & reserve 2 tbsp in a small bowl for later.
- Gradually add the egg/milk mixture to the dry ingredients until a soft but slightly sticky dough is formed. I tend to use a large spoon to start to mix it in, and then move on to using my hands. DO NOT USE A FOOD PROCESSOR OR MIXER. Only add enough of the liquid until just sticky.
- Lightly flour a pastry board, counter/worktop or use some baking/parchment paper with a little flour on top. Dip your cookie cutter in some flour.
- Form the dough into a disc & then flatten gently with your hands until you have a level piece of dough about 1"/2½cm high. Try not to go smaller than this. Don’t be tempted to roll out the dough as this won’t help the scones to rise.
- Push the floured cutter down and DO NOT TWIST the cutter. Twisting can ruin the end structure of the scones. Let it fall onto the prepared tray or leave to the end if it doesn’t come up with the cutter. At which point, just pull back the excess dough & transfer via a palette knife. Try not to touch the sides of the scone.
- Gently roll up the scraps of dough by hand and flatten out to cut out more scones. Note that these last few scones, won’t be as perfect as the first ones, just because of more handling.
- Brush very carefully the egg/milk liquid you reserved earlier, on to the tops of the scones only. If the liquid goes down the sides, it can ruin the rise of the scones. Shaking/taping the brush before moving to the scone & starting to brush from the centre and go outwards,
Bake The Scones
- Bake for 8-12 minutes until well risen and golden in colour. Turn the tray/sheet during baking, to ensure an even bake if needed.
- Cool a little on a cooling rack & enjoy warm with whatever fillings you enjoy. British classic toppings we have on our halved scones are – jams, fruit curds, butter and whipped cream or clotted cream.
Storing & Freezing The Scones
- Store left-over scones in an air-tight container, preferably a cake tin and will last 3 – 4 days if kept cool.


- You can also freeze baked and cooled scones, by wrapping in baking/parchment paper and then in a food baggie, labelled and dated. These will last up to 3 months, and simply defrost at room temperature and you can pop in the air fryer for 2 minutes at a moderate heat, or the microwave, halved and heated for only 20 seconds.

Video
Notes

 For all other information, questions & tips, please refer to the complete recipe post & Scone video tutorial that is nearly real-time.
More information and tips before the main recipe.
For all other information, questions & tips, please refer to the complete recipe post & Scone video tutorial that is nearly real-time.
More information and tips before the main recipe.

 Check out my Cranberry Spiced Scones recipe, or my savoury version – Cheese British Scones. Kids can also try my super simple Tear-&-Share Cheese Scones, with no need to cut out the dough. Or new for 2025, air fryer lemon blueberry scones.

 Air Fryer Scones! New for 2023, try my classic British Scones Made In An Air Fryer recipe.

 Try the Air Fryer Double Chocolate Orange Scones.
 New for 2026, Gluten-free AIr Fryer Scones.
NUTRITIONAL INFORMATION – I am not a qualified nutritionist, and all nutritional values are based on a serving of 1 scone (from a batch of 12 as per recipe above), with no toppings. Bigger or smaller scones & the nutritional values will change. All values from MyfitnessPal.com.
Subscribe For More Recipes
Want more great recipes, tips, baking information and newsletters? Then please consider subscribing by adding your email address below. Be sure to check for a confirmation email & respond back, so you can follow me & receive your free emails. Your personal information will not be shared with a third party.


Join My Facebook Group
Why not also join my – Facebook group Easy Online Baking Lessons, dedicated to this baking lessons website, as well as providing one-on-one support with myself & my team? Be sure to answer all security questions when requesting to join.


Follow me on social media:
Happy Learning & Baking!
Caro x


Classic British Scones – Only Recipe You Need!
Search For Something You Fancy!
Caroline’s Easy Baking Lessons


How many grams of raisins would you recommend adding?
Thanks for your question. There’s a maximum weight of extras to add to scones, before it starts affecting the rise. You can see examples in my cranberry scone sor cheese ones. I recommend no more than 80g. Take some pics and let me know how you get on. ANy other questions let me know.
I didn’t find it easy to find the recipe. when I clicked on Recipe I was taken back to the photograph of the scones. Frustrating
I am sorry that happened to you. Just tried the ‘Jump To Recipe’ button and it takes to the recipe Card. The step-by-step recipe is also before the Recipe card (less the ingredient amounts), as well as very important tips for scones to rise properly.
Sooo, British scones are basically biscuits with a bunch of extra leavener?
Err, to be fair, they do have eggs. Perhaps a sort of a brioche biscuit hybrid? I may have to try it!
Hi. British scones look like US biscuits, but not the same no. The proportions of the ingredients are very different and so the resulting texture is different. Give them a go and see. Air fryer, 2 more flavours and a cheese version too on the site.
I also truly appreciate the many tips and superb recipe. My scones rose so well and were perfect! I’ve tried a number of other recipes that were only so-so. I appreciate you, thank you!
I am so pleased you had success and that you love the tips too. Thank you for taking the time to leave such nice feedback and subscribing too. Next time take some photos as I love to share my reader pics too. Thanks again, Caro
I had heard that your scones recipe was good and some who previously could not get a good rise had success with your recipe and tips. So I had to have a try and can I say how pleased I was? OVER THE MOON!! You ‘what not to do’ tips are spot on. Wish everyone would read your tutorial or video, as it is the key a good scone! Thank you so much Caro!
So, I have really struggled to make scones. I am new to baking and scones have been my nemesis. I have tried over 20 different recipes and only 1, up til now, has been ok. this recipe is fantastic. My scones, rose beautifully, they were crisp on the outside, but not too crisp and soft fluffy and beautifully light on the inside. I made a cherry version and seriously they were so so good. Thank you.
Hi Jayne, thank you so much for taking the time to comment on my recipe and online too. This really helps my website when people trying my recipe and having success, post a comment. I am really pleased you have finally succeeded with scones! Way too many recipes (for anything, not just scones), leave out too many details (important details) and photos, and it is no wonder so many people fail. This is why I spent a lot of time and energy in putting the scones tutorial together, and specifically emphasising what not to do. You will find all my recipes like that, and I hope you have been checking out my other recipes, lessons, and reviews. You might like to try the flavoured version, or the cheese ones. I don’t know if you are on Facebook, but I run 2 baking groups, including the lessons one for this website, that you are welcome to join. Thanks again & happy baking x
It’s great to come across a blog every once in a while that isn’t the same out of date rehashed material. Fantastic read.
Thanks so much
These scones are amazing and so easy to make. Thank you Caro for the brilliant instructions.
Thank you so much Diana. I am so pleased you love the scones and my detailed instructions.
You are very welcome, so pleased you loved them.